


DIY Fabric Pumpkin Tutorial
8 Materials
$10
30 Minutes
Easy
Got 30 minutes this weekend? How about making some fabric pumpkins?

Supplies for velvet fabric pumpkins
- Velvet Material
- Thick Embroidery Thread
- Stuffing
- Template for Shape
- Large Sewing Needle
- Scissor
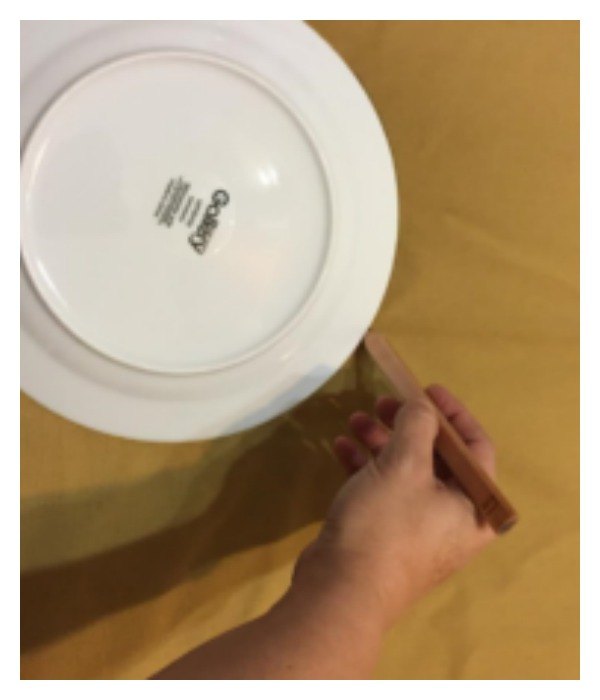
- Stick (found in my yard)
- Moss Prepackaged Found at any Craft Store.
Glue Gun and Glue sticks
I started by tracing round circles on my fabric. Then, I used different sized plates but anything round will work using three different sizes. You can make them as large or as small as you want just make the shape a circle. Cut out your fabric based on your template. I then used the large sewing needle and embroidery thread to start sewing around the outside edge of the circle after tying off the long end of the thread. Go in about 1/4 from the edge.
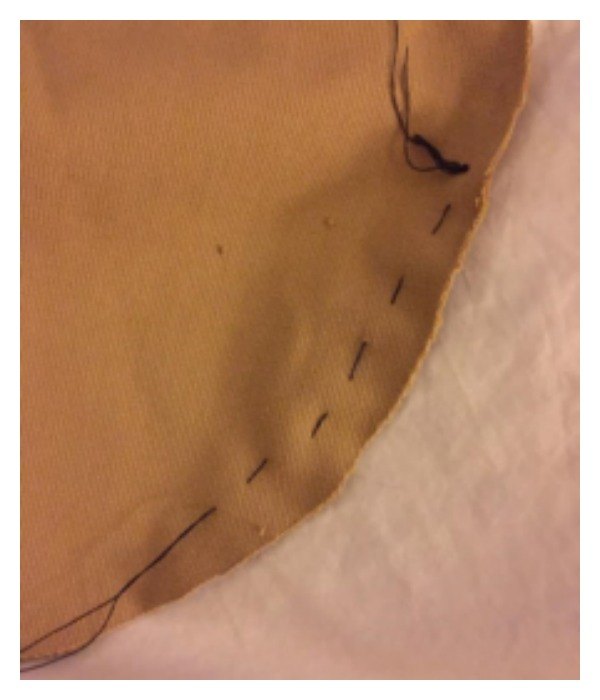
I started on the inside of the fabric to hide the knot you will need to make in your thread. You just go in and out until you’ve made it all the way around your circle then lightly pull on the thread. Your circle will make a bucket shape so you can start to fill them with the stuffing. An optional step is to add raw bean or rice to the bottom prior to adding stuffing to give it some weight.
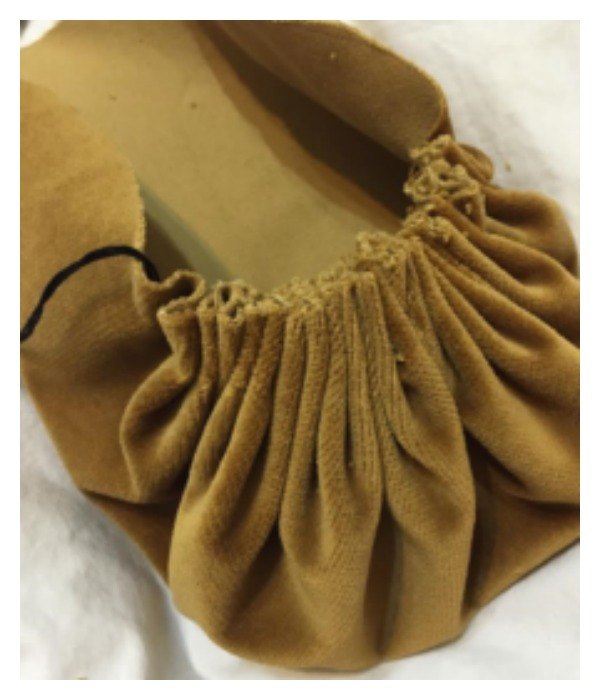
After pulling the thread closed I then tied a simple double knot to close up the circle. I ran the needle and thread through the center of pumpkin to the bottom, out, then back up through the top. Tie that off with a double knot. This extra step helps give more of a pumpkin look. I used the hot glue gun and added the moss and a stick and that’s it! I’ve seen others add additional embellishments like feathers or even antique jewelry pieces.
Directions for fabric pumpkins using machine
For these I used a square template in three different sizes. I just used cardboard. They need to be twice as long as they are tall. So if your pattern is 18 long, it needs to be 9 tall. Trace the fabric on the wrong side with a pencil then cut out my shape.
I placed the fabric wrong sides facing each other by folding long ends together. Then, I sewed a basic straight stich all the way through the open end to close up that side. The top and bottom should be left open. Take your large sewing needle and again use the embroidery thread and knotted the end. I did the same stitch as the velvet pumpkins going in and out all the way around until I had stitched the entire opening on one side. Pull it closes then use a simple double knot to tie it off.
NEXT
Then turn your fabric right side out. Fill it with the stuffing and do the same stitch pattern on top and closed it off. I ran the needle again from top to bottom and back again for shaping and tied it off. Take the upholstery needle (these really help as it makes it easier to run the yarn) and thread it with the yarn. You can use any color you’d like. I ran the yarn about 5 inches through the needle leaving a long tail that I knotted off.
Insert the needle and run it up and the yarn all the way through. Then, I went to the bottom again and repeated the step. This gives your fabric is shape or pumpkin sides or “indentions”. Repeat that step until you’re happy with the shape and knot that off. I used the glue gun and topped it off with the same moss used on the velvet pumpkins and added a stick.
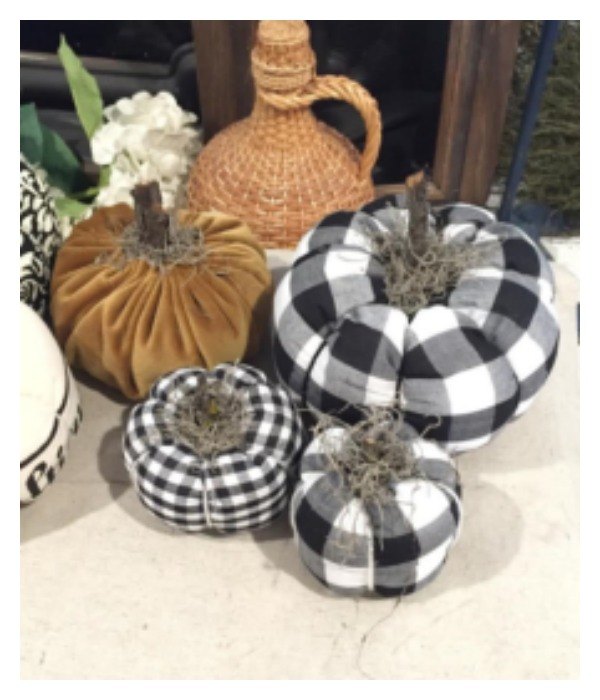
Finished Project! You can see more over at Junque Cottage Blog!

Want more details about this and other DIY projects? Check out my blog post!


Frequently asked questions
Have a question about this project?