


One Step From Trash Day
5 Materials
1 Day
Easy
I saved this ottoman from being in the next trash pickup day at the mall. It was in very good condition meaning that the frame of the ottoman was not bent and/or broken. The form on it was in excellent condition. So the only thing to do is to upholster and bring it back to life. Since the fabric was striped already. Let’s get to work.
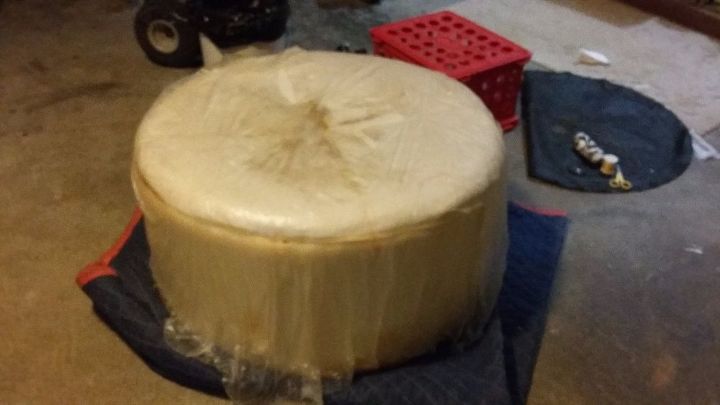
Naked Ottoman
1. Measure the diameter of the top & the sides of the ottoman. The diameter was 4’ feet. I have some fabric left over from an earlier project “swirled half-moon”; so I just cut out (4) equal triangles @ 12” wide. I also cut out (3) equal rectangles @ 16”x 18”wide.
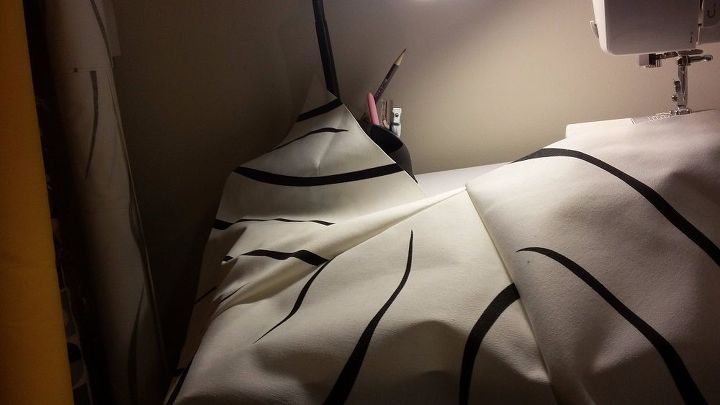
2. I sewed the (4) triangles together. I laid (2) facing each other and sowed them together. I then added one on top of the joined two. And repeated that step for the last piece. You will end up with (4) triangles sowed into a large circle.
Sowing Triangles Together for a Circle
3. I sowed the (4) triangles together. I laid (2) facing each other and sowed them together. I then added one on top of the joined two. And repeated that step for the last piece. You will end up with (4) triangles sowed into a large circle.
Sowing Rectangle Together for the Sides
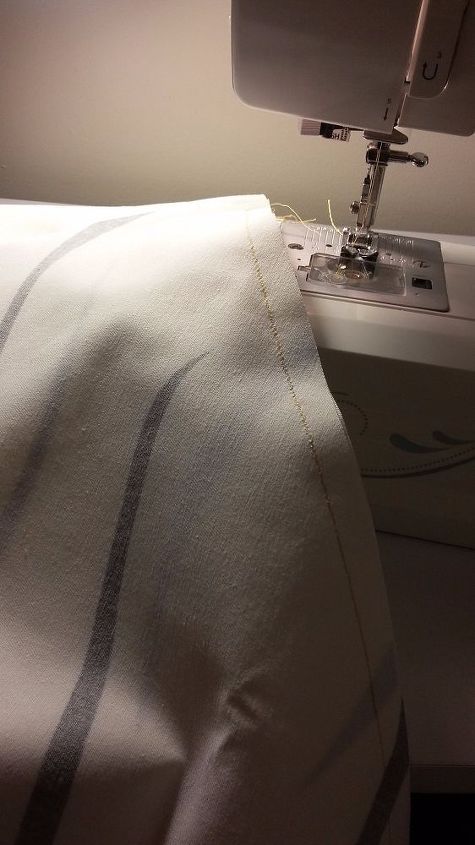
4. I then sowed the (3) equal rectangles together. I laid (2) rectangles facing each other and sowed them together. And added the last rectangle to the joined two. Now, sow the circle to the linear rectangles. NOTE: It may be easier to pin the fabric together then sow. Because joining a rectangle shape to a circle is a bit treaty. It just takes a couple more minutes to do but it will be worth it in the end.
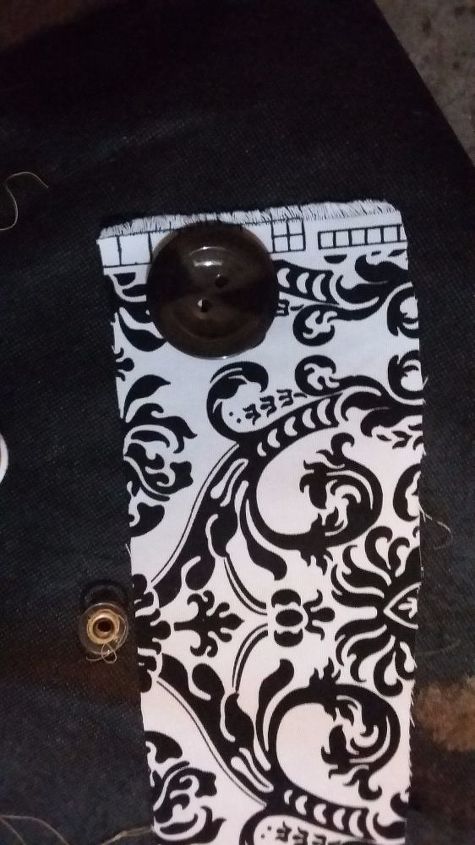
Button before It's Covered with Fabric
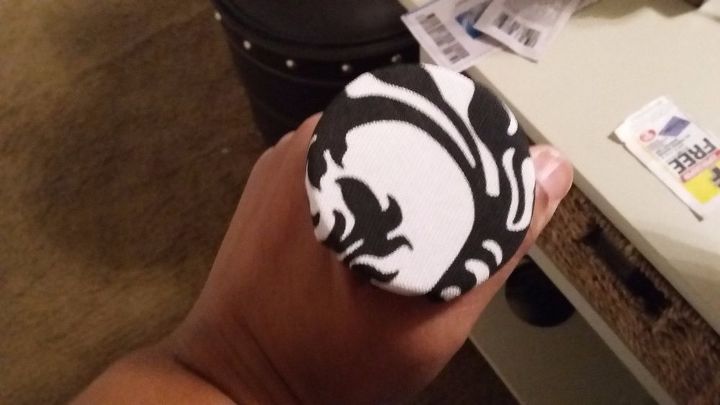
Button Wrapped with Fabric
5. Take a large button and covered with a piece of fabric that compliments your choice of fabric. I wrapped the button and sowed the fabric to the button.
It’s now time to cover the ottoman with the fabric. Slide the fabric over the ottoman. It should be very snug. Now all you need is an upholstery need @ 12” long. These sizes of needle will more than clear through the cushion and form.
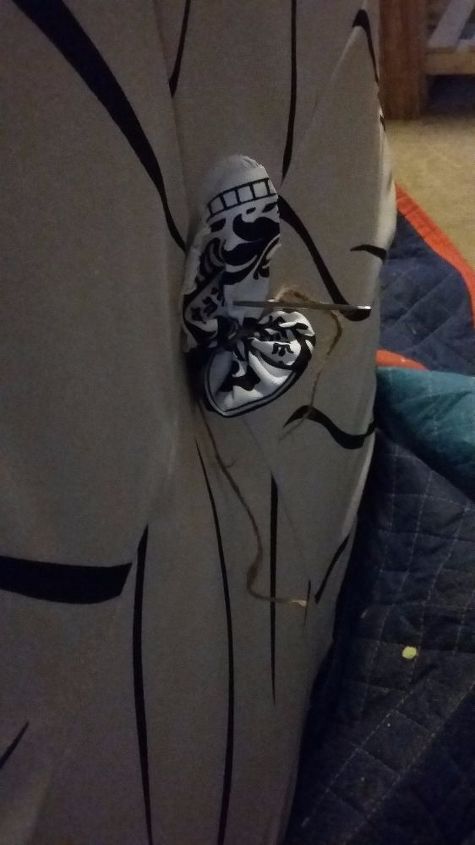
Attaching Button w/12"Upholstery Needle
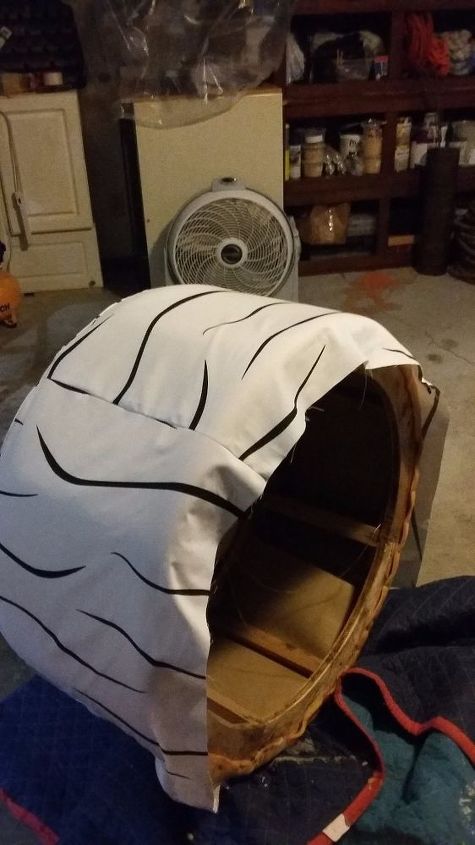
Attaching the Fabric to Underside of Ottoman
6. To attach the fabric to the ottoman is where the nail gun/stapler comes in handy. The fabric needs to be nice and snug and you should pull the fabric as you use the stapler/ (pneumatic) nail gun. This should give you a nice and tight finished look. If this causes discomfort please don’t’ pull on the fabric and just staple in place. NOTE: When using a pneumatic stapler it will pull the fabric a bit more and less on you pulling the fabric that could cause a little muscle work.
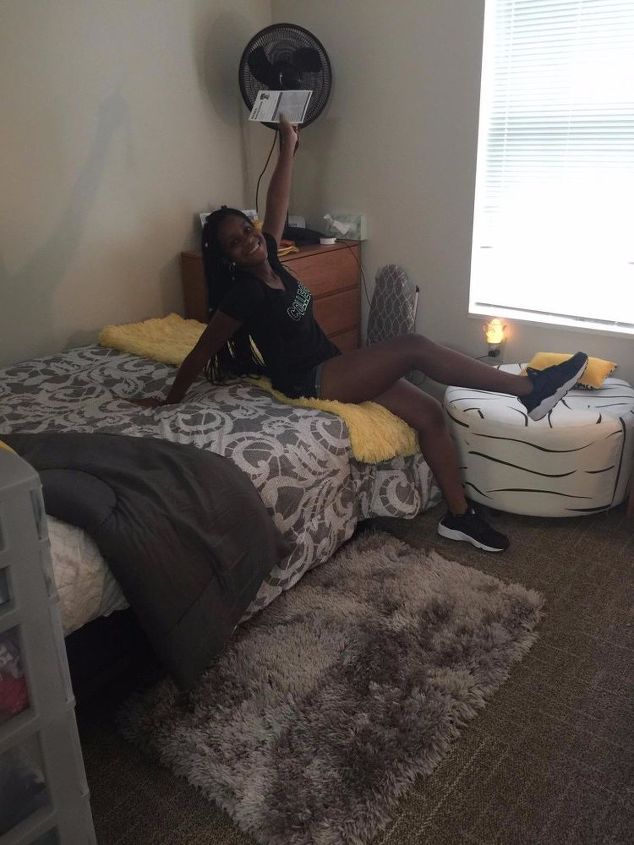
Ottoman's New Home..UGA
7. Screw in the legs and put the felt cover on the bottom and staple. You now have a new ottoman to add to a room. And in this case the ottoman is going to UGA for Pre-Med!!!
Comments
Join the conversation
2 of 6 comments
-
very informative post. I will use the suggestions discussing here for optimizing my new blog site.This post will be very helpful for the begaineer SEO worker who are new in this field.
Keep posting this type of helpful post.
With best wishes.YTD Video Downloader Pro 5.8.5
-
Good Work! I would of made a mess of the math !


Frequently asked questions
Have a question about this project?