


Folding Chair Do-Over

by
Marlene
6 Materials
$8
1 Day
Medium
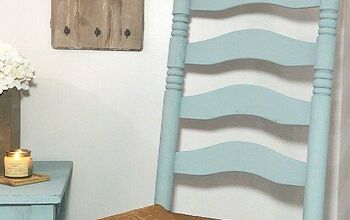
I've had a set of metal folding chairs that once belonged to my parents, for years. I use them as extra seating when family comes over and always knew I wanted to spruce them up one day. That day finally arrived, at least for one of them!
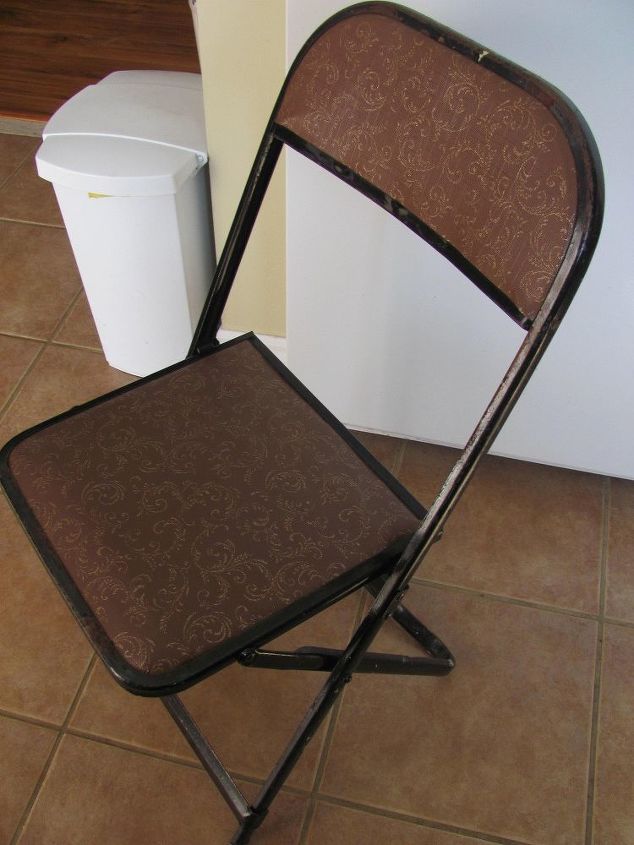
One of the original chairs. I know my mom "reupholstered" the seat and back by taking the chair apart but I needed a much easier method. I also wanted to brighten up the frame with a lighter colour.
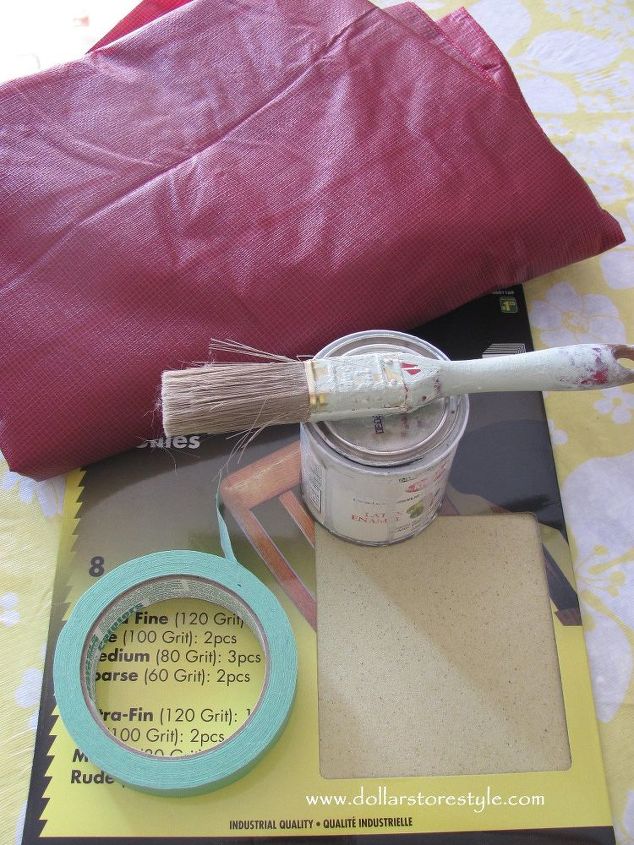
Some of the supplies I used include a flannel backed vinyl tablecloth, rust paint and sandpaper. I thought at first that I'd tape off the seat to protect it from paint spatters, but since it was going to be covered up anyway, I didn't bother.
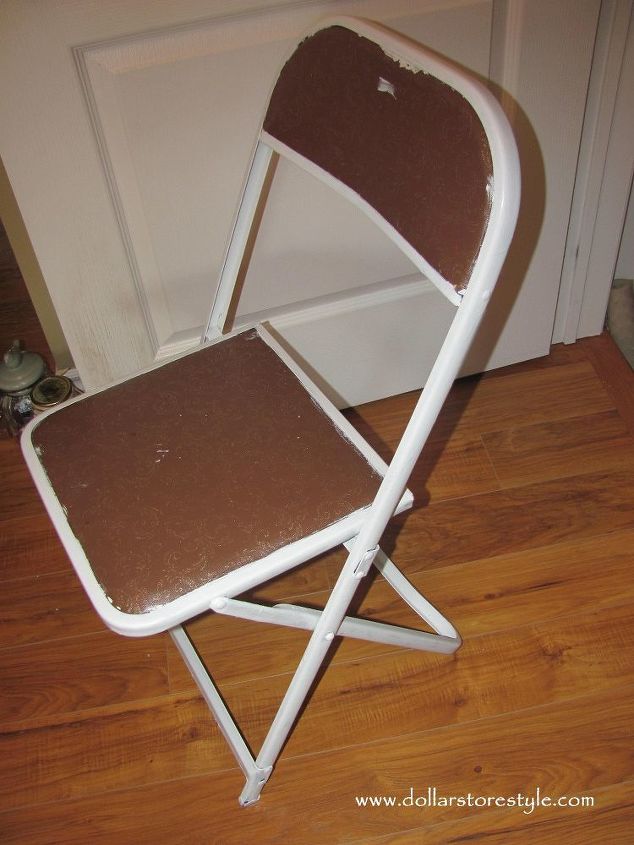
First, I used a medium grit sandpaper to remove any rust and loose paint from the metal, then I washed it down. After the chair was dry, I gave the metal two coats of white rust paint. Let the first coat of paint dry completely before applying the second coat. The Rustoleum paint I used dries fairly quickly.
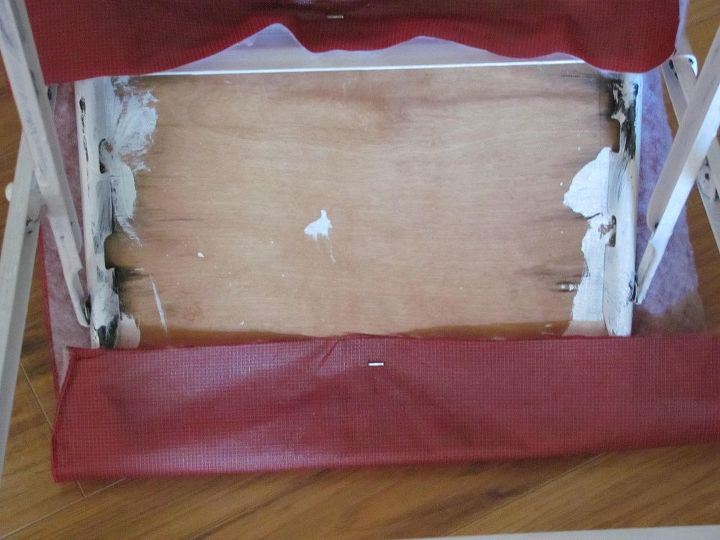
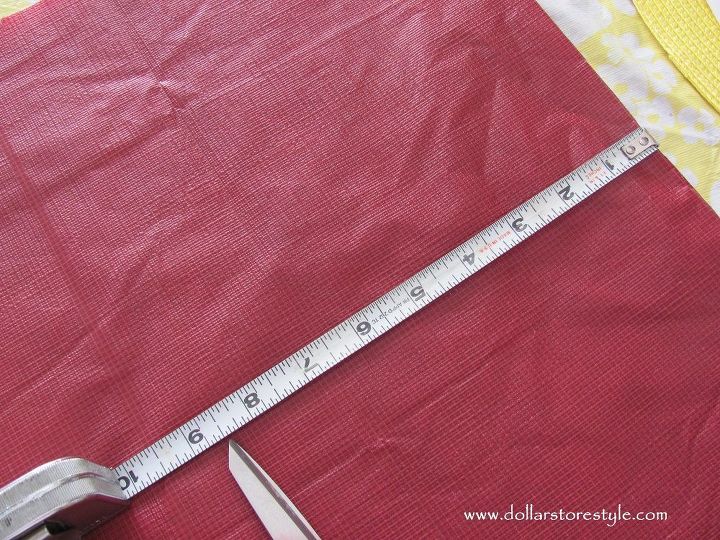
While the paint was drying, I cut a strip of the vinyl tablecloth about 21 1/2 inches long by 16 3/4 inches wide. I needed enough material length to be able to staple it to the bottom of the wooden seat and enough width so that there would be about an inch on either side to fold under.
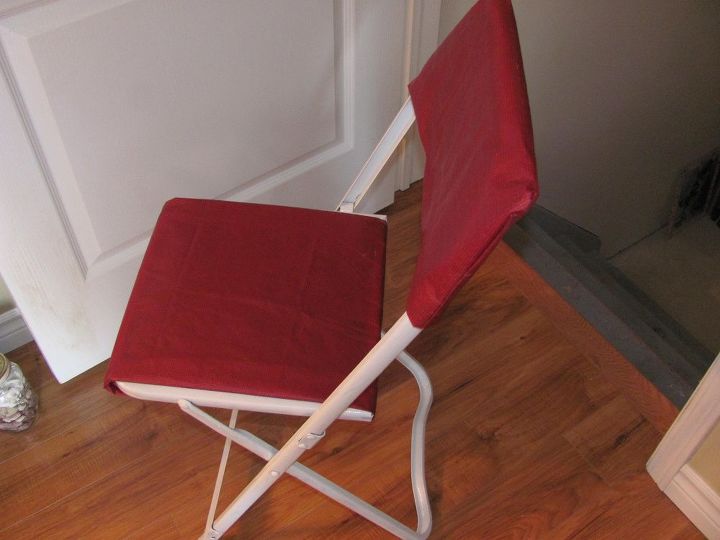
When the paint was dry, I turned the chair over and stapled one end of the fabric in the middle of the seat. Then I stapled the other end of the fabric to the bottom of the seat, making sure that it was smooth and taut on the top of the seat.

I turned the chair right-side-up again and folded the side edges of the tablecloth under so that the white frame was just visible on either side and added more staples to the underside to secure the corners.
To make a cover for the back of the chair, I doubled over the tablecloth so that the fold would make the top of the cover and measured 18-inches for the width, including one inch on either side for seams. Then I measured about 8 1/2 - 9-inches from the fold for the length of the cover, including about an inch to turn over at the bottom.
I turned this piece of tablecloth inside out and used a sewing machine to stitch a one-inch seam on each side. This is the same method you'd use if you were making a pillow cover.
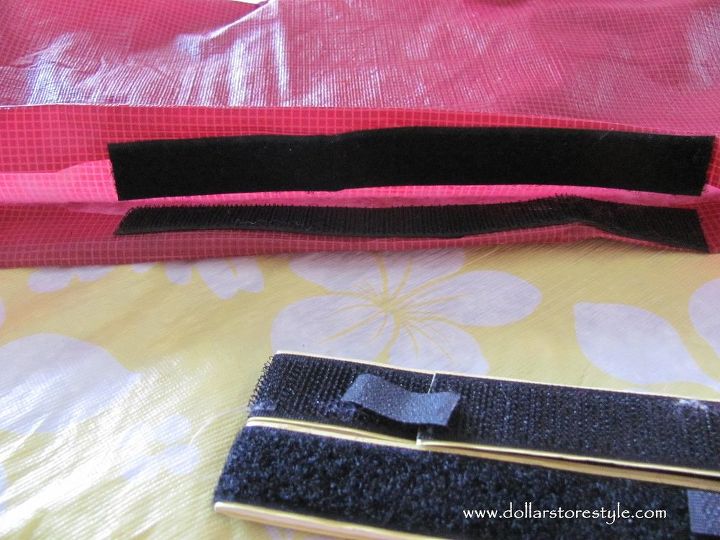
I'm always looking for ways to make things easier, so rather than worrying about sewing up the raw edges at the bottom, I folded the edges over about an inch and used hook and loop strips (about six inches long) to both secure the edges and make a closure for the bottom of the cover. You just cut the length you want, peel off the paper backing and stick it in place.
The finished cover measured 16-inches by 7 1/2-inches.

Before
After
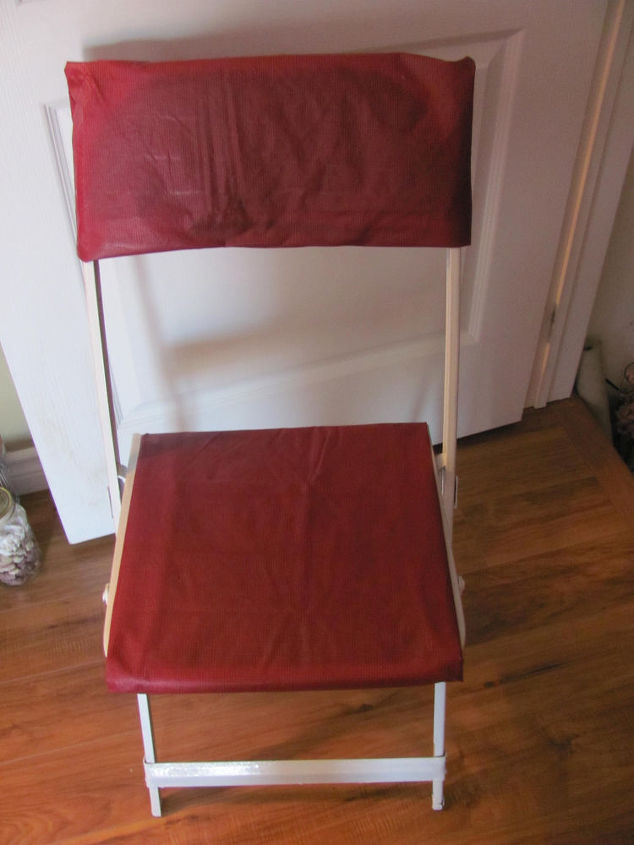
This is a fairly easy update that can be redone as needed using different colours or patterns.
Want more details about this and other DIY projects? Check out my blog post!
Comments
Join the conversation
2 comments
-
Great update! I love the color you chose :)


Frequently asked questions
Have a question about this project?