


Under Cabinet Drawers
$50.00
3 Days
Medium
Hi Everyone!!! Rightnow it’s all about storage in our shop today as we show you how we increasedour kitchen storage using Under Cabinet Drawers. What are these drawers I speak of you ask? –Only the greatest thing since slide bread!
Living in a small space requires you to figure out how touse every single inch of unused space. We brought you posts to complete in between the stud cabinets featuredin our board and batten post listed on Bob Vila Nation a while back. It was an awesome space saver giving us roomto move around in a small bathroom without the cabinet hanging on thewall.
Today we teamed up with our good friends over at D. LawlessHardware to bring you Under Cabinet Drawers for your kitchen space. If you are not familiar with D. LawlessHardware, you need to be. They sell alarge range of needed things from drawer pulls to drawer glides, which theyfurnished for today’s post. They shipdirectly to your door making it super easy to get your projects planned andimplemented so you can start using that lost space.
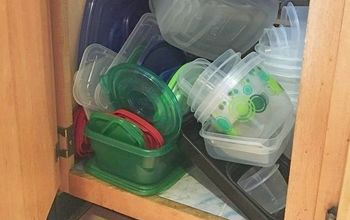
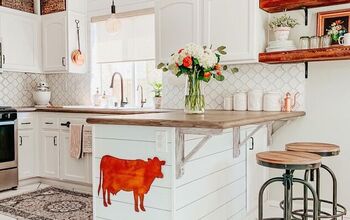
If you recall last week we installed a Sears’s trashcompactor in a retro fitted kitchen cabinet. It was a choice I do not regret,but since I lost some cabinet space, I need to find a way to reclaim it. I needed storage for all the baggies andstuff that lived inside that half of the cabinet, which started my researchinto motion. I got lucky with a FamilyHandyman article that provided nice DIY project instructions for completing theUnder Cabinet Drawers.
The Under Cabinet Drawers, also called Toe Kick Drawers,provide 4” of storage under cabinet storage space for things like baggie storage,cookie sheets, lids for pots and pans and oven mitts and towels. You cannot beat a drawer and if you can putit where no one knows it’s there it’s like having a secret when your guestwatches glide the drawer out.
Here’s what you will need to complete the drawers:
Materials List
1 - 2’ x 4’ sheet of ¾” birch plywood for the drawer sides(we built four drawers that ranged between 15” and 34”)
1 – 4’x8’ sheet of ¼” birch plywood for the drawer andcradle bottoms
12’ of 1x4 pine for the cradle sides
Drawer pulls
Wood glue
5/8” and 1 3/16” nails (We use a Ryobi nail gun. If you use brad nails be sure to pilot toprevent splitting your wood)
4 sets of 18” full extension side mount drawer glides (Weused 18” Length Quantum Full Extension Ball Bearing Slide provided by D LawlessHardware)
Hardwood for the drawer fronts – 3 ¾” (Cut to size dependingon your under counter space)
What we did to build the drawers:
The first part of this Under Cabinet Drawers build requiresyou to remove the toe kick and under cabinet fronts so you can determine yourcabinet measurements. As suggested bythe Family Handyman article you only need three measurements, the under cabinetwidth, depth and height. This will allowyou to determine the measurements for your Under Cabinet Drawers and thespecial cradle that makes all this possible.
With your measurements in hand it was time to start cuttingthe drawer sides. Luckily we had severalpartial sheets of 3/4” birch plywood from other projects. Using an assembly line approach, we rippedall our under cabinet drawer sides to 3” and cut the drawer fronts and sides tolength. The drawers were attached with Titebondglue and 1 3/16” nails and our Ryobi nail gun. Before attaching the drawer bottoms, we slide the drawers under thecabinet for a dry fit. Perfect!
The drawer bottoms were made from ¼” birch ply. We purchased four 2x4 sheets from The HomeDepot. To measure the drawer bottoms welaid the drawer on top and drew a line marking the edges. The ¼” ply was then ripped to size andattached Titebond glue and 5/8” nails using our Ryobi nail gun.
With the drawers built we cut the cradle sides the same lengthas the drawer sides. We then measuredfor the drawer glides. Since we wanted thetops of our under cabinet drawer to align with the cradle tops we measured 2”from the bottom of the cradle and 1 ¾” from the bottom of the drawer and drew aline. Our drawers would be attachedusing this center line as our guide.
With the drawer glides attached we joined the under cabinetdrawers to the cradle. We then placedthe ¼” birch plywood beneath and traced a line to mark the size of the cradle bottom. Before attaching the cradle bottom we didanother dry fit. Then the cradle bottomwas attached using titebond glue and 5/8” nails and our Ryobi Nail Gun.
With the under cabinet drawers and cradles complete, it wastime to attach the cradle sides to the under cabinet frames. We used our Ryobi angle and predrilled a holeand used two #6 1 ½” screws for each cradle side.
The final step was to cut and attach the under cabinet drawerfronts. We had some left over Poplar that we ripped to 3 ¾” width. This provided about 1/8” space for the drawerfront to clear the cabinet. We decidedto use Poplar versus hardwood because we will be painting our kitchen cabinetssoon (that is right, another future post).
Now that the drawers are built, you can see the amazingstorage we created. We want to thank DLawless Hardware for providing their versatile 18” Length Quantum FullExtension Ball Bearing Slide. They are afull service hardware provider, so make sure you visit their page to order theitems you may need for your projects, or to save money on your drawerpulls. They are customer servicefriendly and quick with response to your order needs.
Well, that’s our post for today thanks for stopping by HelloI Live Here – Until or next storage saving post – have an awesome night!
Linda -
Living in a small space requires you to figure out how touse every single inch of unused space. We brought you posts to complete in between the stud cabinets featuredin our board and batten post listed on Bob Vila Nation a while back. It was an awesome space saver giving us roomto move around in a small bathroom without the cabinet hanging on thewall.
Today we teamed up with our good friends over at D. LawlessHardware to bring you Under Cabinet Drawers for your kitchen space. If you are not familiar with D. LawlessHardware, you need to be. They sell alarge range of needed things from drawer pulls to drawer glides, which theyfurnished for today’s post. They shipdirectly to your door making it super easy to get your projects planned andimplemented so you can start using that lost space.
If you recall last week we installed a Sears’s trashcompactor in a retro fitted kitchen cabinet. It was a choice I do not regret,but since I lost some cabinet space, I need to find a way to reclaim it. I needed storage for all the baggies andstuff that lived inside that half of the cabinet, which started my researchinto motion. I got lucky with a FamilyHandyman article that provided nice DIY project instructions for completing theUnder Cabinet Drawers.
The Under Cabinet Drawers, also called Toe Kick Drawers,provide 4” of storage under cabinet storage space for things like baggie storage,cookie sheets, lids for pots and pans and oven mitts and towels. You cannot beat a drawer and if you can putit where no one knows it’s there it’s like having a secret when your guestwatches glide the drawer out.
Here’s what you will need to complete the drawers:
Materials List
1 - 2’ x 4’ sheet of ¾” birch plywood for the drawer sides(we built four drawers that ranged between 15” and 34”)
1 – 4’x8’ sheet of ¼” birch plywood for the drawer andcradle bottoms
12’ of 1x4 pine for the cradle sides
Drawer pulls
Wood glue
5/8” and 1 3/16” nails (We use a Ryobi nail gun. If you use brad nails be sure to pilot toprevent splitting your wood)
4 sets of 18” full extension side mount drawer glides (Weused 18” Length Quantum Full Extension Ball Bearing Slide provided by D LawlessHardware)
Hardwood for the drawer fronts – 3 ¾” (Cut to size dependingon your under counter space)
What we did to build the drawers:
The first part of this Under Cabinet Drawers build requiresyou to remove the toe kick and under cabinet fronts so you can determine yourcabinet measurements. As suggested bythe Family Handyman article you only need three measurements, the under cabinetwidth, depth and height. This will allowyou to determine the measurements for your Under Cabinet Drawers and thespecial cradle that makes all this possible.
With your measurements in hand it was time to start cuttingthe drawer sides. Luckily we had severalpartial sheets of 3/4” birch plywood from other projects. Using an assembly line approach, we rippedall our under cabinet drawer sides to 3” and cut the drawer fronts and sides tolength. The drawers were attached with Titebondglue and 1 3/16” nails and our Ryobi nail gun. Before attaching the drawer bottoms, we slide the drawers under thecabinet for a dry fit. Perfect!
The drawer bottoms were made from ¼” birch ply. We purchased four 2x4 sheets from The HomeDepot. To measure the drawer bottoms welaid the drawer on top and drew a line marking the edges. The ¼” ply was then ripped to size andattached Titebond glue and 5/8” nails using our Ryobi nail gun.
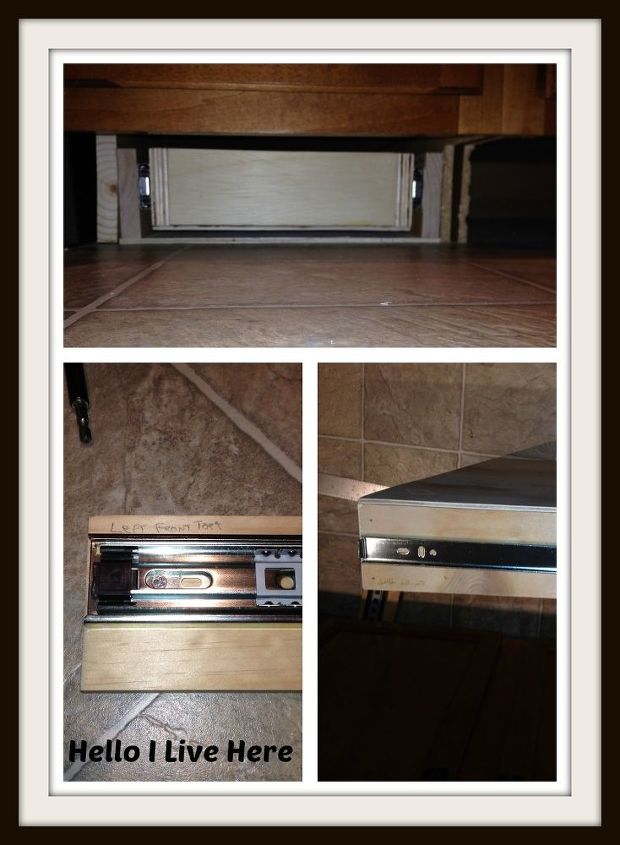
With the drawers built we cut the cradle sides the same lengthas the drawer sides. We then measuredfor the drawer glides. Since we wanted thetops of our under cabinet drawer to align with the cradle tops we measured 2”from the bottom of the cradle and 1 ¾” from the bottom of the drawer and drew aline. Our drawers would be attachedusing this center line as our guide.
With the drawer glides attached we joined the under cabinetdrawers to the cradle. We then placedthe ¼” birch plywood beneath and traced a line to mark the size of the cradle bottom. Before attaching the cradle bottom we didanother dry fit. Then the cradle bottomwas attached using titebond glue and 5/8” nails and our Ryobi Nail Gun.
With the under cabinet drawers and cradles complete, it wastime to attach the cradle sides to the under cabinet frames. We used our Ryobi angle and predrilled a holeand used two #6 1 ½” screws for each cradle side.
The final step was to cut and attach the under cabinet drawerfronts. We had some left over Poplar that we ripped to 3 ¾” width. This provided about 1/8” space for the drawerfront to clear the cabinet. We decidedto use Poplar versus hardwood because we will be painting our kitchen cabinetssoon (that is right, another future post).
Now that the drawers are built, you can see the amazingstorage we created. We want to thank DLawless Hardware for providing their versatile 18” Length Quantum FullExtension Ball Bearing Slide. They are afull service hardware provider, so make sure you visit their page to order theitems you may need for your projects, or to save money on your drawerpulls. They are customer servicefriendly and quick with response to your order needs.
Well, that’s our post for today thanks for stopping by HelloI Live Here – Until or next storage saving post – have an awesome night!
Linda -
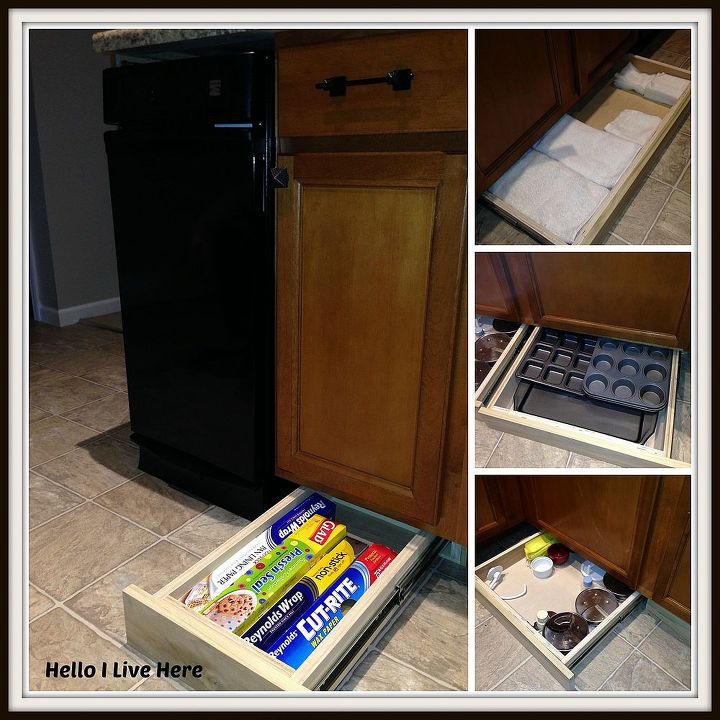
Finished Drawers.
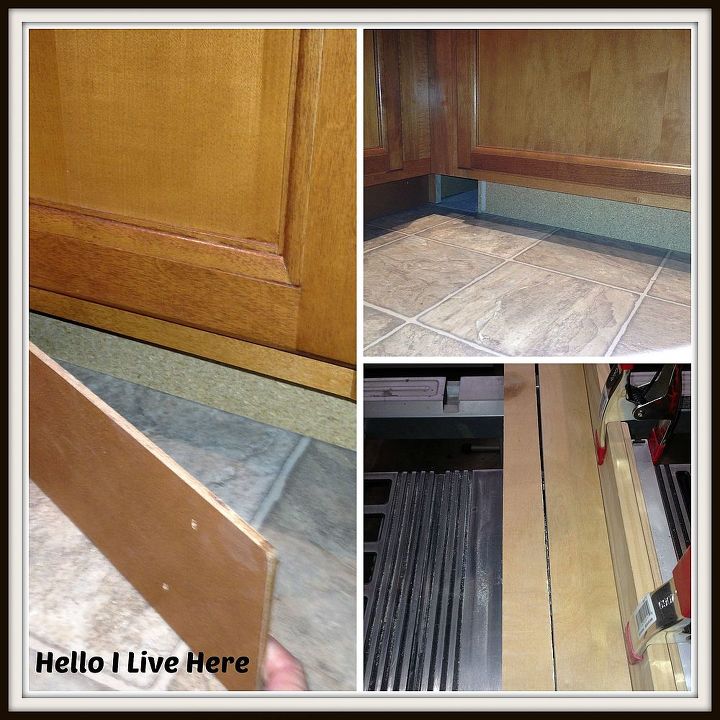
Removing toe kicks under cabinets to get project started
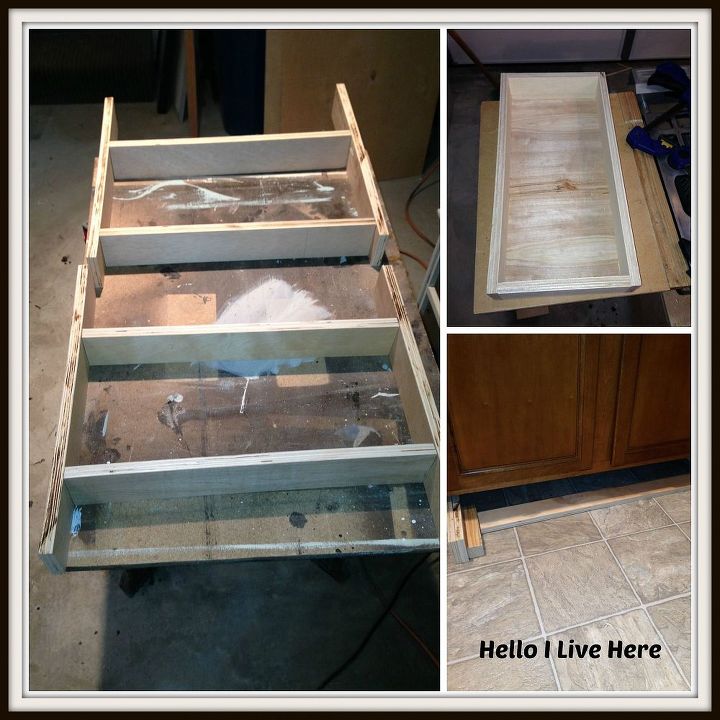
Building the drawers and cradles.
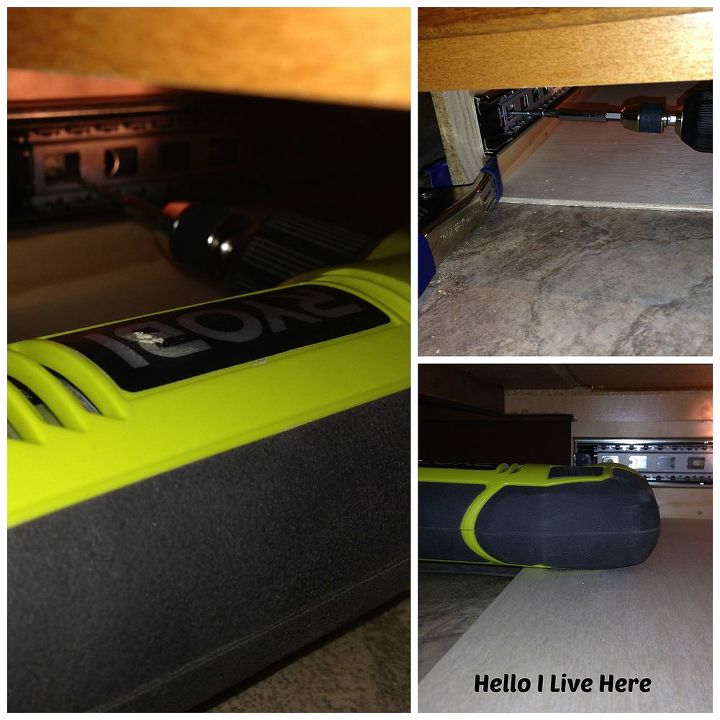
Installing cradles under cabinet.
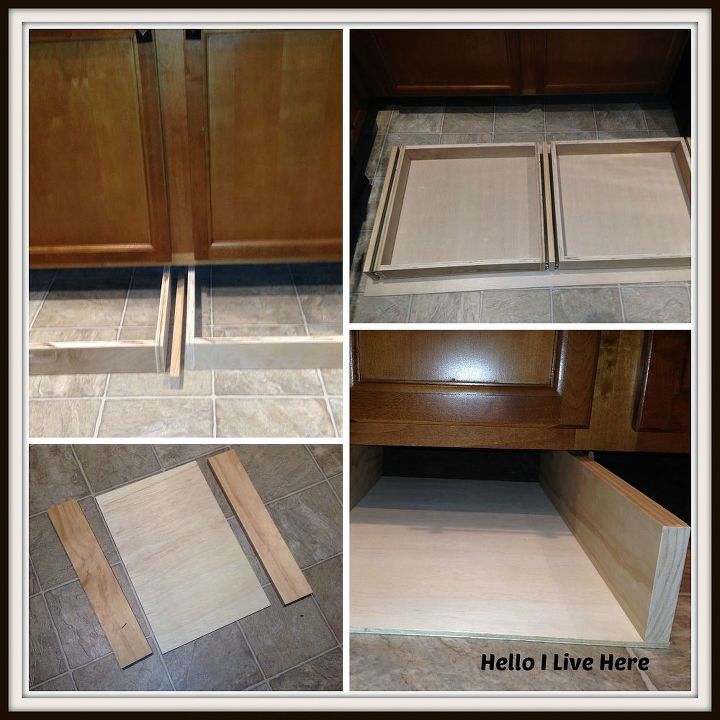
Installing the drawers and cradles under the cabinet
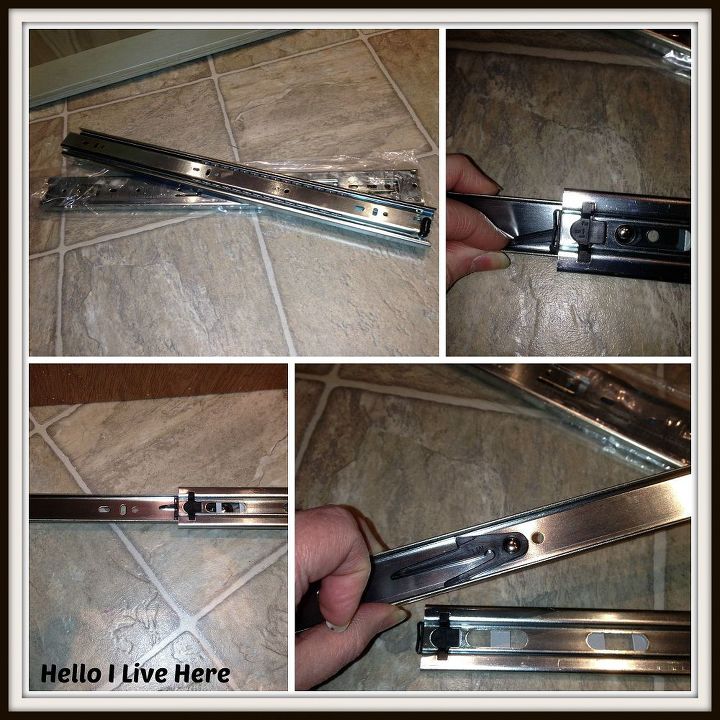
The full extended side mount drawer glides we used.
Sides of drawers.

Want more details about this and other DIY projects? Check out my blog post!
Comments
Join the conversation
2 of 28 comments
-
I have no room on my tiny bathroom floor for a scale, I believe this has solved my issue!!
-
We are just starting to Renovate a small 25' x 30' home, and I WAS worried about kitchen storage. This is going to be a perfect solution and such a game changer..... Thanks!


Frequently asked questions
Have a question about this project?
Did I miss the details on how you open them? And, sorry, Linda, but my first thought was, I'd have to vacuum the mouse, uh, remnants out first. I live in a 107 year old house in the middle of cornfields. However, in your newer house in your neighborhood, this is a fantastic space saver. Thanks for sharing!
I have laid on the floor and looked for the way my toe kicks were installed, and I have no idea of how they are attached. There are no nails, no screws on the toe kicks, so I looked at the bottom shelf inside of the cabinet and there is no way to take that out. How would you go about taking the toe kick off if you had this problem? (one is 5 ft. long and another is 5 1/2 ft. long, then there are smaller ones)