


Steampunk - My Favorite Art Form

by
Pat Ruge
8 Materials
$10
5 Hours
Easy
First let me say that I love, love, love this "draft" feature that Wendy, our Hometalk guidance counselor, pointed out in an e-mail. It allows me to take my time and enter as I go.
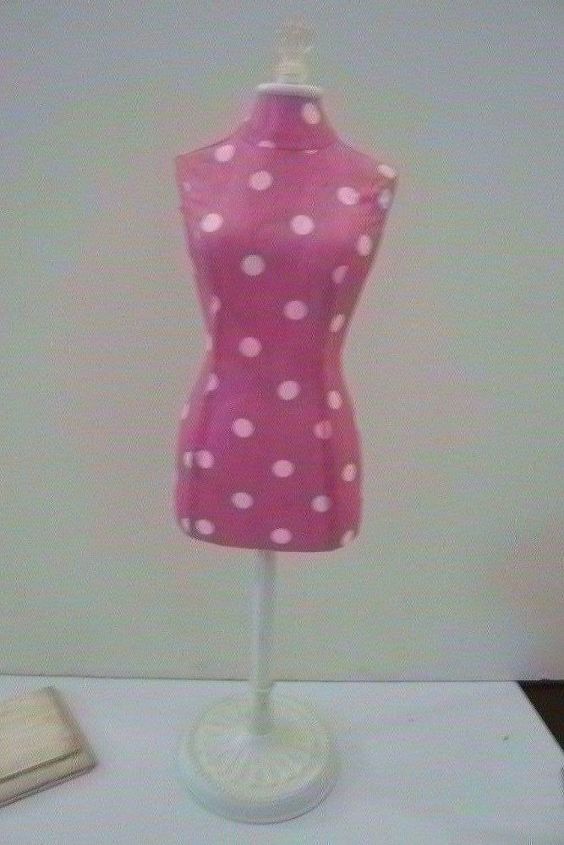
I found this ideal little jewelry mannequin at a garage sale and paid just $1. And so, I Christen her "Wendy". Wendy just won a major makeover for FREE.
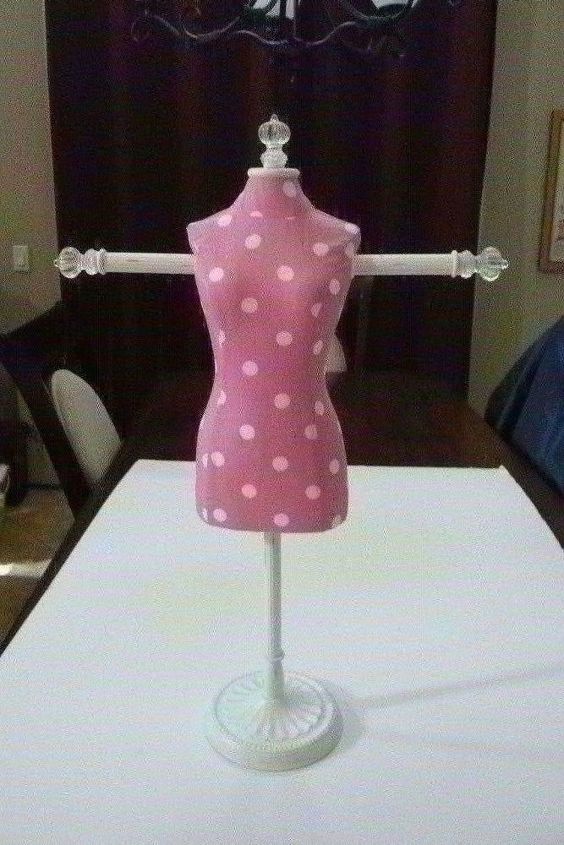
This is how I found Wendy, polka-dots and all. She stands about 24" tall and the body is about 12".
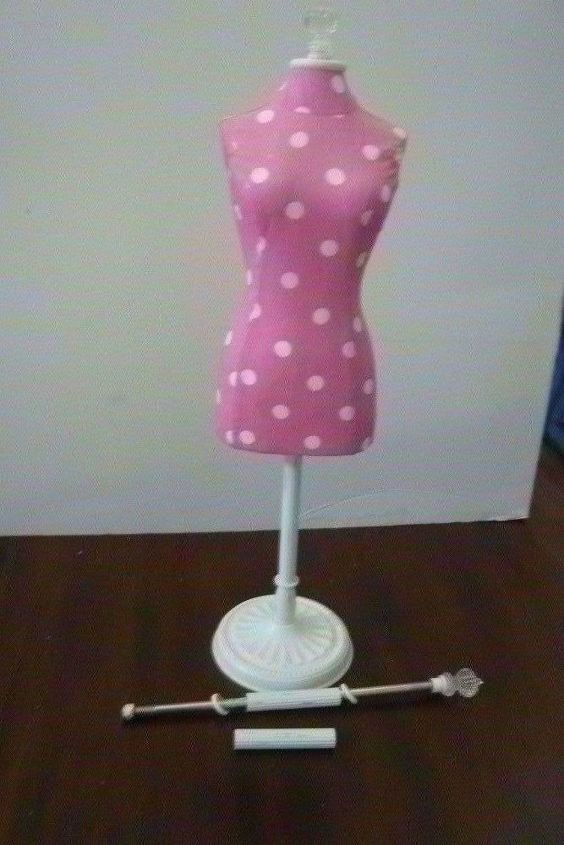
First thing to do is remove the arms. I must admit, I had to enlist my son for this part. Turns out there is a steel rod that runs thru it and he used a Sawzall to remove it. Mission accomplished, now the fun begins.
Hard to tell the difference, but my first step was to ModPodge the exterior. This was an important step because not only does it adhere the fabric to the body form, it also stiffens the fabric and provides a protective layer for the Styrofoam beneath it. I learned the hard way the certain adhesives (those with a petroleum base will totally disintegrate Styrofoam.
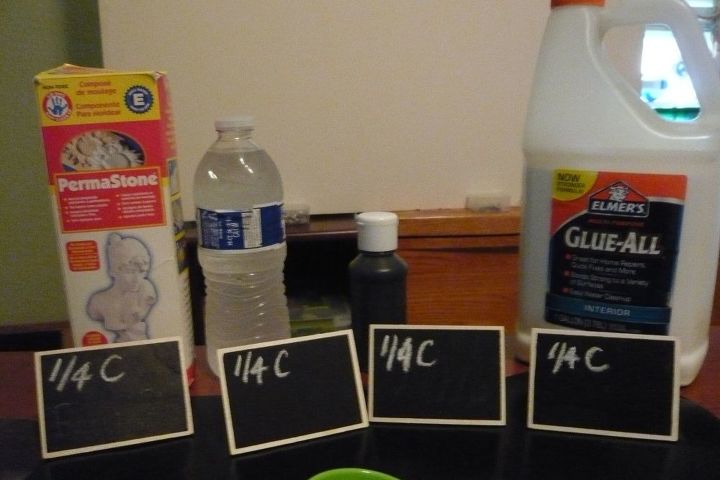
Recipe for Gesso.
Time to make my own gesso. This recipe is so easy to remember because it has 1/4 cup of all four ingredients (or equal parts if you want to mix a larger or smaller batch. The first ingredient I use is PermaStone. This is a clay based powder similar to Plaster of Paris (which can be a substitute). 1/4 cup of water is added to the PermaStone. Mix well to insure all particles are dissolved and without any lumps before adding the final two ingredients. Add the acrylic paint and the white glue in any order and then stir to incorporate all ingredients. I used black paint because my final project will be totally black. Gesso can be made with any color acrylic or latex paint even though it is typically made with white paint.

I just want to point out that although the Permastone, can be used instead of Plaster of Paris for gesso, I don't think I could recommend using it for chalk paint. If you could feel the texture on the body form, you would understand why. Since you can't feel it, take my word. It feels like a canvas.
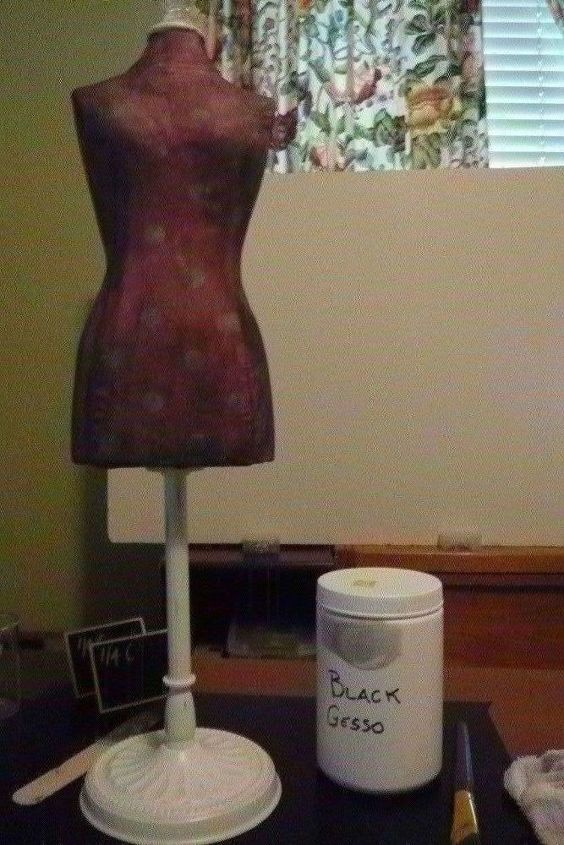
Now that the Gesso is mixed, apply a layer and allow it to dry, takes about 1 hour. By the way, on the back side of this container, I wrote down the recipe. Also I should mention that the Gesso I used, left me with a product that feels very much like a canvas, as I mentioned earlier and I believe this is due to the PermaStone. Adhering to it should be a breeze. These little containers, which I got at the Habitat Restore for 25 cents are great for storing leftover paints. Be sure to label and date.
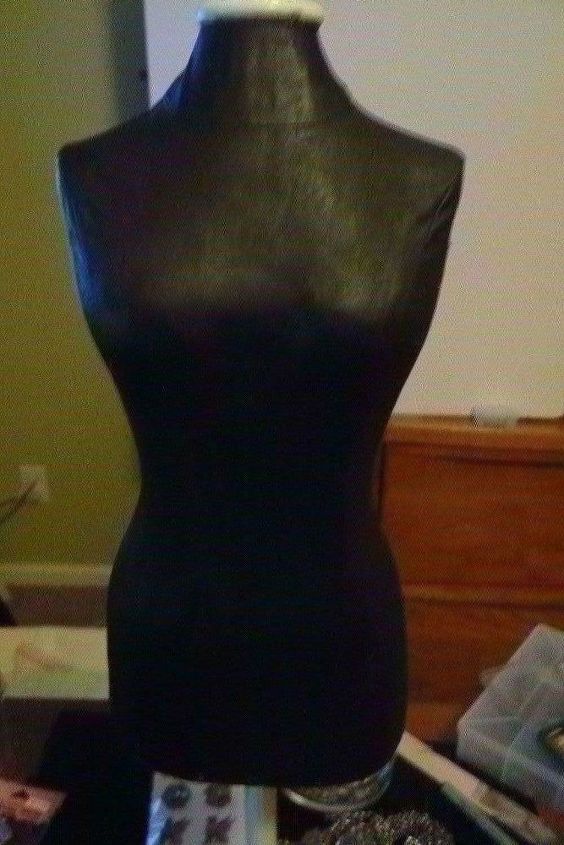
After two coats of Gesso, and two coats of same black latex paint used in the Gesso recipe, it looks ready and feels great. Move'n on.... Time to heat up the glue gun and take this to the next level.
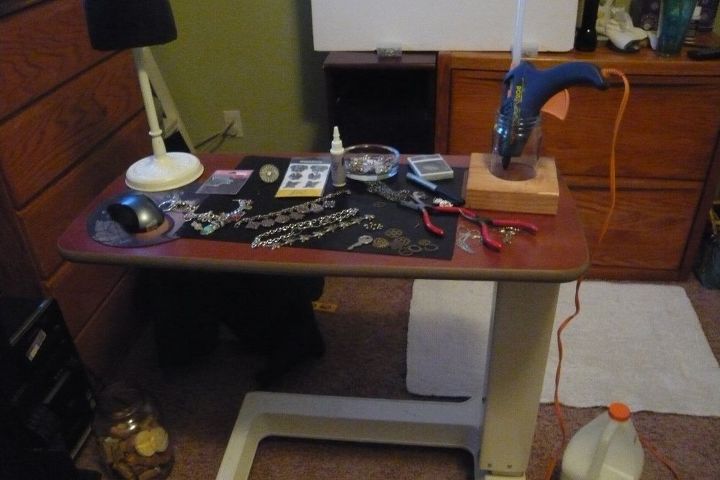
- I just wanted to point out a few things here in this picture that I find very useful in my crafting and hope it will be helpful to some of our Hometalkers.
- First the table you see. rolls under the bed much like the ones in a hospital for serving meals. It is also useful for at-home bed-ridden patients. It has wheels, so I can move it about, it is adjustable, so if I wish to stand up, I can raise it to proper height. You might think it small, but it forces me to stay organized and if the door bell rings, I can quickly roll it out of sight. I suspect they are very expensive to buy, but anyone who reads my projects knows that I go sale'n every Saturday and I found this at a garage sale for $5. Expensive things don't have to be expensive.
- Next I would like to point on the black mat on the table. This mat is a Chefsplanet Universal nonstick bake-liner, most often used in lining your cookie sheets, or the bottom of the oven. The beauty of this mat is that it can take the heat, should you touch it with the glue gun, however, just as important, it is non stick. If you drop the hot glue on it, let it cool and it peels right off. If you should get paint on it, it too wipes right off. I always keep a wet rag next to it when painting. It costs about $10 retail. Mine cost me $3 (after the seller threw in a couple of other small items). You are looking at about 1/2 of the mat.
- Finally, I would be remiss if I did not mention the glue gun holder my son made for me from a 2"x6"x6" block of wood. He drilled a 3" hole large enough to accommodate the glass jar. Isn't he clever? I was uncertain about the glass jar, but it seems to be holding up quite nicely. It doesn't tip and it catches the drips of glue. I'm going to add a small plank of wood to the bottom, as the one thing I don't like is that the glass slips thru the hole. I'll worry about that tomorrow. OK we are in the home stretch. Time to git to gittin.

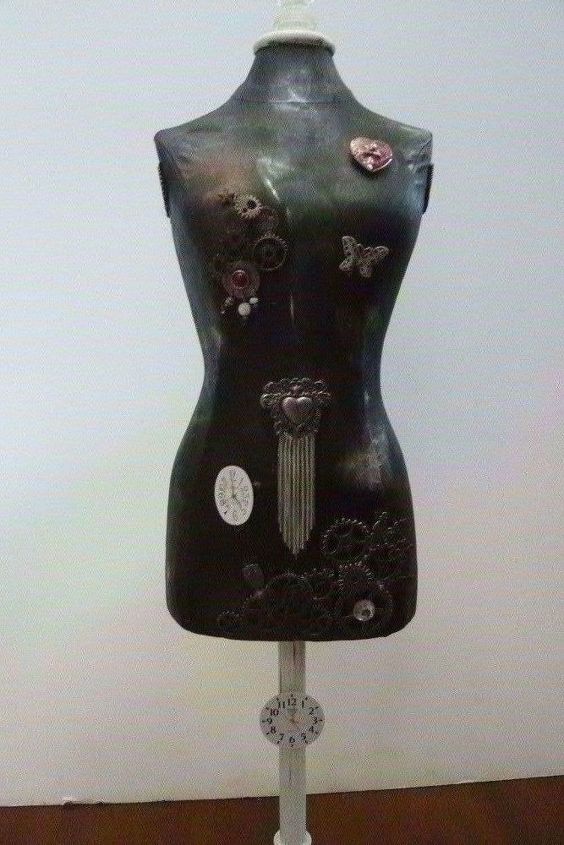
Front side
Time for Wendy to get dressed. So today, we wrap this up by hot gluing the parts. Steampunking is great fun! You pick up a piece you think should go here, and it speaks to you. "yes or no" . You move it around and when it feels right, glue it down.
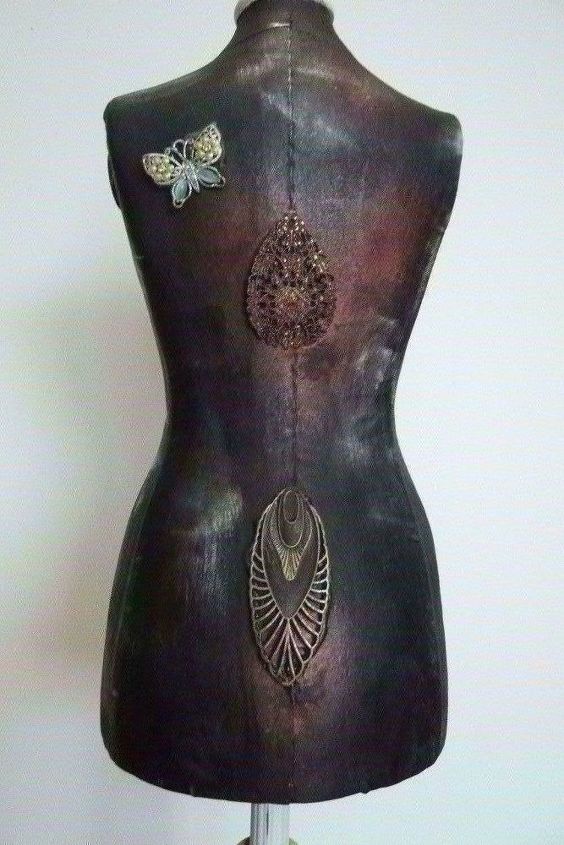
Back side
Once you have the accessories in place, brush the metal pieces lightly with the gesso. This gives a nice base that the glitter ink spray will adhere to. It also tones down the bright and shiny to a matted look. As for the body, the final layer of acrylic paint is sufficient. Without the gesso, you can expect the spray ink and the silver pigment will rub off with each touch. If, as in my case, if the spray ink start to run, quickly dab with a paper towel or tissue.

Side view
On both sides, where the holes remained from removing the arms, I stuffed the holes and then glued a black felt circle to cover the hole, then the glued the gear as a starting point. More to be added later.
I do not consider this to be "complete", (because I want my granddaughter to be involved in completing it). However, all the techniques have been demonstrated and so in that sense, the tutorial is complete. Even when you think it is complete, one day, you find another piece and inside your head you hear a voice, "Oh, that would be perfect ..."

Those of you with the eagle eye probably noticed the two watch faces have been set to 5 o'clock. That, to me, is what steampunking is all about - it makes me smile and even LOL and sometimes even break out in song.

- "Who's tripping down the streets of the city?
- Smiling at everybody she sees?
- Who's reaching out to capture a moment?
- Everyone knows it's Wendy"

I think that's the wine talking, or is it Wendy? I'll pour two glasses. Join me, Wendy?
Comments
Join the conversation
5 of 7 comments
-
I love that you made this piece what you wanted it to be

-
My living grandmother calls 5 O'clock wine time. She's 96. What a stunning piece.


Frequently asked questions
Have a question about this project?