


Thrift Store Table Makeover - Washed Paint Technique
4 Materials
$15
6 Hours
Medium
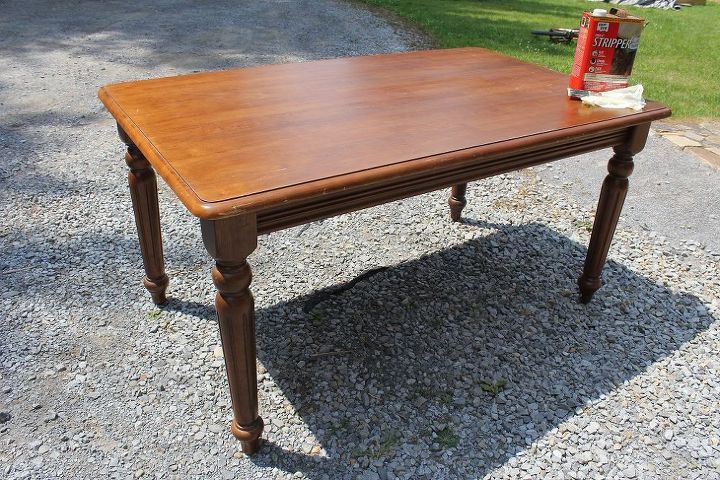
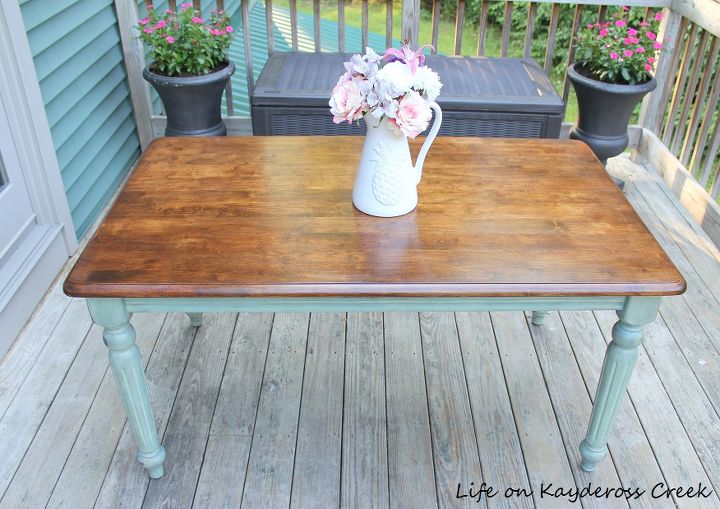
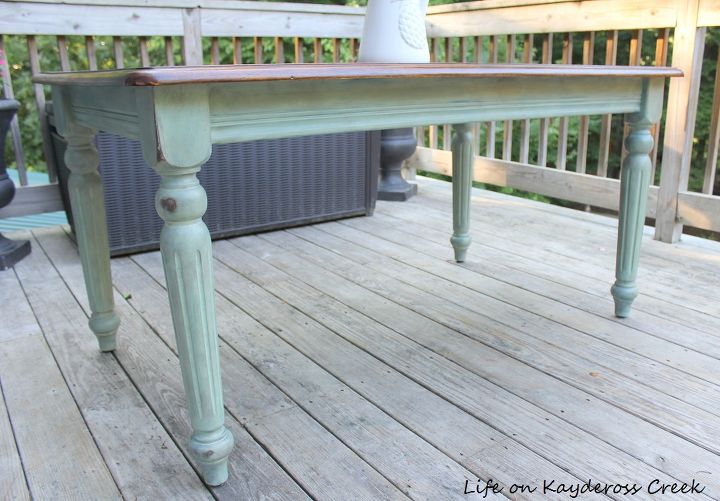
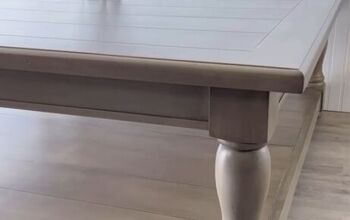
I picked up this dated maple table at a thrift store for just $15. I think it was because one of the legs was coming off but it just needed to have the bolts put in correctly and tightened and she was as good as new. I love the fluted legs and side rails. It was in need of an update and I wanted to give it a farmhouse feel.
After a good cleaning, I stripped the old stain off of the top. This was quite the process because that stain was like baked on there. I had to apply the stripper 3 times and scrape like crazy. Then I sanded it for what seemed like hours with the palm sander. (realistically, it was probably 20 minutes  ) I got all of the chips and scratches out too. Finally, it was clean and ready to stain with a more modern color.
) I got all of the chips and scratches out too. Finally, it was clean and ready to stain with a more modern color.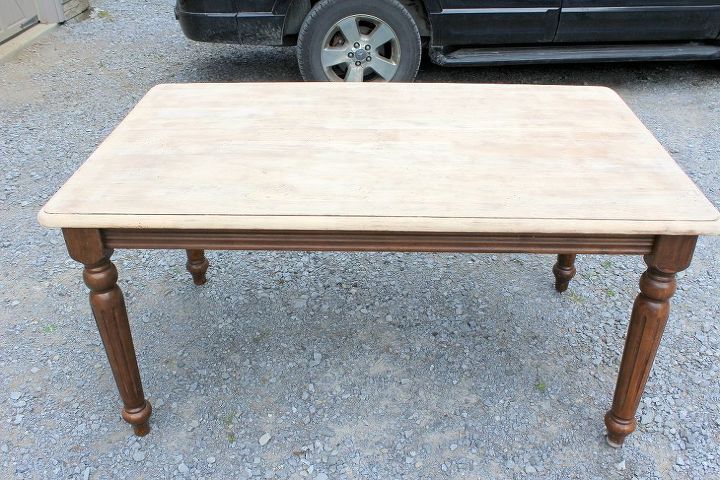
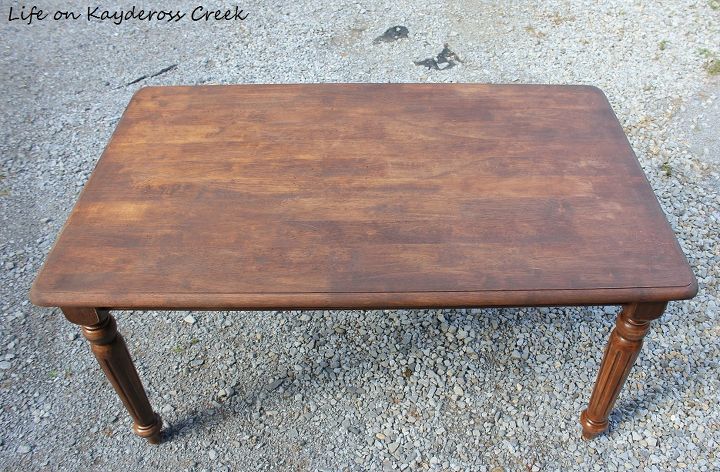
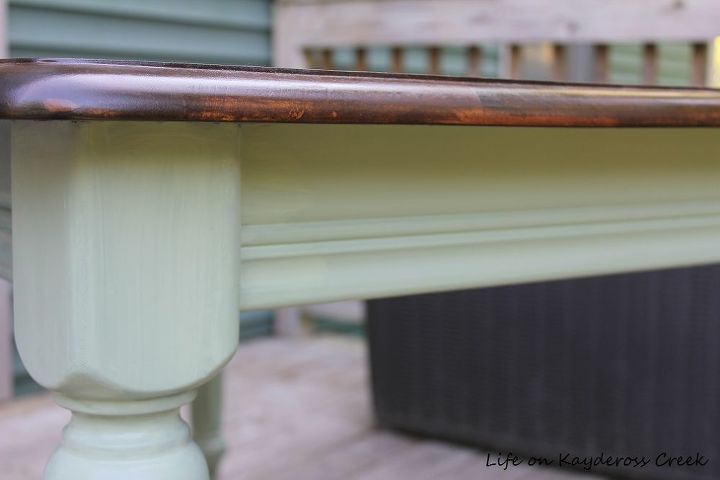
The new stain I chose was a bit darker but more translucent. I mixed some different stains together and came up with something I liked. It’s a bit more fresh and I like the way you can see the wood grain through it. You can see the difference in color from the top and the legs.
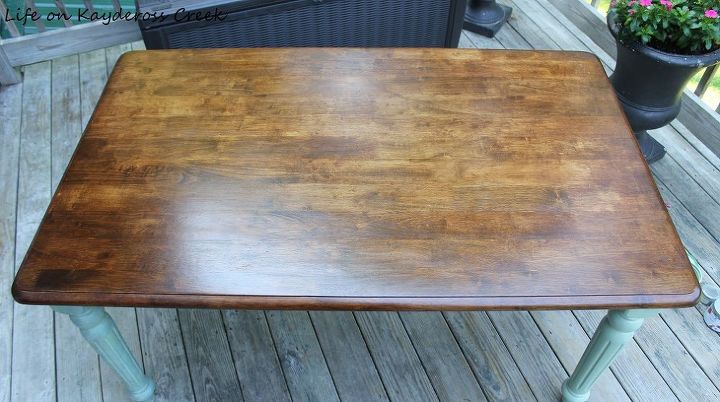
Once it was dry, I gave it 3 coats of poly to make was it durable. I love the way the top turned out!!
The Paint Technique:
This was one of those projects I could see completed in my head while I was buying the piece. I saw the colors mixed together and knew it had to be green and blue. I started by giving the bottom a coat of homemade chalk paint in a mix of sage green and cobblestone from Country Chic Paint that I had used on another project.
I wanted to “wash” the blue on top of the green so it almost looked like a water color effect. I mixed a half a cup of warm water with a quarter cup of plaster of Paris and then mixed it into about 3/4 cup of paint. I wanted it to be a bit runny so I could wipe it off easily.
I brushed just a bit of the paint on and then wiped it off with a dry cotton cloth. I kept a damp cloth near me in case the paint got too heavy on the surface and I cold wipe it off. I also kept the green paint handy if I needed to touch it up.
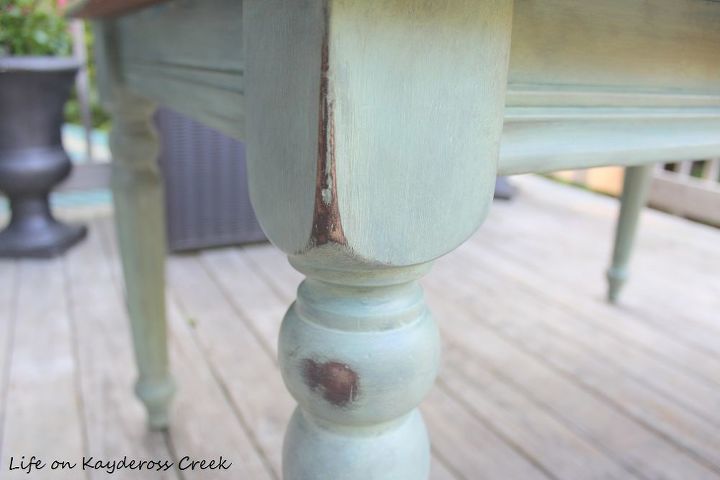
After I gave the entire piece the blue “wash” I sanded down the edges of the corners on the legs where it would wear down if someone rubbed against it over time. I used 120 grit sandpaper to bring out the wood underneath.
Then I used my favorite Country Chic Paint Antiquing Wax over the legs and sides to give it a more aged look.
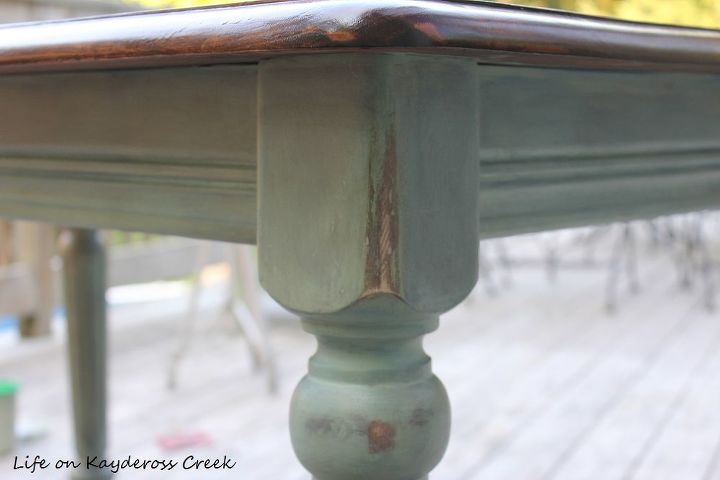
I love the way this table makeover came out! All of the layers of paint and stain give it such farmhouse character.
For more information on this project and others like it, visit my blog http://mylifeonkayderosscreek.com/thrift-store-table-makeover-color-wash-paint-technique/ and you can see the full color wash paint TUTORIAL on Facebook at https://www.facebook.com/lifeonkayderosscreek/

Want more details about this and other DIY projects? Check out my blog post!
Comments
Join the conversation
4 of 51 comments
-
This is really beautiful! Well done!
-
It’s gorgeous!


Frequently asked questions
Have a question about this project?
My dining table has the same design. Do you have any idea how old it might be? Could l use the same technique on it?
how do i paint my kitchen cabinets, which are not wood?
Colleen, this is beautiful! Which color stain did you use on the top? I love it! Thanks for sharing with us!