


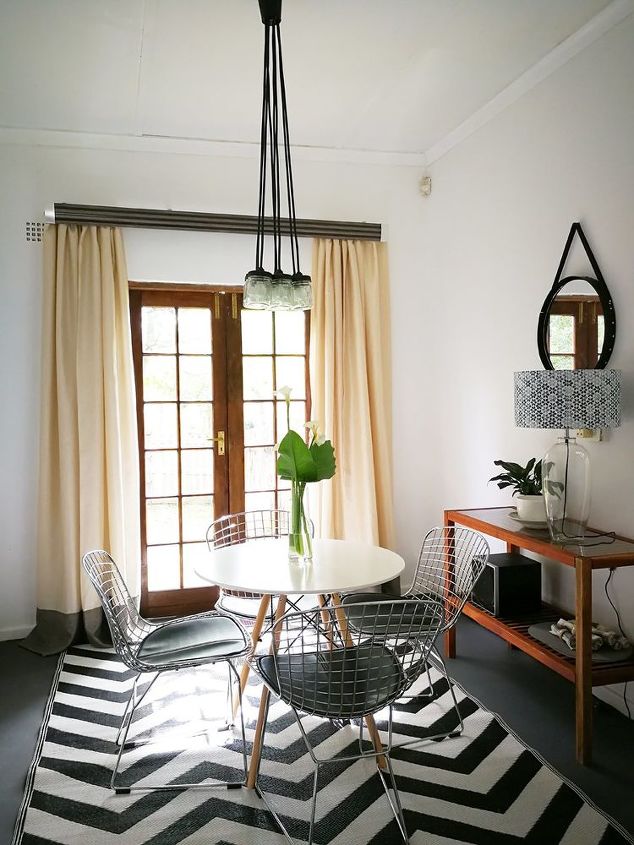
Chandelier DIY With Consol Mason Glass Jars
3 Materials
$20
45 Minutes
Easy
Glass is such an amazing product to work with: it is free from harmful contaminants, it’s reusable and recyclable giving it a great green thumbs up, and it is inherently beautiful. Glass is something we literally use every single day and something that we might sometimes take for granted. While glass jars are great for storage and more recently, for serving trendy drinks in, we were in need of an impressive light fixture above the dining room table more than anything else. And so I set out to create a fun and contemporary light fixture with some electrical cord and Consol jars.
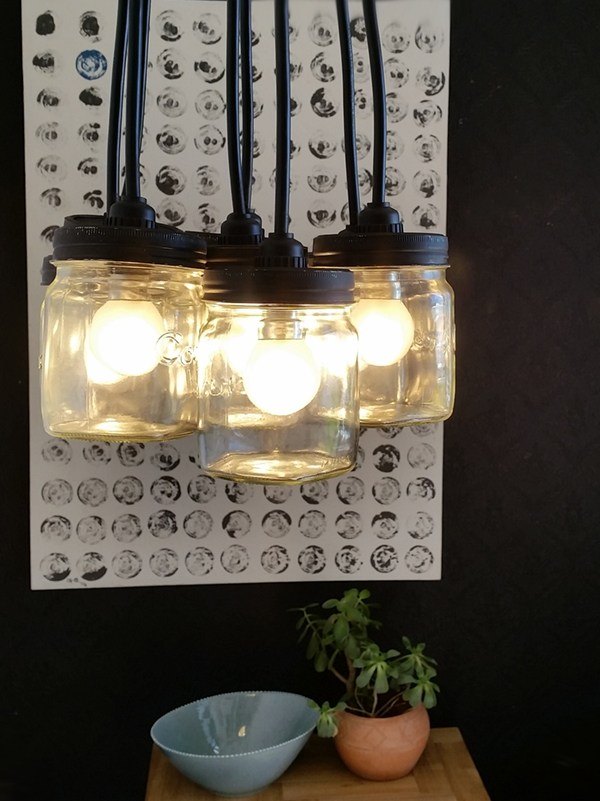
Here are the step-by-step instructions for my chandelier DIY with Consol Glass
PLEASE KEEP IN MIND THAT IT IS ESSENTIAL TO GET A QUALIFIED ELECTRICIAN TO DO THE WIRING ON THIS PROJECT
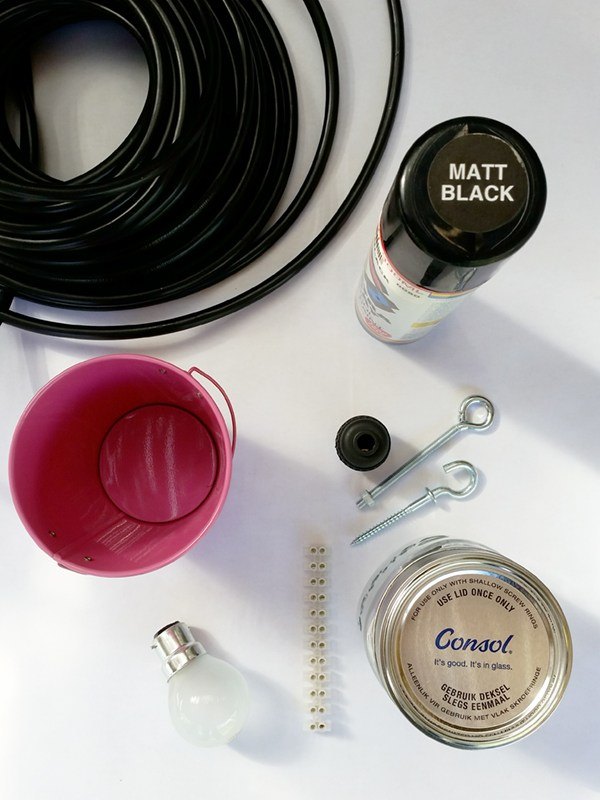
You will need:
- 8x 500ml Consol Jars with screw lids
- 8x 1.1m 2.5 cabtyre electrical cord in black *SEE PRO TIP
- Matt black spray paint
- 8x black light fittings
- 8x golf ball lamps
- Electrical series connectors
- Large ceiling bolt with plug
- Hook with nut (length to match the height of your little bucket)
- Small metal bucket to use as a ceiling cup
- Hole saw to match the diameter of your light fittings
* PRO TIP: The light should hang around 80cm above the table, so in this specific dining room, the total length of the chandelier will be 1m. Add 10cm to each cord to give you some room to play with.
Instructions:
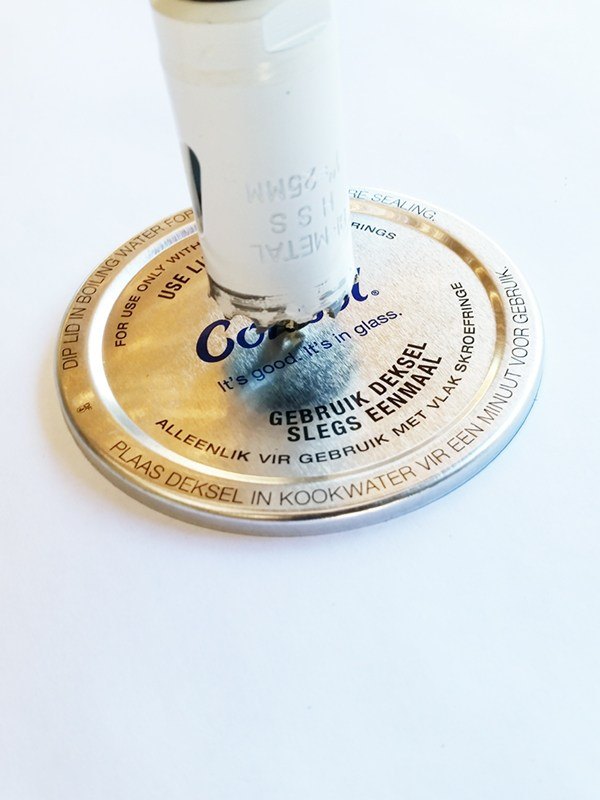
STEP 1
Carefully mark out the center of each lid and drill a hole using the hole saw. Use pliers to press down any rough edges and to slightly adjust the size of the hole if necessary – it has to fit the light fitting snugly.
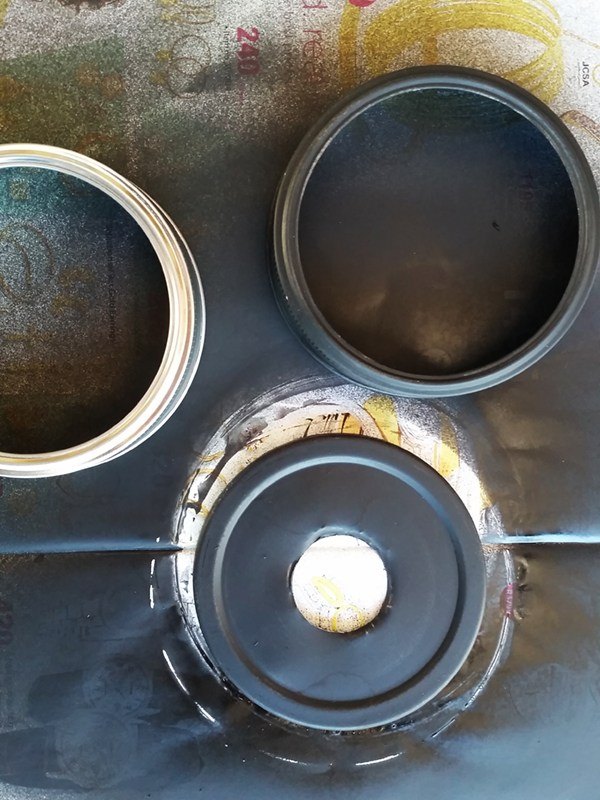
STEP 2
Spray the lids and allow to dry.
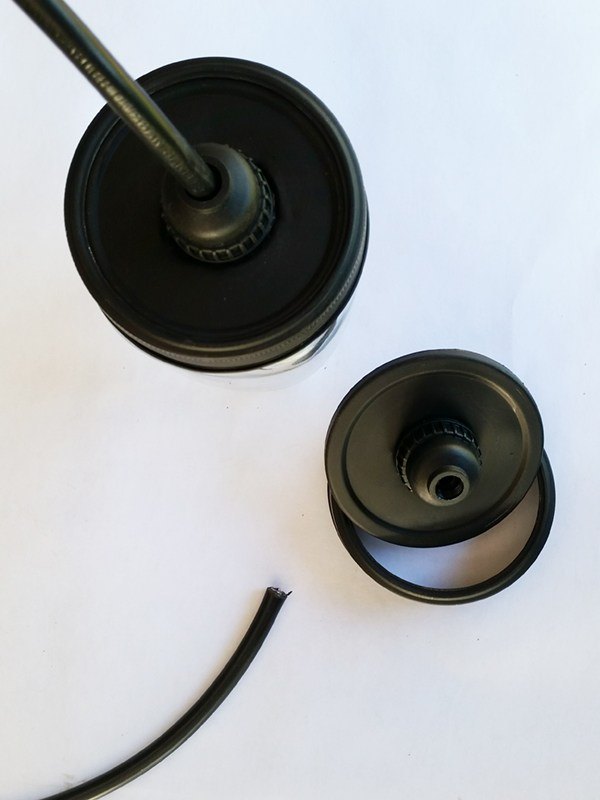
STEP 3
Wire a piece of cord to each light fitting.
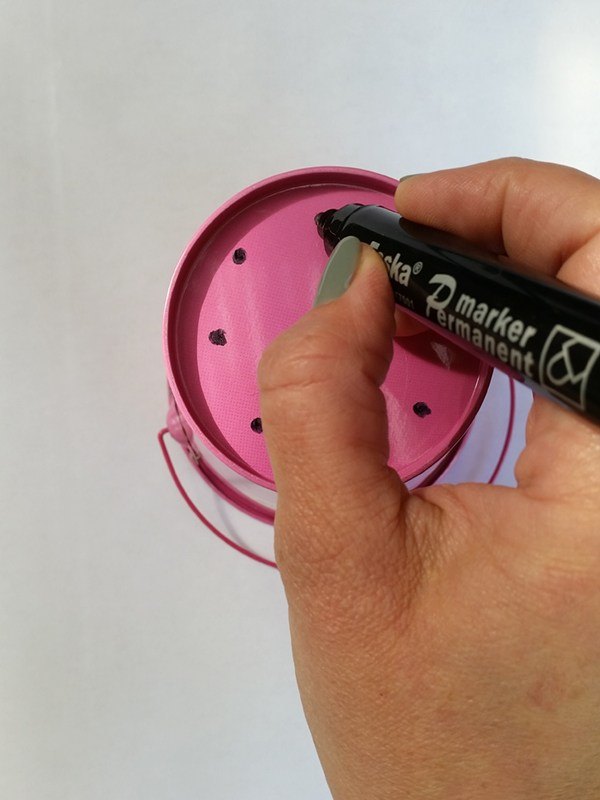
STEP 4
Make 8 equally spaced markings on the bottom of the little bucket and drill holes for the cords to go through.
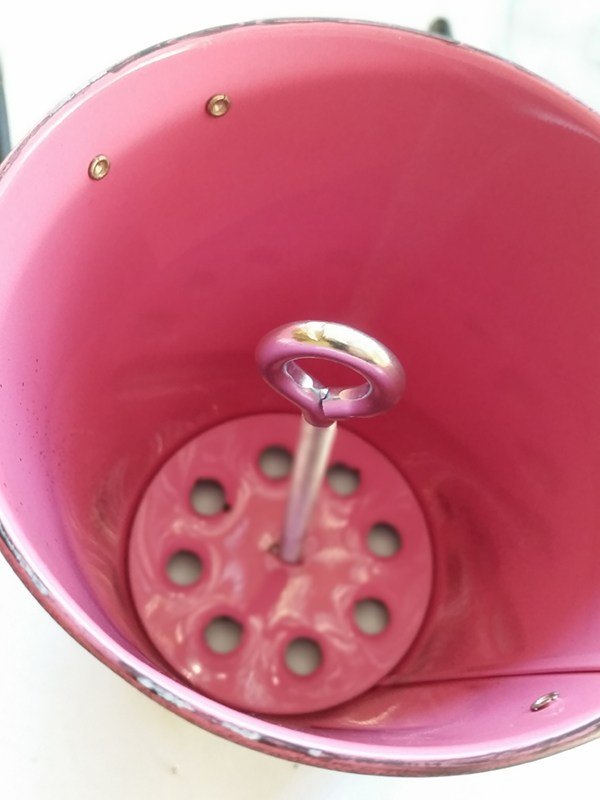
STEP 5
Drill a single hole in the center of the bucket and attach the metal eye, securing the nut underneath.
For the complete article and rest of the instructions, kindly visit the article on my blog.
Happy Lighting!
Germarie
For the complete article and rest of the instructions, kindly visit the article on my blog.
Happy Lighting!
Germarie

Want more details about this and other DIY projects? Check out my blog post!
Comments
Join the conversation
2 of 13 comments
-
Very nice!
-
Suggest that you paint your French doors black.


Frequently asked questions
Have a question about this project?
Yes I would like to try this project, My question is will the jars get Hot?
Do you have a problem with the bulb being inside the glass jar? How does heat escape?