


DIY PVC Wine Rack

7 Materials
$40
3 Days
Medium
Turn a few old pvc pipes, bolts and spray paint into your very own stunning DIY wine rack!
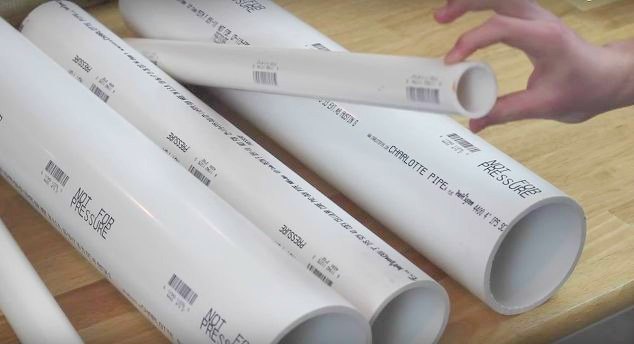
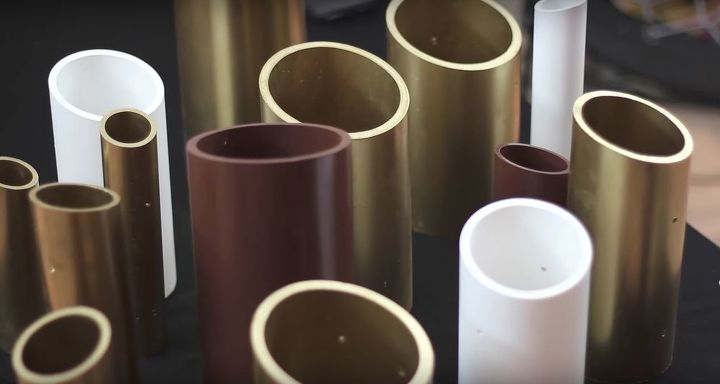
Gather supplies.
Pre-cut 2 ft long PVC of varying diameters are typically super cheap at hardware stores. I picked up a few 3", 2.5" and 1" wide pipes all for under $30 at Home Depot. You'll also need some small bolts and nuts, spray paints of your desired colors, a power drill, a tape measure, a chalk line (optional) and an efficient way to cut the pipes. (Preferably a Miter saw!)
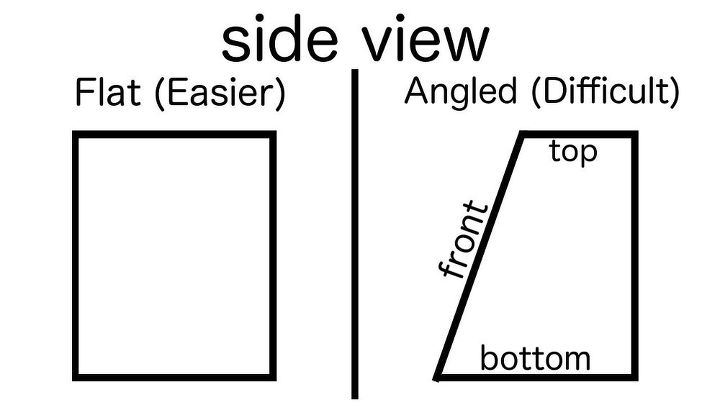
Choose your style.
There's two main ways to go about this project, pictured above. The left is slightly easier; decide on a fixed length for all of the pipes and cut them all to the same size. This also results in easier bolting together, since you can decide how far in the pipes your bolts should go ahead of time.
The right can be more challenging, but results in a much more professional looking outcome. Every single pipe will have to be cut at different lengths, with a 90 degree angle on one end and a 75 degree angle at the other end. (Note- We'll be covering the more difficult version for the remainder of the instructions!)
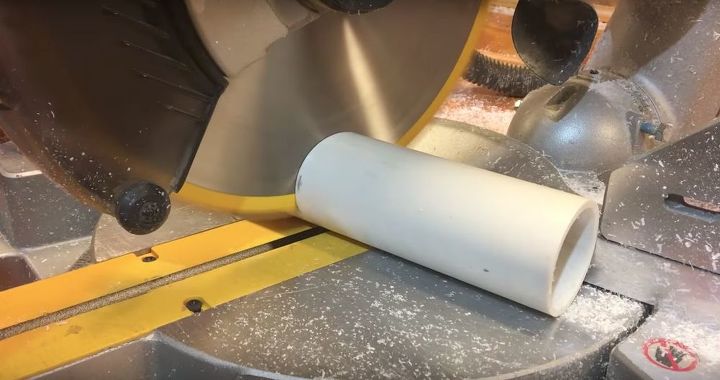
Start Cutting.
The nice thing about this project is the "plan as you go" aspect it has. Start with a short length, around 6 to 8 inches, and cut the first pipe. For the following pipe, you'll use the dimensions from the one prior to aid in this one. Butt the two pipes up against each other on a flat surface, with the angled side pointing straight up in the air, and mark on the next one where the first one ends. The longest length of the first pipe will be the shortest length of the second.
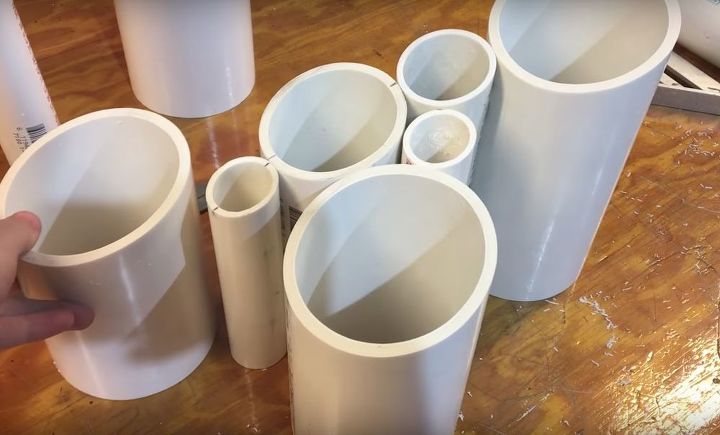
Roughly piece together.
Continue cutting each pipe, randomly choosing different diameters for different locations. From this point on it's completely up to you- go as wide or as tall as you'd like! If you're planning on having the rack free standing on a table or the the floor, make sure to put some wider mouthed pipes at the bottom, so you'll be able to but larger, heavier bottles that'll weigh down the structure.
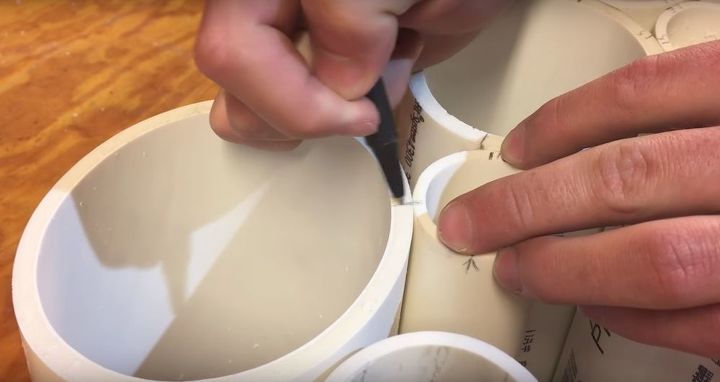
Mark each junction.
Once you've completed cutting, make sure to mark each joint, on both the angled side and the 90 degree side, where every pipe meets. Some will only have 1 or 2, but some can have up to 4 or 5. This will save you countless time throughout the next few steps.
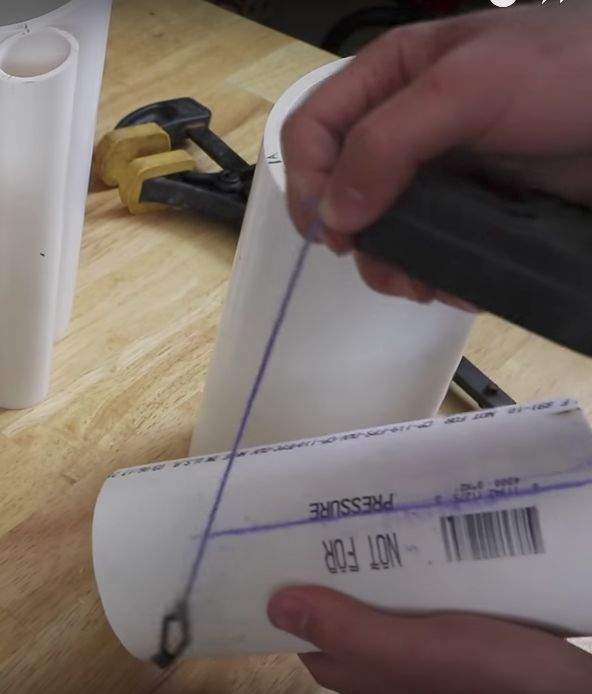
Snap a chalk line (optional)
Although it is possible to skip this step and still have a successful result, I'd highly recommend taking the extra time to snap a chalk line at each junction on every pipe. This will result in more accurate measuring in the next step.
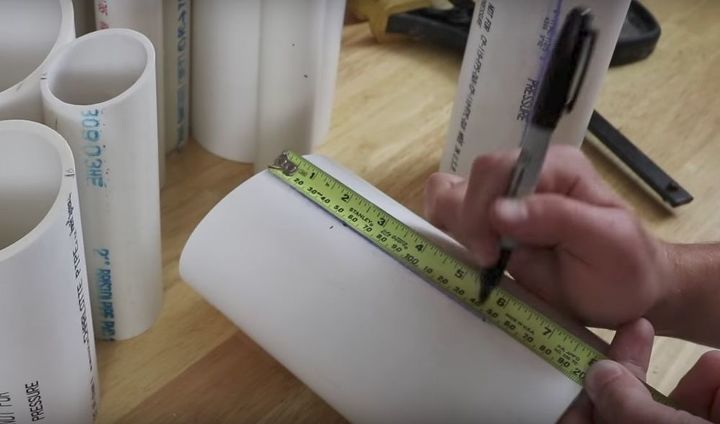
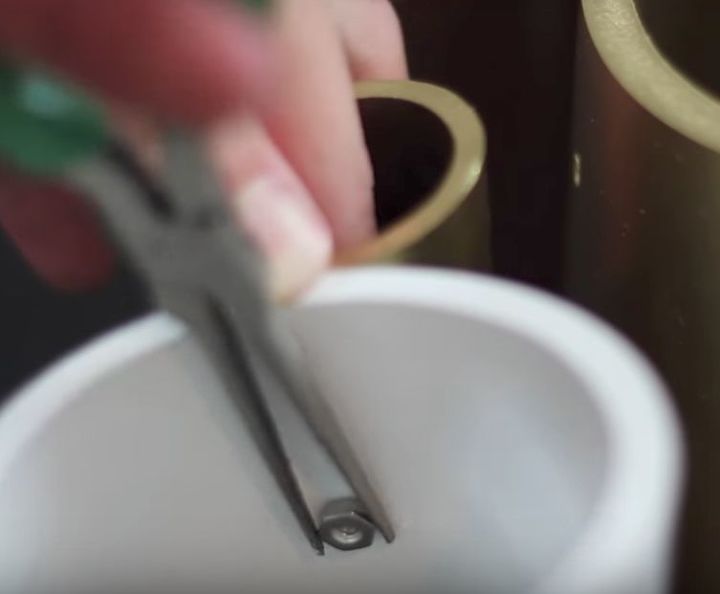
Measure for the bolts.
Starting from the 90 degree side, choose two points along every junction to place your bolts. Because I choose the more difficult version of this project, each junction will have different measurements, as a result of the varying pipe lengths. If you had chosen the easier version, you could essentially place bolts at the same lengths on every pipe.

Check measurements and drill.
You can ensure that your holes will line up by holding the pipes together and making sure each marking meets the other. Once double checked, drill out each marking with a drill bit slightly larger than your bolts.
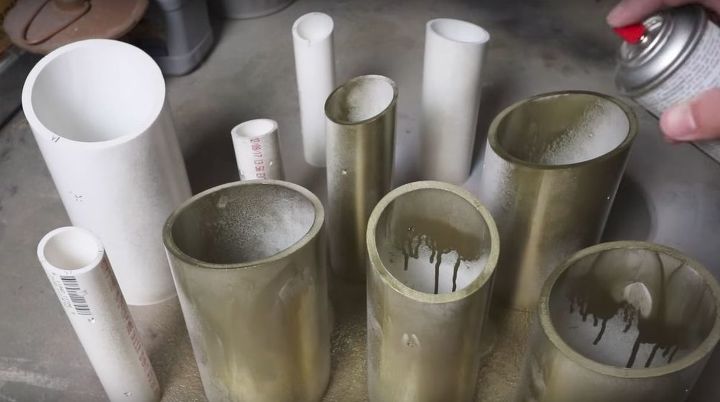
Paint.
With whatever colors you'd like, spray paint the pipes outdoors or in a well ventilated room. Feel free to rough up the PVC a bit will some sand paper to lessen the chances of the paint running off the surface. I didn't, and it took about 4-5 coats to fully cover the plastic inside and out.
Let dry and piece back together.
I allowed the pipes to dry for a full day once the final coat of spray paint was applied. Reconstruct the pipes (this may take a bit longer since your joint marks are now covered up!)
Bolt together.
Using pliers, wrenches and your hands, place bolts in each hole you've made at every joint. This surprisingly took me the longest time out of every step, as admittedly I did have to go back and re-drill some holes that weren't lining up as planned. Don't be discouraged if you have to do the same- remember that the holes and screws will be covered by wine bottles!
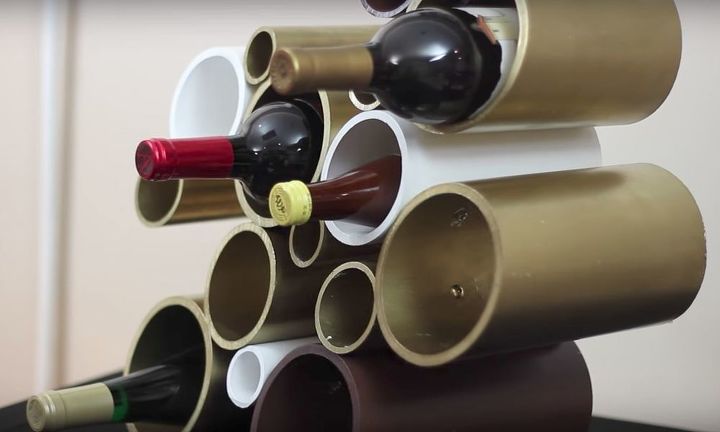
Display.
You're finished! Place the wine rack on a shelf, desk or floor- you can even use L brackets to bolt the entire structure to your wall for an amazing floating effect! Just make sure to bolt it into some studs- this thing can be heavy!
{
"id": "4232211",
"alt": "",
"title": "",
"video_link": "https://www.youtube.com/embed/rjmloIiJPls",
"youtube_video_id": "rjmloIiJPls"
}
{
"width": 634,
"height": 357,
"showRelated": true
}
Watch the full-length instructional video over on my Youtube channel, and feel free to check out some of my other projects!
Comments
Join the conversation
2 of 9 comments
-
This would be a great way to make a tabletop utensil holder too.....or a craft stand for pens, markers, crochet hooks, paint brushes, etc!
-
GREAT idea !!!


Frequently asked questions
Have a question about this project?
Do you cover the screw heads and bolts with anything to prevent scraping or scratching the bottles?