


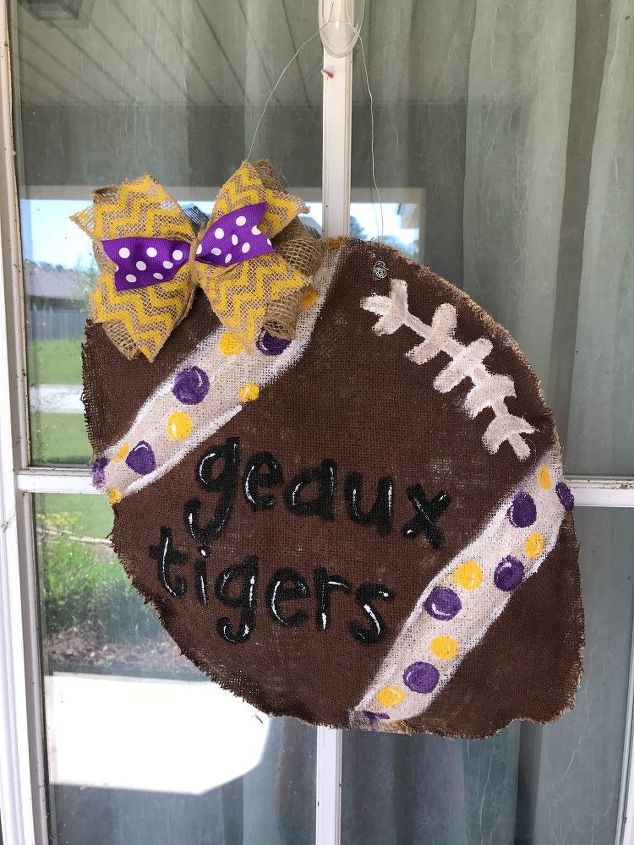
Puffy Burlap Football Door Hanger

7 Materials
$20
30 Minutes
Easy
Easy & Inexpensive Door Hanger Tutorial
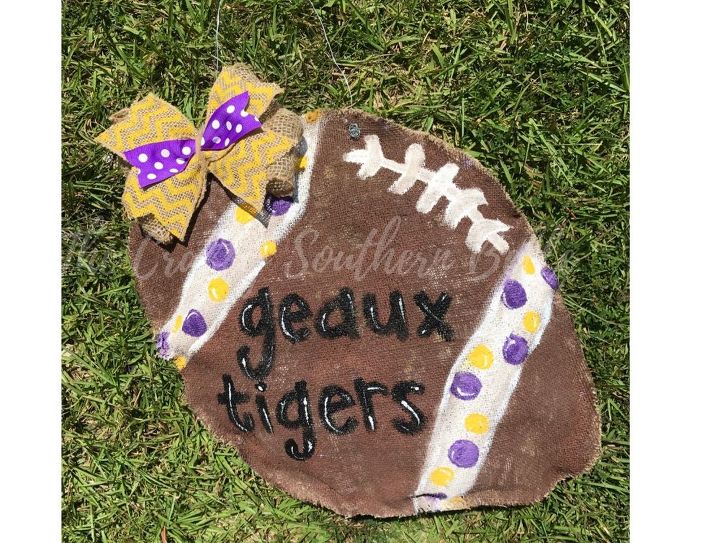
I have the greatest DIY project to share with you that can be made all year around for every holiday and/or party. Here is what we are making!!
We want to help you DIY, so some of the materials in this post are linked to sellers. Just so you know, Hometalk may collect a small share of sales from the links on this page.
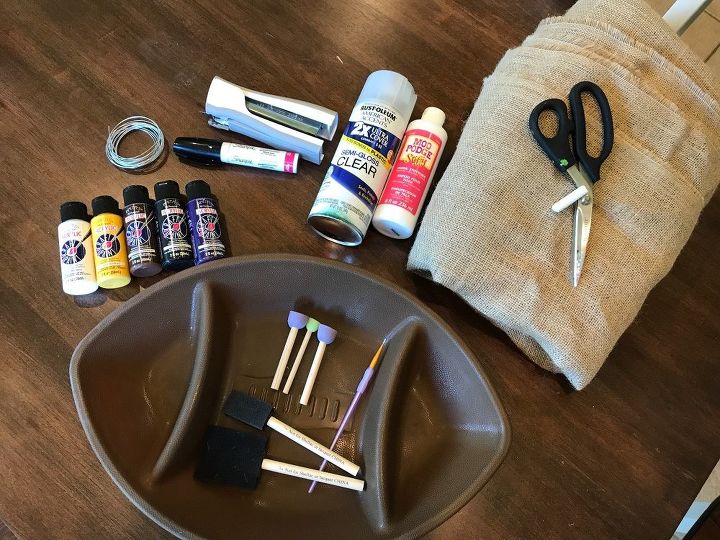
The supplies you will need are:
Acrylic Craft Paint (I used brown, white, black, yellow gold, and purple)
Outdoor Sealant Spray Paint (omit this if you use outdoor or patio paint)
Foam Brushes ( I used a 2 inch, 1 inch, and circle sponge brushes for polka dots)
a black paint pen
15-20 grocery bags
Football Tray (found at Hobby Lobby for $2.99 or Amazon)
Scissors
ribbon & pipecleaner (if you want to add a bow like I did :)
you can exclude the stiffy paint because the paint and sealant make it stiffy.
Let's get started:
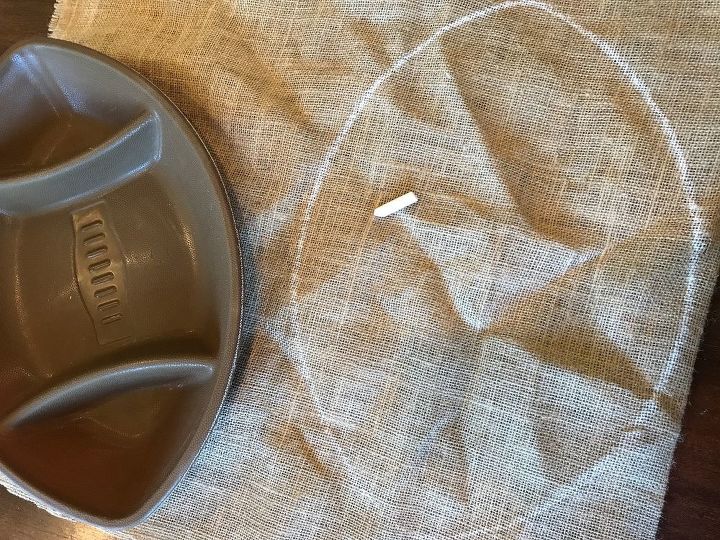
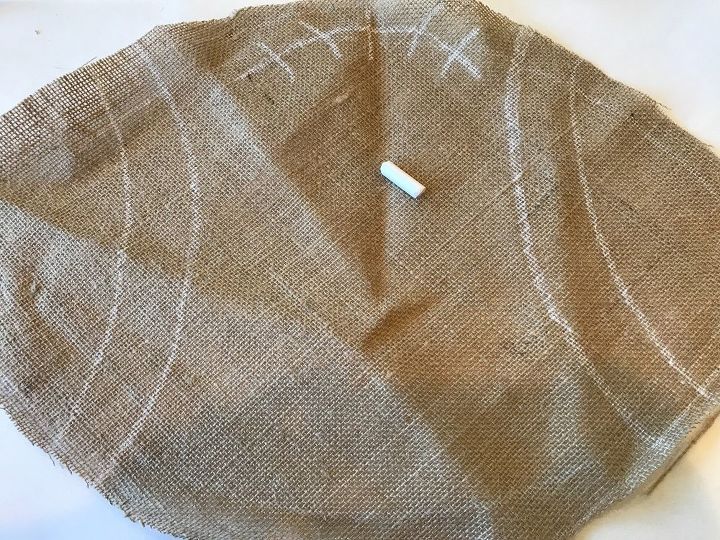
Fold your burlap in half and place the football tray face down.
Using the chalk, draw a line around the tray creating a template for you to cut out.
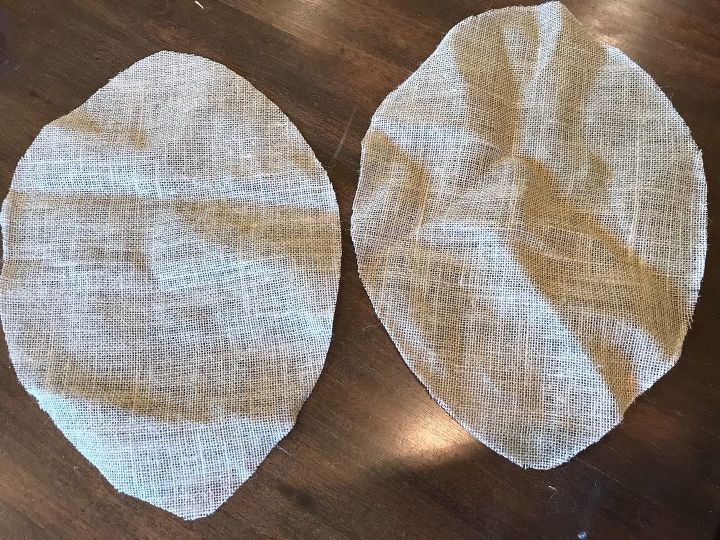
Then cut around the chalk line. Once completely cut, you should have two identical pieces of burlap to work with.
Take your chalk and outline your design on the football. Then start painting.
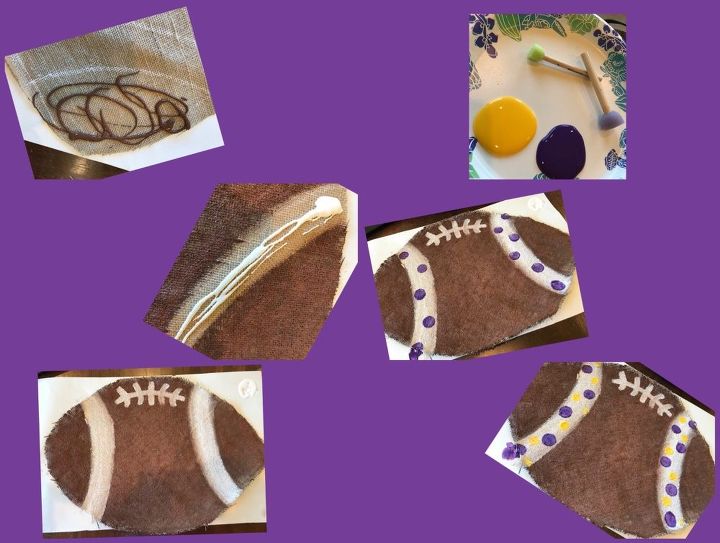
Squirt the paint directly onto the burlap and using the 2 inch brush paint in the areas that are to be brown. Repeat this step using the 1 inch brush and white paint for the sides of the football. Take the 1/4 inch flat brush and paint the laces at the top of the football.
Using your polka dot sponges add polka dots to the white part.
Let this dry for at least 1 hour.
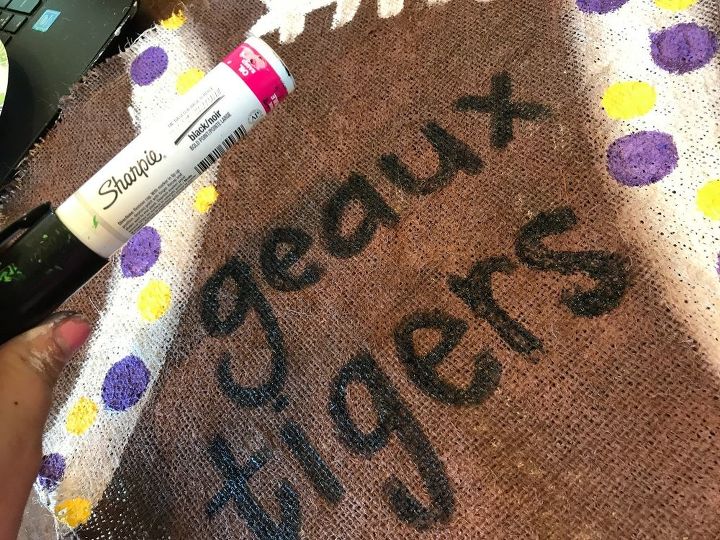
After it is dry, using the paint pen add the saying you would like. I usually go back over my paint pen writing with the same color paint and the 1/4 inch flat brush to give it a thick coat.
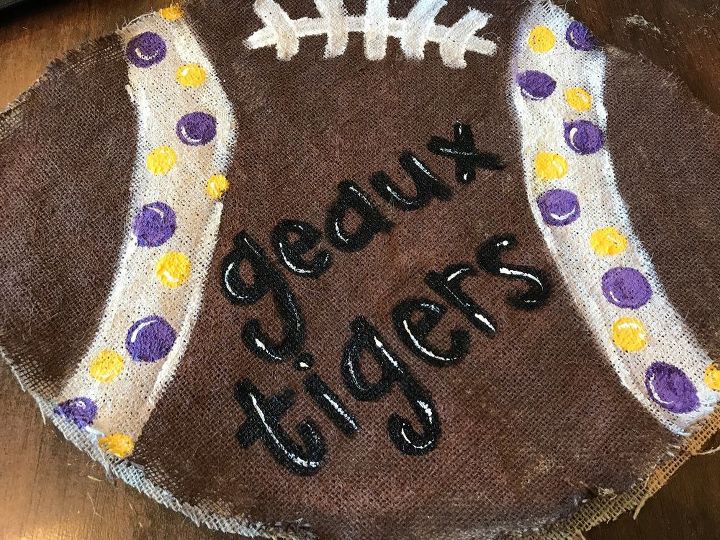
Next, take your small detail brush and add your highlights in the polka dots and the letters.
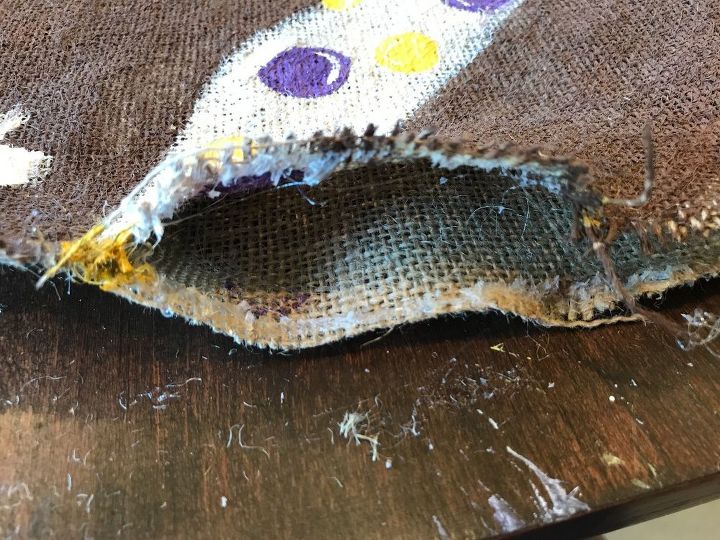
Now your ready for assembly! Lay the two pieces on top of each other and grab your glue gun. Glue right on the edges as though you are making a pillow. Make sure to leave a 3 inch pocket to add the filing through. I always start at the corners first.
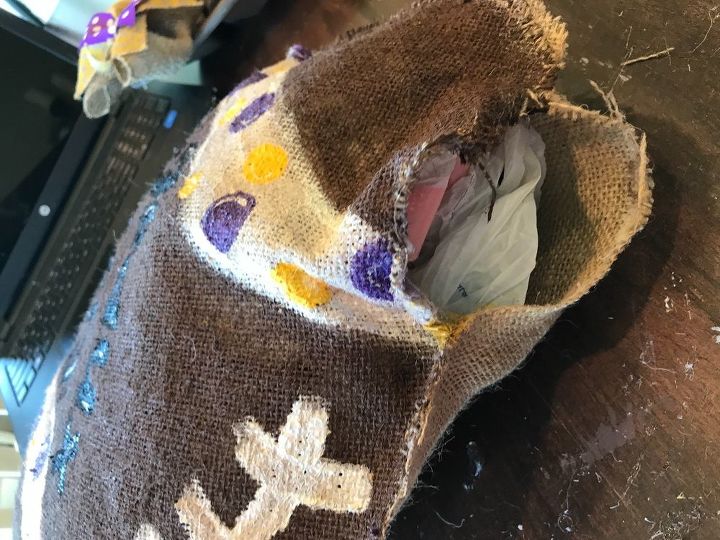
Then taking grocery bags fill the inside until you get the thickness you want. Once filled, glue up the opening.
Now we need to attach the hanger. Take your scissors and cut some floral wire. I cut mine to 14 inches. Thread the wire through one side and make a spiral to form a knot. Repeat on the other side. I made mine hang catty-cornered so placement of the wire depends on how you want it to hang.
I attached a bow that I made and then sprayed it with the enamel protectant!!
There you go!!! All done and perfect for your front door!
Comments
Join the conversation
1 comment
-
Love this! Thanks for sharing :)


Frequently asked questions
Have a question about this project?