


How to Make Fabric Pumpkins
2 Materials
$5
10 Minutes
Easy
Make your own fabric pumpkin patch this season with this simple tutorial!
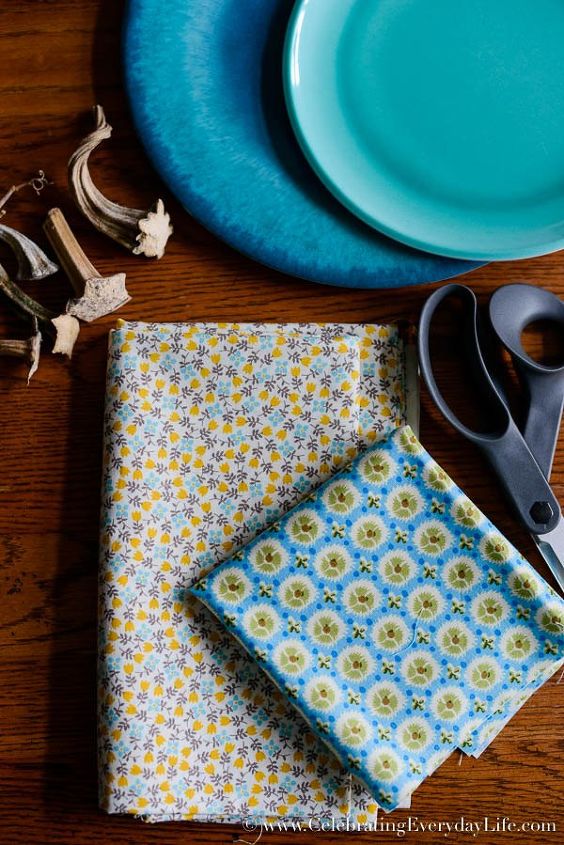
The supplies that you need for this project are:FabricPlates (2 sizes if you want to 2 sizes of pumpkins)ChalkScissorsNeedle + ThreadPillow stuffingOld pumpkin stems or other "topper"
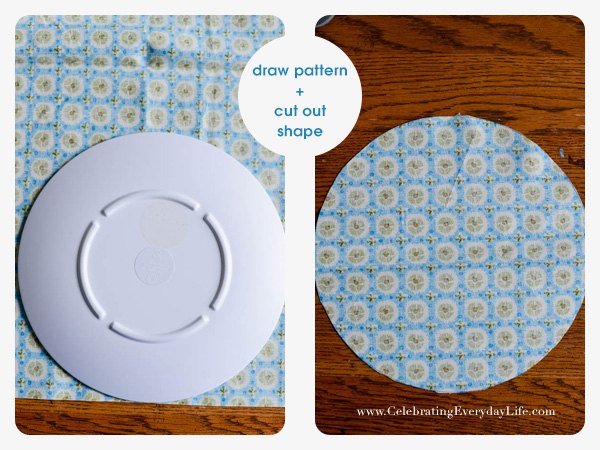
To begin you need to cut out your fabric. I used a dinner plate as the guide for my larger pumpkins and a salad plate for the smaller pumpkins. Place the plate face down on your fabric and trace with chalk. Cut out your pattern.
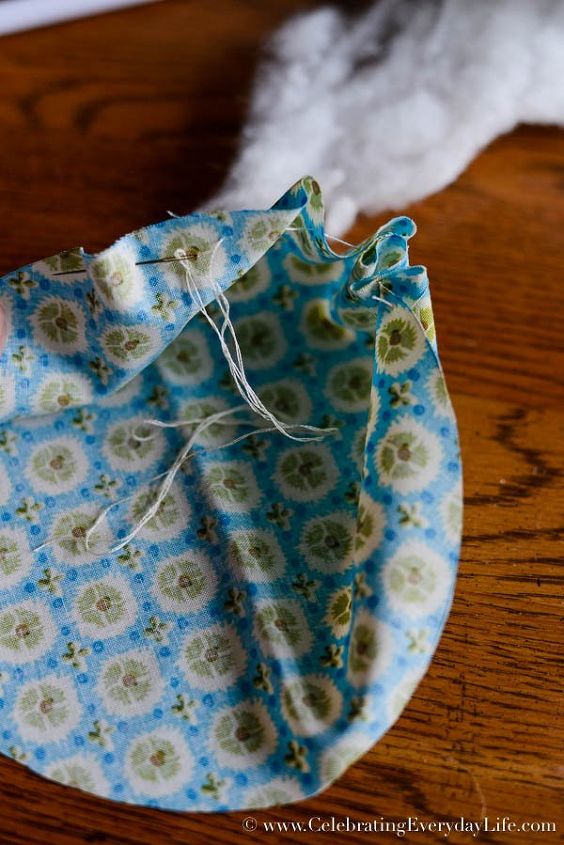
Next, take a needle and thread and begin making a wide stitch weaving in and out of the fabric near the top - but not too close to the edge, you don't want the thread ripping the fabric.
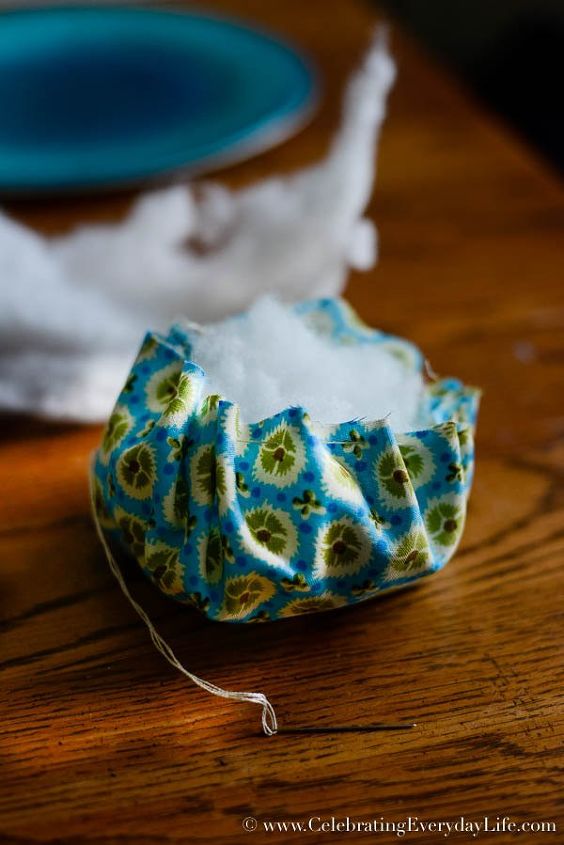
Once you've sewn around the edge, fill the pumpkin with stuffing.
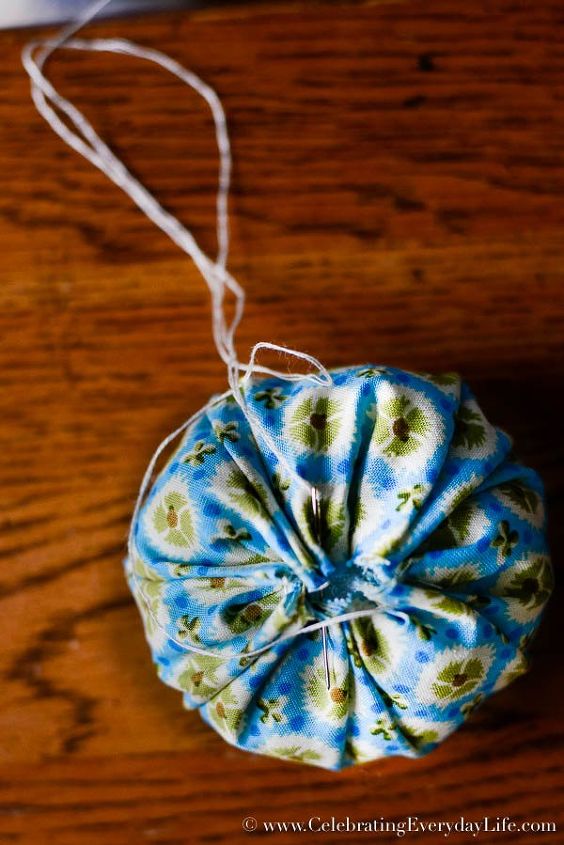
Pull the thread tightly and sew back and forth a little bit to be sure you've tightly closed your opening.
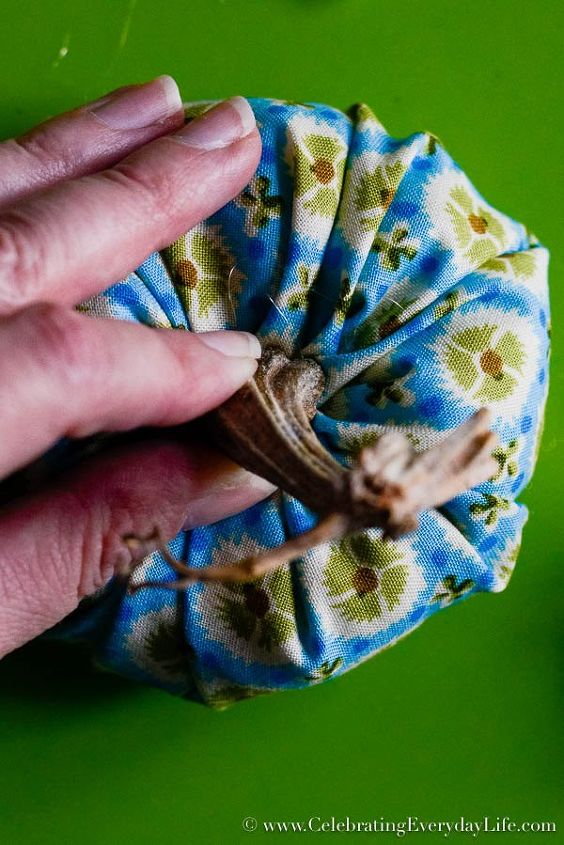
Glue on a DRIED pumpkin stem. It's very important that the stem is dried. Fresh stems will make your fabric a bit yucky while it's drying out.
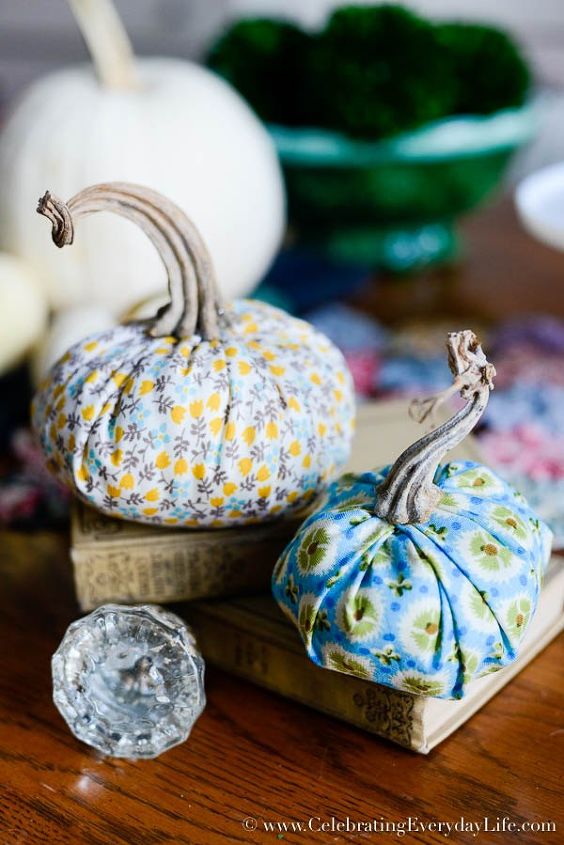
Voila! Now you have your own little pumpkins which really do come together easily. I love how you can make these in any color scheme to compliment your decor!

Want more details about this and other DIY projects? Check out my blog post!
Comments
Join the conversation
2 of 17 comments
-
I do this and put dried beans or rice inside before the batting to give them a bit of weight
 .
. -
Oooo, pretty!


Frequently asked questions
Have a question about this project?