


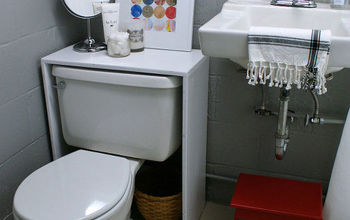
Over Toilet Spacesaver Shelf Upcycle
4 Materials
1 Hour
Easy
I get lots of hand-me-downs from my mom, and I wasn't quite sure what to do with this Over toiler spacesaver shelf...but inspiration hit me a few days ago. Check out this fun upcycle project! https://www.janesreallife.com/toilet-spacesaver-shelf-upcycle/
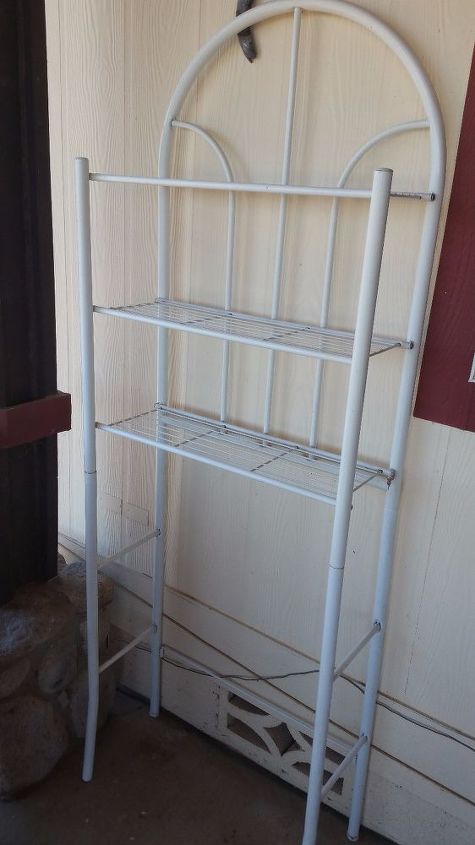
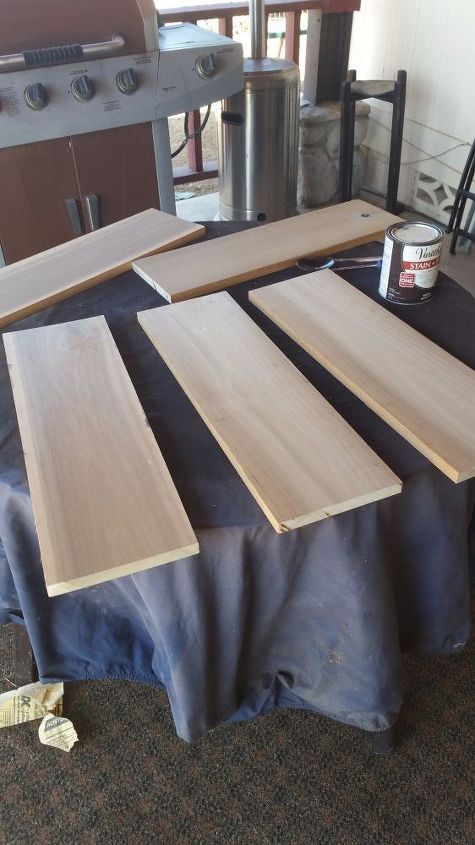
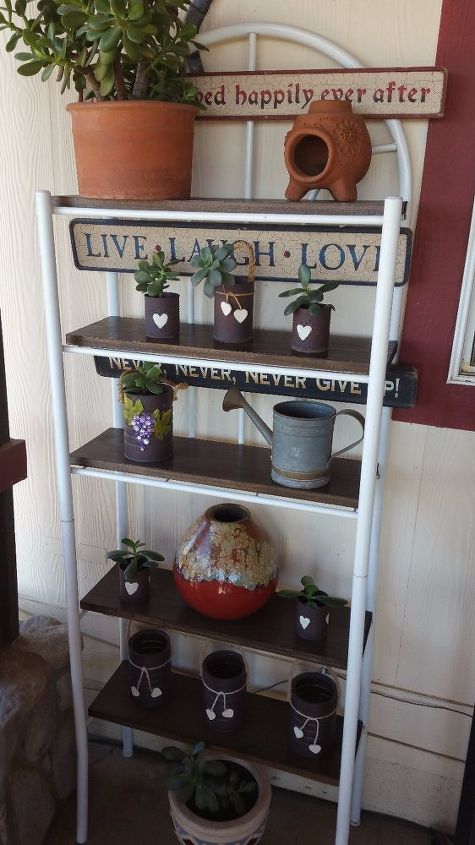
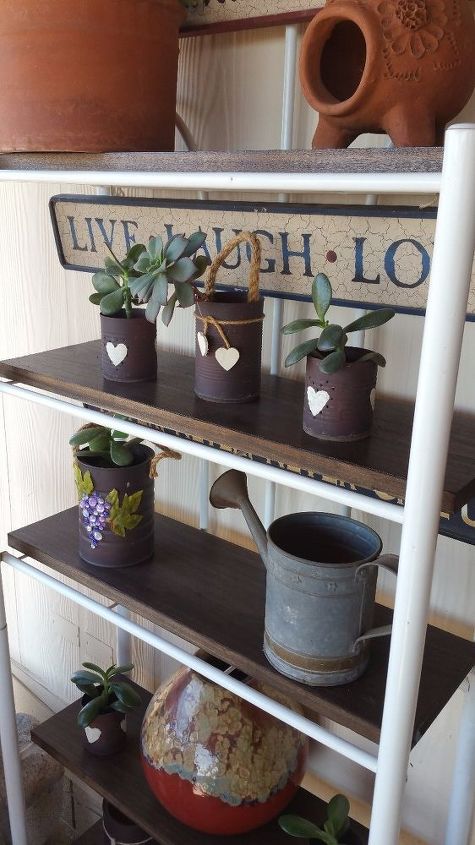
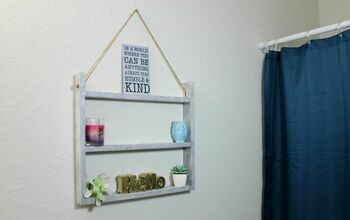
I needed something to display my patio jade garden, but wasn’t crazy about having a white bathroom piece on my patio, as it just doesn’t go with the rest of my decor…plus it looks like it belongs in a bathroom (haha)…so I had to find a way to doll it up. Painting it was out, since I didn’t want to make this an all day project…but I had a better idea. Stained wooden shelves! My husband keeps tons of scrap wood pieces in the garage, so I crossed my fingers that I would find the right size to fit. I totally lucked out! I found two 6′ long boards (of really nice wood!) and the 7″ width was just exactly what I was looking for too. I had my husband cut five 24″ long pieces for me.
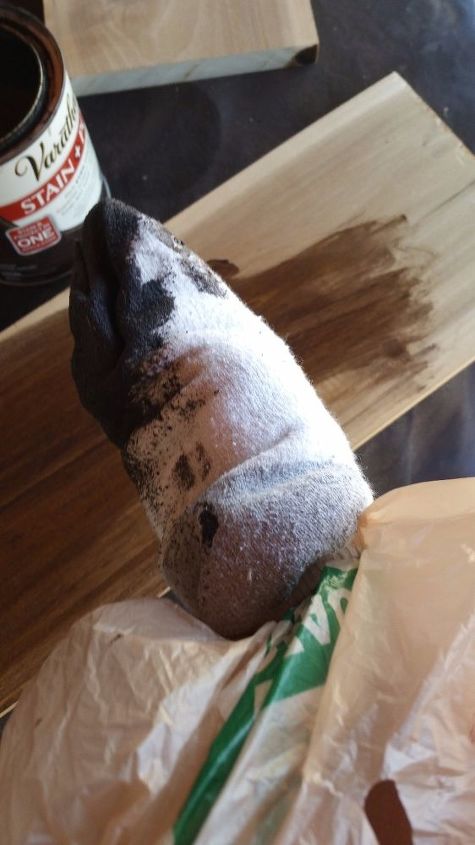
I LOVE TO STAIN WOOD. In fact, I hope someday to stain all of the cabinets in my house. Squeeeeee! Today, however, I just stained 5 pieces of board for this patio project. I’m not real big on using a brush to stain…maybe its because the brush strokes bother me, or maybe the brushes are just too hard to clean up afterward. Not sure. My "go to" is to use an old sock. First I wrap my hand in a plastic bag (rubber gloves work too) then I put the sock over the plastic bag. This helps keep the stain off of my hand. Being that I was in a time crunch, (and admittedly I'm a little impatient) I only went with one coat of stain…it dries very quickly so this took me less than half an hour to stain all 5 pieces.
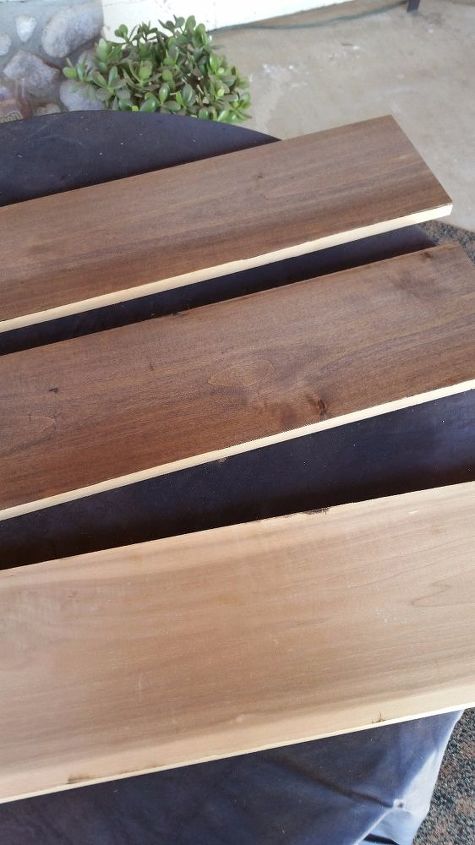
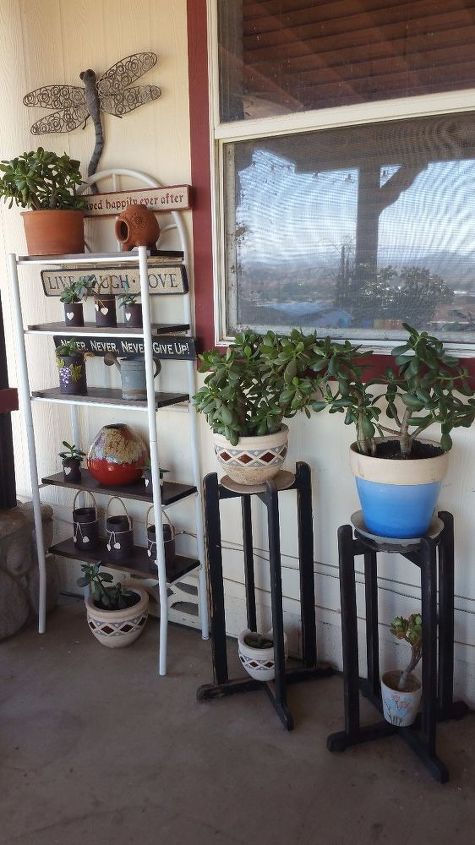
Once the stain was dry to the touch, I placed the wood pieces on the 5 tiers of the spacesaver, I can’t believe how it changed the look…so adorable! Then I just added plants and decor pieces and voila! PERFECTION!
This literally cost me nothing because I had all the materials on hand, and the spacesaver was gifted to me. However if you purchased all the materials it would cost less than $50. Follow my blog for more adventures in upcycling, homesteading, and other fun projects! Follow me on FB and Instagram @JanesRealLife
Resources for this project:
See all materials


Any price and availability information displayed on [relevant Amazon Site(s), as applicable] at the time of purchase will apply to the purchase of this product.
Hometalk may collect a small share of sales from the links on this page.More info

Want more details about this and other DIY projects? Check out my blog post!
Comments
Join the conversation
2 of 43 comments
-
That's a great idea. Is probably take it one step further (cost about $5) and spray the white portion with a dark hammered type paint. I think it would blend in great with the other porch decor.
-
Love this. I moved into a rental and one of these over the toilet shelving units was left by the last tenant. It is dark so I would probably go with a lighter stain but now I know what I want to do with it!! Yay!


Frequently asked questions
Have a question about this project?
Are the shelves attached or just resting on the metal side supports?
Good makeover🇦�,!! ,!'!..!
How did you attach the signs? The top one imparticular.
How do you keep the shelf unit from tipping, there is obviously no bracing of the bottom legs? Nor does there appear to be any bracketing to the wall. With all that weight, it would easily become too top heavy, and would be unstable. I know you have the unit on a covered porch, but mine would be exposed to the 'windy' side of the house. Any suggestions?