


DIY Vintage Hot Air Balloons!

8 Materials
$4
1 Hour
Easy
We're throwing a circus themed Halloween party this year and the best part about throwing a party is decorating for it. This is how I made cool vintage looking hot air balloons with supplies I bought from the dollar store. 
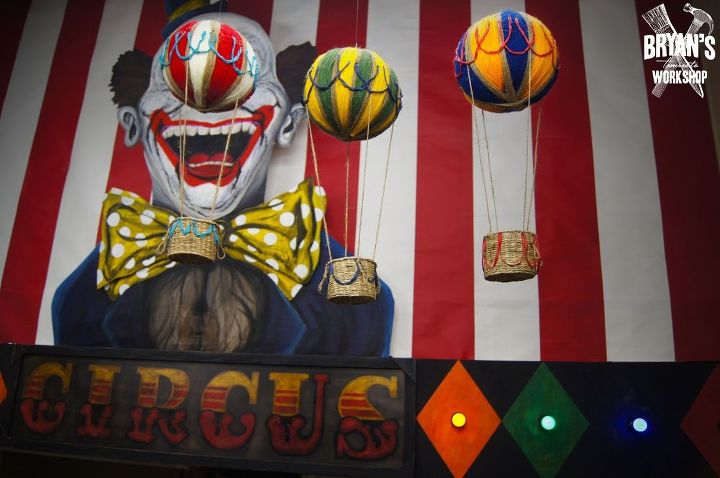
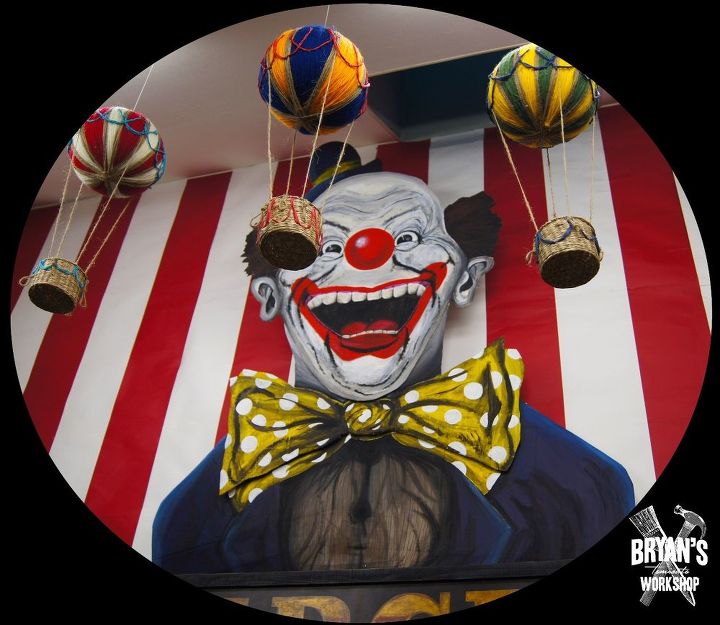
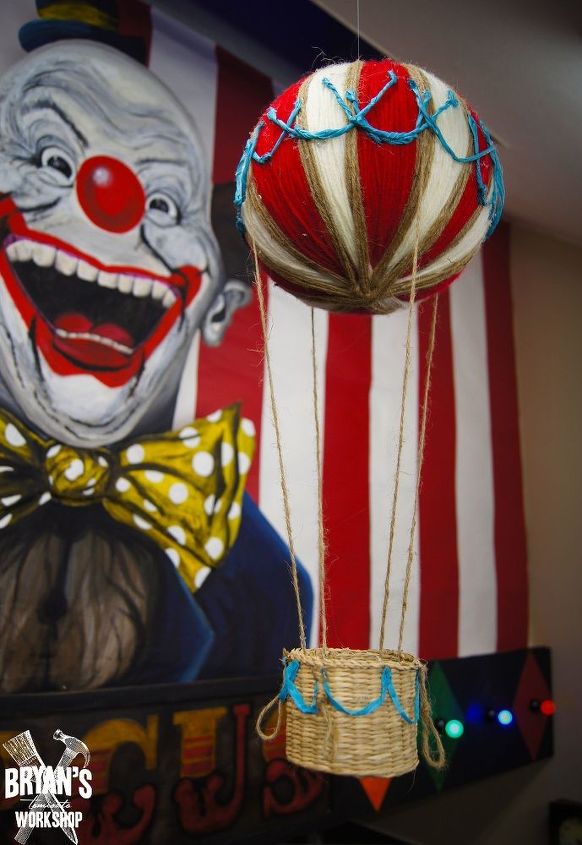
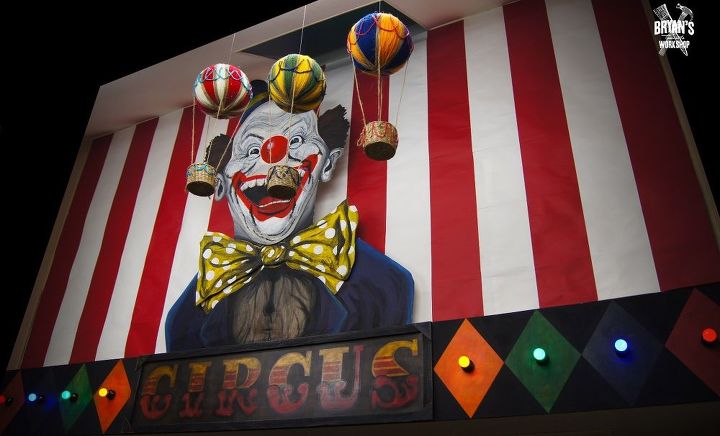
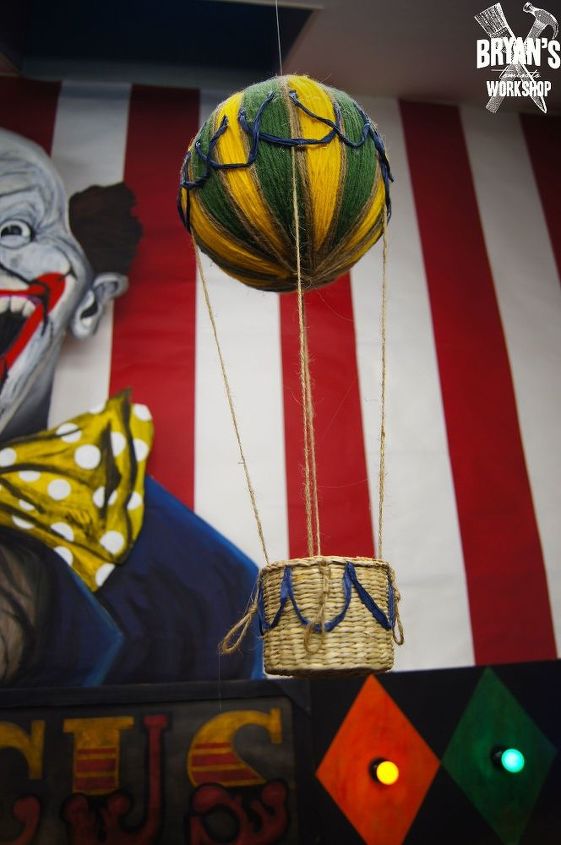
These are the finished balloons in front of my gigantic clown display. That clown is a little under 6 feet tall.
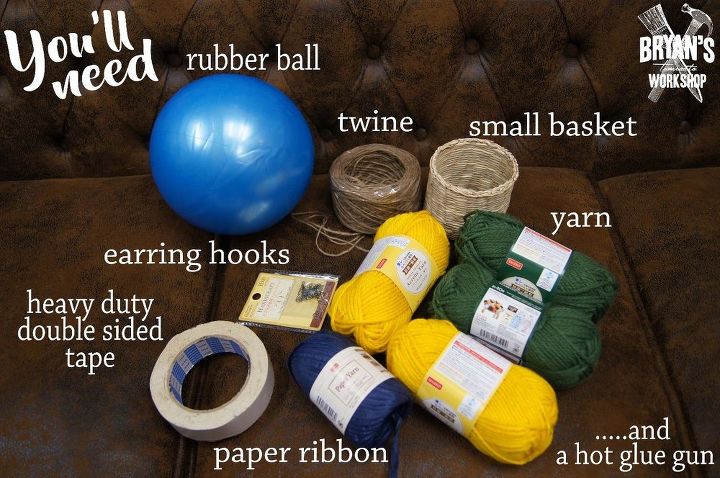
This is what it takes to make one balloon. I already had heavy duty double sided tape, a glue gun and twine, so each balloon cost me about $4 to make. All of these supplies should be at your local dollar store. Each balloon only needed two skeins of yarn (one of each color) I bought these from the Japanese dollar store and one skein is about 68 meters long. I also had to Google what those things of yarn are called. It's not yarn thingy....I checked.. The earring hooks are to fasten the twine coming down from the balloons to the basket.
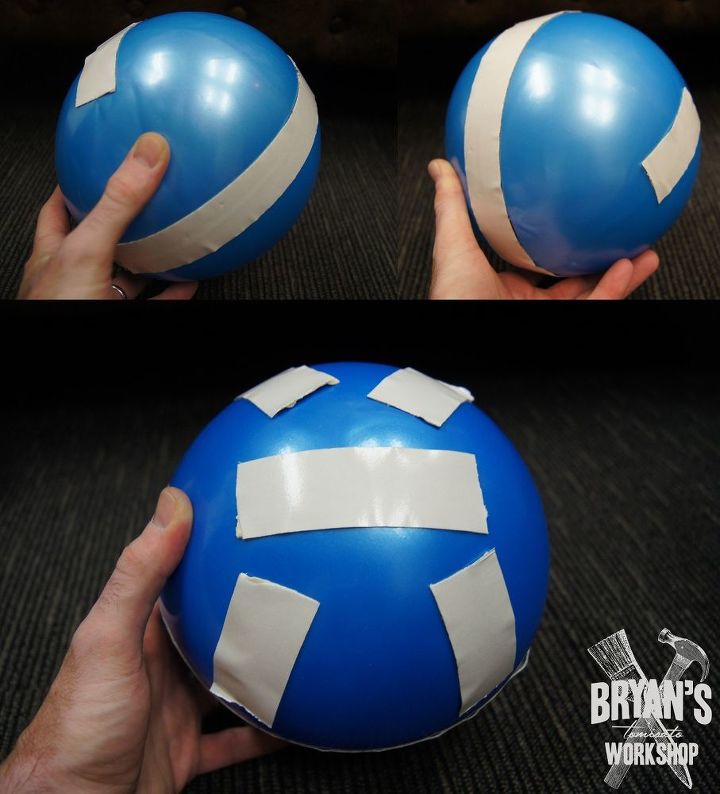
First you'll need to add tape to your rubber ball. I just wrapped tape around and then put four pieces on each end. Too much tape might show through the yarn so keep that in mind. I started adding the top pieces of tape later on while making the second and third balloon, because I kept getting yarn stuck in places I didn't want it to be.
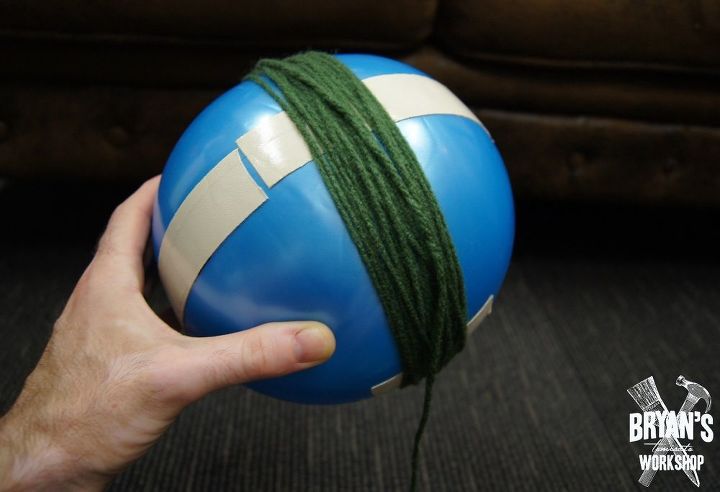
You'll start wrapping your yarn around the ball now. This is my second balloon and you can see that the top and bottom pieces of tape aren't on yet. Make sure that you establish the bottom and top from the start. This is so your balloon looks straight when it's hanging. All of the yarn should cross on a top point and a bottom point.
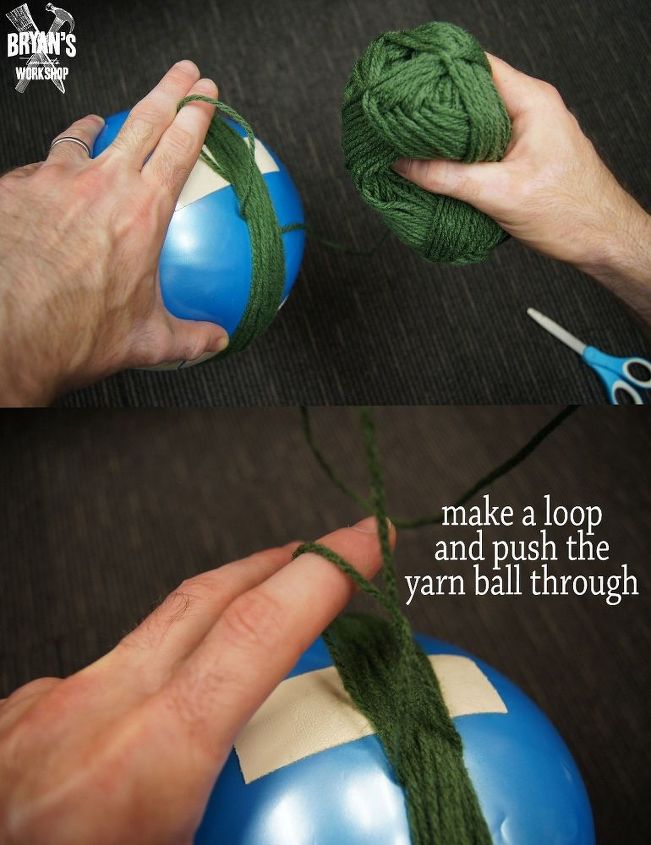
When you change directions with the yarn, tie the yarn into place by making a loop and pushing the yarn ball (skein) through. This will keep everything tight. The tightness of the yarn might make the ball morph a little like a Power Ranger, but its totally OK.
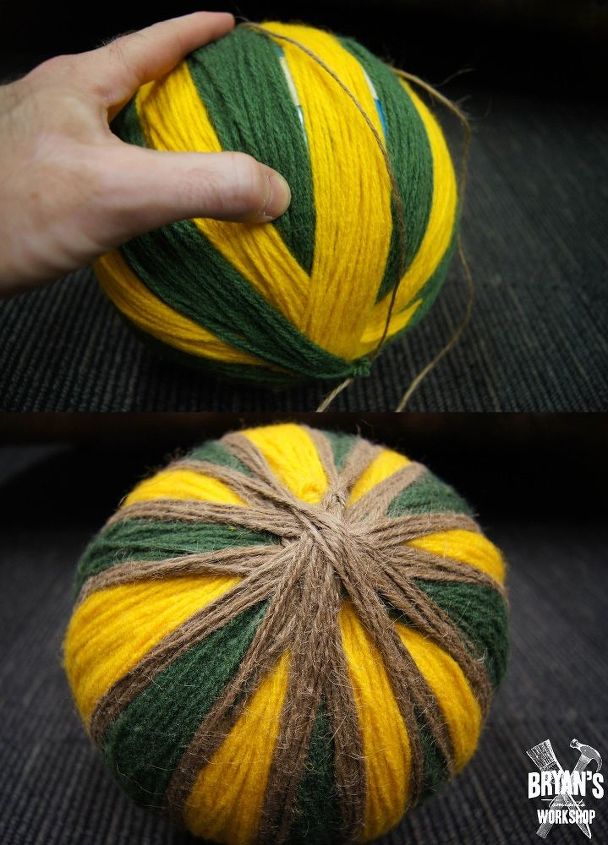
I wrapped the twine just as I did the yarn. Tie the twine on the top to start it and make all of your loop ties on the top too. Nobody will be able to see the top when it's hanging so focus on keeping the bottom as neat as possible.
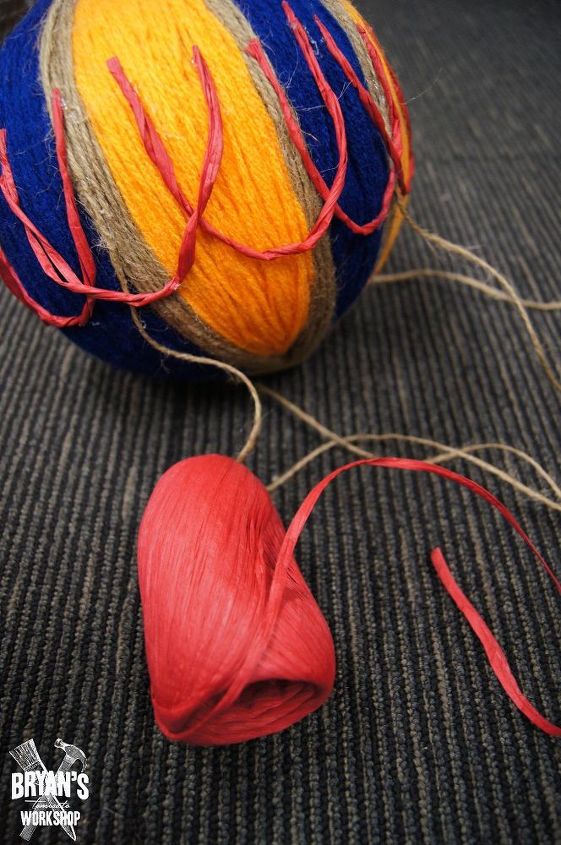
Hot glue and paper ribbon!
Hot glue, paper ribbon and twine loops.
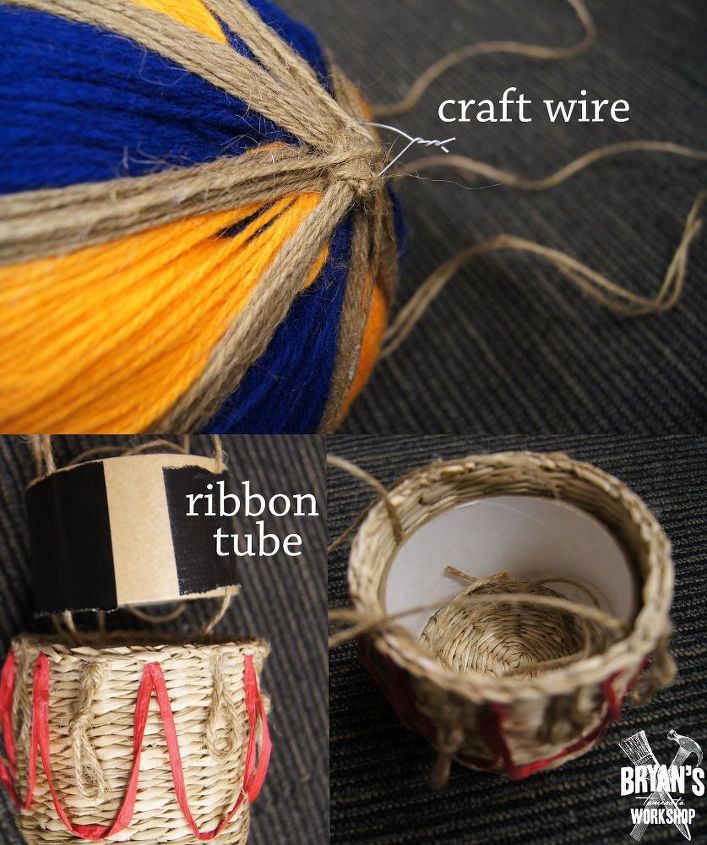
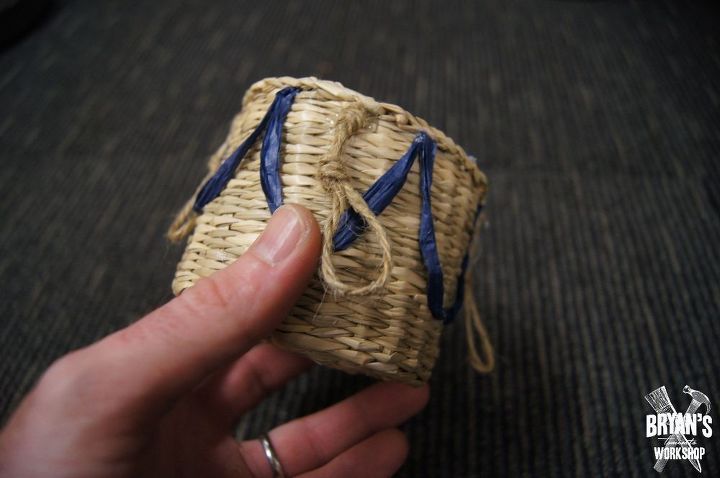
I twisted some craft wire on the top and hung these with fishing wire. Make sure you don't puncture the ball when you're pushing the wire under the twine. I found some ribbon tubes that fit perfectly into my baskets so I taped the twine coming down from the balloons to it and put the tubes in the baskets. The earring hooks work well too. Tie the twine to the hooks and hook the hooks to the baskets from the inside.
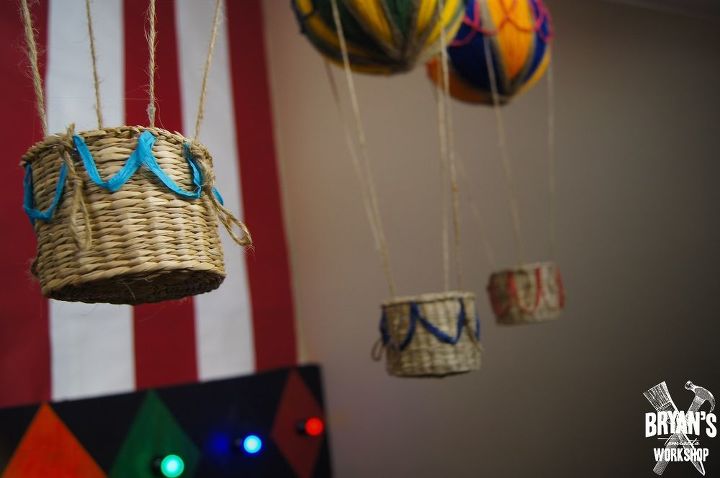
These are the finished baskets.
For more fun crafts and custom furniture-check out Bryan's Workshop on Facebook and Instagram.
We want to help you DIY, so some of the materials in this post are linked to sellers. Just so you know, Hometalk may collect a small share of sales from the links on this page.


Any price and availability information displayed on [relevant Amazon Site(s), as applicable] at the time of purchase will apply to the purchase of this product.
Hometalk may collect a small share of sales from the links on this page.More info
Comments
Join the conversation
2 of 52 comments
-
Very whimsical!

-
Getting ready to though a circus 🎪 party I’m going to make one of these


Frequently asked questions
Have a question about this project?
Where'd you get the creepy clown print for the background? Fun!