


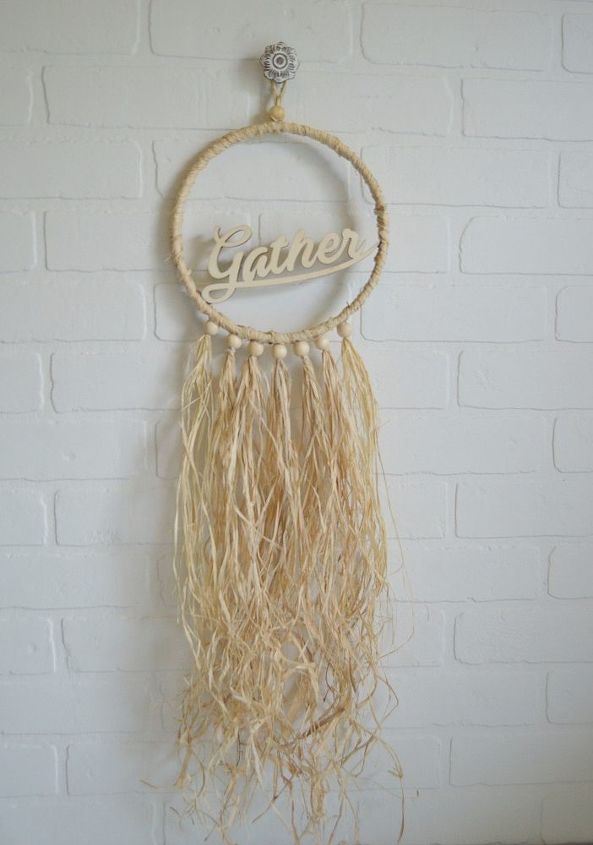
Fall Straw Dreamcatcher Wreath
6 Materials
$10
30 Minutes
Easy
Easy peasy, quick and inexpensive Fall straw dreamcatcher wreath.
With just a few craft supplies you can create this simple dreamcatcher wreath for your home or a quick and easy one for gift giving.
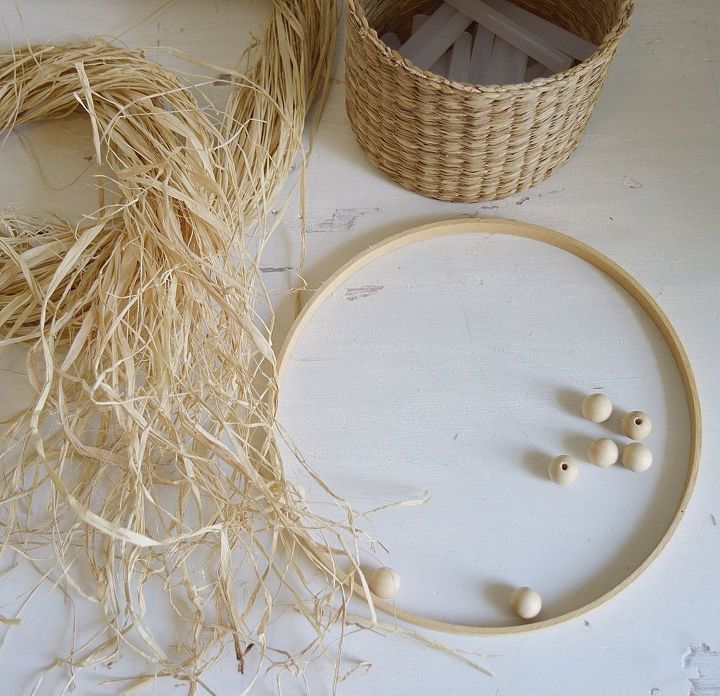
Here's what you'll need:
• the inside hoop to an 8" wood embroidery hoop (save the outside for another project)
• 8 wood beads (but can use as many or as little to suite your style)
• natural rafia (a little goes a long way)
• wood word of your choice (make sure it is less than 8")
• glue gun/glue sticks
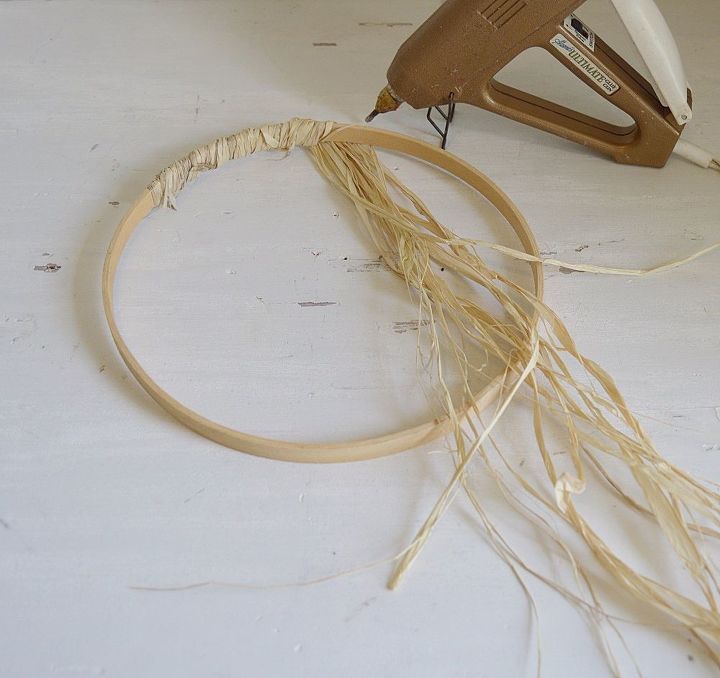
Gather a few strands of the rafia (can be found at any craft store) that you will use to wrap around the embroidery hoop. After I gathered the strands I cut the top to make them even. Glue the end to the hoop and start wrapping. I wrap to the right on an angle. Going on an angle will use less rafia and will go much quicker.
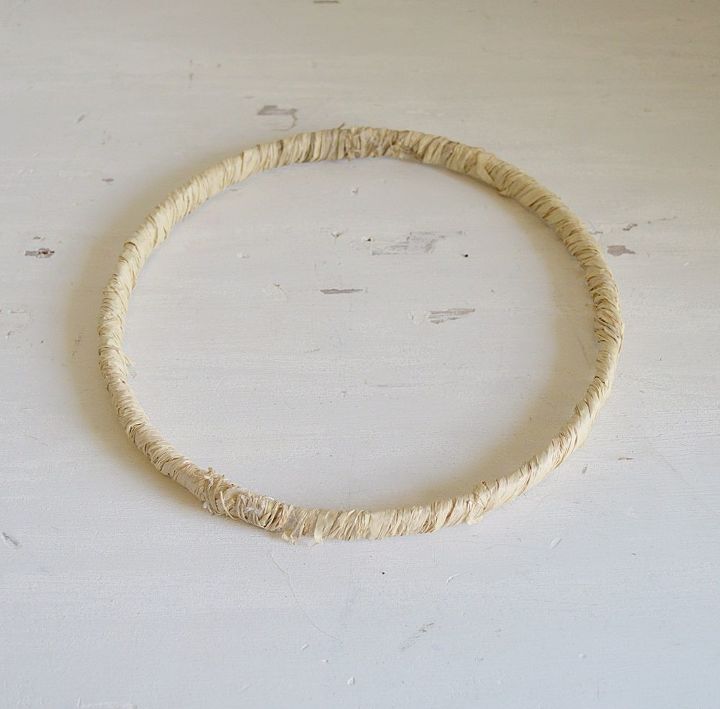
Once the hoop is completely covered, glue the remaining ends down. There will be loose ends around the hoop. You can either trim them or glue them down or leave a few here and there to add to the natural charm.
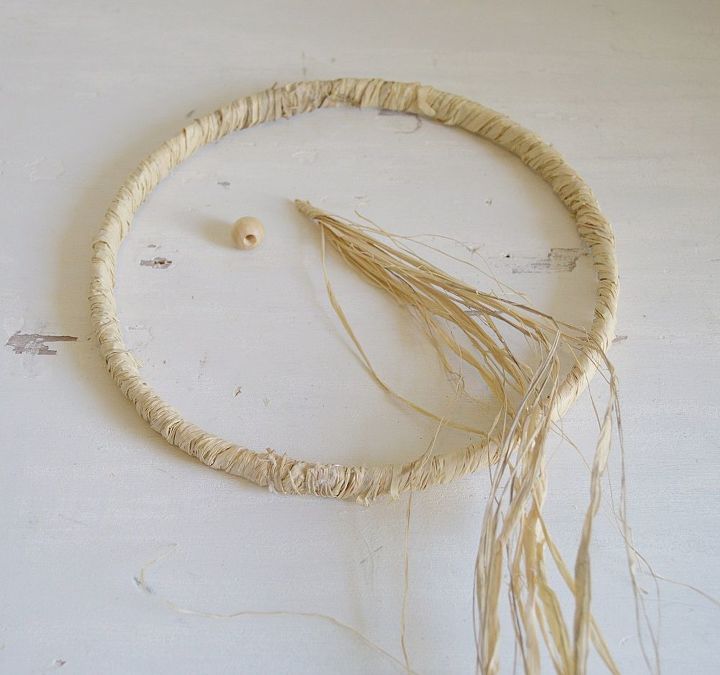
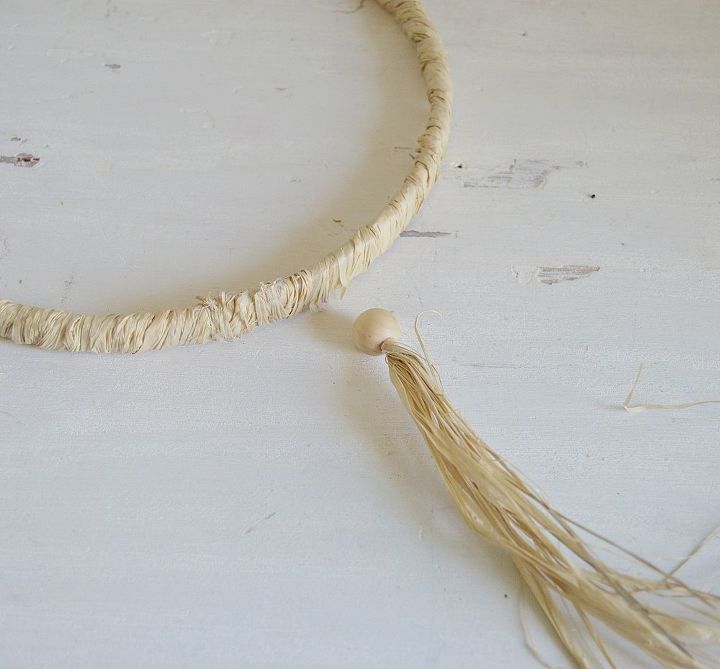
Next step is to add the rafia to the wood beads. I chose (7) beads for the bottom of my wreath, but you can use as little or as many as you like. Gather a few strands of the rafia and cut the end to make it even. Add a bit of glue to hold the end together and give it a twist. This will make it easier to place inside the wood bead.
If you find the hole is too small in the bead you can carefully widen the hole by taking the pointy end of a pair of scissors, placing it into the hole and twisting the bead around the edge to shave a bit off.
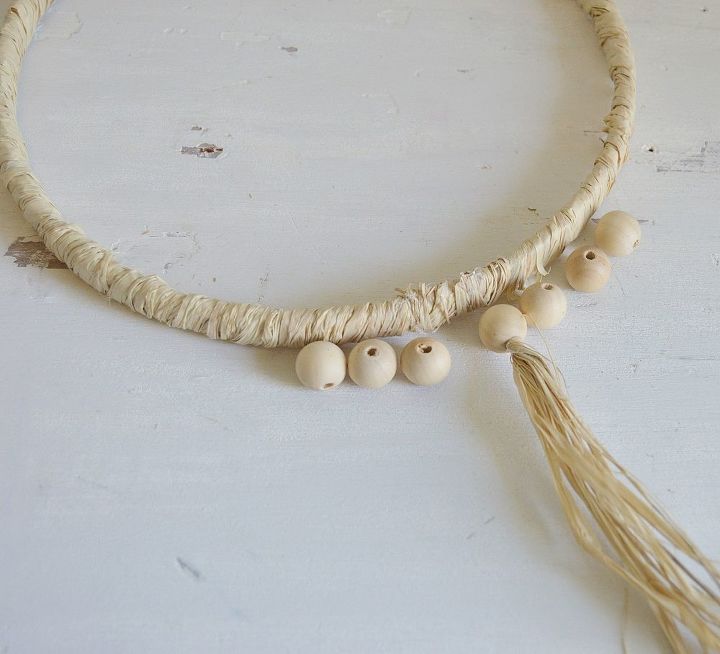
Repeat this step for all of your wood beads that are to go on the bottom of the wreath. Once all are ready, glue them to the bottom of the hoop.
Once each bead is filled with the rafia you can glue them onto the hoop. Excuse my glue mess! If you have an excess of glue it is best to wipe it off while the glue is hot : ) HERE'S A TIP: If you ever need to remove something that has been hot glued, carefully heat the area up with a hair dryer and gently pull away!

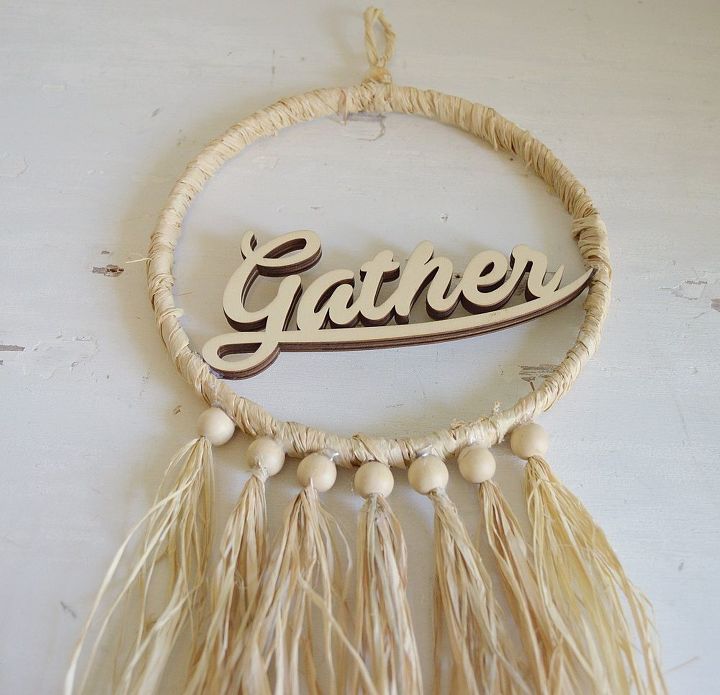
I am always inspired by words and love the word "gather". It has so many beautiful meanings and is very fitting for this time of year. I found this wood word cutout from Hobby Lobby and it fit just perfectly inside my hoop. I simply glued the wood piece on either side of the hoop.
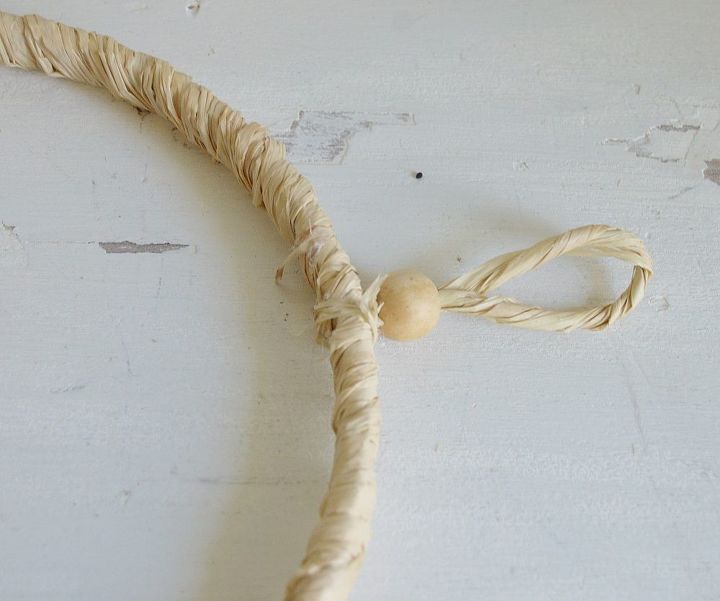
For the top hoop, I took a few strands of rafia, gave them a twist and pulled it through the wood bead. Again, you may need to make the hole larger in order to pull the rafia all the way through. I drilled a hole through the top of the hoop and ran the rafia through the hole to the inside of the hoop, trimmed the rafia and glued it in place with the hot glue.
And that't it! You can leave it just the way it is, simple and natural or give it a light spray paint in your favorite Fall color. I created one and left it natural and created a second that I may give a light spray in gold for a little shimmer. You can glue on flowers or leaves for a bit of pretty. Or another idea would be to add wire to them so you can remove them and change them out for each season. This would also look super cute in the summer with seashells.
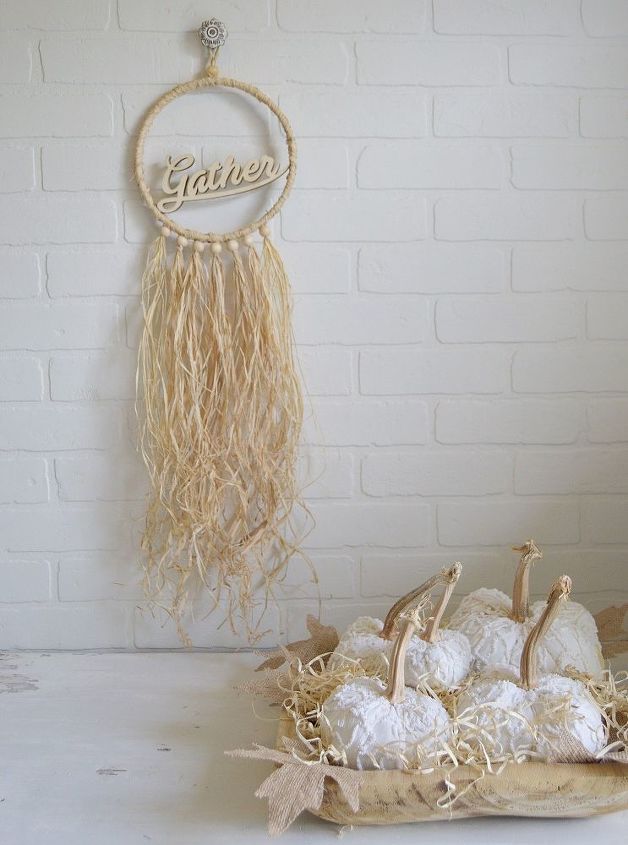
Well there you have it! Easy peasy right! I so hope you give this one a try! You don't have to be super crafty to make this one and it only takes a few things to put this one together. Let me know if you give this one a try or stop in with any questions you may have. Happy creating and Happy Fall! Blessings, Tammy

Want more details about this and other DIY projects? Check out my blog post!


Frequently asked questions
Have a question about this project?