


Update Your Art Niche With Peel and Stick Real Stone

by
Joy
6 Materials
$600
6 Hours
Easy
I am so excited to share with you a fantastic true DIY project that will add value to your home using peel and stick tile. Want more excitement? This upgrading project can be done in an afternoon. That’s right, one afternoon, friends!
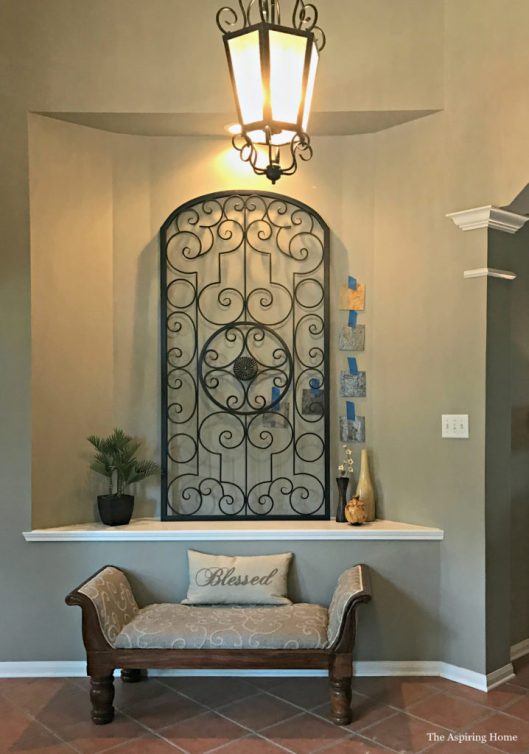
From This:
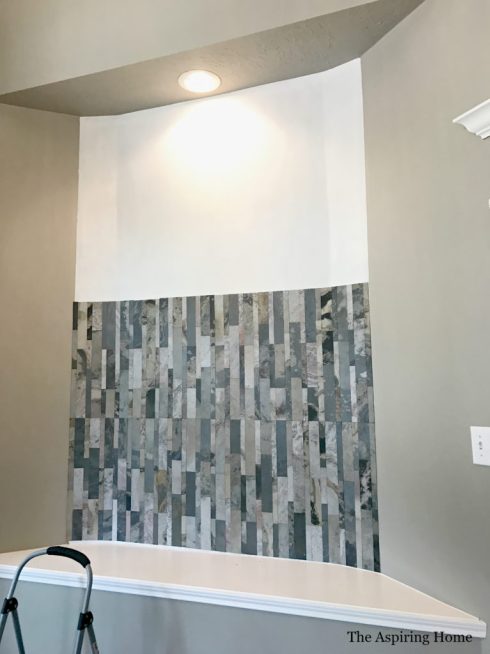
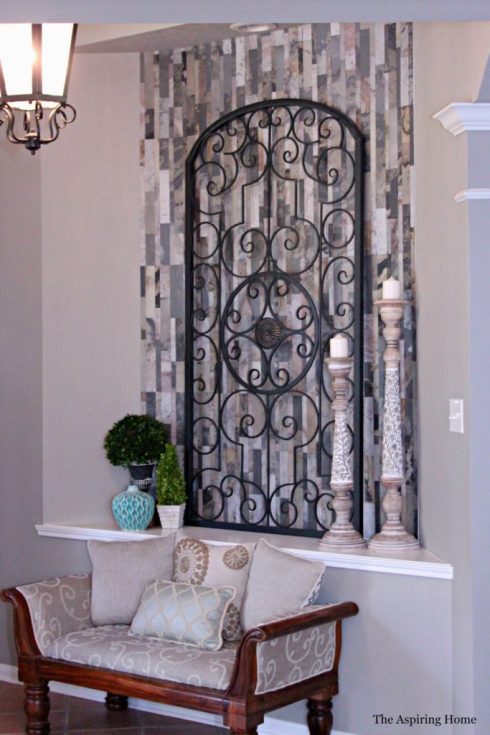
To This:
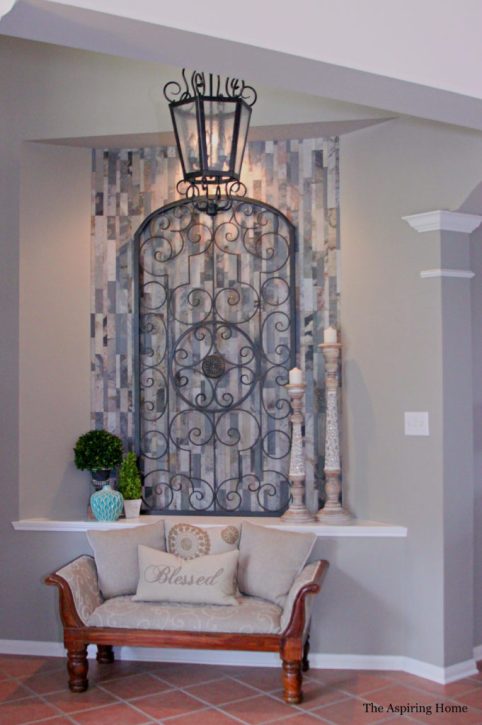
Don’t you just love it? This whole project idea has been in the works for a very long time. A good friend of mine bought an “older” (older for our neighborhood) home. She has spent countless hours trying to bring this jewel up to date on a budget for a few years, I was fortunate enough to get to go on the “walk-through” with her to see the potential in this abode. The foyer area is very welcoming and this art niche has so many possibilities! Question was… which direction to go?
Enter the right direction! I reached out to Aspect Tile and they were on board for revamping the niche. Thankfully my friend was on board as well! We taped up a few different selections of stone (they have a crazy amount of options in stone, glass, metal-the sky is the limit!). This peel and stick tile is made with real stone. The kicker? You can cut it with tin snips! Let’s get started, shall we?
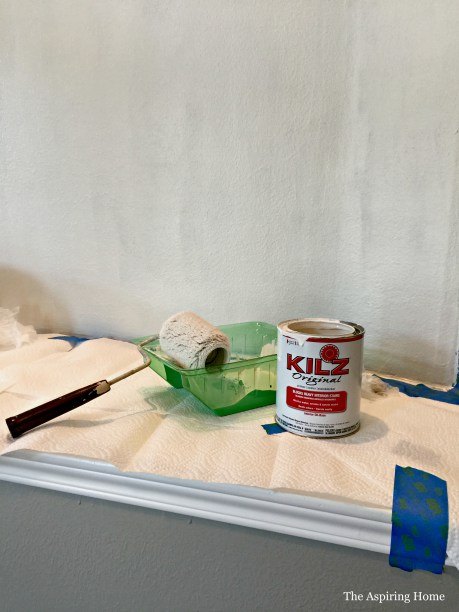
Supplies-
- Peel and Stick Stone
- Primer
- Paint supplies
- Tin Snips
- Level
- Pencil
- Box cutter
- Measuring Tape
- Painter’s Tape
Step 1: Prep the Area
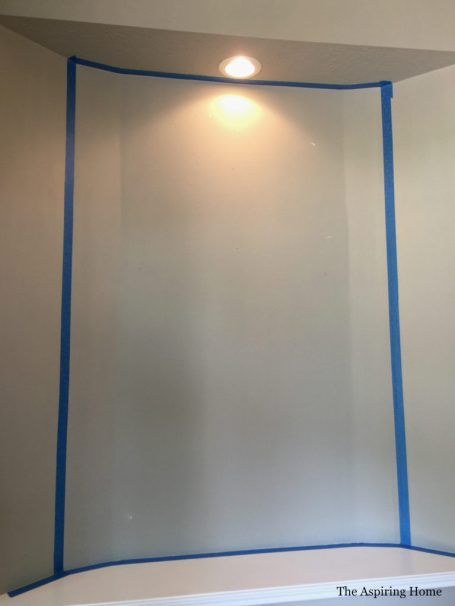
STEP 2: LAYOUT A PLAN
Decide which direction to run your tile. We chose to run the tile vertical. This art niche is huge and a focal point of the foyer. After deciding on the direction, use a level to create a “mock-up” of where the first tile will go. It is very important to get the first tile level because once you apply this peel and stick stone, it becomes very difficult to reposition.
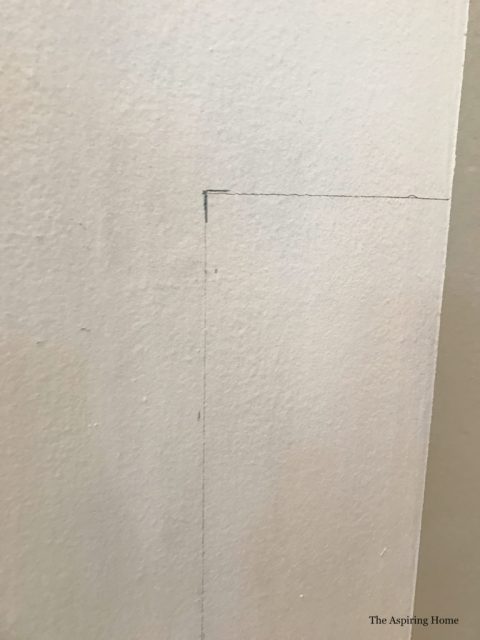
Create hash marks to line up the first tile.
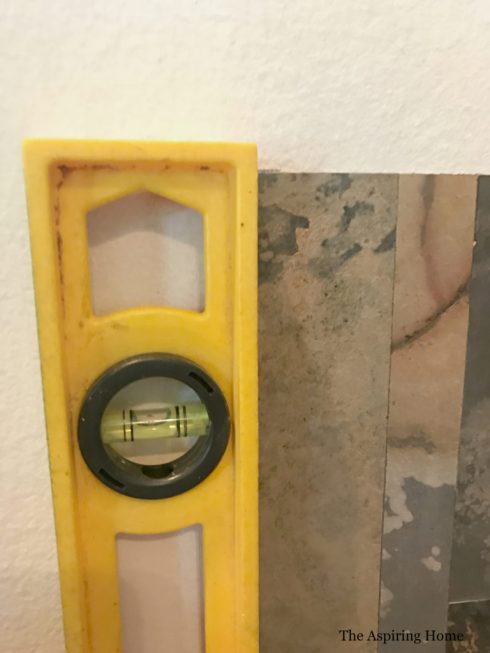
Nice and Level!

STEP 3: BEGIN INSTALLATION
Begin carefully adding the tiles. We chose to run the tiles narrow to wide, this allowed us to run one narrow strip to finish off each row.

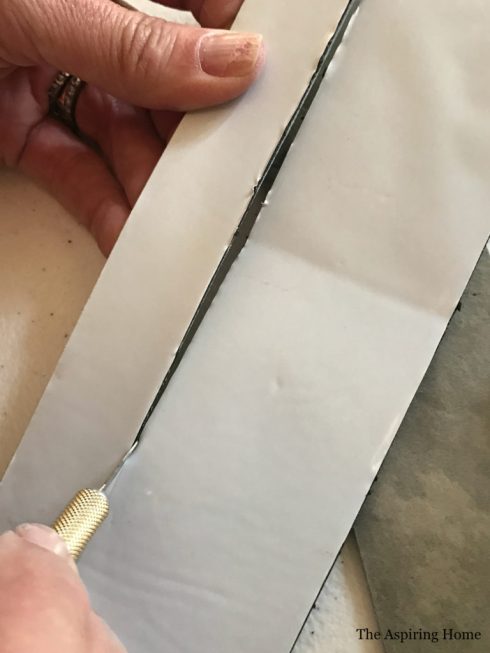
Adding the last piece of stone is super easy, just cut with a mat knife or box cutter.
Continue adding rows of tile making sure to verify the tiles are level. We did get off slightly and had to adjust a bit. To adjust we cut away a bit of the stone until it was level.
Step back from time to time to look at your handiwork. We stepped back and had a thought… Our original idea was to create a flowing movement with the stone, but what if we flipped the tiles? Would it make a difference? So to answer our curiosity, we decided to use painters tape and dry fit the tile to see what happened.
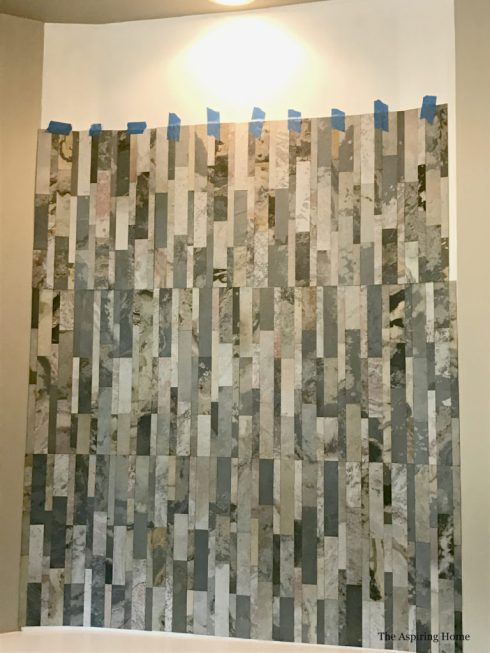
It may be hard to tell from the pictures but in person the switch made the project way too busy. We had our answer and flipped the tile back in the original direction and kept going.
STEP 4: FINISHING THE LAST ROW
The last row gets a bit tricky but it’s not complicated.
Take your tile and rest it up against the top of the niche. Mark each side where the tile meets the top of the bottom row.
Cut along the line using tin snips. Then, dry fit the piece. We had a few mistakes but thankfully they worked down the row. Once you are happy with the dry fit- peel and stick.

This project provided a lot of laughter and fun, so grab a friend and start tiling!


Any price and availability information displayed on [relevant Amazon Site(s), as applicable] at the time of purchase will apply to the purchase of this product.
Hometalk may collect a small share of sales from the links on this page.More info
Want more details about this and other DIY projects? Check out my blog post!
Comments
Join the conversation
2 of 46 comments
-
Way too busy for me. Takes away from the wrought iron..which is beautiful. The wrought iron and tile just don't 'click' togather.
-
What a difference this made!


Frequently asked questions
Have a question about this project?
Can you peel the tiles off without damaging wall if you decide you don't like it.
If you are using this for a backsplash what do you seal the stone with?
Question pls.
I bought stone peel and stick and started putting up and than noticed some of stone tiles were cracked.
Talked to Mgr if home depo where I bought them and was told “it’s stone” their veins in real stone.
I said this is cracked piece of stone.
Anways looked to get pieces that weren’t cracked and couldn’t find one 12x12
so im stuck now as I already started and if I pull off what I’ve put up I’m pulling wall with it.
I know it’s natural stone but did you have cracked stone on your tiles?
you can’t tell once it’s up but this was expensive.
I wont do natural stone again unless I see all the pieces I need in tack.