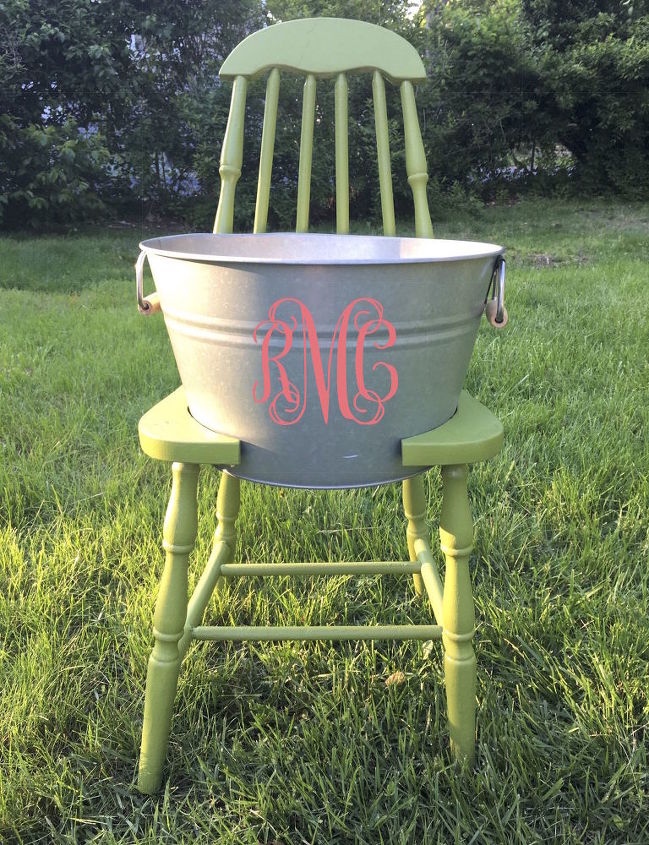
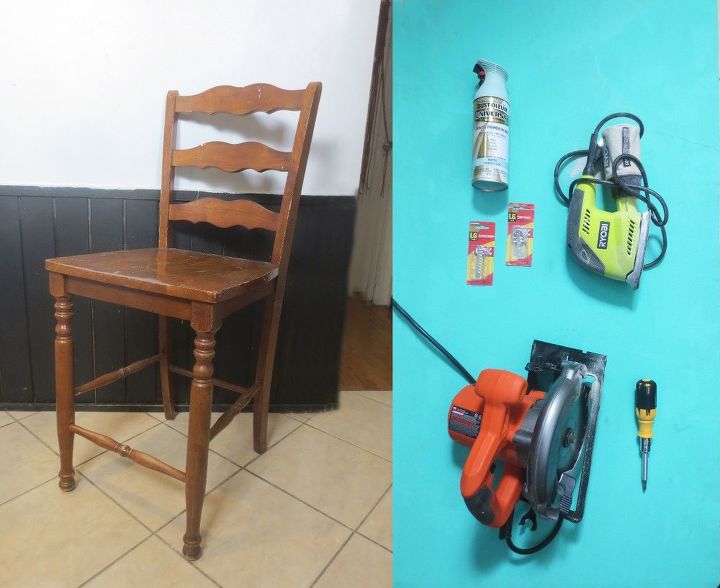
One Chair Was Too Hard & One Was Too Soft... the Third is up to You!
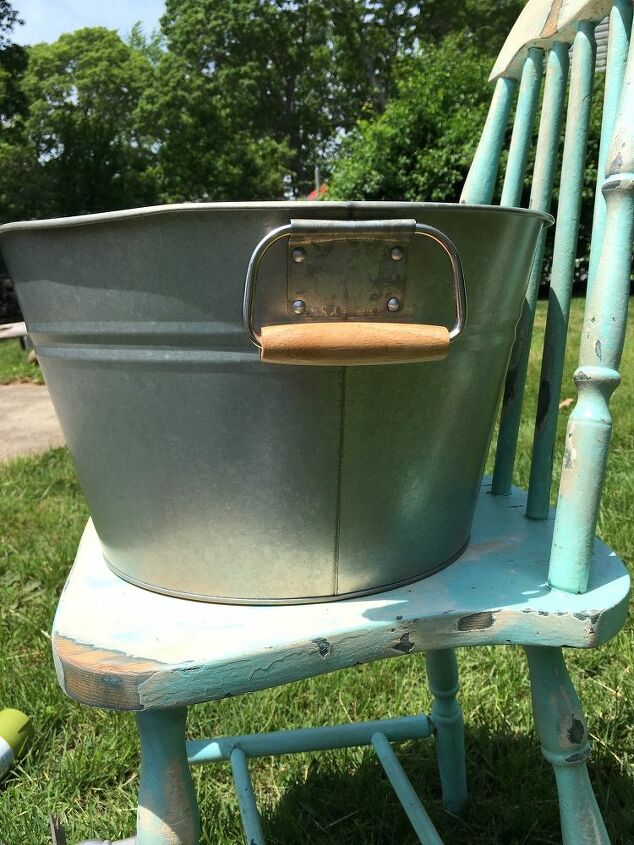
Step 1: Place bucket in center of chair
Lay your tin bucket onto an antique chair to figure out where it should sit Get tutorial here
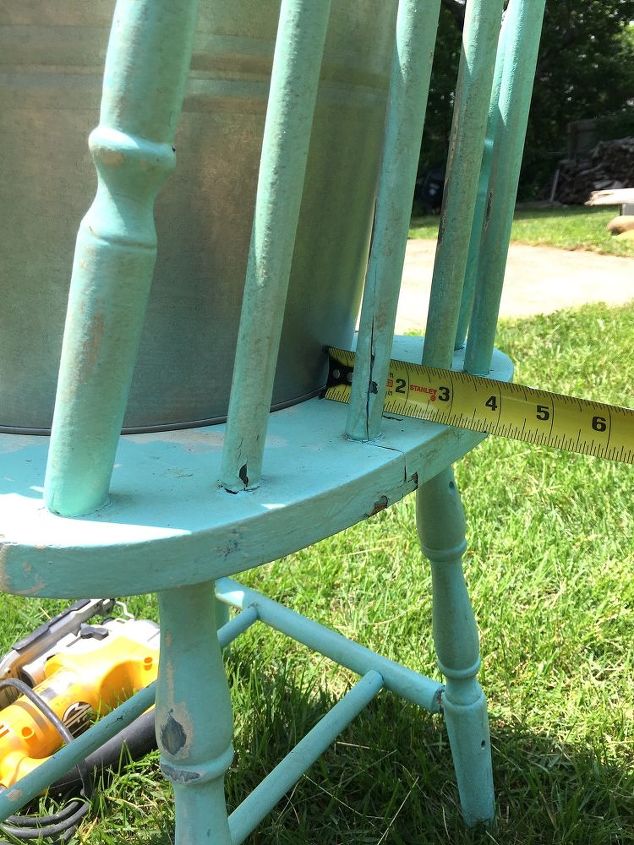
Step 2: Measure the distance
Measure the distance between the back of the bucket and the back of the chair Get tutorial here
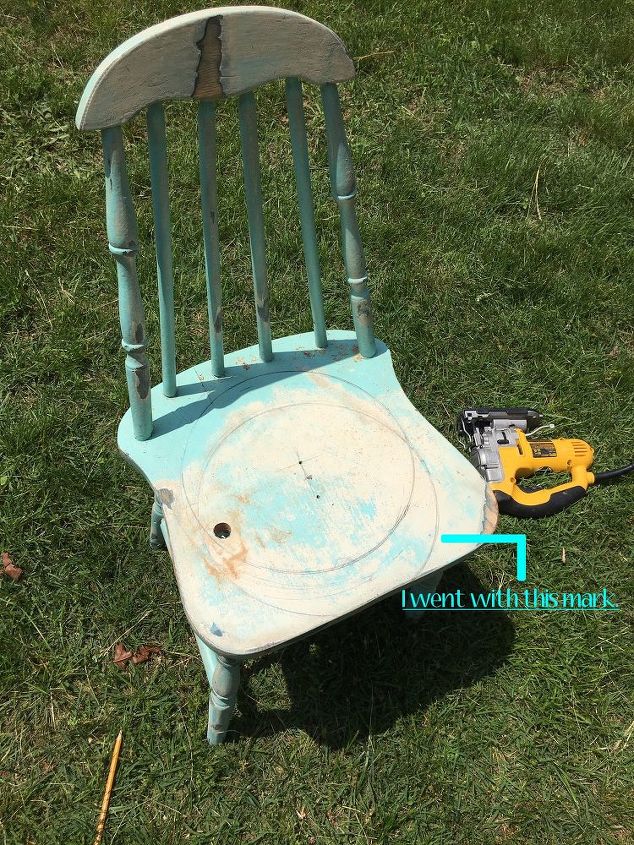
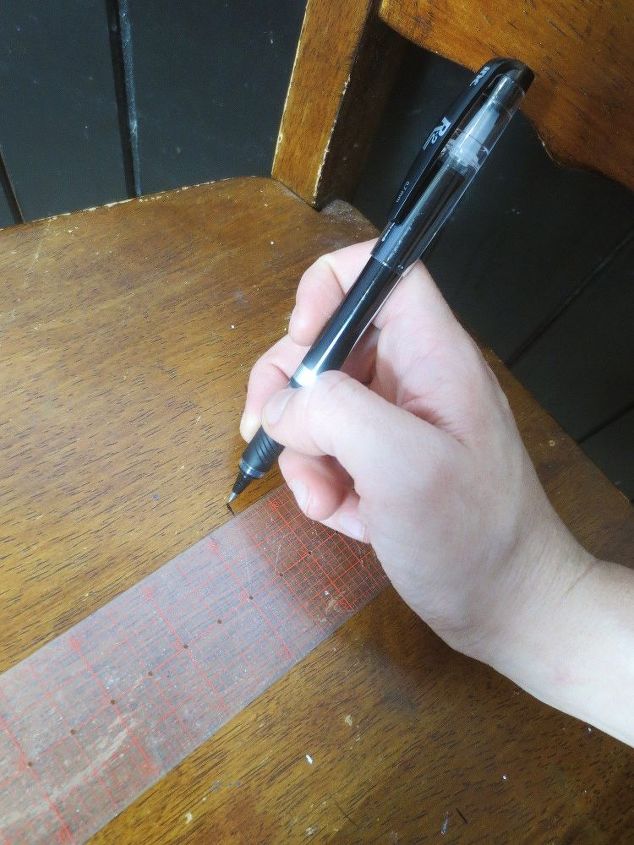
Step 3: Trace size of bucket with pencil
If you're not happy with the results try a different placement for the bucket and draw again Get tutorial here
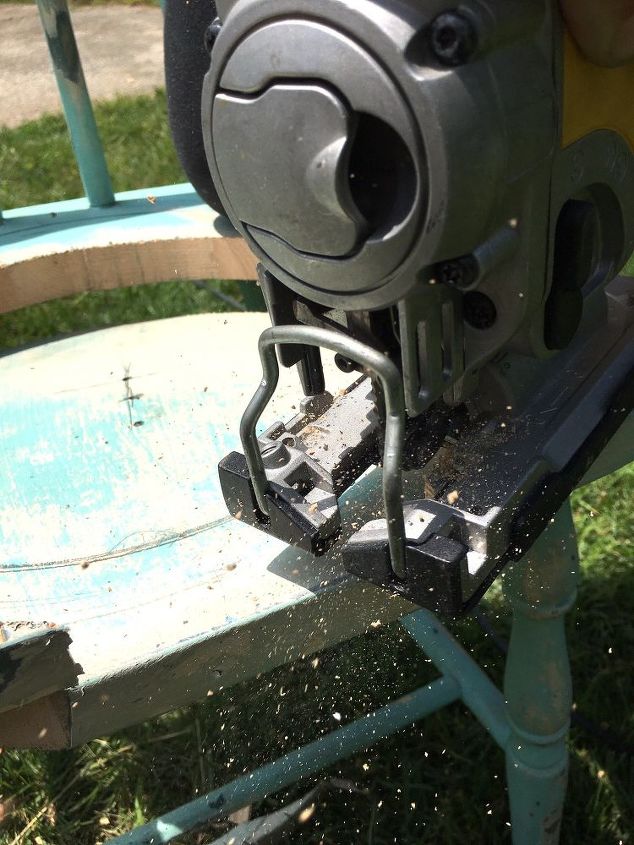
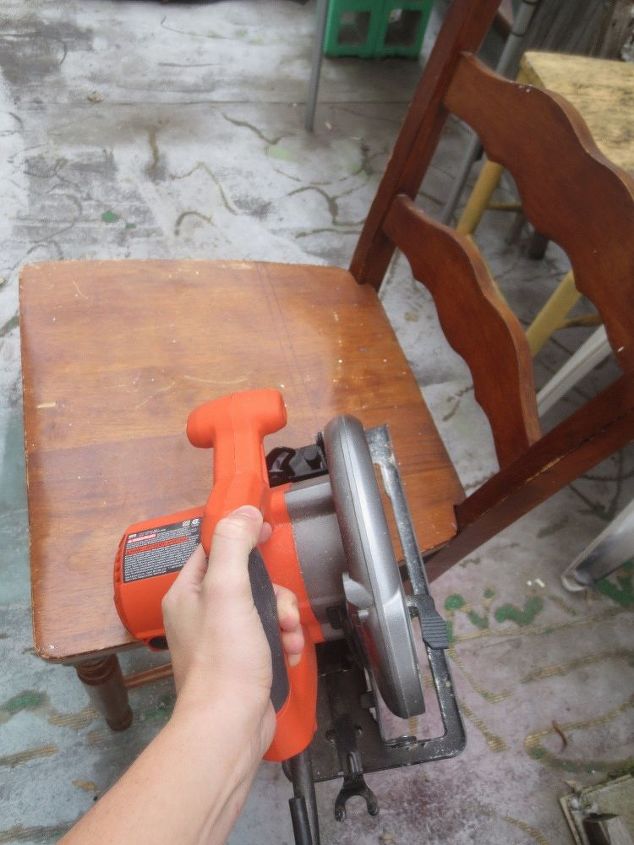
Step 4: Cut with a jigsaw following the line
Make sure not to hurt your fingers Get tutorial here
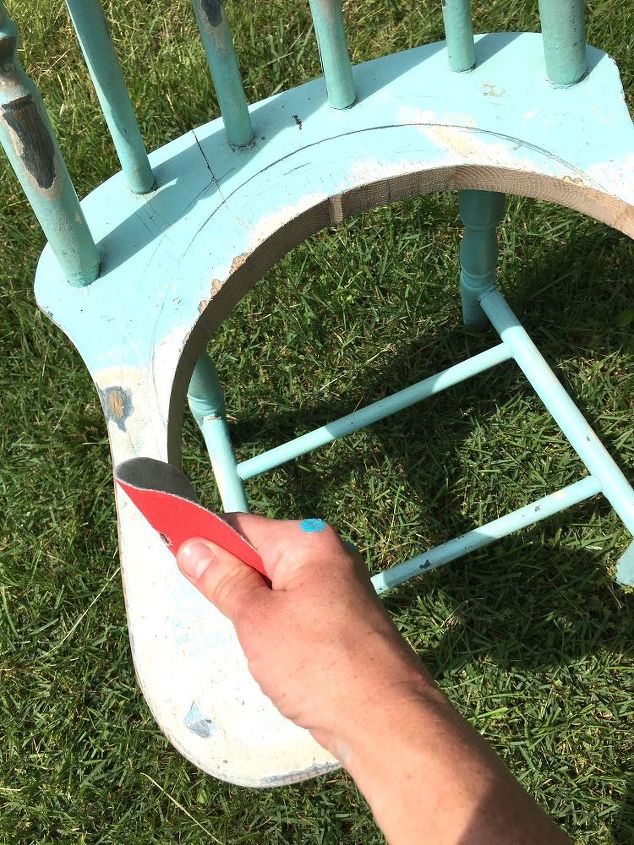
Step 5: Sand the edges of the circle
Clean up the edges of your circle with a piece of fine grit sandpaper Get tutorial here
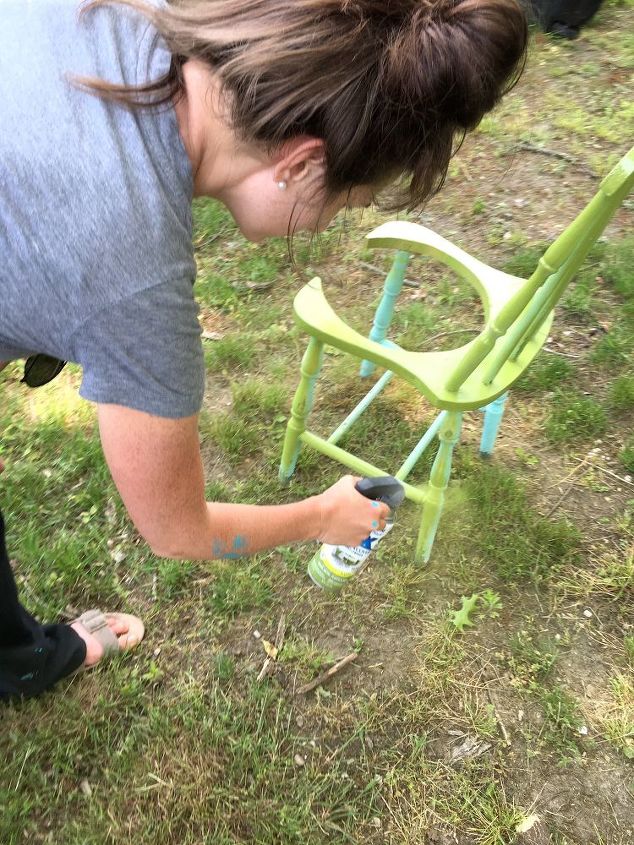
Step 6: Paint the chair with a color you love
You can apply a few coats of paint until you achieve your desired look Get tutorial here
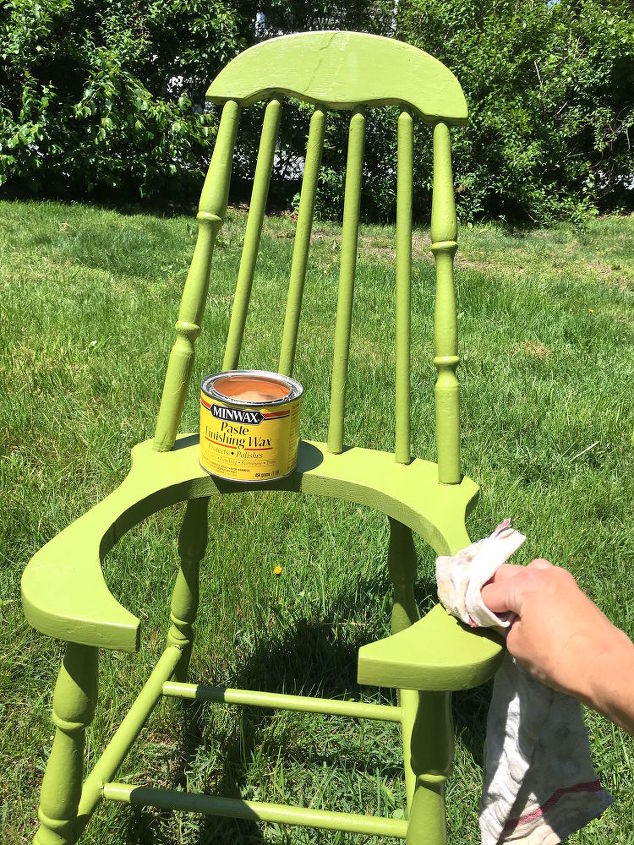
Step 7: Seal with Minwax Finishing Paste Wax
Sealing will protect your chair from rotting and weathering Get tutorial here
Step 8: Place the bucket in the hole
Add any extras to your bucket that you wish! Get tutorial here
Next: Take an old dining chair & do this!
Have on old chair you don't want anymore? Before tossing it, consider repurposing it into a shelf! Get tutorial here
Step 1: Measure the shelf
Decide how deep you would like the shelf portion of your shelf to be and draw an even line across the seat Get tutorial here
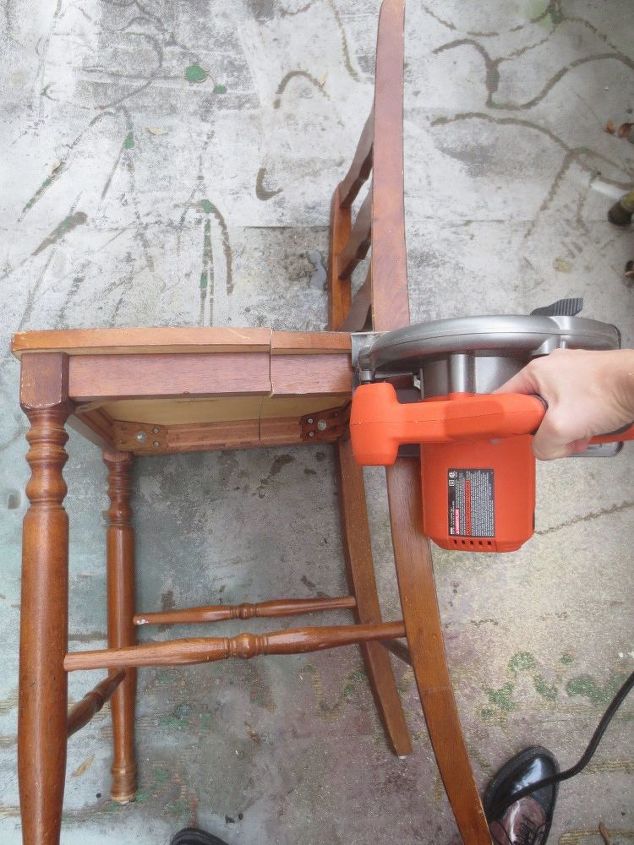
Step 2: Saw the chair
Use a circular saw to cut across the seat of the chair all the way through Get tutorial here
Step 3: Saw off the legs
Cut off the back legs of the chair as close to the seat as possible Get tutorial here
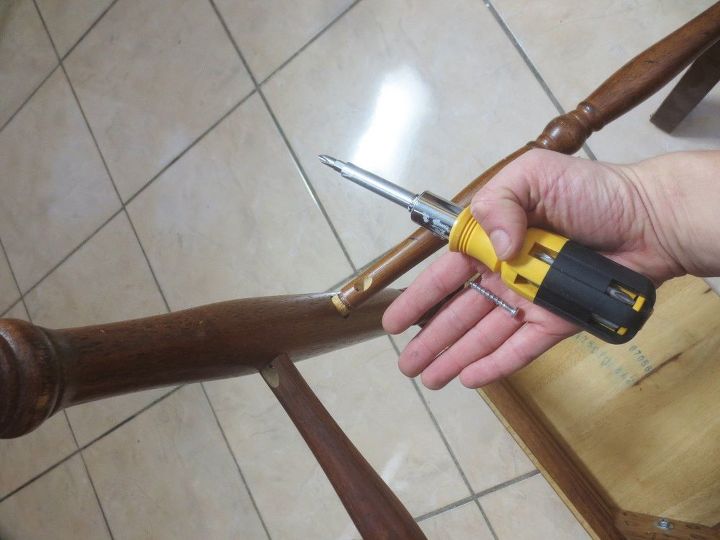
Step 4: Take off cross beams
If you have cross beams on your chair you can remove them with a screw driver Get tutorial here
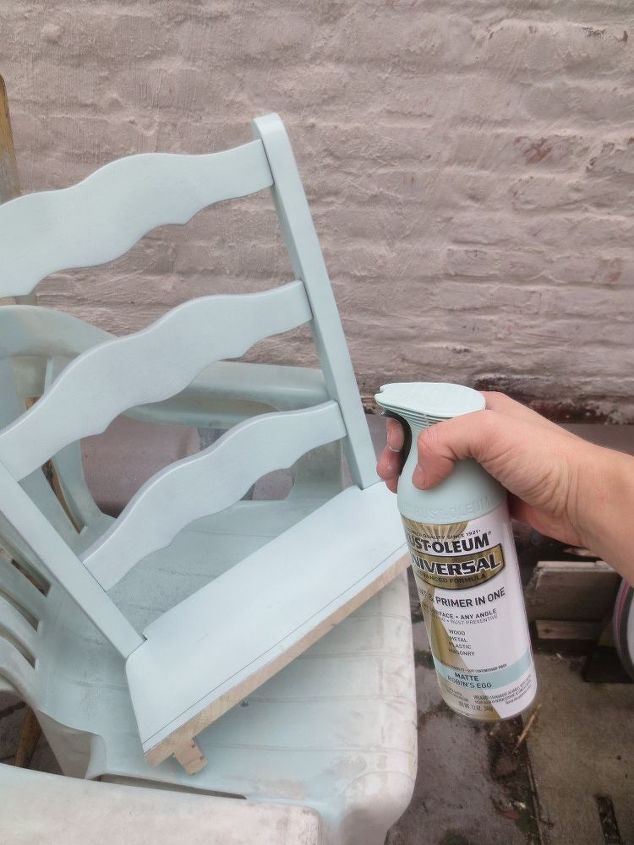
Step 5: Paint the chair with a color you love
Remember to paint the rails if you are using them Get tutorial here
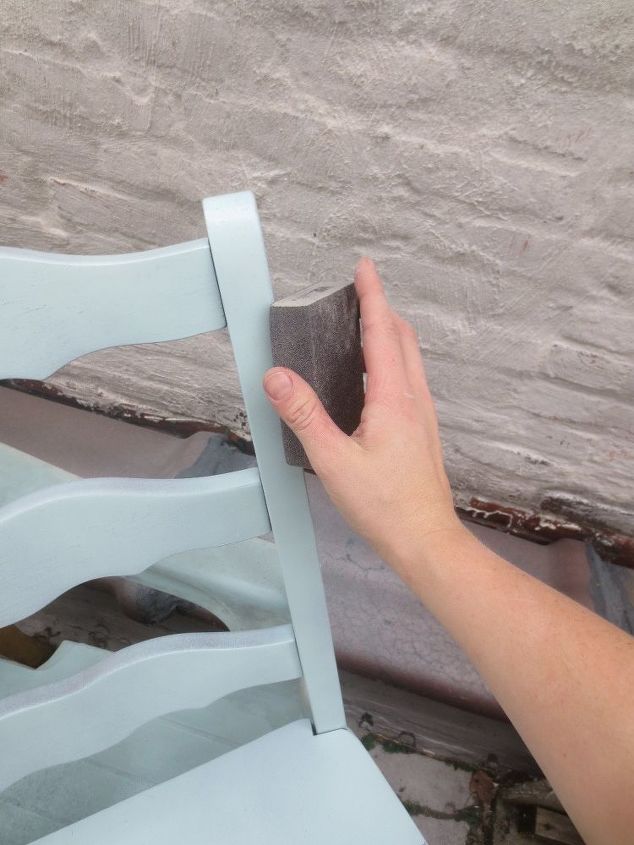
Step 6: Get a distressed look (optional)
Use a sanding block to rough the edges of the chair pieces & allow the wood color to peak through from underneath Get tutorial here
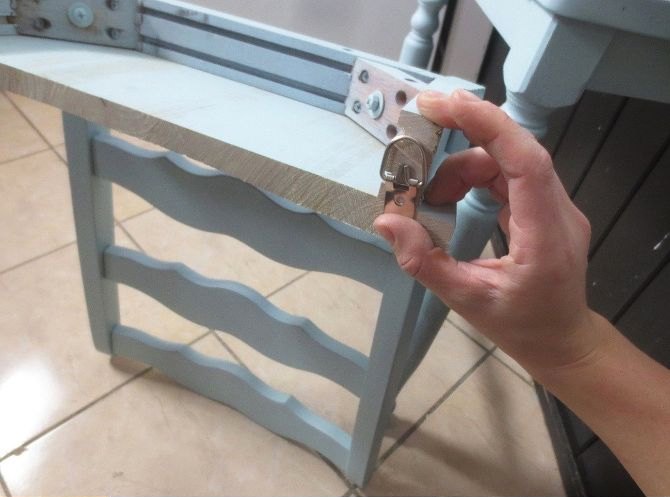
Step 7: Attach hanging hooks
For the top piece of the chair you will attach them to the edge of the seat where you cut through Get tutorial here
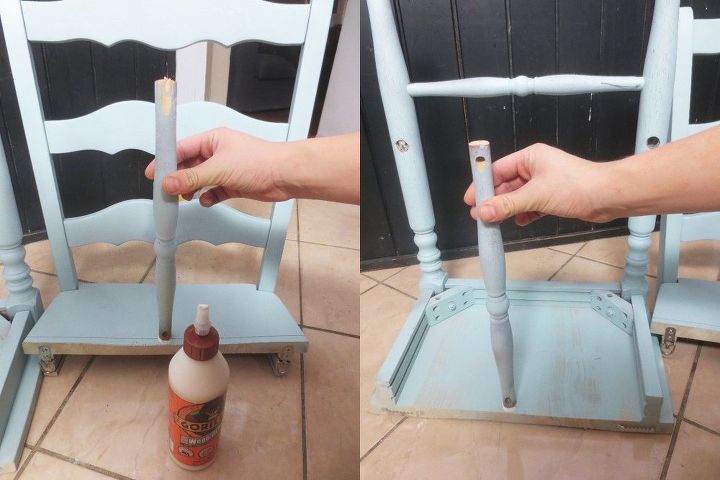
Step 8: Screw the bracket back in
Take the chair rails you cut earlier & using wood glue and screws, screw them to the shelves Get tutorial here
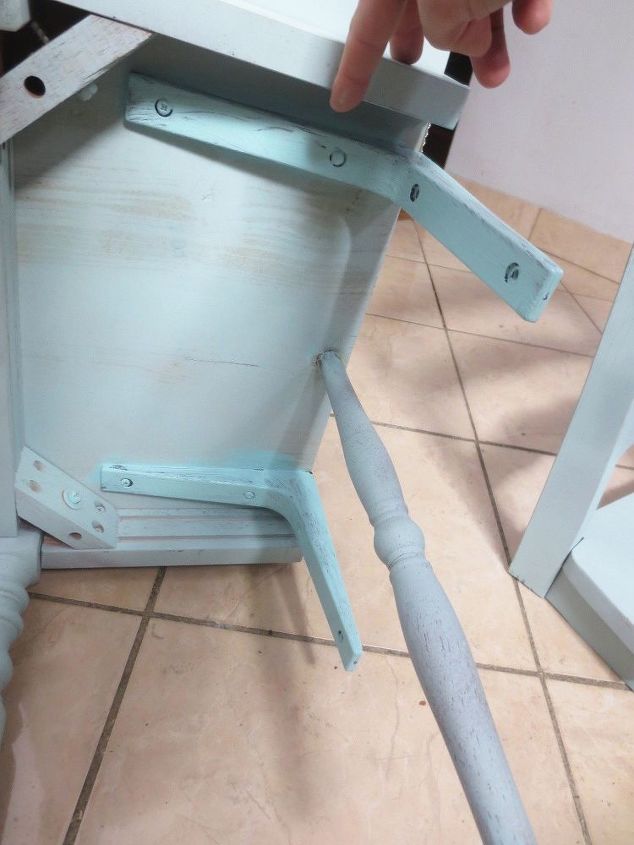
Step 9: Add L shape brackets
Add two actual brackets to the bottom of the chair and paint them to match Get tutorial here
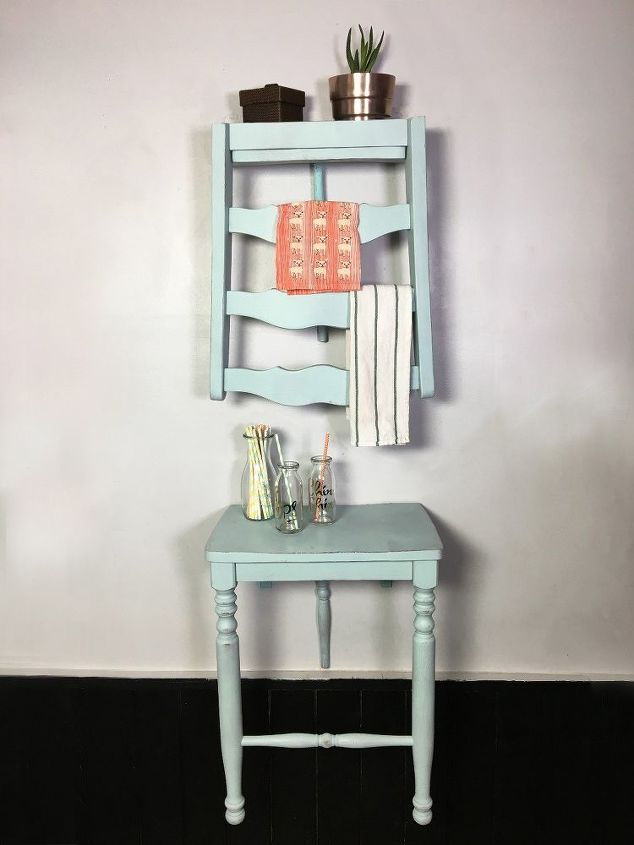
Hang both pieces on the wall
These shelves are perfect for towels to hang from, but can really be used for a multitude of things! Get tutorial here
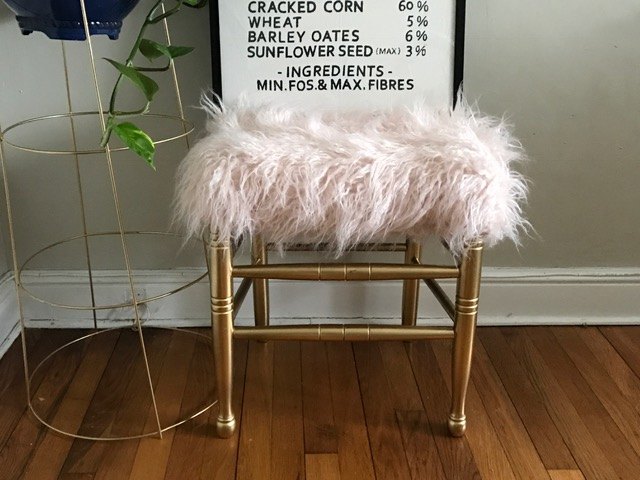
Next: Guess what happen to this chair...
Here's a hint: Now it's soft and cozy! Get tutorial here
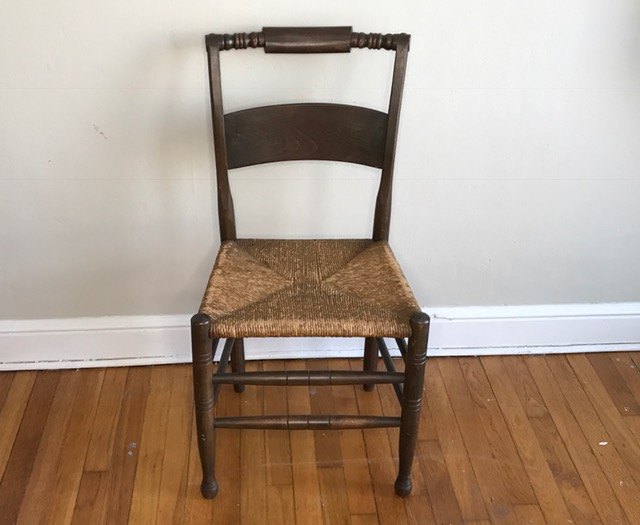
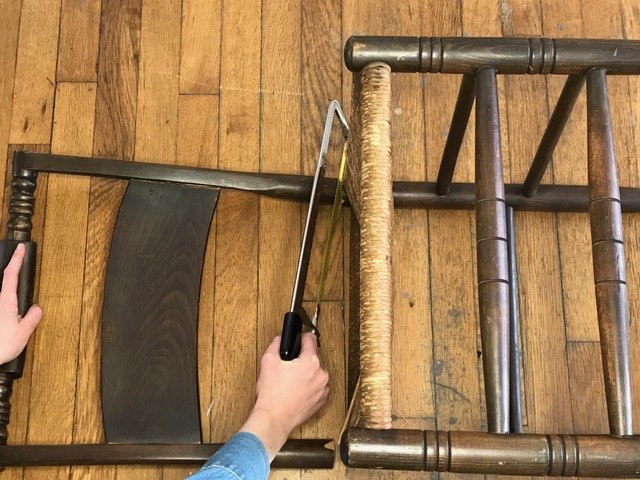
Step 1: Cut off the back of your chair
You will only need the base, seat and legs Get tutorial here
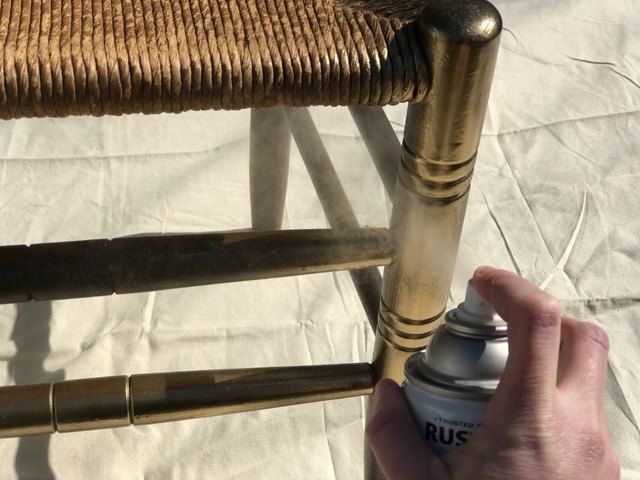
Step 2: Spray paint the stool
You can throw away the back of seat Get tutorial here
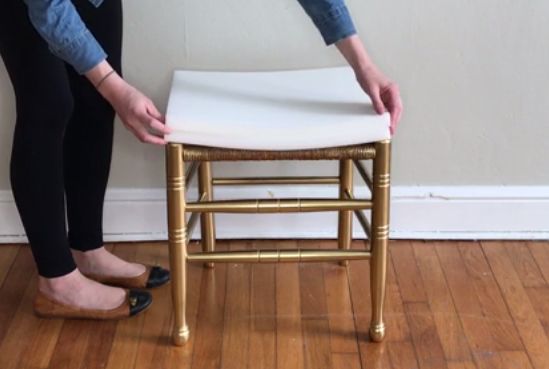
Step 3: Place foam pads on top of the chair
If you are using two pieces, be sure they are aligned as closely as possible Get tutorial here
Step 4: Cut faux fur to the correct size
Be sure to leave a large amount of excess, so you can wrap it around the underside of the stool Get tutorial here
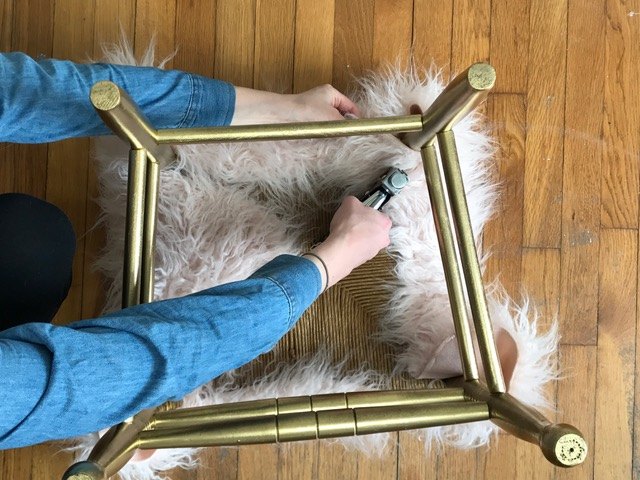
Step 5: Attach the faux fur to the base
Flip your stool over, and secure the excess faux fur to the base of the stool using a staple gun Get tutorial here
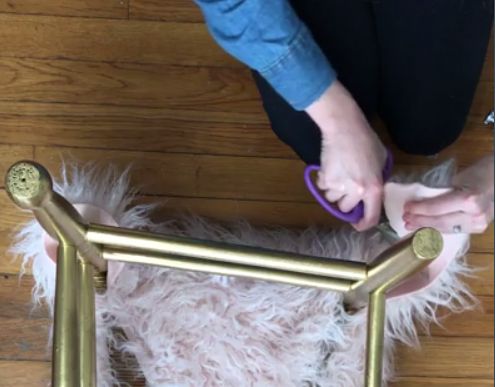
Step 6: Cut any excess fabric off
You can use the excess faux fur pieces by placing them onto any bare areas on the underside of the stool base Get tutorial here
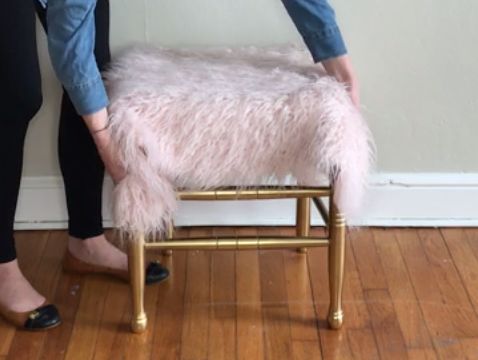
Step 7: Admire your beautiful stool!
Place the stool where ever you want. Get tutorial here