


The Color Purple: Monochromatic Edible Container Garden

Have you been to a garden center or farmers market lately? They are starting to fill up with spring gardening gems. Just take a look at what I found!
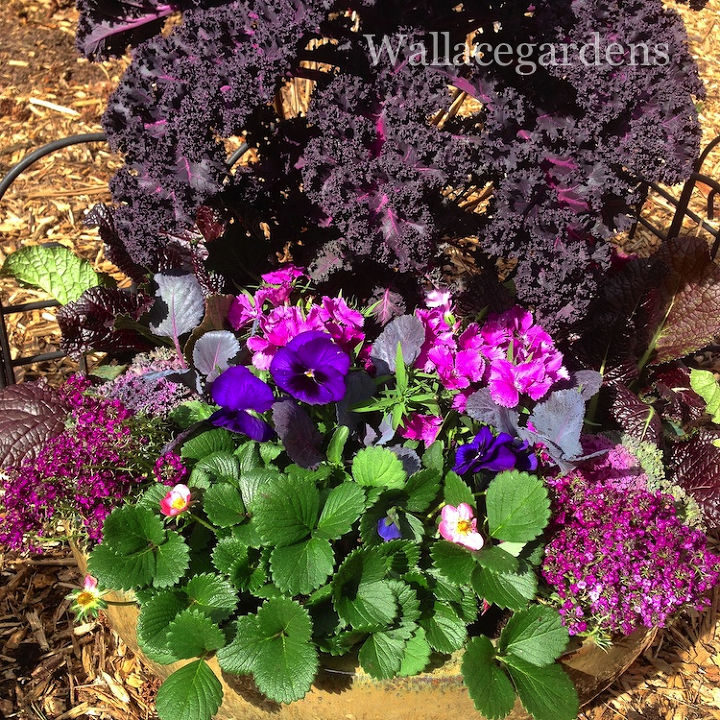
Edible gardens are popular right now, and for good reason: you can eat what you grow, even if it's beautiful. Here is a container garden made up in shades of purple and lavender foliage and flowers, using edible plant materials. (NOTE: before consuming edible plant materials, make sure they are 100% certified organic, and better yet, grow them yourself so you have complete control over what goes into your garden.)
Even if you don't intend to eat what you grow, you can still create colorful container gardens using seasonal "edible" ingredients. This container garden is made up with plants readily available February through May, depending on what part of the country you reside.
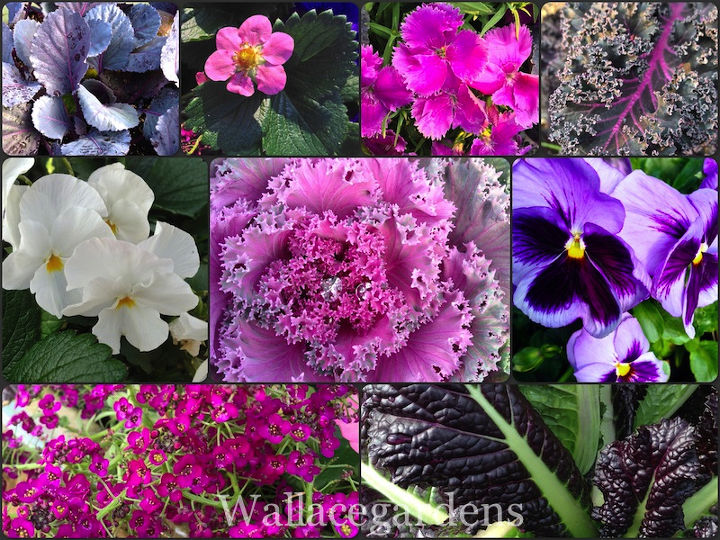
Here's what I chose for this garden.
Clockwise from top left:
1. Brassica oleracea 'Red Delight' - three 4" pots
2. Everbearing Strawberry - two quart-size pots
3. Dianthus chinensis - two quart-size pots
4. Kale 'Red Bor' - one 2-3 gallon pot
5. Dark purple pansies - three quart-size pots
6. Mustard 'Red Giant' - two gallon-size pots
7. Alyssum (lavender) - two quart-size pots
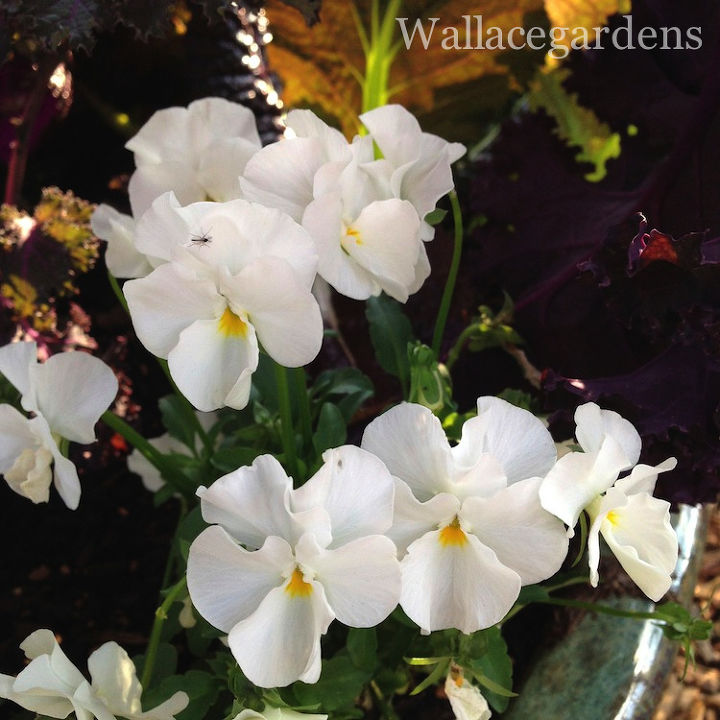
8. White Violas - four to six quart-size pots (as fillers)
9. Center: Brassica oleracea 'Kamome Pink' - two quart-size pots
Maybe your favorite color is pink? Or red? Choose your own Monochromatic Color Scheme! I'll keep this garden growing with my favorite certified organic cow manure tea. Cheers!
More edible flower ideas, here:
http://www.hometalk.com/diy/gorgeous-edible-gardens-organically-1706699
gardening
Edible gardens are popular right now, and for good reason: you can eat what you grow, even if it's beautiful. Here is a container garden made up in shades of purple and lavender foliage and flowers, using edible plant materials. (NOTE: before consuming edible plant materials, make sure they are 100% certified organic, and better yet, grow them yourself so you have complete control over what goes into your garden.)
Even if you don't intend to eat what you grow, you can still create colorful container gardens using seasonal "edible" ingredients. This container garden is made up with plants readily available February through May, depending on what part of the country you reside.
Here's what I chose for this garden.
Clockwise from top left:
1. Brassica oleracea 'Red Delight' - three 4" pots
2. Everbearing Strawberry - two quart-size pots
3. Dianthus chinensis - two quart-size pots
4. Kale 'Red Bor' - one 2-3 gallon pot
5. Dark purple pansies - three quart-size pots
6. Mustard 'Red Giant' - two gallon-size pots
7. Alyssum (lavender) - two quart-size pots
8. White Violas - four to six quart-size pots (as fillers)
9. Center: Brassica oleracea 'Kamome Pink' - two quart-size pots
Maybe your favorite color is pink? Or red? Choose your own Monochromatic Color Scheme! I'll keep this garden growing with my favorite certified organic cow manure tea. Cheers!
More edible flower ideas, here:
http://www.hometalk.com/diy/gorgeous-edible-gardens-organically-1706699
gardening
Nine different plant materials. See the list above.
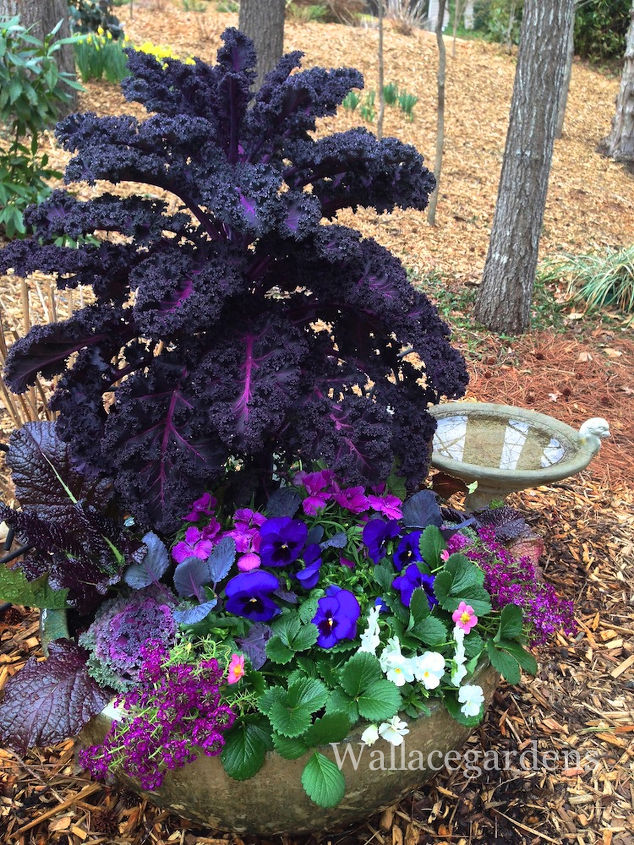
One day after installation. Give this container a couple of weeks to fill in….and you'll have a traffic-stopping color storm for your garden.
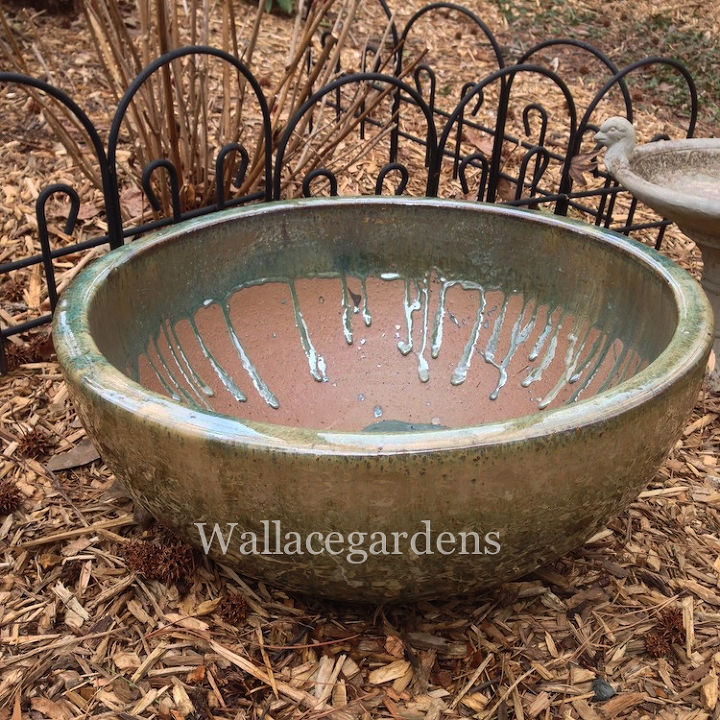
Always use the largest, best-quality planter you can afford. It's a good investment. This one is 26" across and 16" deep. After all, we're creating a garden here!
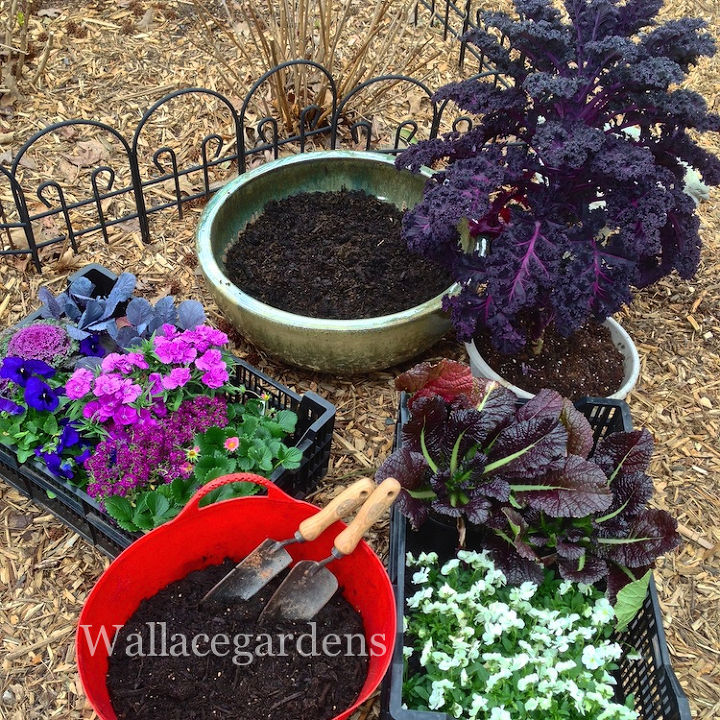
Assemble all your edible ingredients to make the installation quick and easy. Use a good quality potting soil - a key to success!
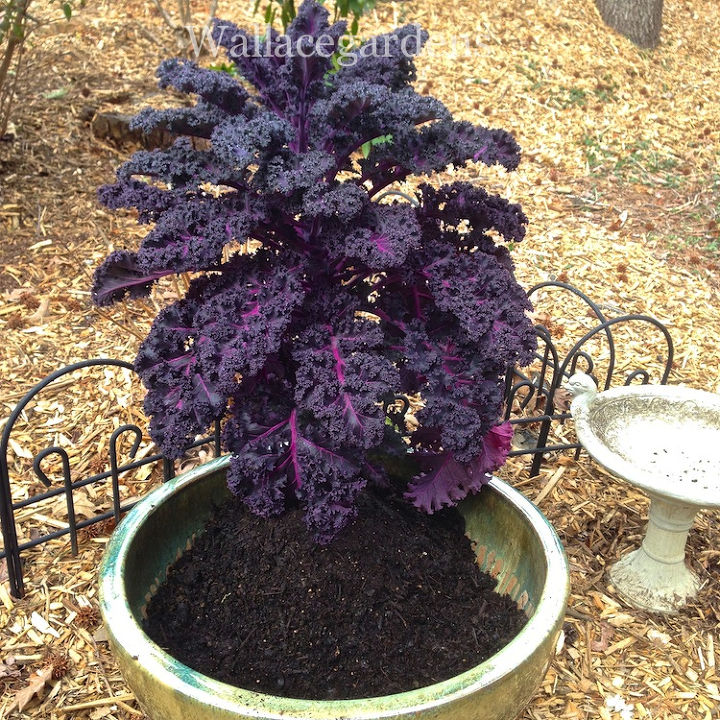
Start with the biggest plants first. I placed the 'Red Bor' Kale at the back of the pot, leaving the entire front open for thrillers, fillers, and trailers. Add soil around the plants, as you put them in the planter. It's easier!

Look at those roots! Don't be afraid to pull them apart gently with your fingers. This allows the plants to establish more quickly.
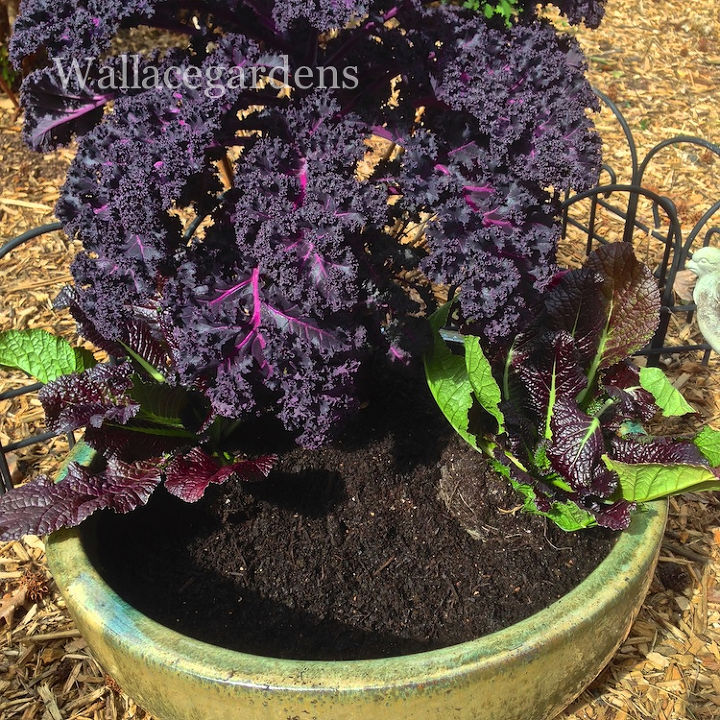
Next up, on either side of the 'Red Bor' are the 2 'Red Giant' Mustard. The foliage is stunning - and edible. Don't forget to fill in the soil after each plant.
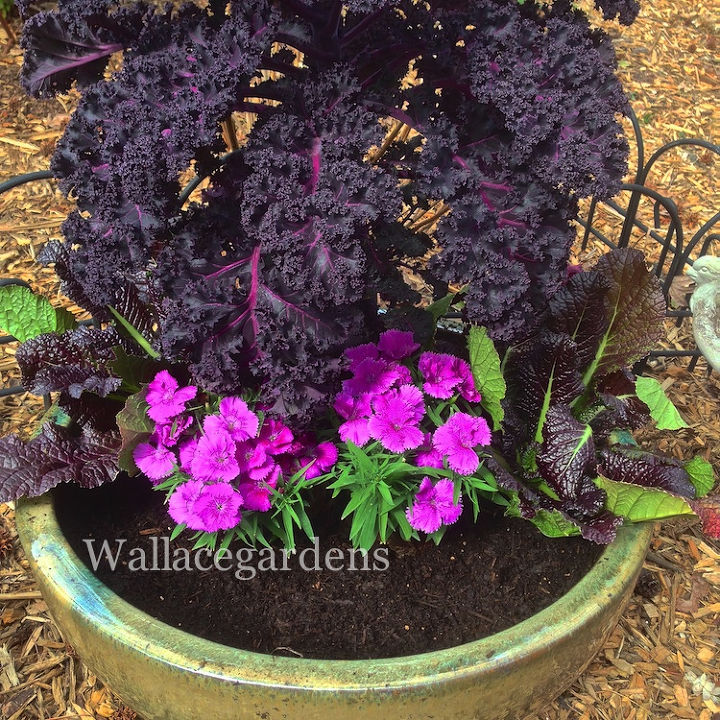
The Dianthus chinensis (which will get taller), is center front of the 'Red Bor' Kale. I like the color contrast.
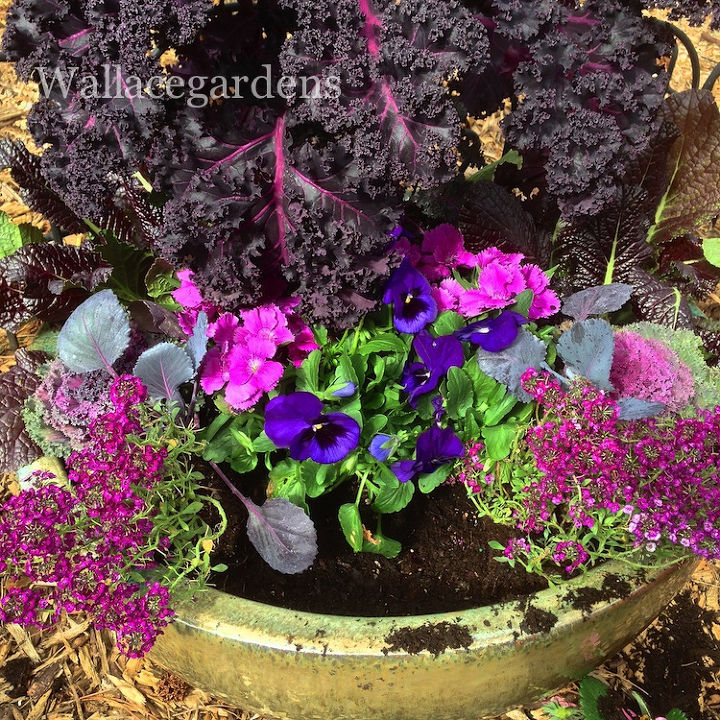
Here you can see that I've added the purple pansies, the lavender alyssum, and tucked in the Brassica 'Red Delight'. And we STILL have room for more.
The Everbearing Strawberry takes center front, so that it can trail over the sides of the pot, and make those strawberries accessible! I've been adding soil around the individual plants as they are placed in the planter.
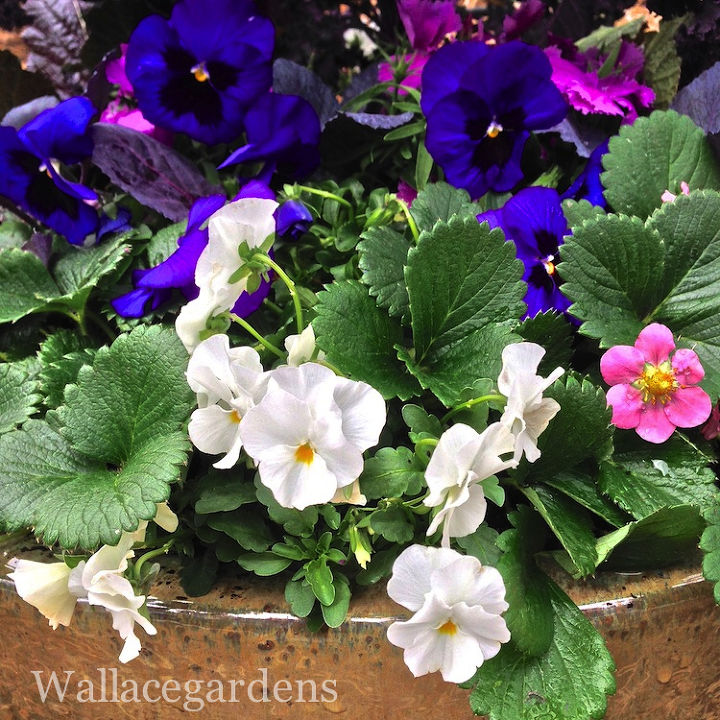
You couldn't tell, but there is still room for more: the white violas are on hand as fillers. I tucked them in any place there was an extra spot. Their pure white faces brighten the darker foliage and flowers.
Plenty of room around back of the container, for more violas. They will spill over the sides, and fill in all the empty spots in the planter.
Comments
Join the conversation
1 comment
-
Love the tips, and that kale!


Frequently asked questions
Have a question about this project?