


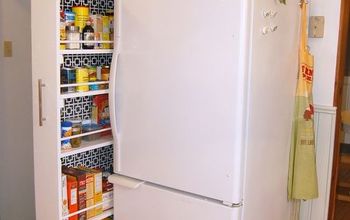
DIY Rolling Pantry

17 Materials
$100
7 Hours
Medium
Our friend Lisa moved into a new apartment with no pantry. The solution? Build a custom rolling pantry!
{
"id": "4391406",
"alt": "",
"title": "",
"video_link": "https://www.youtube.com/embed/6nCXps2O4lI",
"youtube_video_id": "6nCXps2O4lI"
}
{
"width": 634,
"height": 357,
"showRelated": true
}
There are a lot of things about this project that probably make more sense in video form, so check that out above. We’ve also got free plans available (link in the video description on YouTube). Please note that this project is inherently hard to give measurements for (since each space will be different), but we're giving dimensions on our specific build and trying to make it easy to adapt to the dimensions you'll need for your own space.
Also, we intentionally went with a design that didn't need any glue so that it would be easy and fast, making it accessible to more people with limited time. Ok disclaimers over, let’s get building!
We measured the space between the refrigerator and the cabinet and it was 24” x 69” x 7.5”. But it was an older building, and the floor and framing were a bit uneven, so we decided on 23" x 68.5 x 7.25" for the final dimensions of the pantry. We have made a cut list for these specific dimensions as an example. In our case, we were able to get all the wood we needed from one 4'x8' plywood sheet, two 1"x8" boards, and two 1"x4" boards.
The materials we ended up choosing for this build were a compromise of looks and cost. Premium pine was a quick and easy way to improve the look of pieces that would show, and less costly wood was used in areas that would be hidden. In all, the materials (including casters, screws, stain, the handle, etc) were about $100-$110. Depending on the quality of the wood, this could be made for more or less.
This pantry is made of a two general parts: the main body, and the shelves. The main body is made of a plywood backing and a 1x8 frame around that backing. The shelves are made of extra plywood that we cut for the shelf bottoms, and 1x4's for the shelf fronts.
We had the 4'x8' plywood sheet cut in half at our local hardware store and it was really rough, so we cleaned up the edge and cut it to width on our table saw. This could also be done with a circular saw, which we used to cut it to length.
We used a miter saw to cut the 1x8 boards (for the frame) and the 1x4 boards (for the shelves) to length, then trimmed the width of the bottom frame piece to 6.5" on the table saw to account for the shelf lip that would be added to the front of it later.We used a table saw to cut the shelf bottoms out of the remaining plywood.
Once everything was cut, we did a test fit of all the pieces to make sure that everything fit as planned. Since it did, we applied two coats of Minwax ebony stain to match our friend's dark cabinets.
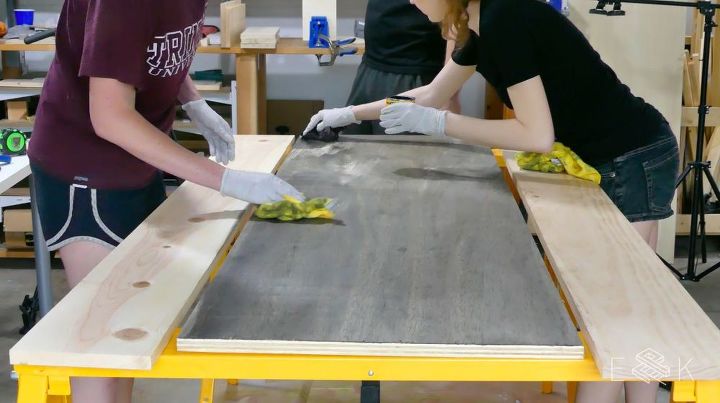
Since we were staining some pretty big pieces, it helped to have one person apply the stain and another to wipe off excess stain, which helped keep our application even.
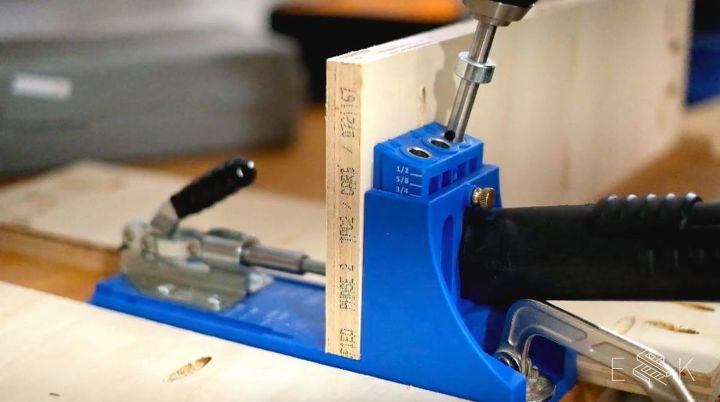
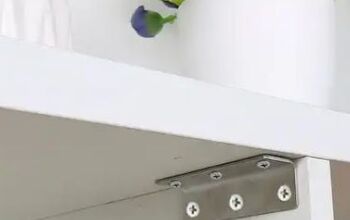
We drilled pocket holes as shown above (on the top side of the top piece of the frame, the under side of the bottom piece of the frame, and the underside of each shelf). These were the only fasteners we used and it turned out very sturdy.
We had thought we might need to add some countersunk screws to the side, holding the side panels into the back panel but that turned out not to be necessary.
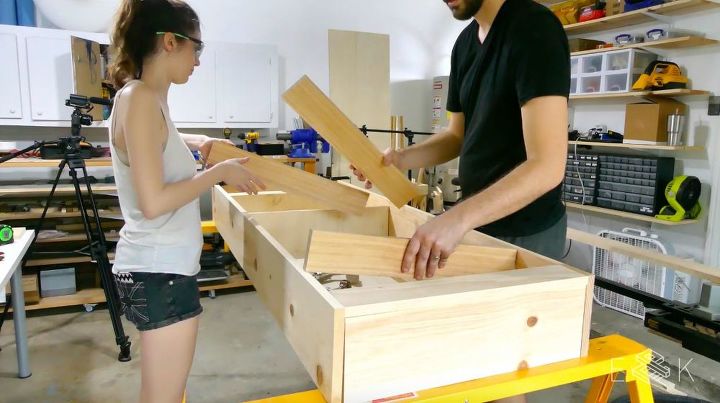
Assembling the main body is pretty quick. Again, the main body consists of the plywood backing and the 1'x8' frame.
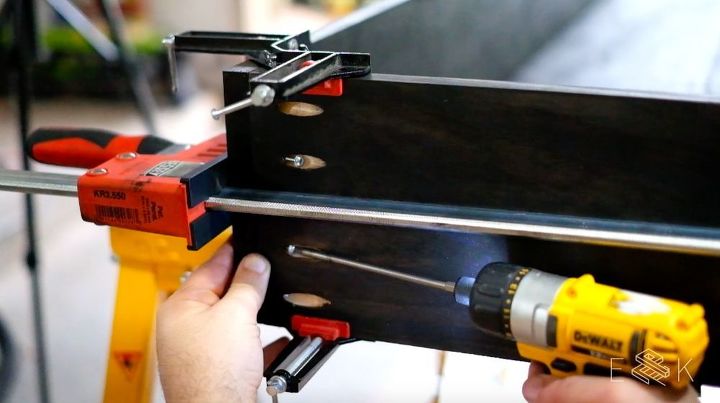
We attached the top piece of the 1'x8' frame into the two side pieces first. We clamped it together using right angle clamps and some larger clamps across the width, then screwed through the pocket holes we made earlier.
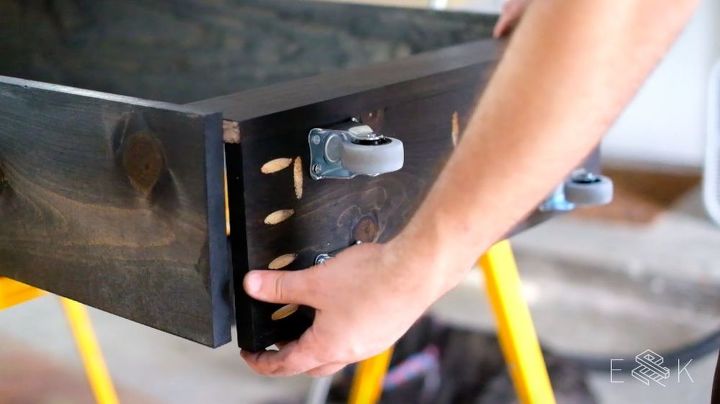
Before adding the bottom piece, we screwed four non-swivel casters to the underside of it. In the photo, you'll see that the casters look off-center at first, but it's because we're accounting for the shelf front that we added to it next. We used right angle clamps to keep the bottom piece and shelf front square when attaching the shelf front to the bottom frame piece.
Then we added the bottom frame piece to the rest of the frame, again using right angle clamps and some large clamps across the width, and screwing through our pocket holes.
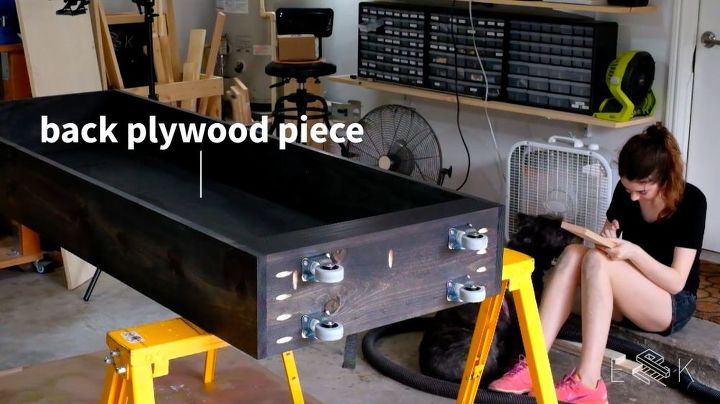
Next we set the back panel down and lowered the main body on top. It was a really tight fit, as planned, so we had to use a covered rubber mallet (a wood one will work too, but use something soft that won't mark your piece) to pop it in. There are no screws attaching the frame to the back panel - the shelves will hold everything together, and we'll cover that later.

With all the pocket holes drilled, it's quick to assemble the shelves. Each shelf is made of a bottom plywood piece and a front 1x4 piece. We used right angle clamps to ensure that everything stayed true during assembly. Then we screwed through the pocket holes on the bottom of each shelf into the front of each shelf.
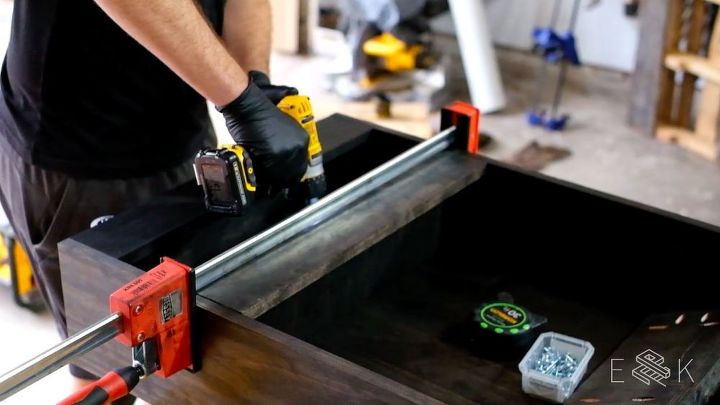
We did one more test fit of the shelves before assembling them to the main body. A large clamp was used to hold them in place during assembly. We screwed through the bottom of each shelf into the plywood backing and the 1x8 frame. This ended up being very sturdy when fully assembled.

Lastly, we attached a handle. It was about a 9" long handle, and we attached it at a height that felt natural to our friend (you can see in the photos that it's about 2/3 up the height). To attach the handle, we drilled a hole for the top screw, we screwed the top screw in, then the handle was aligned vertically. We used a pencil to mark the outline around the bottom of the handle where it touched the wood, and we drilled the the bottom hole using that mark as a guide. Then we added the bottom screw.
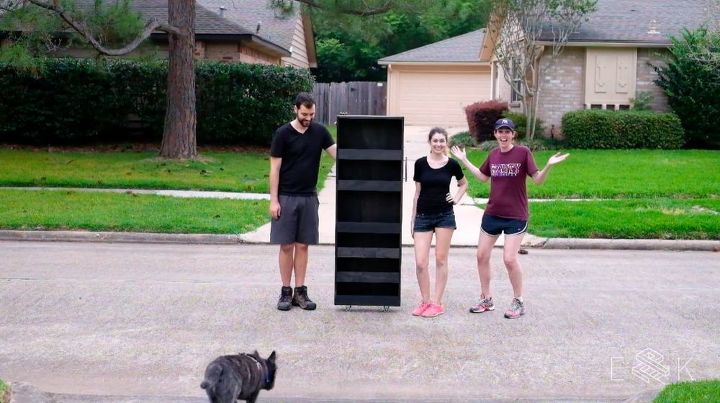
All of this work was done at our garage workshop, so we went to our friend's apartment to do a test fit. We were just a little bit nervous, but it fit perfectly!


Any price and availability information displayed on [relevant Amazon Site(s), as applicable] at the time of purchase will apply to the purchase of this product.
Hometalk may collect a small share of sales from the links on this page.More info
Comments
Join the conversation
7 of 111 comments
-
Great idea. I think I would like to try it in my craft room.
-
Who has that machine that makes side holes for screws? Glue I have... that machine I don’t...🧐


Frequently asked questions
Have a question about this project?
I saw that you were using a KREG tool. Is it possible that your instructions and materials are available on the Kreg site?
Can I make corner kitchen booth?
Why are you in the middle of the street taking picture's