


One Pillow Design That Does It All... Year Around and Every Season!
3 Materials
$65
2 Hours
Medium
So, I wanted something new to decorate with for fall. Yet with Christmas just around the corner, wouldn't it be nice to get both done?!
Then again, do I really want to store fall, Christmas AND everyday stuff? That's a lot of stuff.
Putting my stencil thinking cap on, I decided one pillow design could solve all my problems. Imagine one reversible pillow that showcases an everyday message, yet chimes in with any season possible too.
Seasonally mixed up yet?
You won't be after this post. Here's how I saved money, time and storage space with this simple concept... with a pretty cute outcome!
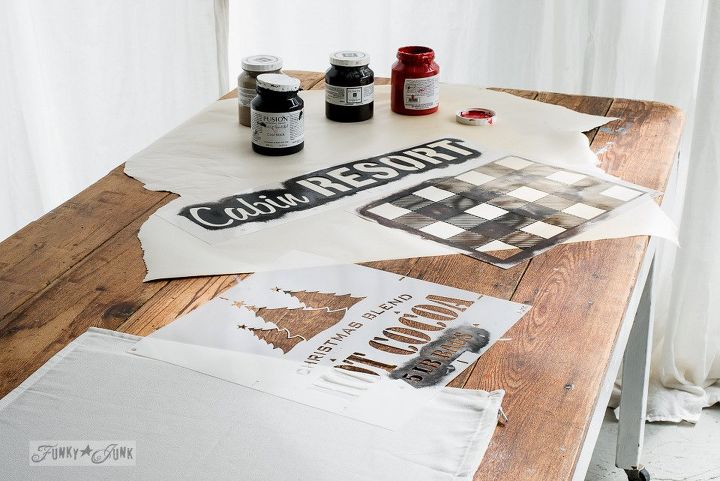
1. Gather up all your supplies... you'll need paint, stencils, a stencil brush, a blank pillow case, and masking tape.
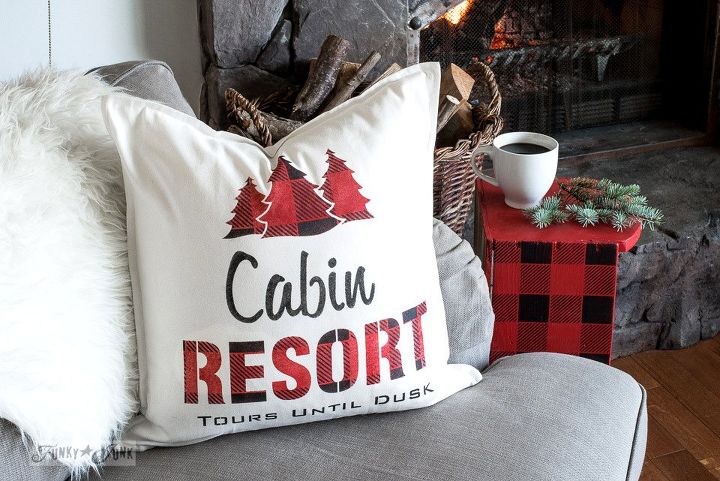
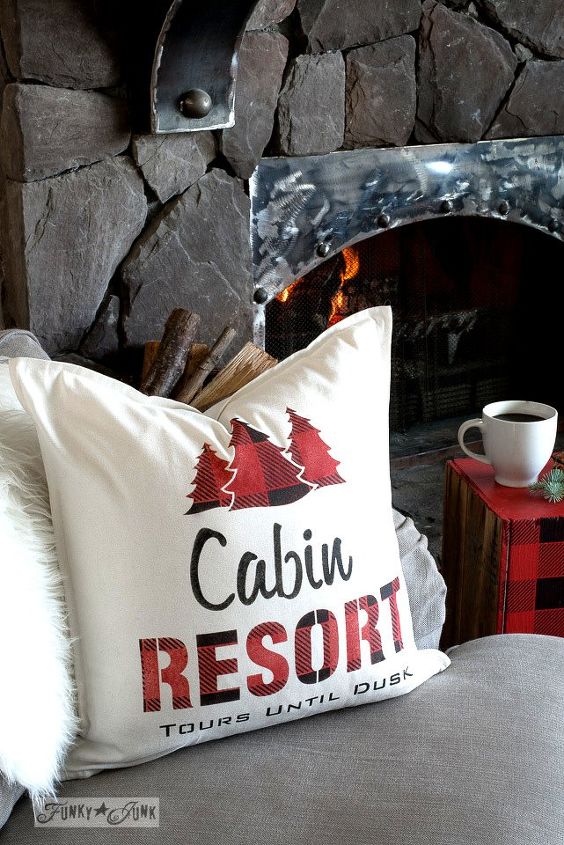
In this case, I desired a cabin styled plaid theme to cozy things up!
Full details on all supplies I used are at the end of this post.
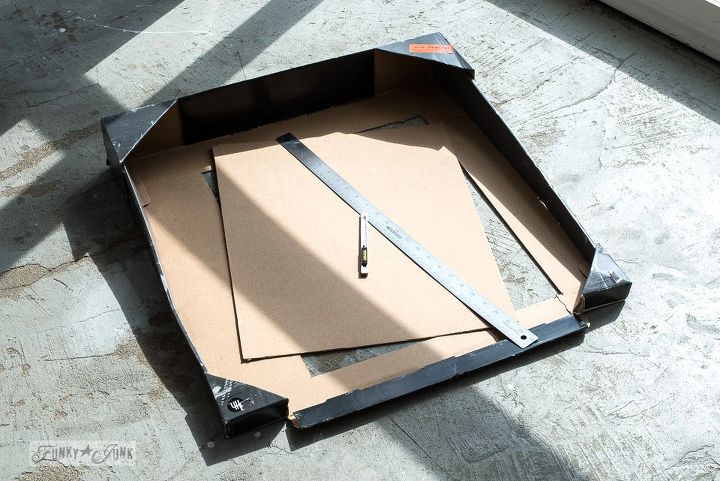
2. Insert something inside your chosen pillow case.
If you plan to stencil lots of pillows, consider creating a cardboard template insert so the paint won't bleed through both sides of the fabric. Plastic wrap works perfectly fine too.
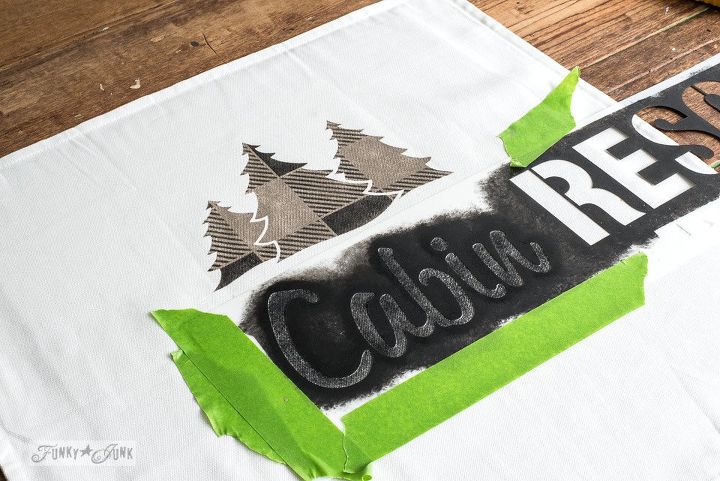
3. Stencil an everyday tone on one side of the pillow.
My goal was to create a patterned stencil design. Here's how:
- Stencil the trees first in tan. Leave stencils in place.
- Place Buffalo Check on top of the trees. Stencil in black. Remove stencils.
- That gives you a pattern effect!
- Next, I worked on Cabin in black.
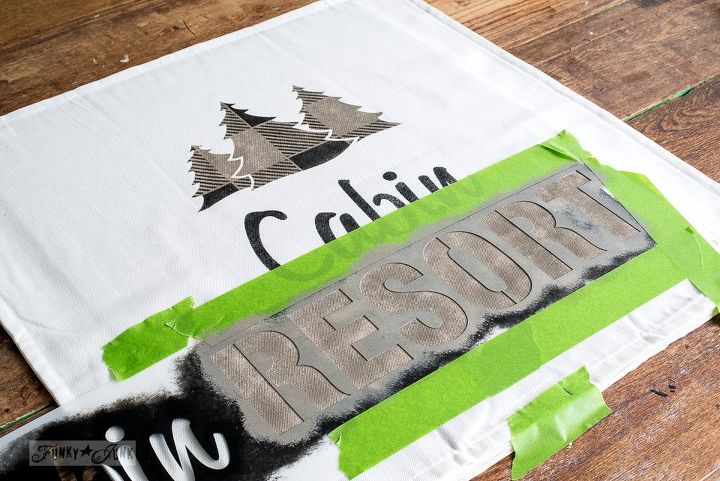
5. Resort went on like the trees... tan resort first, then buffalo check over top in black.
Learn how to do this technique with more pictures HERE
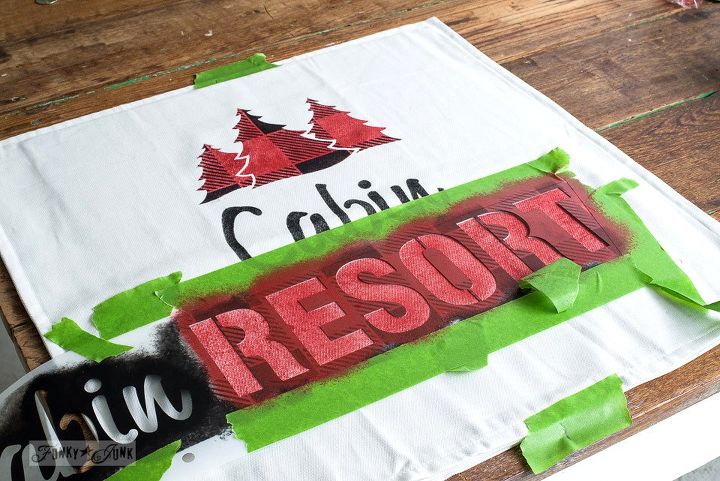
6. Stencil festive colour son the other side of the pillow.
Repeat all the same steps starting with red design first, then black buffalo check.

Here's how the Buffalo Check stencil looks. It's highly detailed giving you this iconic look on anything you wish in minutes! Especially super cool on furniture tops.
Find all of Funky Junk's Old Sign Stencils HERE
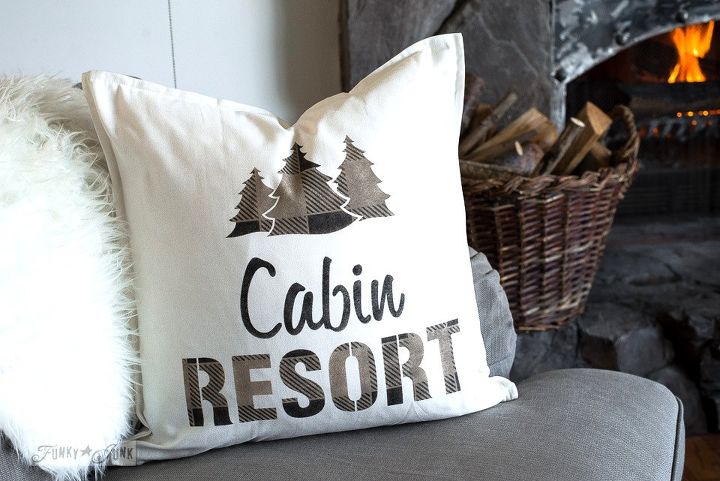
And the finished result...
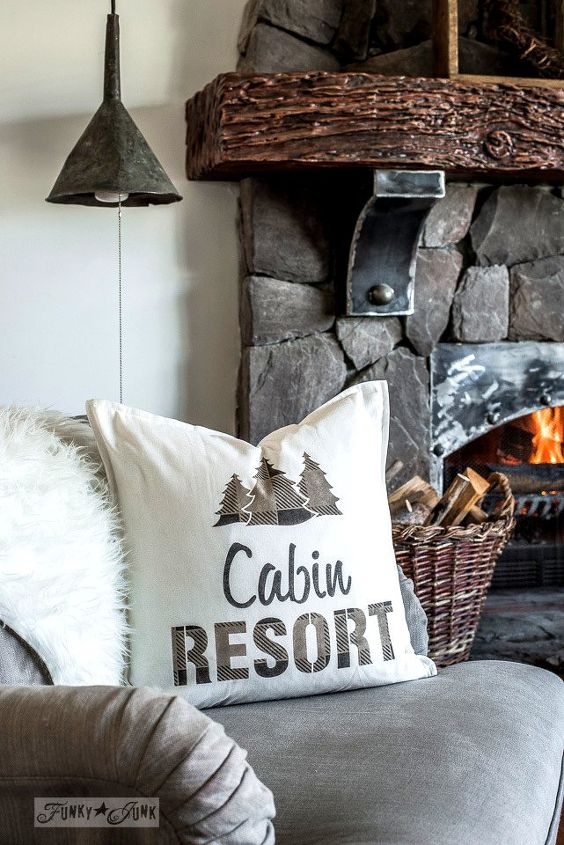
... is a touch of cabin-cozy in neutrals. Happy Fall to ya!
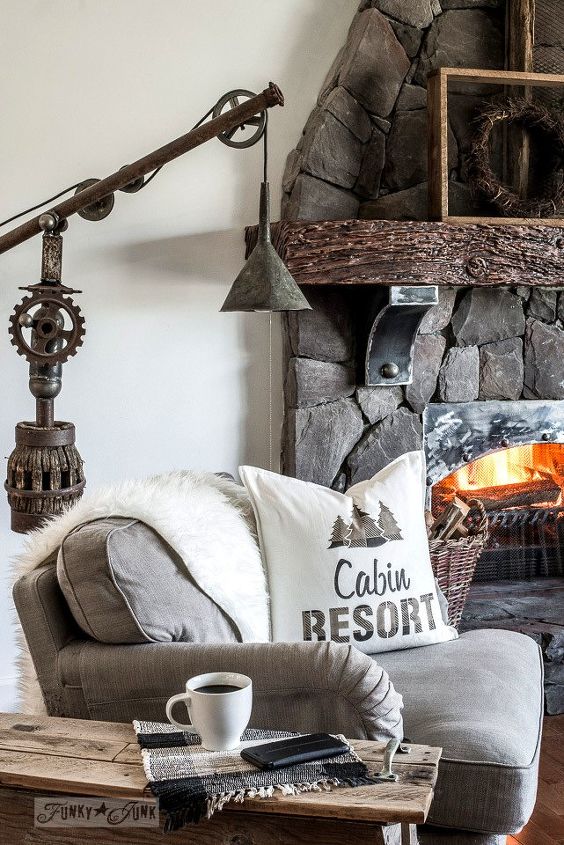
Or... everyday too!
Then with a flick of the wrist, turn it around...
... for a full-out festive Christmas experience!
Ho ho ho... now that was some easy Christmas decorating!

And after Christmas, remove the greens and you're good to go.
Now that was easy...
p.s. What Christmas storage boxes?
Learn more by clicking the See More At link below!

Want more details about this and other DIY projects? Check out my blog post!


Frequently asked questions
Have a question about this project?