


Build Cabinet Doors Like a Boss
6 Materials
1 Week
Medium
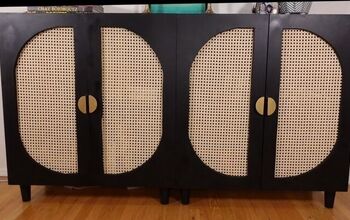
When I look at the built-ins, I love telling myself “I did EVERYTHING.” I say that out loud because that just sounds braggy. But I brag about myself TO myself because that’s just building self-confidence right? Haha! To be honest, the biggest thing that scared me about the built-ins were doing my own cabinet doors. I wanted to make good doors and not take a shortcut. I looked into it and practiced and practiced and boom-I done made my own cabinet doors! And if I can do it, you can do it. Just read this post and you will know how to build cabinet doors like a boss.
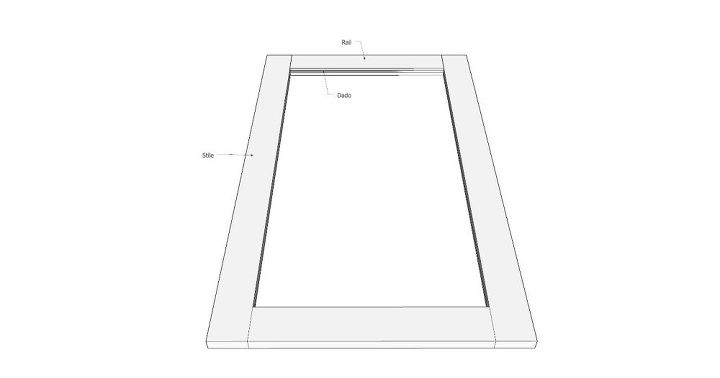
First, let me explain about the cabinet door. The way a shaker style cabinet door is constructed is with five pieces of wood: two rails (the top and bottom of the frame), two stiles (the sides of the frame), and the center panel. Each of the rails and stiles have a dado cut into the center of them–a groove cut into the center of the edge of the wood. The ends of the rails get little notch cut out of it and fits into the dado.
Supplies:
- 1x3x8s
- 1/4″ MDF panel
- Wood glue
- White paint
- Black knobs
- 1/2″ Overlay Euro Hinges (2 per door)
Tools I used:
- Table Saw
- Miter Saw
- Dado Stack
- Dado throat plate
- Large clamps
- Kreg Concealed Hinge Jig
- Kreg Hardware Jig
- Drill and Driver
Calculating the Size of the Doors
It took some seriously meticulous math to calculate the size of the door. First I measured the opening. Then I had to account for the fact that the opening is going to be covered by two doors, plus a 1/2″ overlay on three sides of each door, minus 1/8″ for the space between the doors. Once I got the size of the door, I needed to calculate the size of the rails and stiles. I had to subtract for the width of each rail from the overall door size and then add 1″ to account for the notch. I did my calculations and then went over them a couple times to ensure they were correct.
Making the Dado Cuts
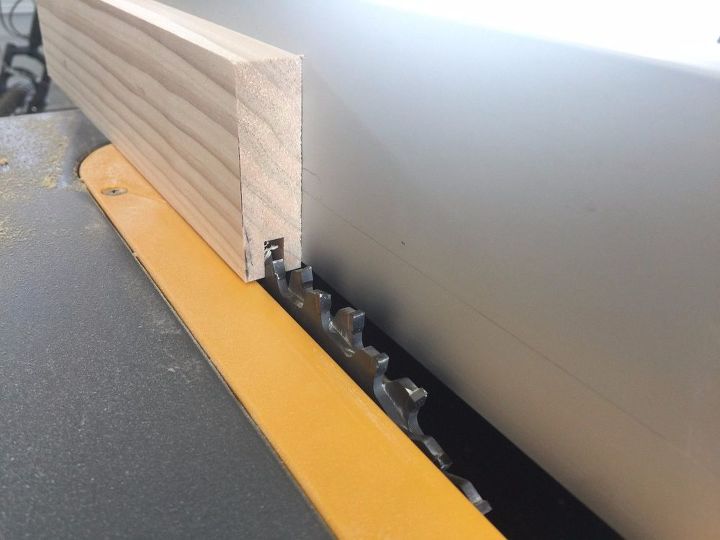
I first tried to cut the dados on my router. But I started to feel like it was pushing a lot of pressure on my router and wasn’t doing a great job. I actually had a dado stack sitting in the garage that I bought two years ago but had never used because it intimidated me. But after watching a couple YouTube videos on how to install the dado stack correctly, I got it working! And it was so exciting. I cut all my 1×3’s 1/4″ wide and 1/2″ deep. I did this by using the right stack (according to the guide included in the stack) and by measuring the height of my blades and adjusting accordingly.
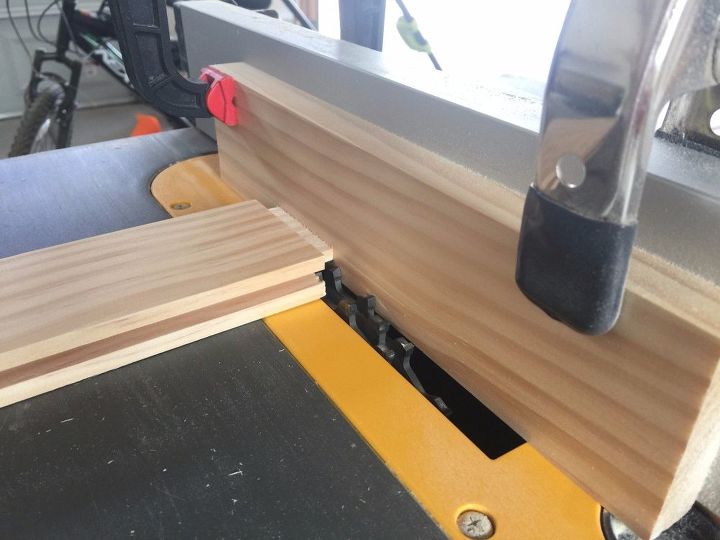
After I cut the 1/4″ dados in all of the 1×3’s, I added more blades to my stack until it made 1/2″. Then I clamped a piece of scrap wood to the fence so I could put the fence right next to the blade (you don’t want your metal fence right next to the blade.) I lowered the blade to approximately 1/4″ and ran my rails through–one side, then flipped it over and ran the other side through, on both ends of the rail. This created the little tongue to fit into the groove.

Want more details about this and other DIY projects? Check out my blog post!
Comments
Join the conversation
2 comments
-
Measurements for making rail and stlie doors can drive anyone batty. I usually use scrap wood first. When everything fits I start building the doors with the finished wood.
-
It ain't braggin' if ya done it - Yogi Berra : )
Thx for the inspiration


Frequently asked questions
Have a question about this project?