


Heartfelt Gift Idea Made With Leftover Wood Shims

by
Lisa L Hall
8 Materials
$16
30 Hours
Easy
I'm always doing something in the house and it will call for 1-2 shims...well they don't just sell that amount at Home Depot so I end up with a bag of 25 shims. So while out doing a bit of early gift shopping I saw this great gift idea for remembering birthdays, but I was not about to pay $40 for the sign and the little tabs that went with it.
I came home empty handed but saw that bag of shims that was still sitting on my bench...Thus my gift will still be given but at a much cheaper price tag.
Now I have almost everything I needed for this project at home whereas someone may need to purchase some of the items. You don't have to use the shim sized wood, you can go to the remnant container at any hardware store and get scraps of wood for $1.
I have added in the pricing if you would need to buy the pieces that most people don't have lying around their house. I did have enough shims to make two of these signs, so keep that in mind too.
With wood projects as popular as they are right now, this is a great gift for someone on your list, or even for your own home.
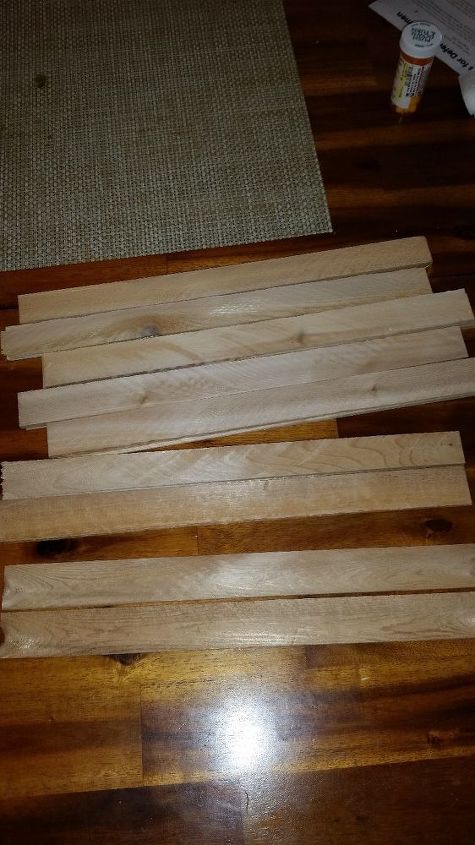
Here are the shims. I did go through my entire package to find the ones that had similar coloring and not a lot of flaws. When using shims you will want to make sure you are using the smooth side for painting.

If you choose to use shims you will have to use 2 per line since they are cut at an angle. I glued my two pieces together with regular Elmer's glue. I then painted them with a sample of Heritage chalk paint. I really like this paint. One coat coverage every time. I love the blue grey tint to it as well. It goes with just about any color palate. This is one of those projects that you can use up any last bits of paint you have on hand. It doesn't take much.
Once the paint had dried, I glued the slats together to form the sign. This was the longest part of the project since I needed to let the glue dry overnight. I didn't use any clamps as I wanted it to appear a weathered piece of wood. You can use clamps and get a much tighter fit between the pieces.
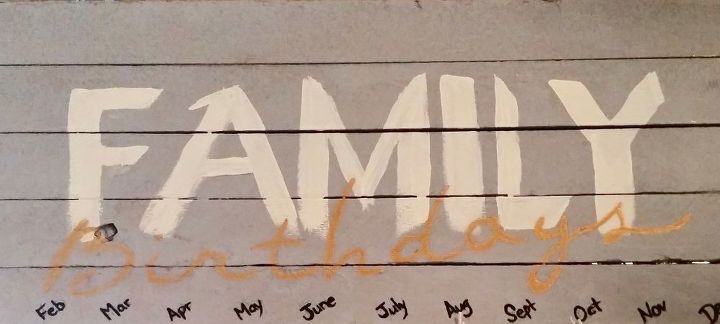
once I got it glued then I could start on the fun part. I chose to do this by hand but you can use stencils, stamps, stickers....
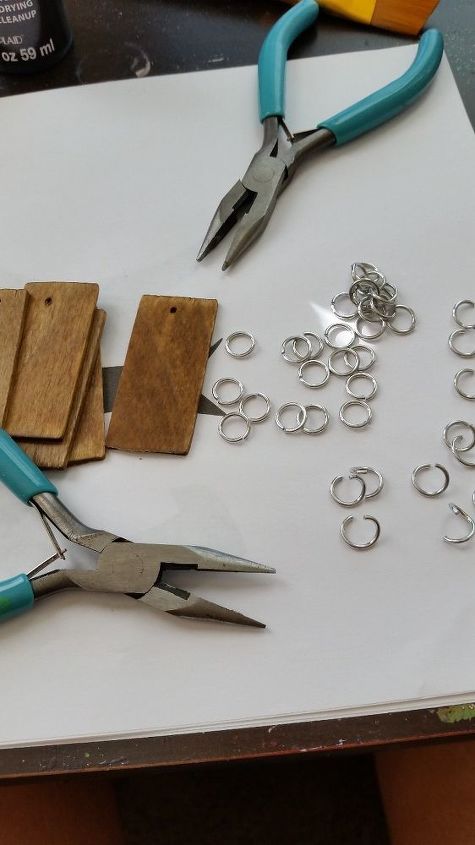
Since I used solid wood pieces I did need to drill a small hole for the jump ring. These are just inexpensive jump rings that you can get 50 per bag for about $1. I just slip the jump ring through the hole and close it up. Then I can attach my string (or ribbon - your choice).

You can use any string to make your loops for hanging the name plates. I chose some hemp cord. You only need about 3" per name plate.
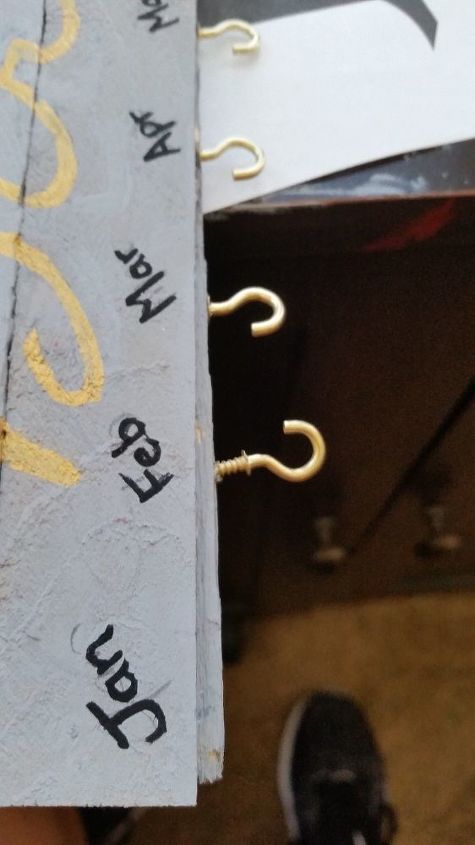
These little hooks are great. No drilling required, you can screw them in with your hands. They come in a package of 10 so you'll need to buy 2 and have some left overs. But they can be used for a lot of projects which you can find right here at Hometalk.

Here is my final project. I chose to use a metallic paint for the birthdays portion so it doesn't show up really well due to the bad lighting in my family room, but I think you get the idea. I'm not a huge fan of nails in my walls but since I'm not sure if everyone likes the Command Strips on their walls, I opted for attaching a small piece of leather to the top. You can use the same hooks you used for the birthdays, or you can use a solid loop type. I did add a touch of glue to the leather where I tied the knot, just to be safe.


Frequently asked questions
Have a question about this project?