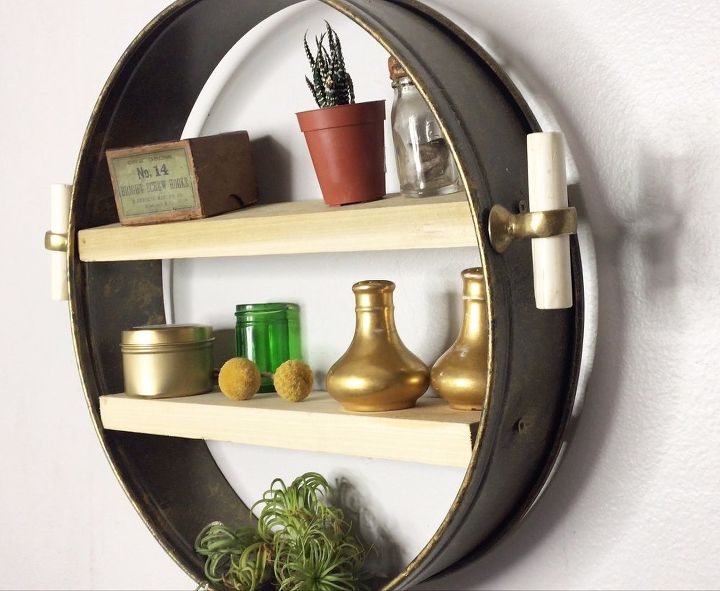
Turn A Cake Pan Into A Shelf + More Clever Repurposing Ideas!
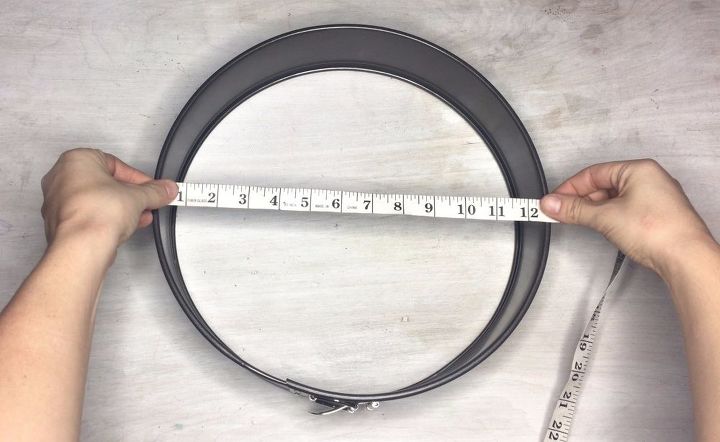
Step 1: Measure the diameter of your cake pan
Measure the diameter of your cake pan in 2 different spots where you would like your shelves to rest Get tutorial here
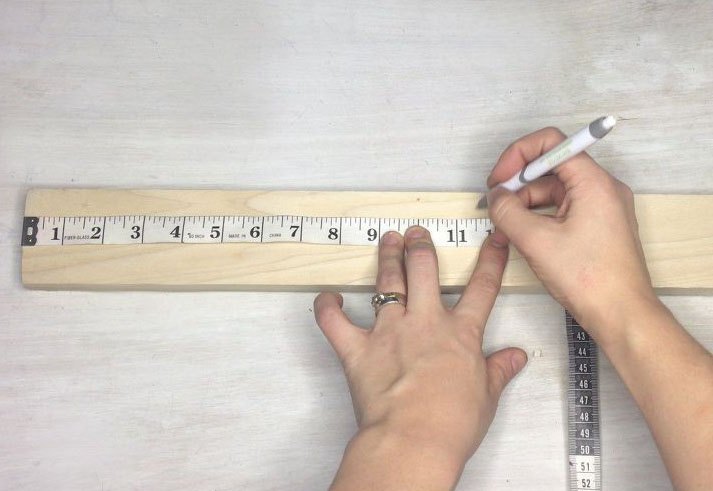
Step 2: Mark measurements on wood
Take your measurements from step 2 and draw a line across the lumber at each distance Get tutorial here
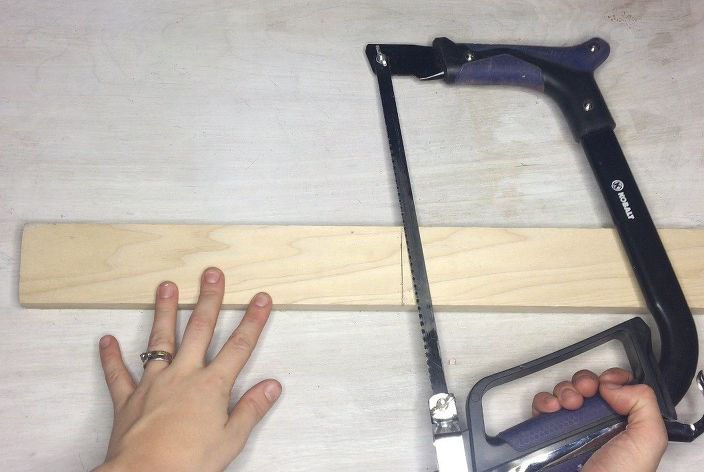
Step 3: Saw wood on marked lines
Take your measurements from step 2 and draw a line across the lumber at each distance Get tutorial here
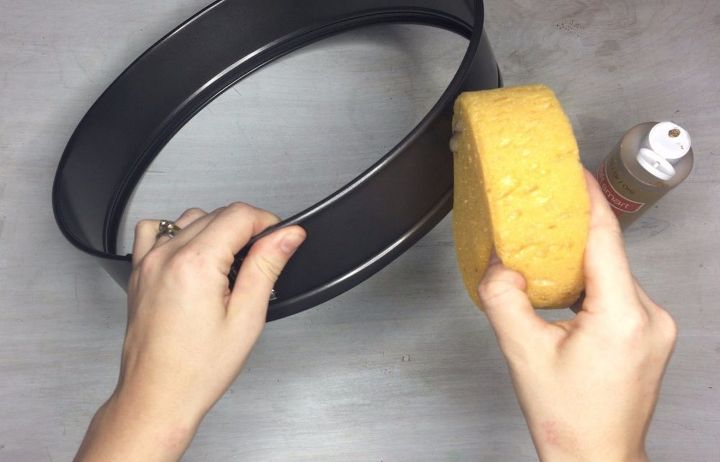
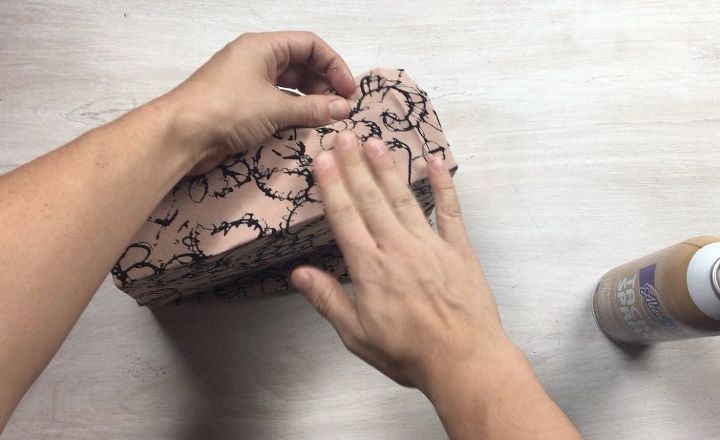
Step 4: Sponge paint pan ring (optional)
Place a blot of your paint on a sponge and dab it onto the ring of the cake pan and set aside to dry Get tutorial here
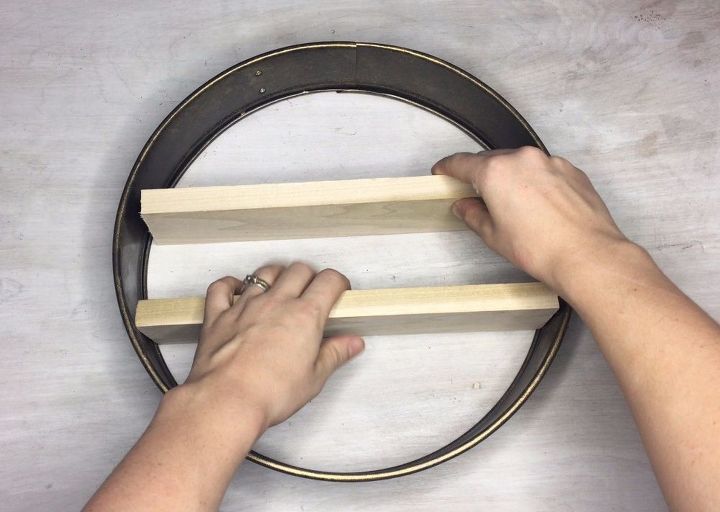
Step 5: Insert wood pieces into ring
Place your wood pieces into the ring of the cake pan and make sure they are resting level. Get tutorial here
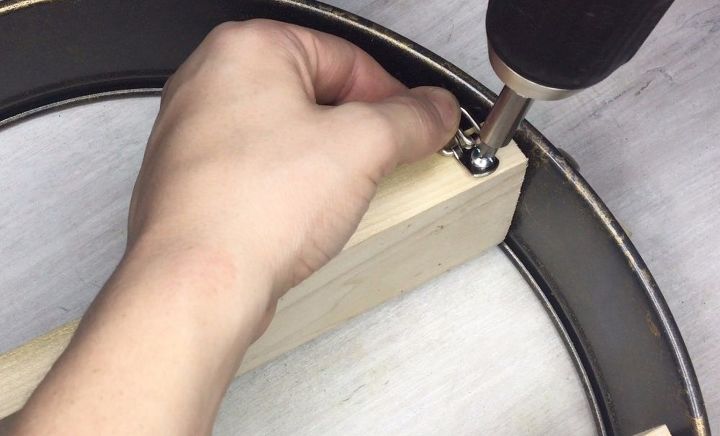
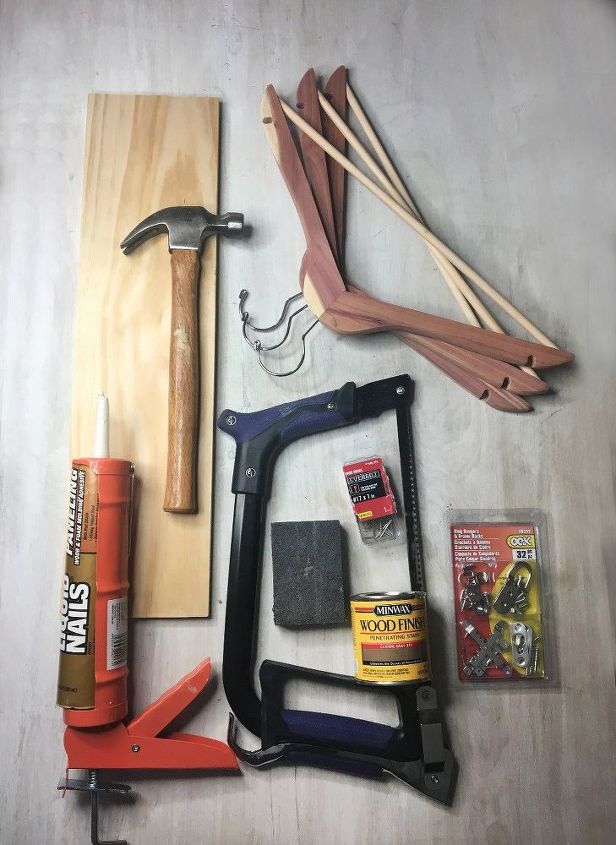
Step 6: Drill holes through pan and shelves
Take a drill and drill a pilot hole through the outside of the cake pan into the side of the shelves on each side Get tutorial here

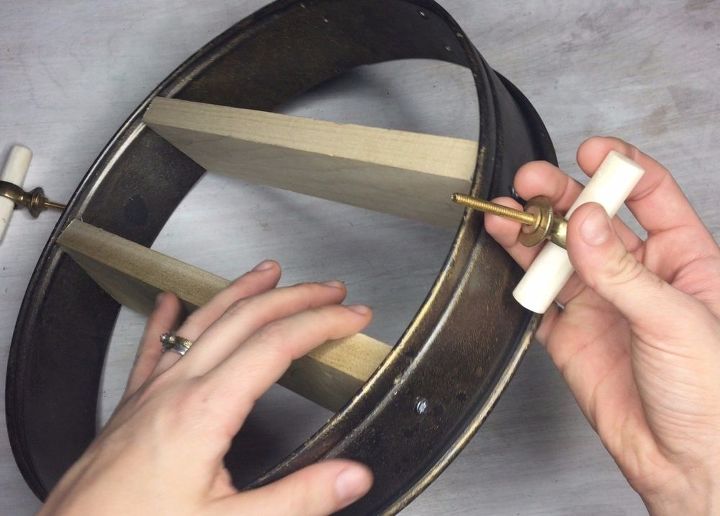
Step 7: Screw drawer pulls into holes
Screw your drawer pulls into the holes you just drilled until they are tightly in place Get tutorial here
Step 8: Add picture hangers to the back
Turn your shelf over so the back is facing up and screw picture hangers into the back Get tutorial here
Step 9: Hang on wall and fill shelves!
Fill up your shelves with whatever you wish! Get tutorial here
Next: Repurposed Hangers Into Wall Hooks
A couple of wooden hangers and a piece of wood board are basically all you need to make a multipurpose wall hook on the fly! Get tutorial here
Step 1: Draw lines on hanger and saw pieces
Saw a straight line 5" on top of your hanger and 1" beneath the base of the hook of the hanger. Cut more hangers Get tutorial here

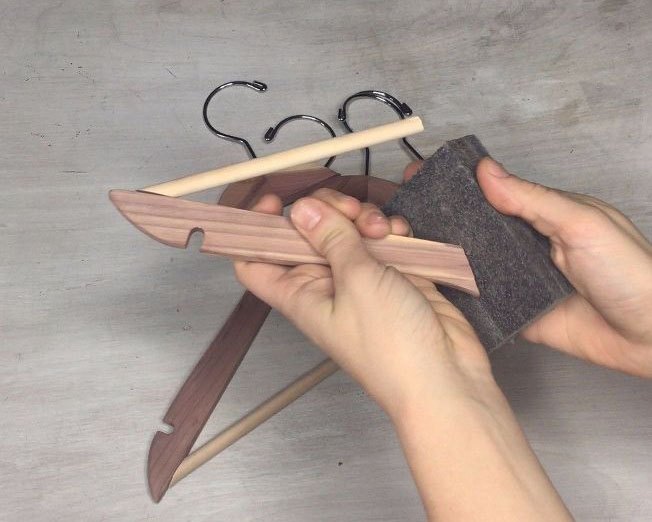
Step 2: Sand edges
Sand down the edges of the cuts you have just made Get tutorial here
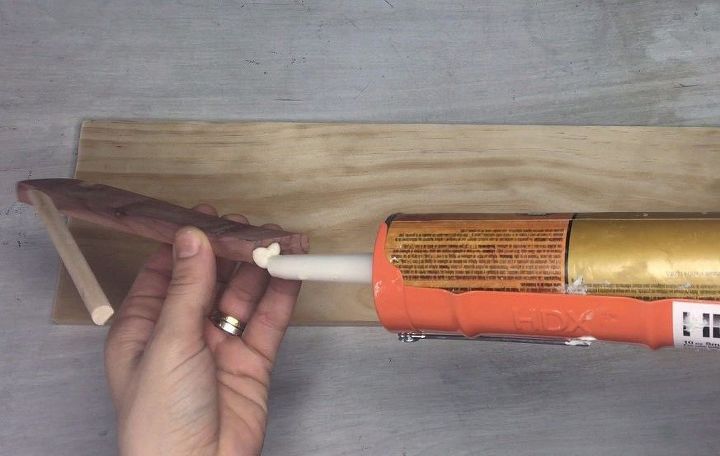
Step 3: Glue hanger ends to ends of board
Place the ends of your hangers on either end, glue in place and allow to dry Get tutorial here
Step 4: Glue hooks in place
Grab the hooks you cut off and disperse them evenly between the ends you just glued to the board Get tutorial here
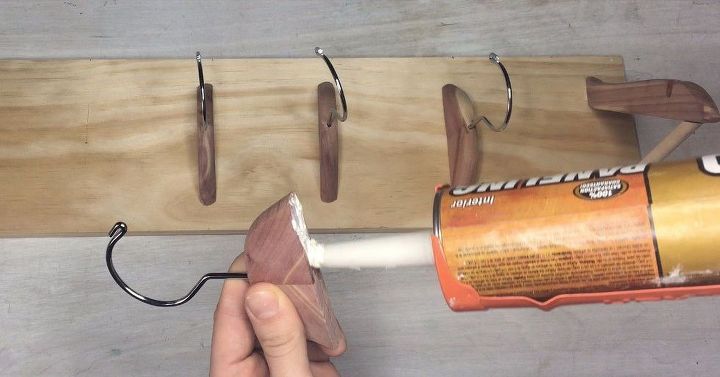
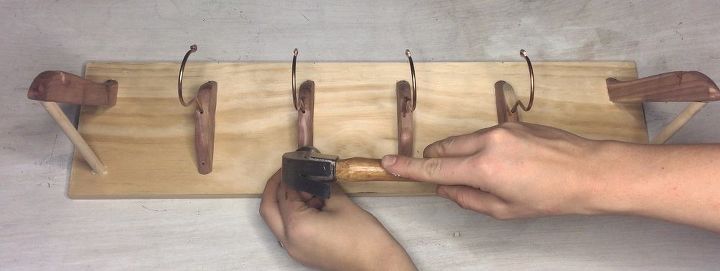
Step 5: Secure hooks with tack nails
Grab a hammer and drive the tacks through the pieces and into the wood board Get tutorial here
Step 6: Stain or paint your piece (optional)
If you want to stain or paint your piece go ahead and do that now Get tutorial here

Step 7: Add pictures hangers to back of board
Once the paint has dried, add picture hangers to the back of the wood board to so you can hang your piece Get tutorial here

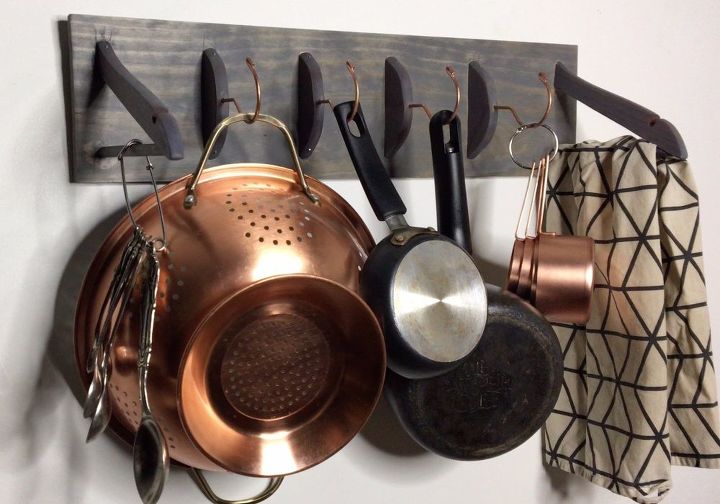
Step 8: Hang your hooks and use for anything!
These multipurpose hooks will be the perfect addition to your home! Get tutorial here
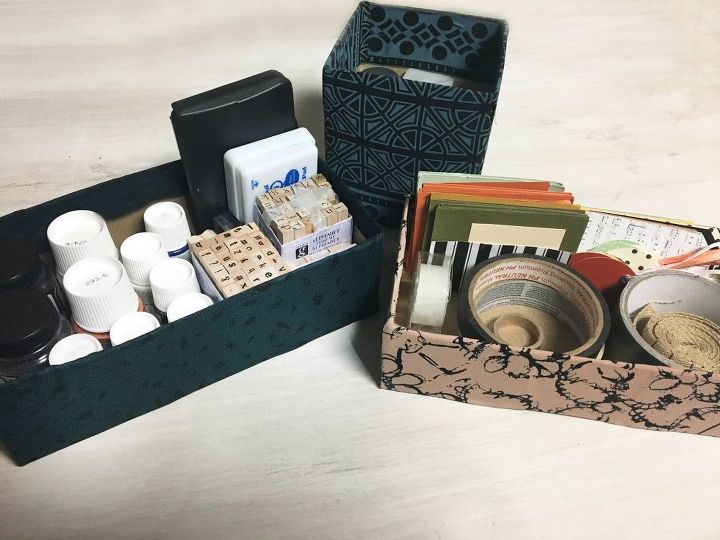
Next: Tissue Box Turned Storage Bins
Why not repurpose something you have on hand to help clean the clutter? Get tutorial here
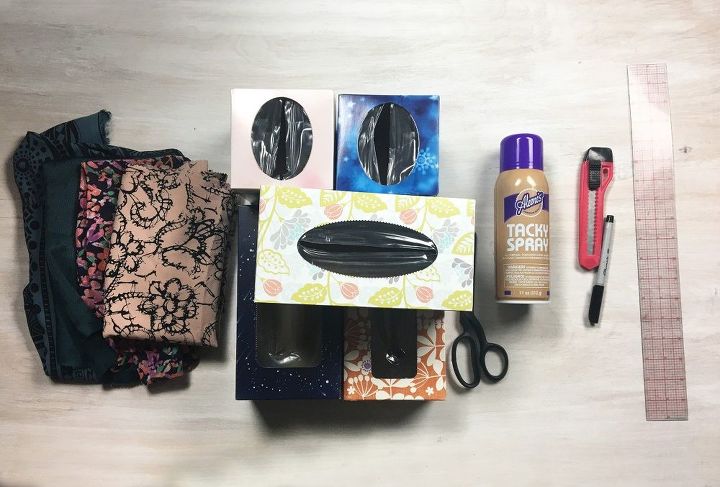
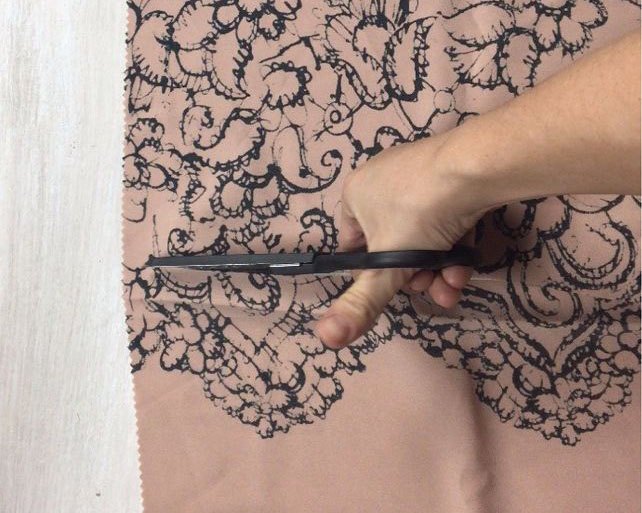
Step 1: Cut fabric to size of tissue box
Wrap the fabric around the box to make sure it is large enough to cover all sides fully and cut fabric Get tutorial here
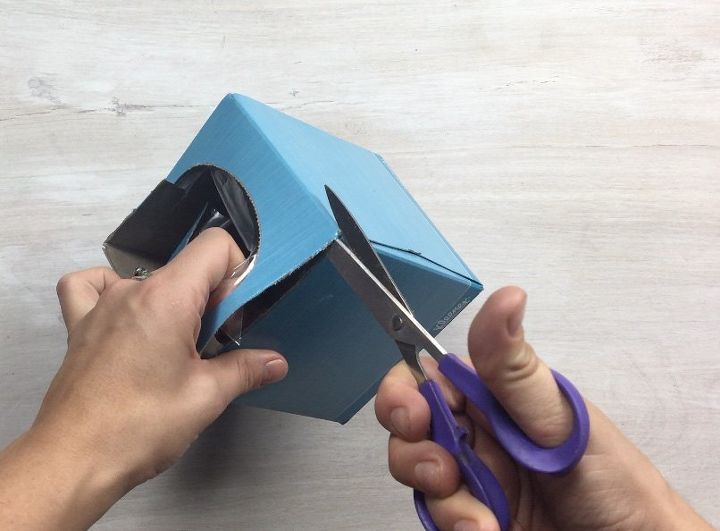
Step 2: Cut off tops of boxes
Cut off the top portion of each box so that you'll be able to easily place items inside Get tutorial here
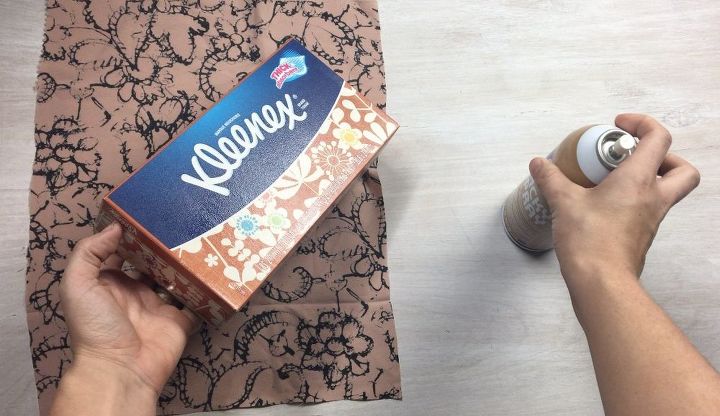
Step 3: Spray bottom with glue
Use a spray glue to cover the bottom of the box and then place it on the fabric Get tutorial here
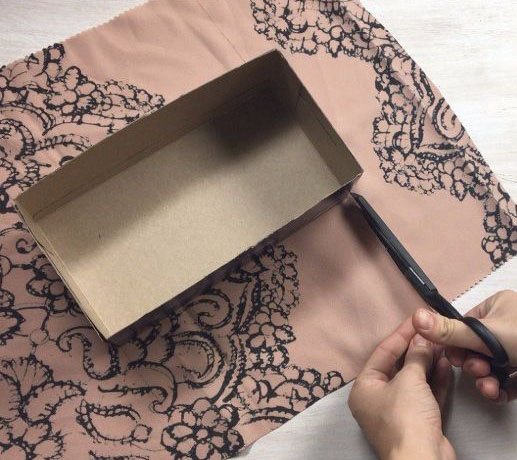
Step 4: Cut slits in the fabric at each corne
Mark a straight line on fabric against each side of the box, cut slits along the lines Get tutorial here
Step 5: Fold and glue all fabric in place
Press all the fabric into place making sure there are no bubbles Get tutorial here
Step 6: Store your items inside!
Who knew organization could be this easy! Get tutorial here