


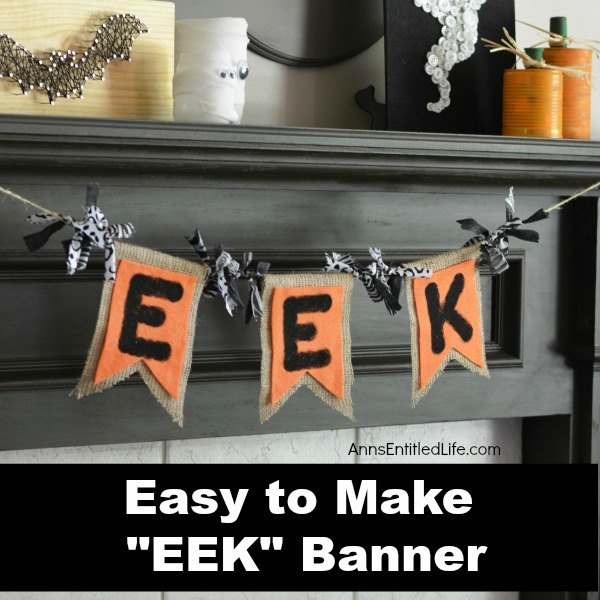
Easy to Make Halloween EEK Banner!
6 Materials
$3
30 Minutes
Easy
A simple to make Halloween banner perfect for mantel or window! Very versatile, you can make this banner as long, or as short, as you like to fit the area where you wish to hang it.
EEK Banner Directions:
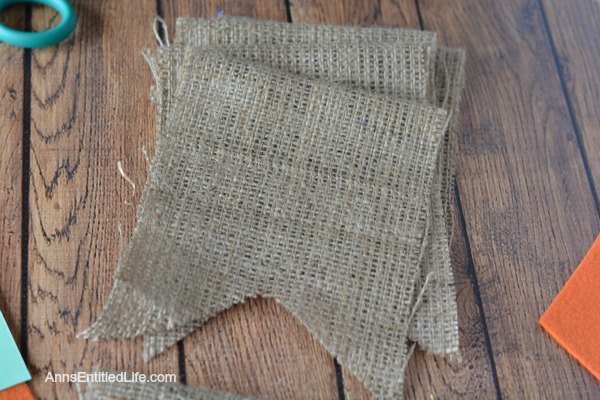
• Cut out three pieces of burlap to 5″ x 8″.
• Cut a small triangle out of the bottom of the burlap in order to make the flag shape. Make certain your triangle cutouts are all the same size (you could make a template with a piece of cardboard if you like).
• Fold over the top 1″ of burlap and hot glue it to to the back of the fabric. Be sure to leave the burlap open so there’s a pocket to thread your twine through. (Put a pencil or other straight long, narrow object in that space to make sure it stays open while you are hot gluing.)
• Repeat for all three pieces.
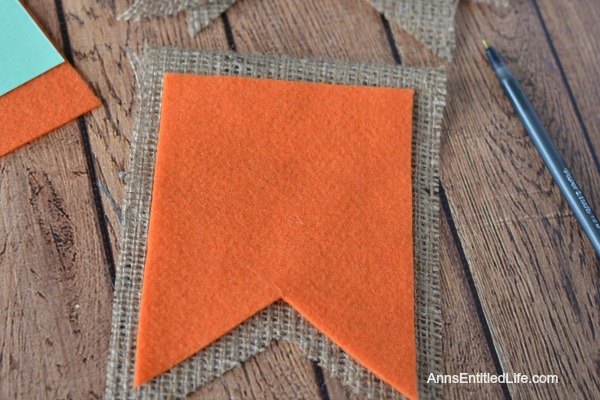
• Use a scrap piece of paper or cardboard and cut out a 4″ x 5″ shape. Cut a small triangle out of the bottom of the paper or cardboard. You want a flag shape. (see photo)
• Place paper (or cardboard) on top of your orange felt and cut out three pieces of orange flag-shaped felt (4″ x 5″)
• Center one piece of orange-flag felt on top of one piece of burlap-flag.
• Hot glue the orange felt onto the burlap.
• Repeat with all three pieces.

• Use a paint dauber and black paint to paint the letter E in the middle of the orange felt of your first flag.
• Use your paint dauber and black paint to paint the letter E in the middle of the orange felt of your second flag.
• Use your paint dauber and black paint to paint the letter K in the middle of the orange felt of your third flag.
• Allow to dry.
• Cut a piece of twine or ribbon the desired size of your space to hang it. Slipknot the ends.
• Find the center of your twine and thread the flag pieces onto the twine, centering the second E.
• If using scrap fabric, cut 20 pieces of 5″ x 1″ fabric scraps.
• If using 1″ wide Halloween ribbon, cut 20 pieces, 5 inches in length.
• Tie five (5) pieces of ribbon (scrap fabric) before each letter, and after each letter. You would like this to be symmetrical, so one set before the first “E”, one set between the first and second “E”, one set between second “E” and the “K”, and one set after the “K”.

Want more details about this and other DIY projects? Check out my blog post!
Comments
Join the conversation
4 comments
-
SO cute!!
-
This is a great project. I love quick, easy, and inexpensive crafts.


Frequently asked questions
Have a question about this project?