


Dressing up the Kitchen

by
Lauren
6 Materials
$150
4 Days
Medium
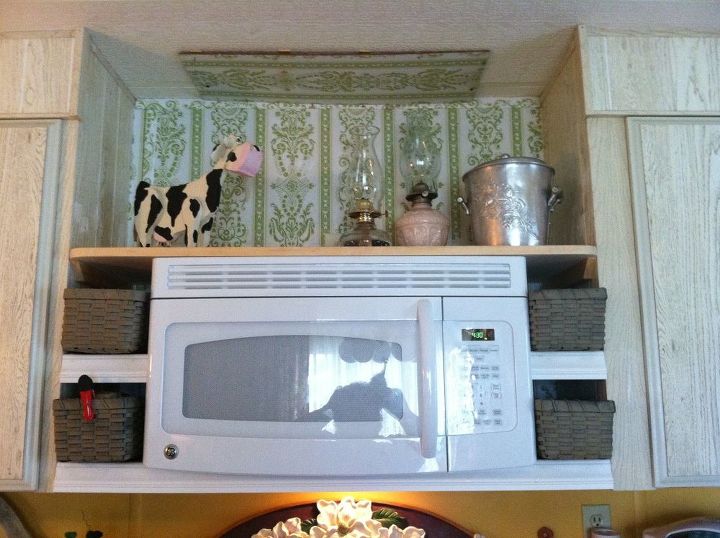
Moving a Microwave to the top, left a big area to be filled.. Baskets!  Thats the Ticket!
Thats the Ticket!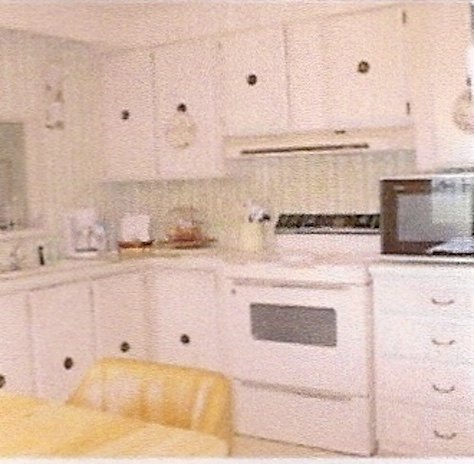
This photo was from the Home for Sale site... those are pot holders hanging there on the knobs in the middle of the doors.. and that Microwave, oh my! We read on the back that it was made in 1973 and weighed a ton... Also the hood fan shorted out the first time we tried to work it.. the Microwave blew shortly there after.. the rest of the house is great. lol
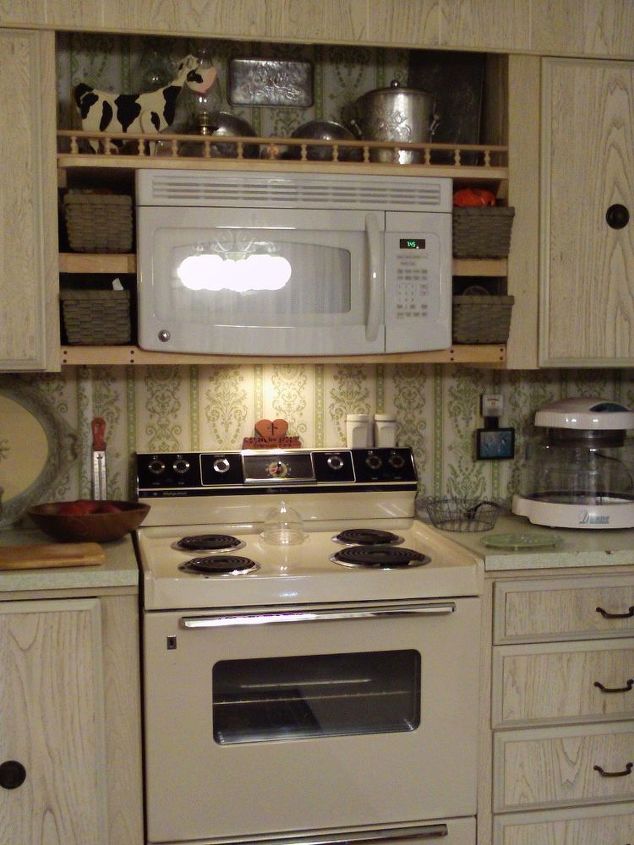
Got a friend to help us re do the area... His wife and I went shopping and when we came back, the guys were very apologetic that there were gaps on each side of the new set up ... So I had them put shelves in while we went back out shopping and got some long baskets.. Michaels had a sale... :) The top shelf rests on brackets, mounted to the side cabinets, so that we can take the board off and remove the Microwave from its bracket if needed..

They screwed the "boxes" they made into the wall of the cabinet next to it, and the back wall, then added the trim...The bottom "box" hangs so that the trim will fit all the way across the bottom and look like a full shelf... The Microwave is mounted on a bracket bolted to the back wall...and is pretty well free standing..
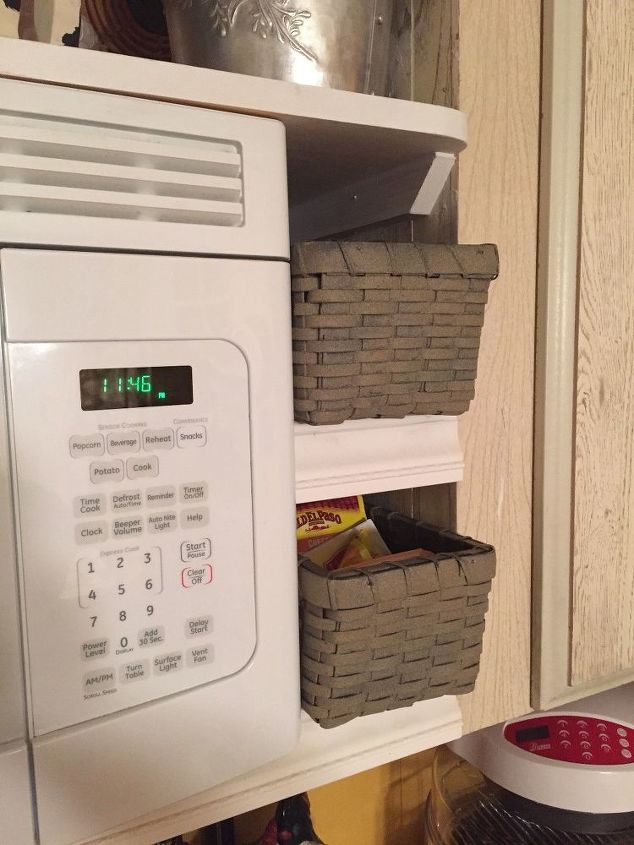
The Baskets fit nicely ....
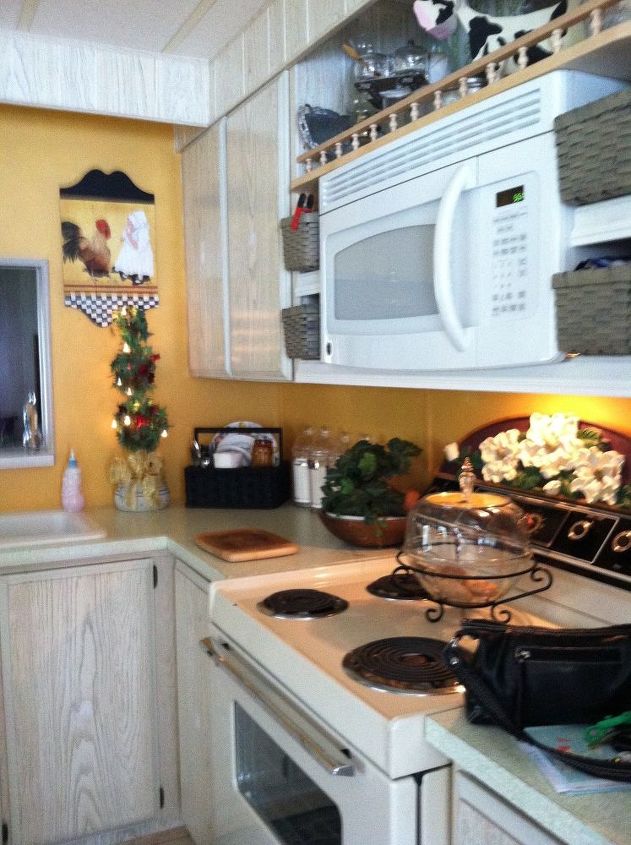
I sprayed the Baskets with a granite spray from Rustoleum and they are great for storing the bread and spices and the snacks.. The guys had put up a little rail of unfinished spindles and thought it looked nice... As you can see, I also stopped at Home Depot a few weeks later and got some white primer and a lovely yellow for the walls.. it took 3 coats of primer and 2 of the yellow to squash that Whoville wallpaper... Every time I looked at that paper I could find faces from Whoville...
See the faces.. I do not know what designer picked that paper out, but it had to go.. There was a hole in the ceiling from the vent fan, and since we had picked out a Microwave with built in fan, I just needed to patch that hole...The Baskets look really swell and underneath you can see a door topper I found at a Thrift store, I set that on the top of the stove.. I used some tack clay to hold it in place temporarily, but it might stay.. I really like it.. I also removed the spindle rail..
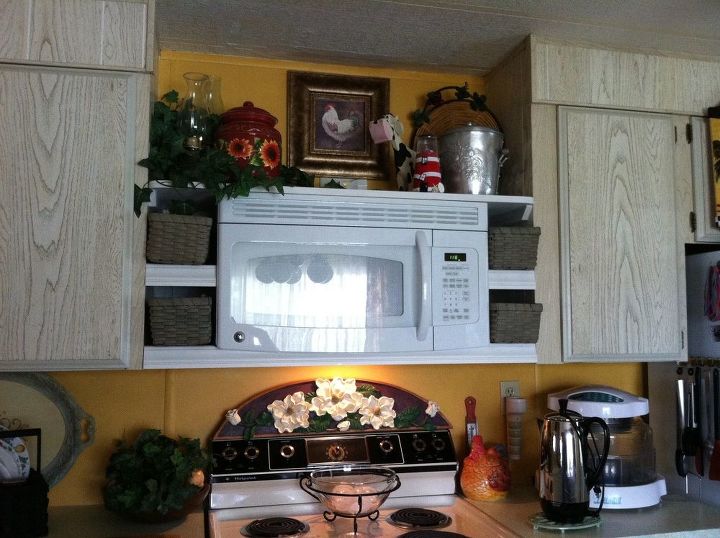
Finished painting and put things away... What a new look. I had planned on painting the cupboards, but once the wall paper was gone the cupboards look good.. Cleaned them up and removed the knobs.. filled the holes until I find just the knobs I want... I do not feel I lost space without those two cupboards over the stove. There was a fan up the middle and I am too short to reach very high.. The Baskets are so much more useful..
Comments
Join the conversation
3 of 4 comments
-
thank you Wendy !
-
I really like how this turned out. Great job. :)


Frequently asked questions
Have a question about this project?
Curious how the rest of the kitchen looks, and what kind of future dream projects you might have. This project is beautiful a great upgrade. Were the electrical services around the stove repaired and upgraded before starting?