


Easy DIY Pillow Cases - Simple Seasonal Decor
2 Materials
$5
30 Minutes
Easy
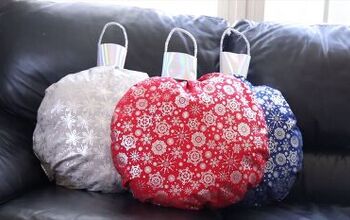
It's easy to change out your decor for each season with these Easy DIY Pillow Cases. No expert seamstress required. This project is very simple and takes very little time. See the full post HERE.
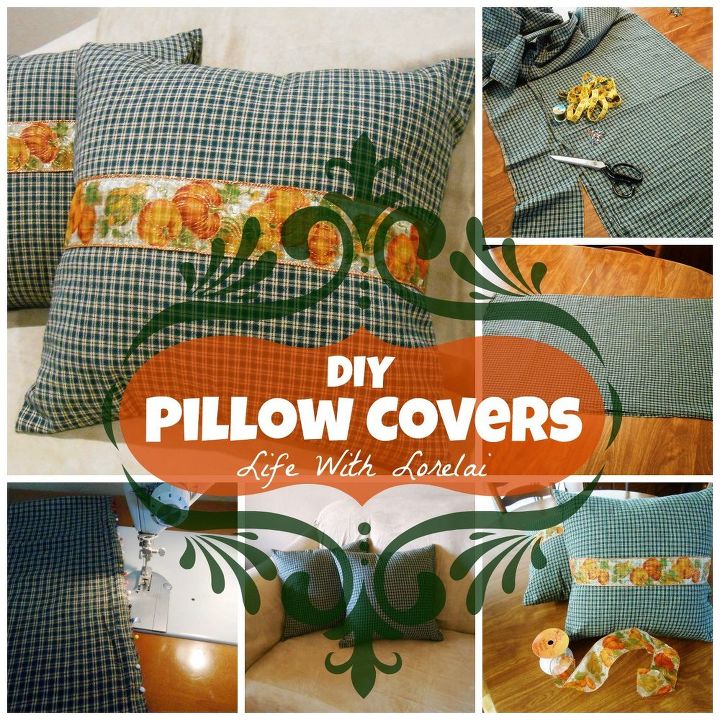
When we fixed up the living room after the flood repairs and renovations, we put neutral covers on our couch and loveseat. Rory and I found some really pretty pillows to brighten them. Since there is not yet any decoration at all on the walls, the pillows really made a big difference. We decided that having seasonal pillows would be something we could have fun with while changing the feel of the room a bit from time-to-time.
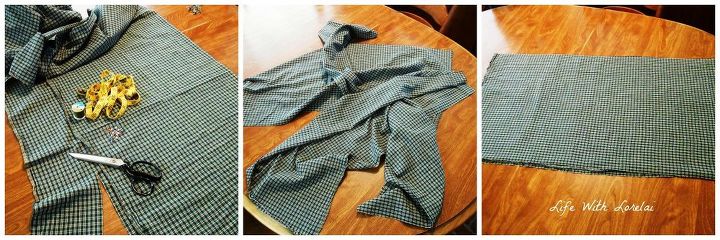
We found a 3-1/2 yard remnant on sale for $4.50. I quickly estimated if that would be enough to cover my pillows and decided we couldn’t pass it up.
At home, I scrounged through my mother’s old sewing stuff and found thread and snaps, as well as some leftover ribbon that I’d been saving. I measured the pillows and came up with a formula for how much material I would need to cover each pillow and just how I would go about sewing it. This is what I came up with…
How To Sew The Pillow Covers:
- Start with the short edges of the fabric. Turn fabric right-side down. Fold edge over to the wrong side of the fabric (about the width of the sewing foot). Stitch.
- Turn the edge over again and Stitch. This will keep raw edges from being exposed. Do both short edges of fabric this way.
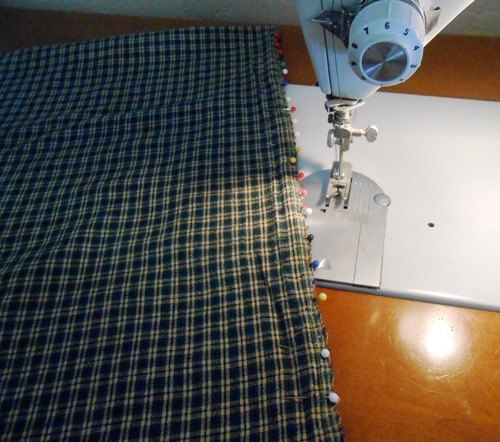
- Fold the fabric length-wise, right-side out, so there are 6 inches of overlap. Pin and stitch each side. (I lined up the edge of the sewing foot with the edged of the material.)
- Once both sides are stitched, turn the pillow cover inside out and stitch the sides again.
Flip pillow cover right-side out. Your sewing is finished!

Options:
You do not need to use anything to seal the overlap flap closed, but you could use snaps (like me) that would be hidden, velcro, buttons, or even ribboning. The possibilities are endless.
This is a basic, simple pillow cover that you can embellish how ever you like.
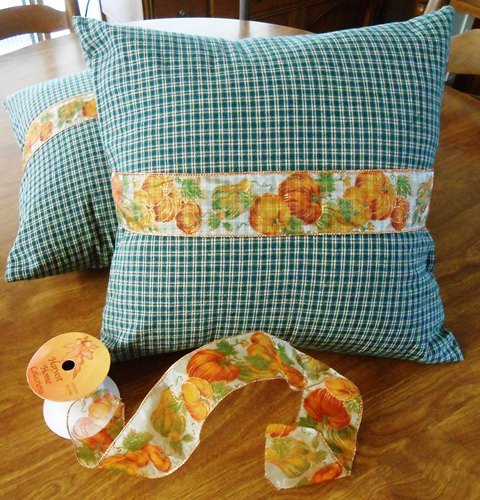
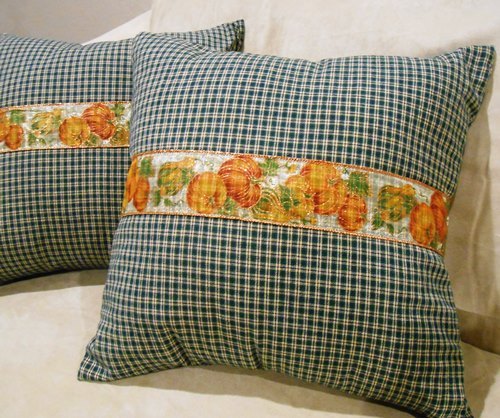
I decorated my pillow with a fall ribbon.
**NOTE – my ribbon was wired, so I pulled the wire out of the ribbon before sewing it around the pillow. Since I will be using these pillow covers for Christmas as well as Thanksgiving, I did not attach the ribbon to the pillow cover, but rather just sewed it around it so that it will slide off when I want to change the decoration. I hand stitched the ribbon at the edges so you cannot even see where I stitched.
So, for $4.50 Rory and I have new Fall pillows just in time for our Thanksgiving celebration!
For further instruction, you can see the complete tutorial HERE.

Want more details about this and other DIY projects? Check out my blog post!


Frequently asked questions
Have a question about this project?