


Kitchen Remodel Reveal
9 Materials
$12000
3 Months
Advanced
Oh my goodness you guys, for a 3000 sq. ft. house this kitchen was truly just an after thought. It was SO underwhelming when we first walked into this space. Not to mention the dingy vinyl flooring and outdated wallpaper. We lived here for about 3 months without a kitchen, going out to eat and/or using our faithful BBQ on the back patio. But it was all worth it!
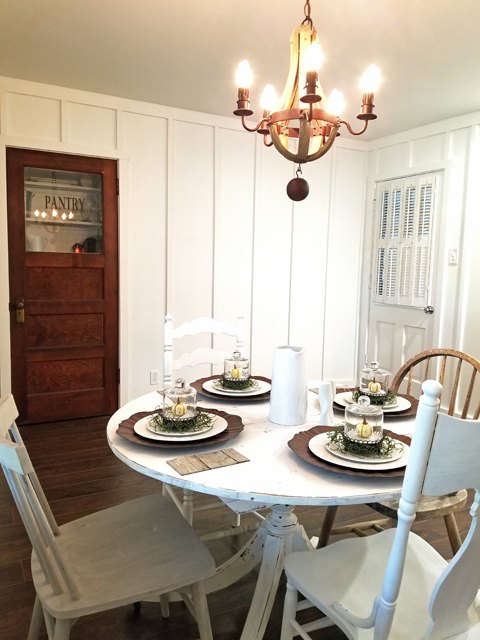
I can't wait to show you all the before and after photos of this project. But can I just tell you about this little dining set first? We found the base of the table for just $20 at a vintage market and then my hubs built the round top for it. I then painted it all white and distressed it. We picked up the mismatched chairs at a local shop. Each one came from a different Vendor. I only painted one, the rest I left just as they were. I am pleasantly surprised how much I love it and how well it fits in the space! We were way over budget on the kitchen reno, so I needed to be creative when it came time to decorate.
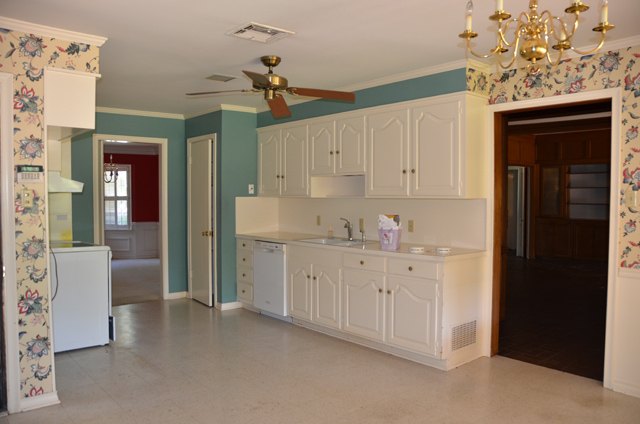
Before photo. This kitchen had not been touched since the 60's when it was built.

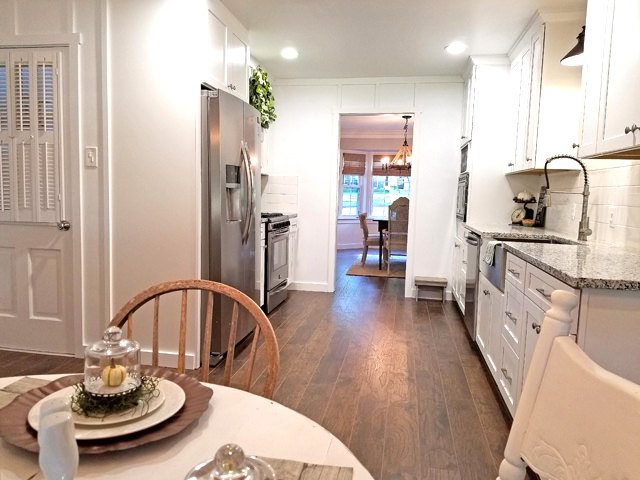
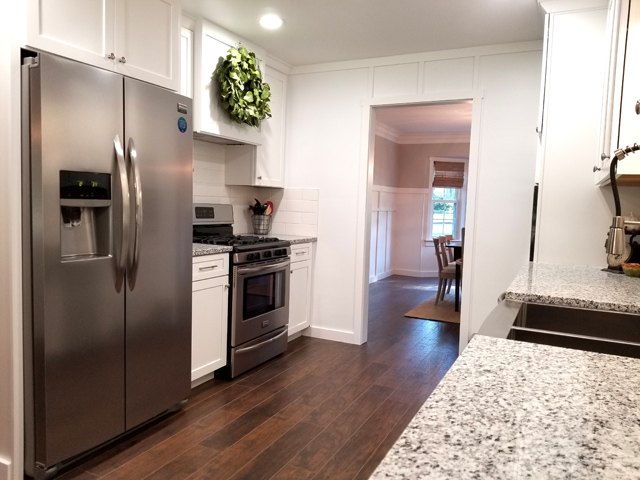
Whoa… this what I’m talking about! Open, bright and clean kitchen with loads of storage and counter space! White shaker style cabinetry reaching to the ceiling. Brand new stainless steel appliances including an apron sink. Large subway tile back splash and granite counter top. We continued with the same laminate flooring through the kitchen which ground the space.
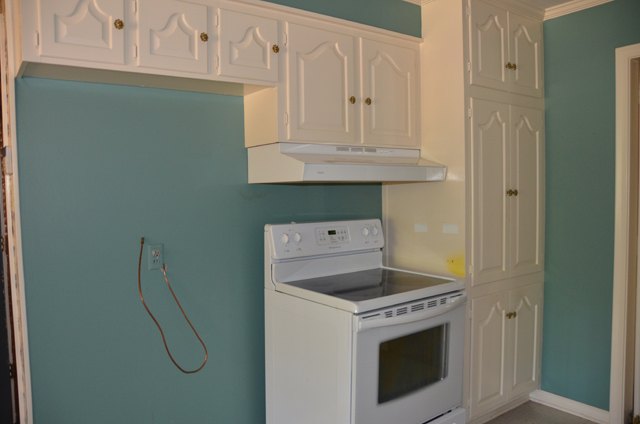
There was no counter space at all next to the stove. That had to be really inconvenient while cooking in this kitchen over the years.
We removed the large cabinet to the left of the stove and shifted things around a bit to add and 18" cabinet and counter on either side. It just makes more sense now!
We covered up the wall paper by adding new custom wood trim work throughout the entire kitchen. A fairly simple DIY project, just takes time. We also removed the ceiling fan and had our electrician add can lights with bright white light bulbs. WOW…what a difference!!!
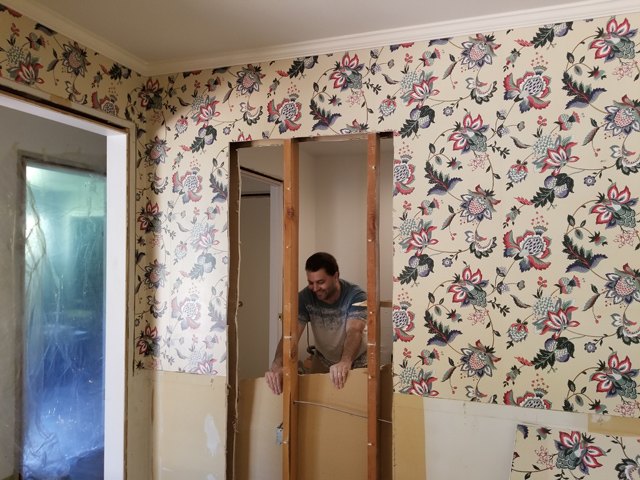
Basically this area was just a walking path to the “mother-in-law” suit/4th bedroom, 3rd bathroom and laundry. We made a drastic change here! We stole some space out of the large laundry room to add a much needed pantry.
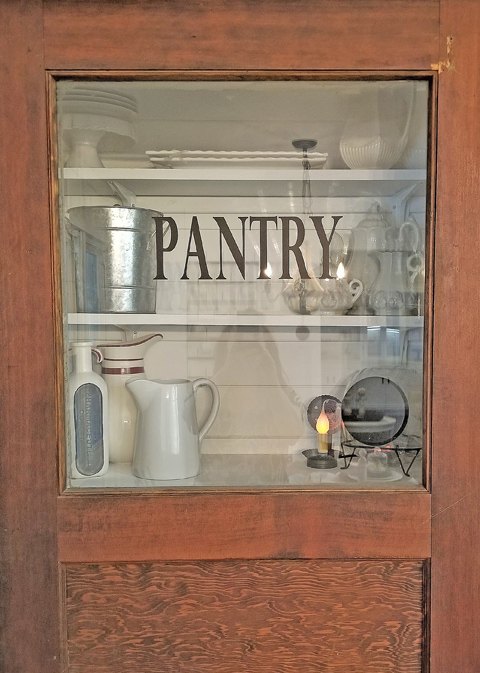
The vintage door for the pantry came out of a cabin we deconstructed on Spirit Lake in Idaho. I just thorough cleaned and waxed the door before we hung it. I’m hiding all the food items on the lower shelves and just displaying the pretty items where you can see through the window. Smiles!!!
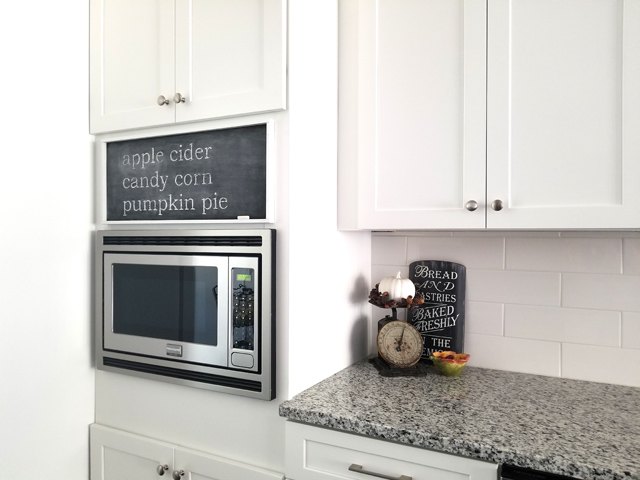
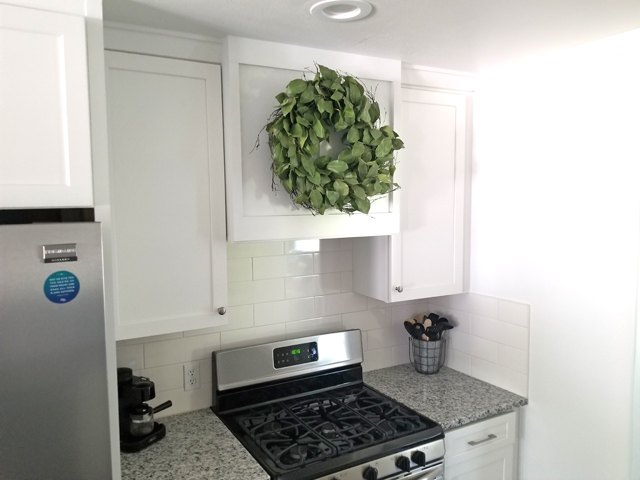
So…this little snack shack was tricky. When we ordered the end cabinet, it was suppose to come uncut (meaning, no pre-hole cut for the microwave). Unfortunately, the notes were never read. It came with a giant hole big enough for a built-in oven. We had to figure out a way to fill the gap and make it truly one-of-a-kind. I came up with the message board idea and the hubs got busy to make it happen! He amazes me every day with his talents!
The custom range hood was also a DIY project. It not only saved a lot of money, I got to design exactly what I wanted. Right now a Lemon Leaf Wreath adorns the front of it, but the decor can change with the seasons. I would love to have you stop by the blog to see more before and after photos. Blessings!

Want more details about this and other DIY projects? Check out my blog post!
Comments
Join the conversation
2 comments
-
Wow! What a gorgeous inviting space. I love the white and gray, so in right now!


Frequently asked questions
Have a question about this project?