


DIY Barn Door Shutters From Reclaimed Wood
4 Materials
$5
2 Hours
Easy
I have a wall in my front room that’s been bugging me for some time now. It has a nice, big, pretty window in the middle, but nothing I came up with to fill up the sides ever looked good. I finally got sick of looking at the empty space and decided I literally had to take matters into my own hands and DIY my own shutters.
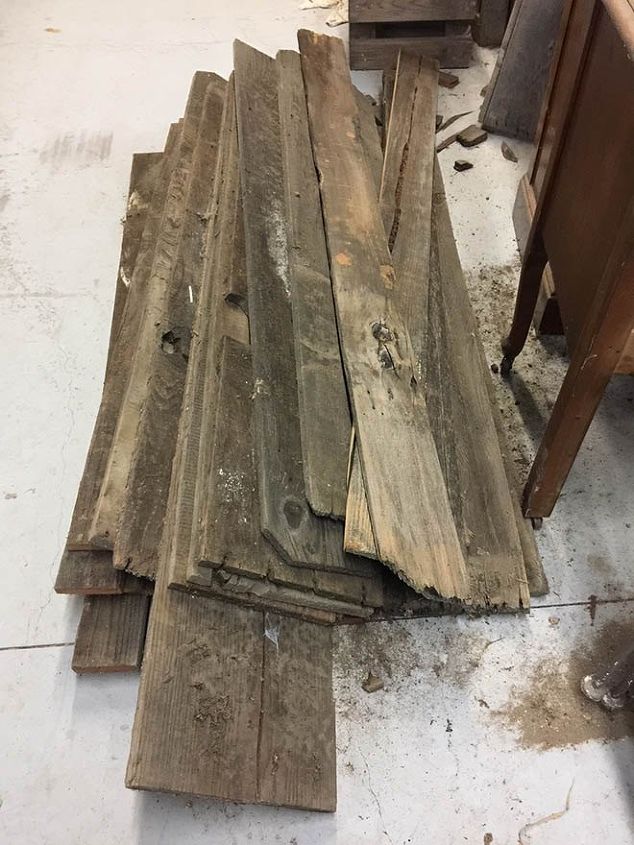
My husband always saves any fence boards that are being disposed of from his contracting jobs, so we got a good little pile of them in our shop.
I apologize for not having any pictures of the actual construction of the shutters, but I will try to be thorough in my description of the process.
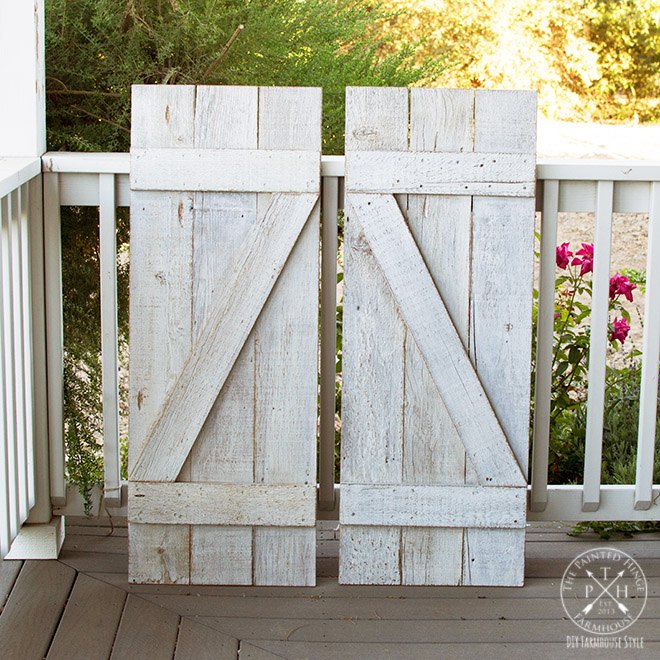
Each shutter measures 18 inches wide by 4 feet tall. We cut three boards for the back of each shutter measuring 6 inches wide by 4 feet tall using a table saw.
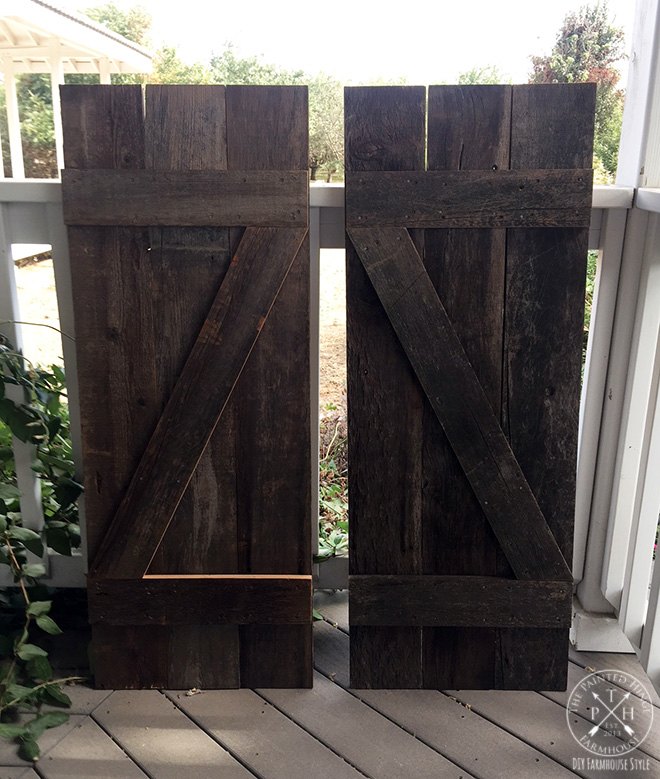
For the barn door “Z” pattern, we cut two boards measuring 4 inches by 18 inches and one board measuring 4 inches by 32 inches. The ends of the 4″ x 32″ board were cut at a 26 degree angle. We centered these 3 boards on the back boards and screwed them together with wood screws.
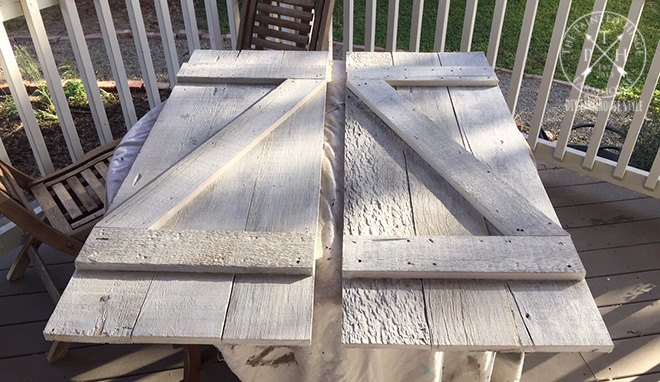
The paint I used to make my whitewash is FolkArt Chalk Paint in White Adirondack. You can get it on Amazon here. I poured some off in a bowl and watered it down to the consistency of milk, then I did two coats on each shutter. I used whitewash instead of straight chalk paint because whitewash will soak into the porous fence board wood and allow some of the natural patina to show through.
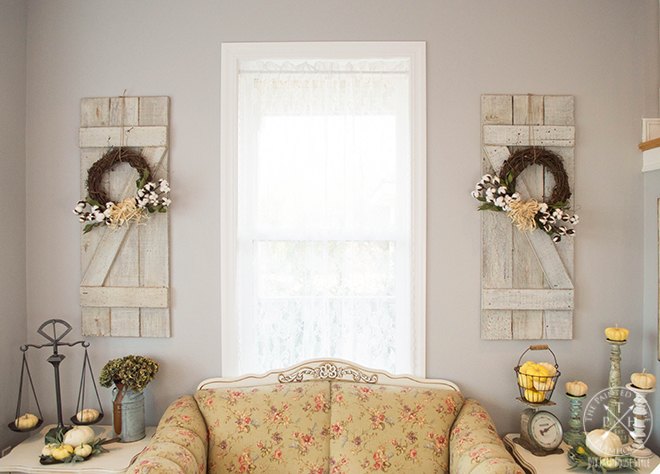
Once they were dry, I wasted no time hanging them up! It’s fall right now so I decorated the shutters with fall wreaths. I really love how they turned out and they fill up the space perfectly!
I hope you enjoyed my DIY Barn Door Shutters From Reclaimed Wood!
Please visit my blog The Painted Hinge Farmhouse at http://www.thepaintedhinge.com to see this and my other DIY farmhouse style projects!
Happy DIYing!
Michelle
The Painted Hinge Farmhouse
Resources for this project:
See all materials


Any price and availability information displayed on [relevant Amazon Site(s), as applicable] at the time of purchase will apply to the purchase of this product.
Hometalk may collect a small share of sales from the links on this page.More info

Want more details about this and other DIY projects? Check out my blog post!
Comments
Join the conversation
2 of 62 comments
-
Love this!
-
Very nice! - thank you for the inspiration.


Frequently asked questions
Have a question about this project?
Hello ! I love your project. Can you tell me how you washed the salvaged wood in order to prepare it for painting. The boards are obviously cleaned from the first picture taken, to the following pictures.
I love this idea. My hubs and I just bought a fixer upper and were doing everything by ourselves except for the furnace. There aren't any shutters on the house at all and I love this farmhouse look. You can't buy this kind of awesome. What would you suggest to put on for outdoor weather? They probably should be sealed with something..
OMGOSH, I love this, is these just indoor or can you. Use these outdoors too?