


DIY Shabby Chic Easy Crackle Vase Plus Decoupage!

8 Materials
$15
1 Day
Easy
I made this vase to see how it would look. I love how it came out so I wanted to share it with you and it's so easy to make. All you need is a paper napkin with roses, Mod Podge, Elmer's glue and some paints... that's it! You can use this as a decor piece or seal it with the dishwasher safe Mod Podge and then you can add real roses to make an amazing center piece for any occasion, party, gift, or dress up a spot in your home!
{
"id": "4442896",
"alt": "",
"title": "",
"video_link": "https://www.youtube.com/embed/_AFzjdT36tM",
"youtube_video_id": "_AFzjdT36tM"
}
{
"width": 634,
"height": 357,
"showRelated": true
}
I have also provided a very detailed step by step video if you want to watch that or just keep scrolling and follow these steps. Let's get started! 
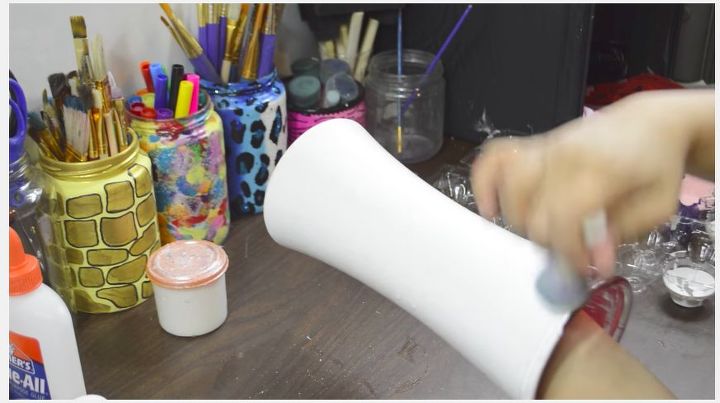
Using a pouncer brush and matte white acrylic paint, give the whole vase a coat.
This coat of paint will act as the primer. If you will be placing real flowers in this vase, give it a layer of dishwasher safe Mod Podge first, let it dry and then prime it with the matte white acrylic paint. I use Apple Barrel paints by plaid. Let that fully dry.
Tip: I like to set my pieces in front of a small fan so that they dry faster.
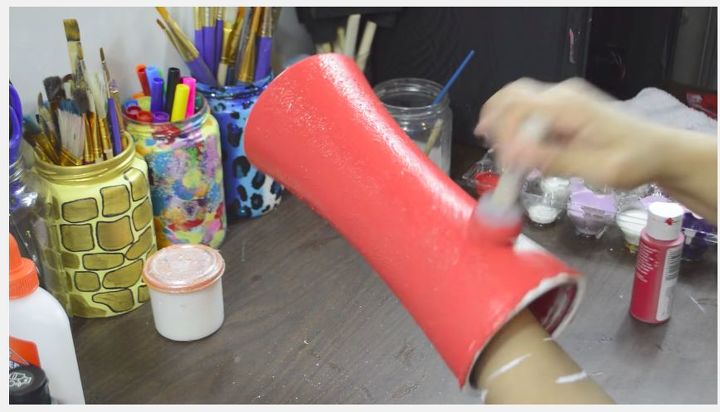
Now give the the whole thing a coat of whatever color you want the cracks to show through as. I wanted my cracks to be red. Use a pouncer brush.
Let that fully dry.
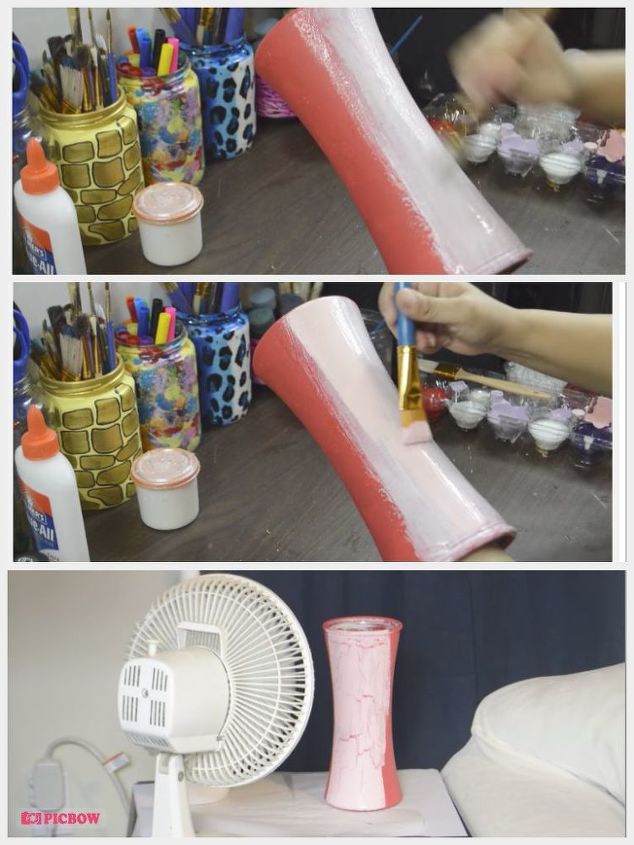
The next step is the crackle using the Elmer's glue (PVA or white school glue) Using a brush and Elmer's glue (any PVA or white school glue will work) Place a layer on a section of the vase. Immediately after placing the glue , place a layer of paint over the glue and immediately after that place in front of a fan to dry. YOU MUST PLACE IN FRONT OF A FAN OR USE A BLOW DRYER ON THE COOL SETTING, IN ORDER FOR THIS TO WORK.
Tips:
1.) Work quickly on these steps. You don't want glue to start drying before you've placed the paint over it.
2.) The more glue you use, the longer it will take to dry and therefore the bigger the cracks will be. (note that they will look like stretched cracks if you use to much glue)
3.) When layering the paint do not over work it. Glide the paint over the glue and once the brush feels like it won't glide, do not spread the paint you've placed, reload the brush and continue.
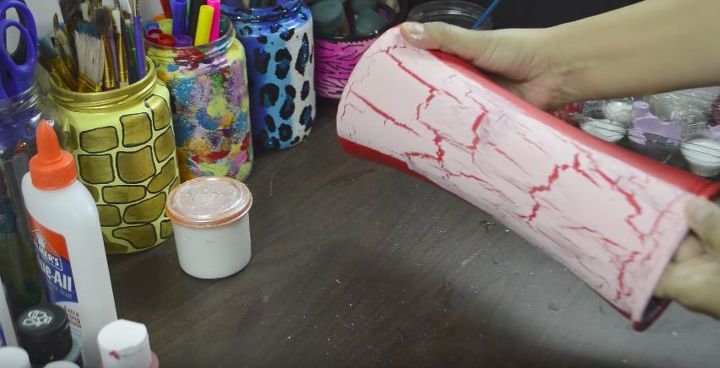
It should look something like this when it's all dry. Continue doing this all around the vase, in sections, until it's completely covered.
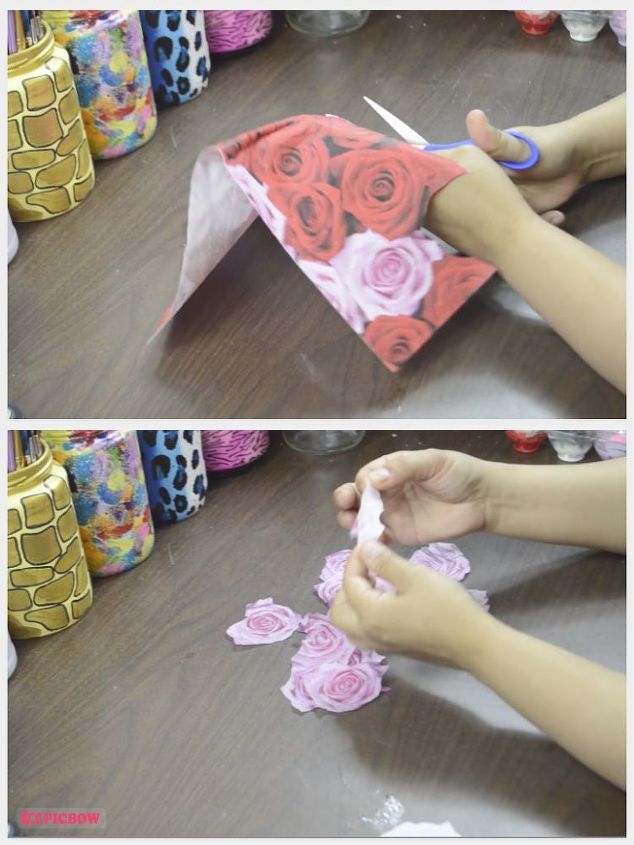
While the last section on the vase is drying, prepare all the rose cutouts.
Cutout all the roses from a napkin and then separate all the plies. Keep the printed layer and throw out the other layers.
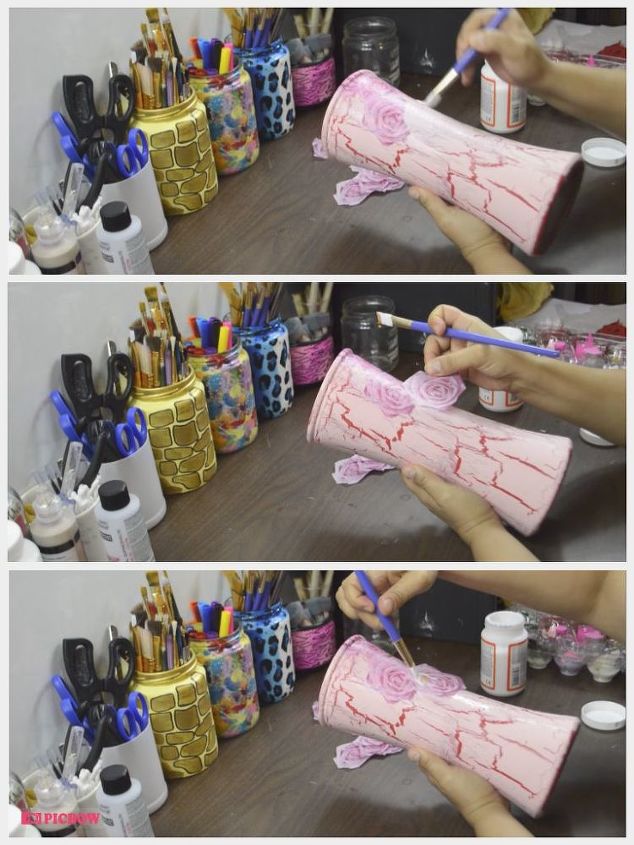
Now Decoupage all the paper roses onto the vase. Using a brush place some Mod Podge on the spot that you will be placing the rose at, place the rose and then cover it with more Mod Podge. Do this to all the roses and then let it fully dry.
Decoupage
de·cou·page
ˌdāko͞oˈpäZH/
noun
the art or craft of decorating objects with paper cut-outs.
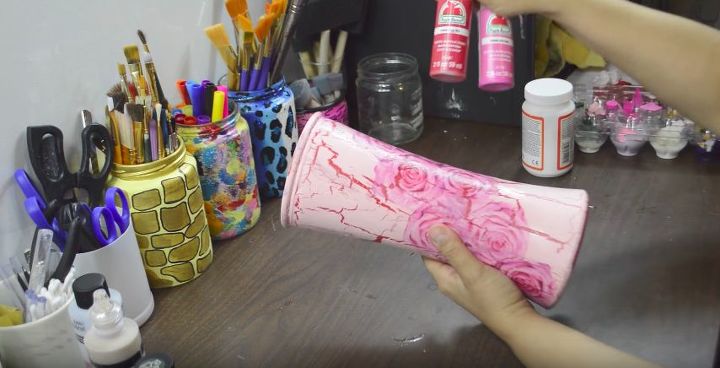
To give it that shabby chic look I added (smudged) paint, randomly around the vase.
I focused around the cracks, rim and base.
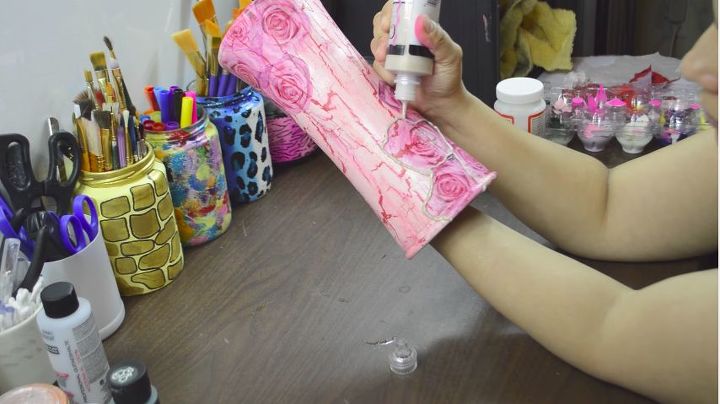
You could stop there and seal it with the dishwasher safe Mod Podge or if you like how mine looks, you could add puffy glitter paint to it. I outlined all the roses with gold glitter puffy paint and added it all around the vase randomly.
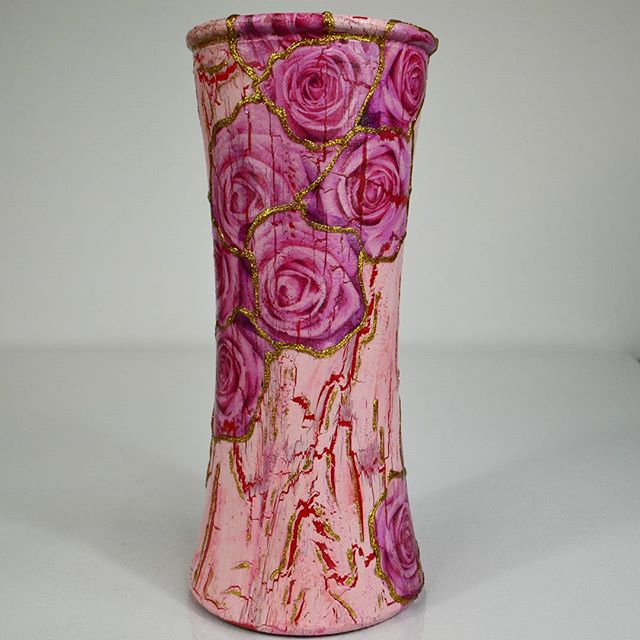
Once that's dry, you'll have a very shabby chic, beautiful, custom made vase! I love how easy and fun this was to make. Hope this was helpful and has inspired you to create something. Thanks for stopping by, happy crafting!
If you liked this DIY and want to check out more of my work, stop by my YouTube channel. Don't forget to say high! 
Resources for this project:
See all materials


Any price and availability information displayed on [relevant Amazon Site(s), as applicable] at the time of purchase will apply to the purchase of this product.
Hometalk may collect a small share of sales from the links on this page.More info
Comments
Join the conversation
2 comments
-
Very interesting and pretty. I may try this. Love crafts.


Frequently asked questions
Have a question about this project?