


DIY Tin Kitchen Blacksplash

by
Jenni Ingram
5 Materials
$75
2 Hours
Easy
If you're following my home makeover - you've seen my kitchen transformation include new WHITE cabinets. They were a golden oak and I painted them! Now it's time to get rid of the beige color and keep the makeover going. So I'm going to show you how I added a gorgeous tin backsplash. It really brightens my kitchen and adds a glamorous texture. Let me show you how!
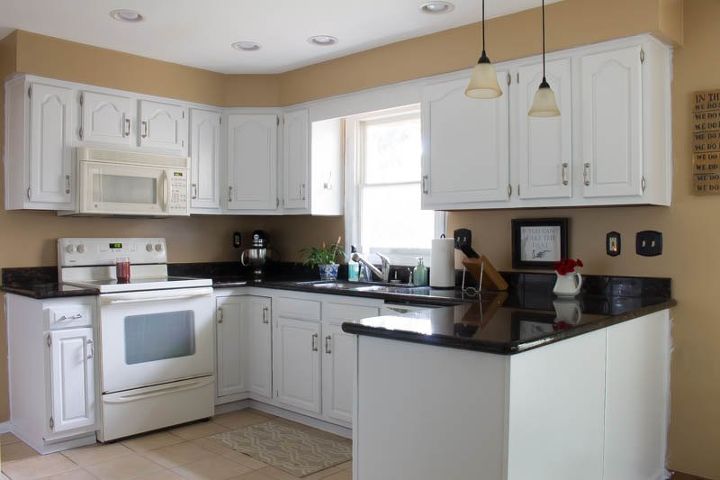
Here is my kitchen before -- very beige. The first thing we did is paint it a soft gray. We made sure to paint around the edges of where the backsplash will be.
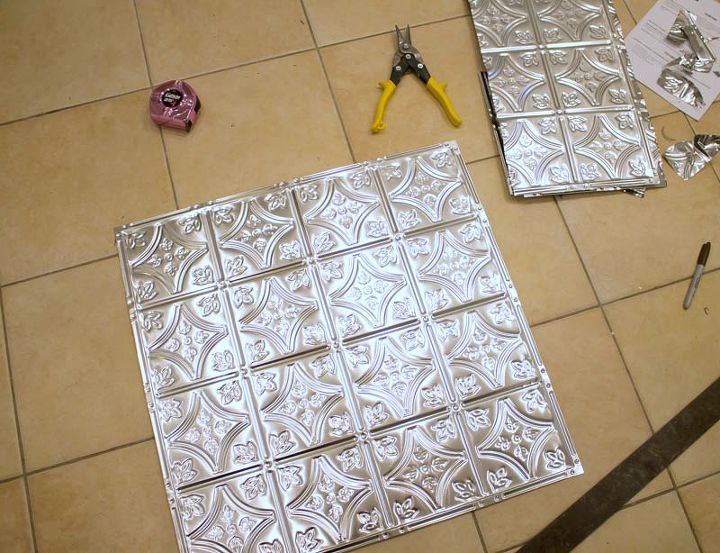
Installing the tin was surprisingly easy. My full blog post has my supplier for the tin pieces. There are tons of colors and patterns to chose from. The tin comes in 24"x24" panels.
All you need to do is measure and cut it to size. Be sure to make your markings on the BACK side of the panel. Tin snips are going to be your best friend for this project! (Be careful!)
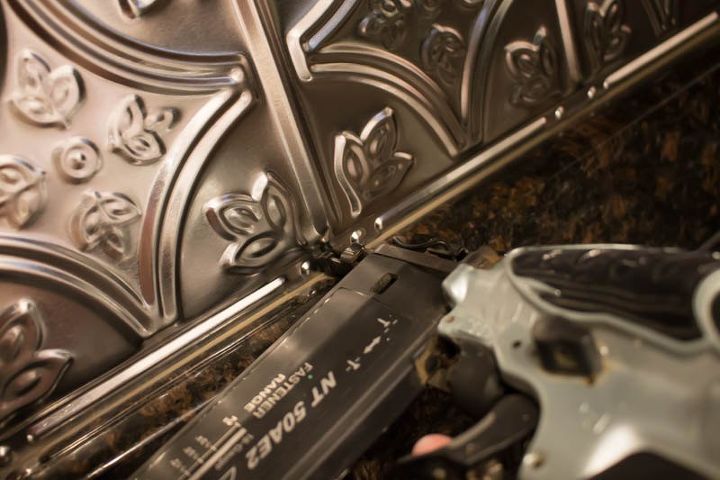
Once your cuts are made, you just nail it to the wall.
I chose not to use Liquid Nails just in case I wanted to remove this at some point, I didn't want to wreck the drywall.
I used my brad-nailer and 1" nails, and just popped some nails along the edges. Worked perfectly.
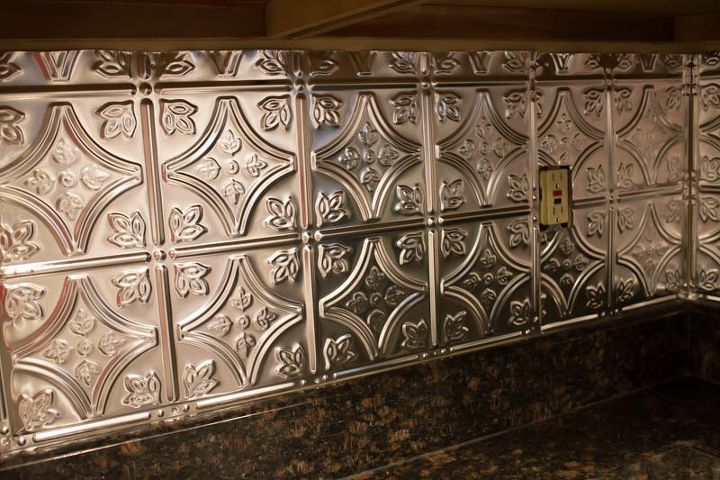
Bam! Instant difference, am I right?! For the light switches and outlets, I measured where they would be and drilled a small hole through the tin, then used the tin snips to cut the piece away.
I still need to get switch plates and change out these outlets, but I was just so excited to show you, I couldn't wait!
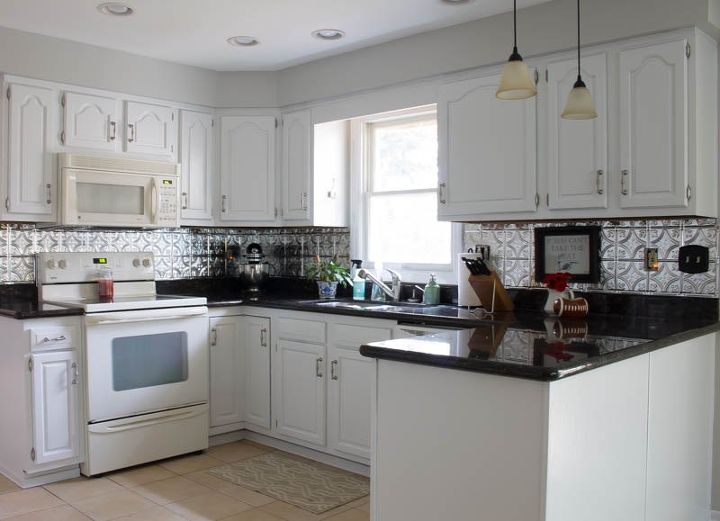
And here's the kitchen, in its new gray and white glory! I love the tin because not only is it bright, but it's just the right amount of shiny bling!!
Woah, right? The light just bounces around the kitchen now, it's so much brighter!! I love it!
My of my home transformation is coming via my blog! You can subscribe here to get all the fun DIY updates!
Click on the blog link below to see more photos of my kitchen with its new gorgeous backsplash!


Any price and availability information displayed on [relevant Amazon Site(s), as applicable] at the time of purchase will apply to the purchase of this product.
Hometalk may collect a small share of sales from the links on this page.More info
Want more details about this and other DIY projects? Check out my blog post!
Comments
Join the conversation
2 of 88 comments
-
I have seen plastic 24”x24” tiles that LOOK like tin, with a metallic coating, at Home Depot. Might be easier to cut. I love how this turned out!
-
Makes the whole kitchen look larger
Very nice and looks pricey


Frequently asked questions
Have a question about this project?
I have been considering this for a long time but wonder on how to clean it? Behind the top of our stove can get quite greasy at times.
Is it possible to install the tin over a tile backsplash?
Can this be done over a tile backsplash?