


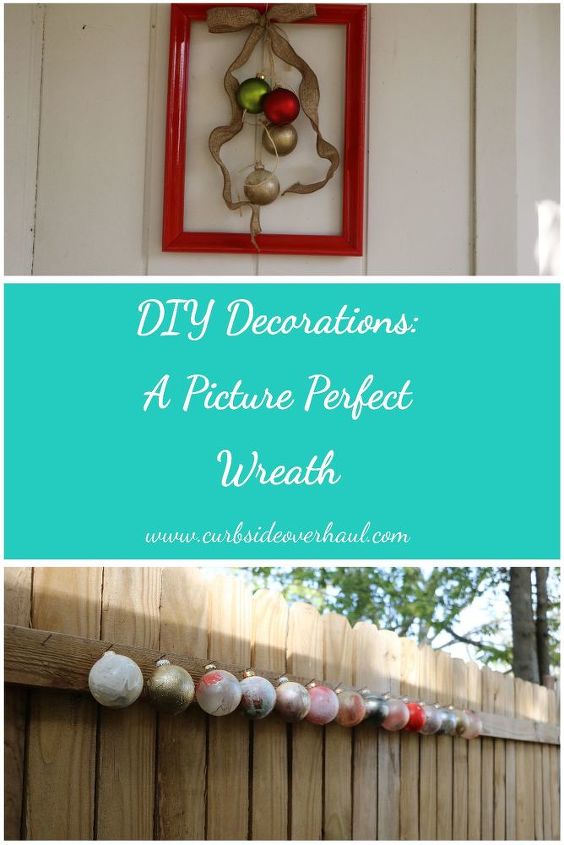
How to Make a Picture Perfect Wreath
8 Materials
$25
1 Hour
Easy
This Repurposed Christmas Wreath is part our round two of our handmade Christmas with DIY decorations. This week, we continue the same theme with our Picture Frame Christmas Wreath and Hand-Swirled Christmas Ornaments.
If you stumble on this post at another time of the year, feel free to use colors for that season.
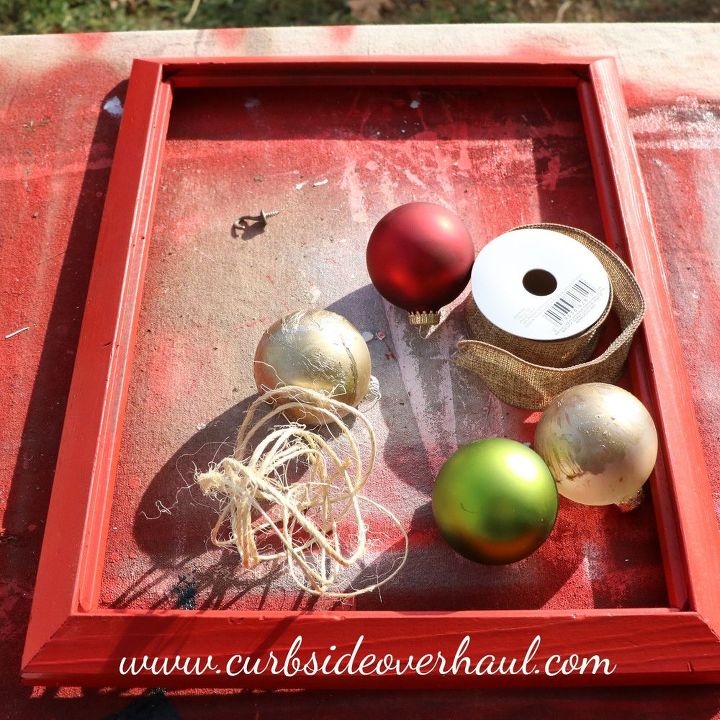
Get your materials ready.
Start with your frame, wiping it down to get rid of all the dirt and grime.
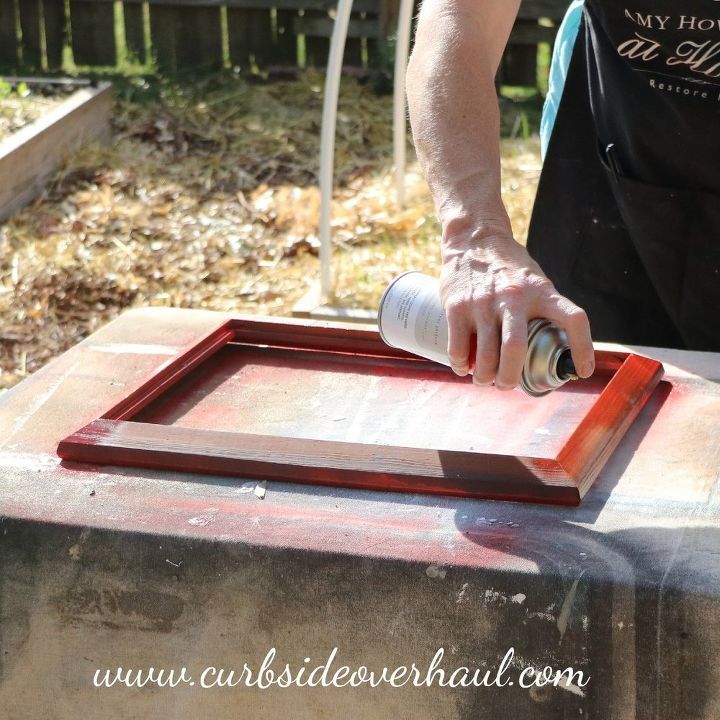
Step Two: Paint with Spray Lacquer
Shake your spray lacquer then start at the top of the frame and work your way down with long clean strokes. We used Brisson Red Spray Lacquer to get this shade of red.
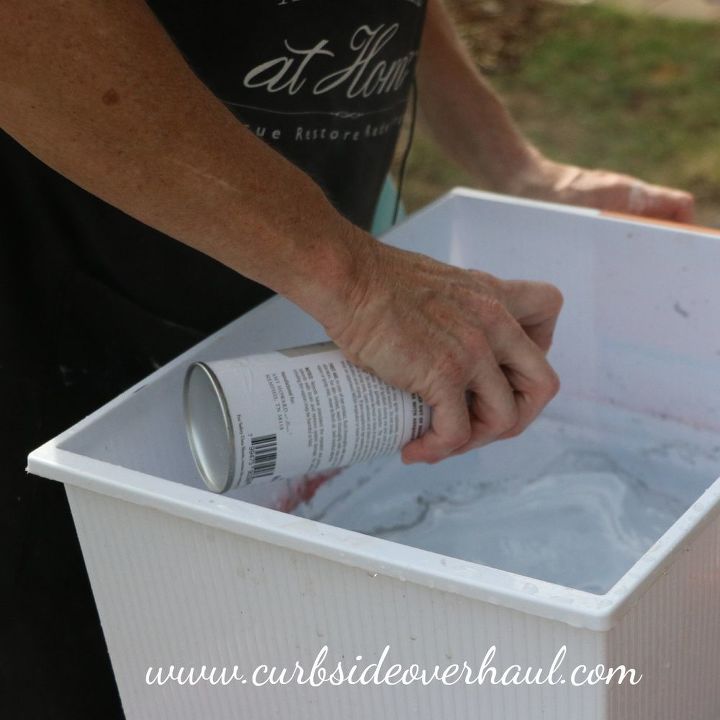
After after you wipe down your ornaments with Clean Slate, you’re ready to hand-swirl your Christmas ornaments. You can do this a number of ways. You can either fill your spray lacquer lid and then pour the spray lacquer into a water. Or you can you spray the paint right into the water. Immediately, the lacquer will start to harden and make a stretchy consistency. You can experiment to see what textures you like better. Times can vary between immediately dunking the ornament and waiting about about 10 seconds.
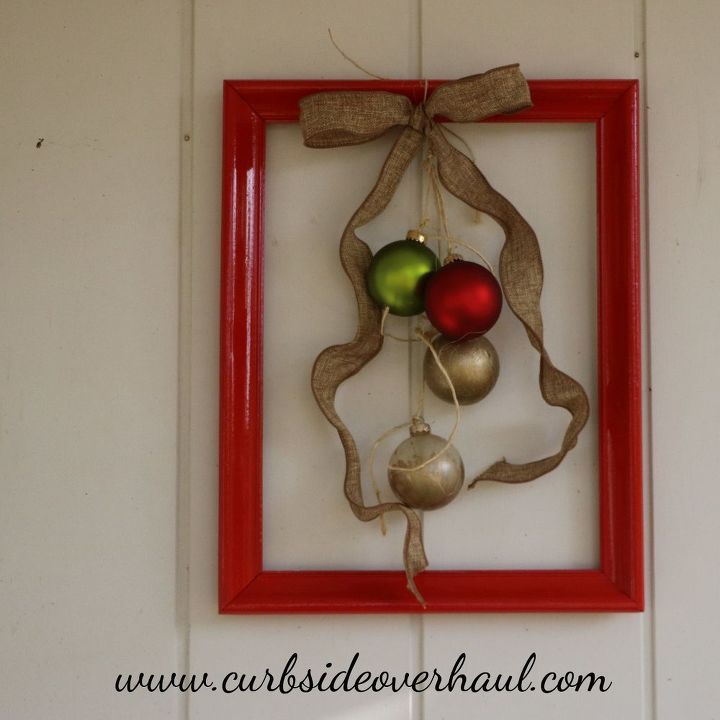
Once you have your ornaments ready, we chose two painted ones and two plains ones, you can start putting together your wreath. Tie a piece of jute string around the ornament hanger and tie it to the top of the frame, using various lengths of string.
We are on round two of our handmade Christmas with DIY decorations with our Picture Frame Christmas Wreath and Hand-Swirled Ornaments.
{
"id": "4481418",
"alt": "",
"title": "",
"video_link": "https://www.youtube.com/embed/X_VjJdAH7EE",
"youtube_video_id": "X_VjJdAH7EE"
}
{
"width": 634,
"height": 357,
"showRelated": true
}
Resources for this project:
See all materials


Any price and availability information displayed on [relevant Amazon Site(s), as applicable] at the time of purchase will apply to the purchase of this product.
Hometalk may collect a small share of sales from the links on this page.More info

Want more details about this and other DIY projects? Check out my blog post!
Comments
Join the conversation
4 of 25 comments
-
Love it! Perfect for those nail holes in the wall when I take down art to make room for the tree. I've hung extra stockings there in the past, but this is so much cuter & gives me lots of crafting & decor ideas. Thanks for sharing! ~ Jackie
-
Yes I will try this, simply brilliant!


Frequently asked questions
Have a question about this project?
Will the laquer make the bulbs less breakable? With them hanging down like you have shown it looks like the wind could blow them around.