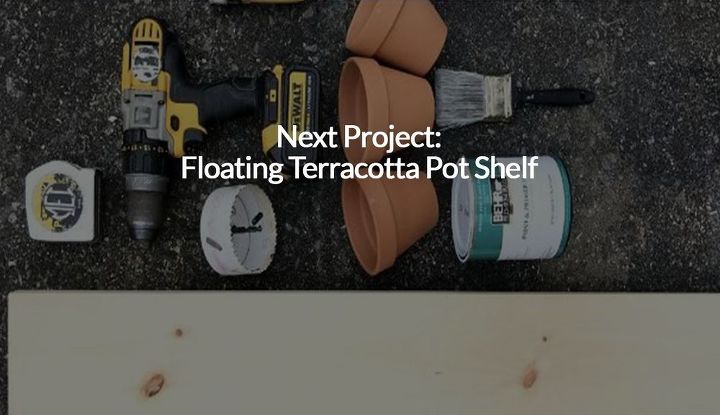
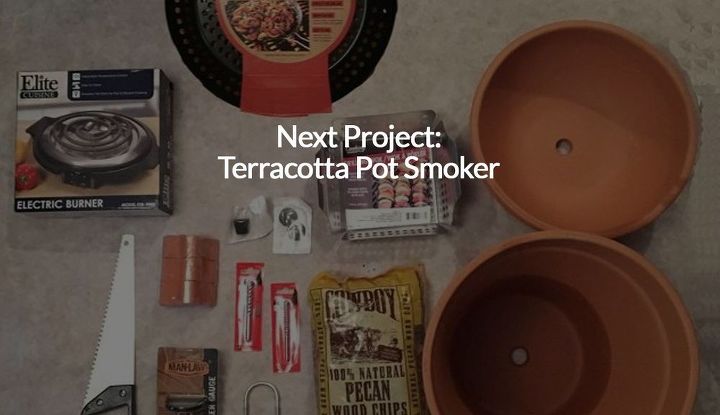
3 Ideas To Use Terracotta Pots You Definitely Haven't Seen Before
Step 1: Screw two bolts onto a threaded rod
Screw them about an inch down, and then the nuts in the opposite direction to lock them into place. Get tutorial here

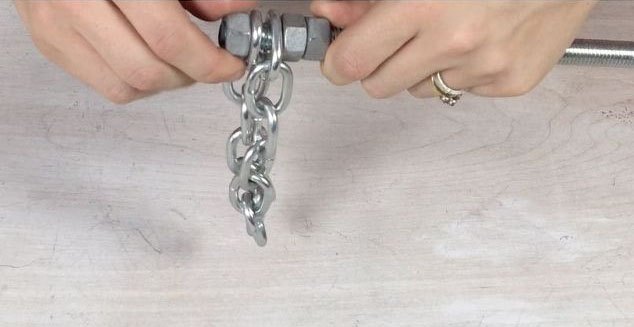
Step 2: Secure the link chain around the rod
Take a link chain (about 11-12 links) and place each end link around the threaded rod and secure it into place. Get tutorial here
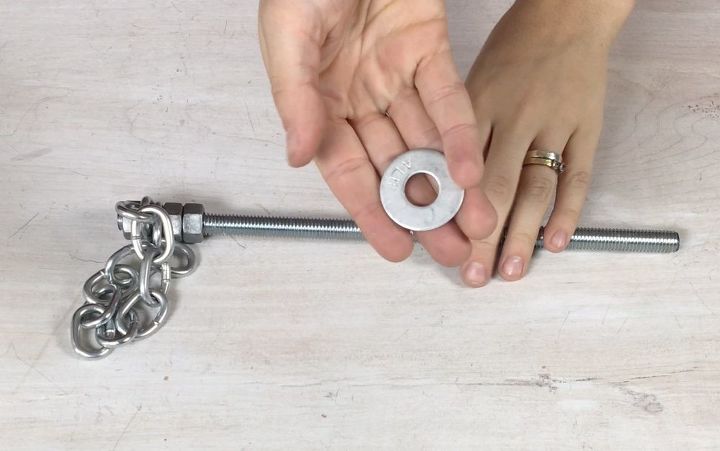
Step 3: Place a washer under the nuts
Feed the threaded rod through the washer hole, so that the washer rests under the 2 nuts. Get tutorial here
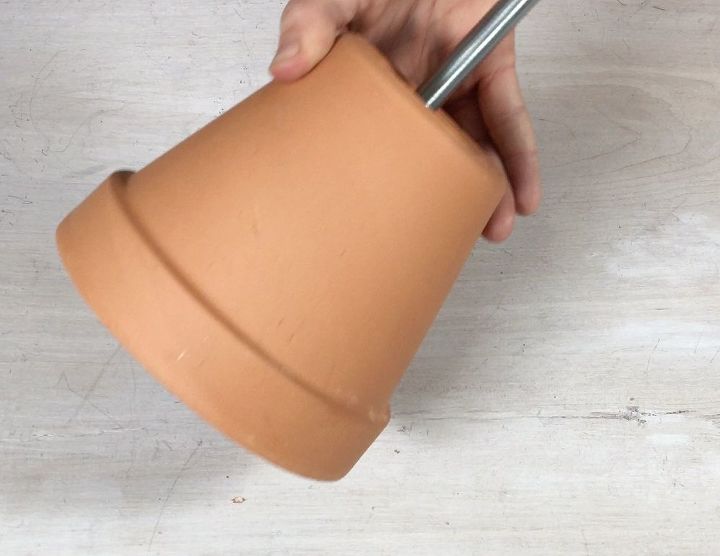
Step 4: Feed the rod through a terracotta pot
Grab a 6" terracotta pot and feed the rod through the drain hole so that the open end rests away from the chain. Get tutorial here
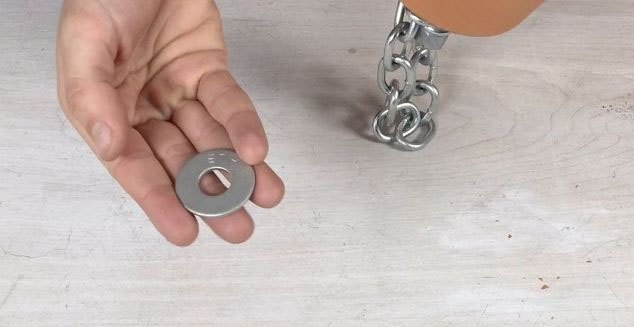
Step 5: Secure another washer on the rod
Place another washer on the rod and follow up with a nut to hold it and the pot in place. Get tutorial here
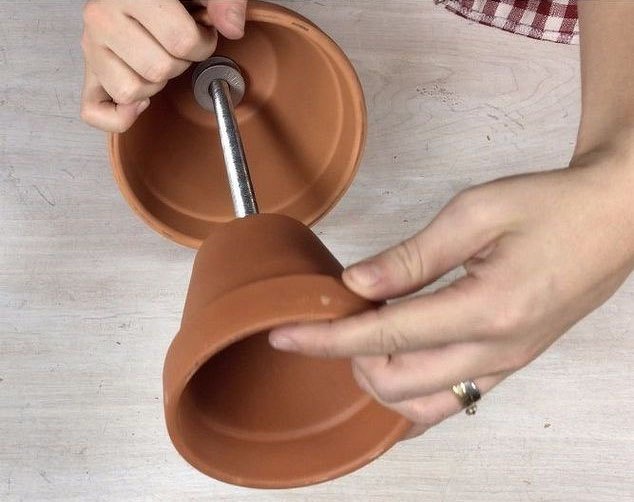
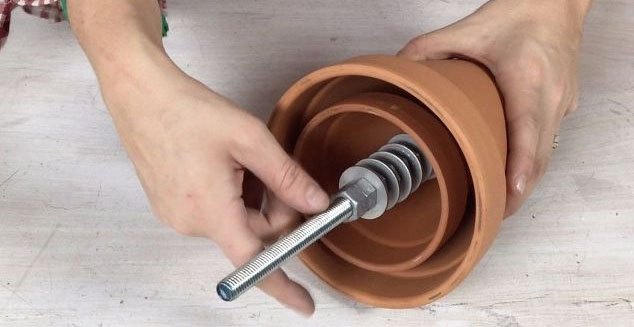
Step 6: Add the smaller terracotta pot
Place another washer over the rod followed by a 5" terracotta pot. Get tutorial here
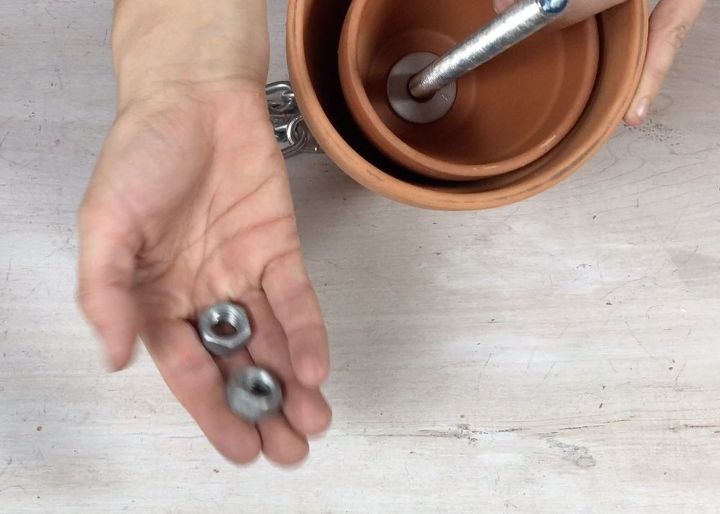
Step 7: Secure the pot with washer and nuts
Place another washer on the rod. Secure the second pot and the washer in place with 2 nuts. Get tutorial here
Step 8: Add six sets of washers and nuts
Create 6 sets of alternating washers and nuts, and then add one more bolt to the end to keep them all in place. Get tutorial here
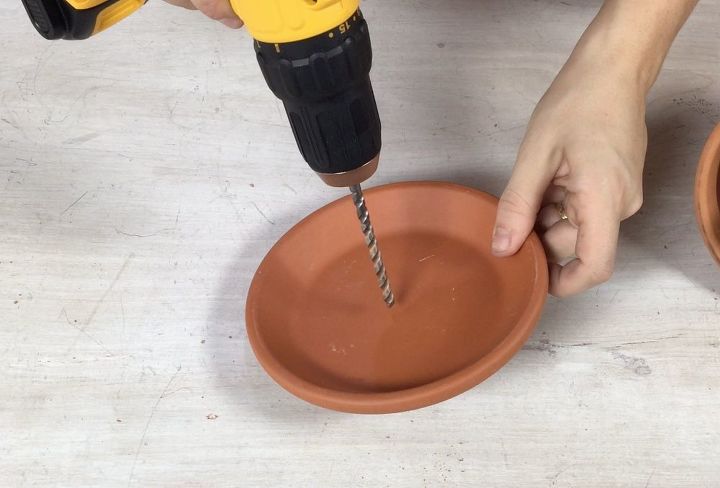
Step 9: Drill a hole in a terracotta saucer
Grab a terracotta 6" plate and drill a hole through the center that is large enough for the rod to fit through. Get tutorial here
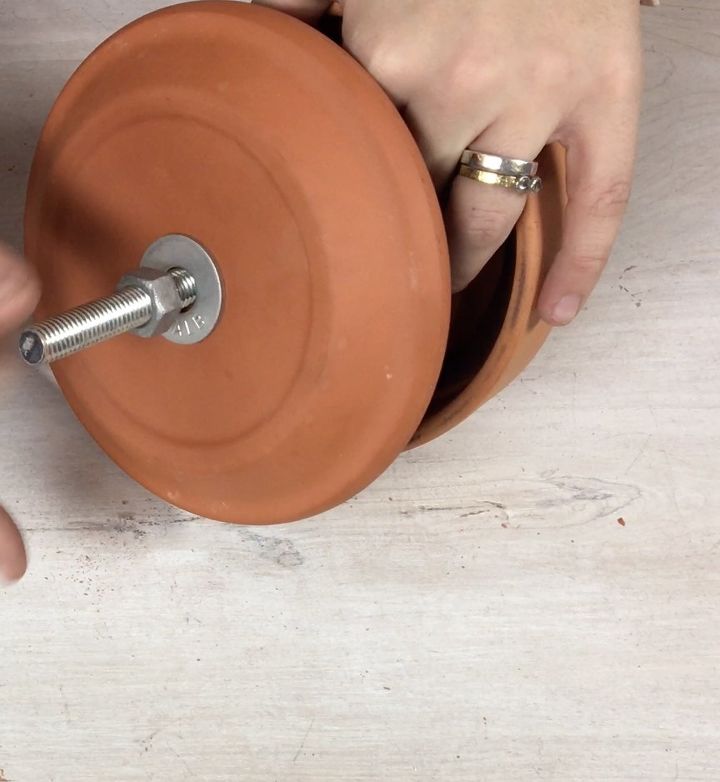
Step 10: Secure the saucer onto the rod
The saucer can be adjusted to rest higher or lower on the rod to create different temperatures. Get tutorial here
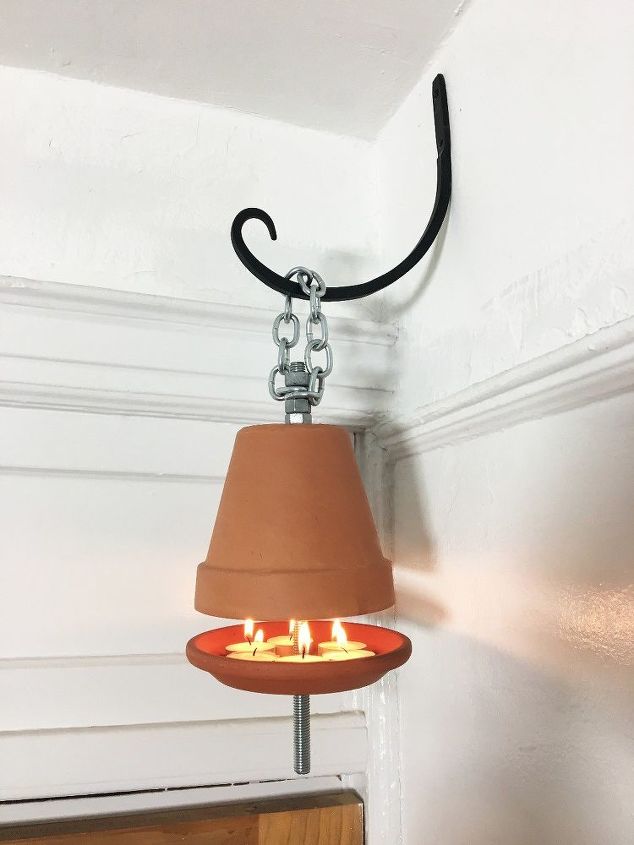
Step 11: Place real tea lights on the saucer
Place tea lights on the terracotta saucer so that they fill any empty spaces (about 5-6). Get tutorial here

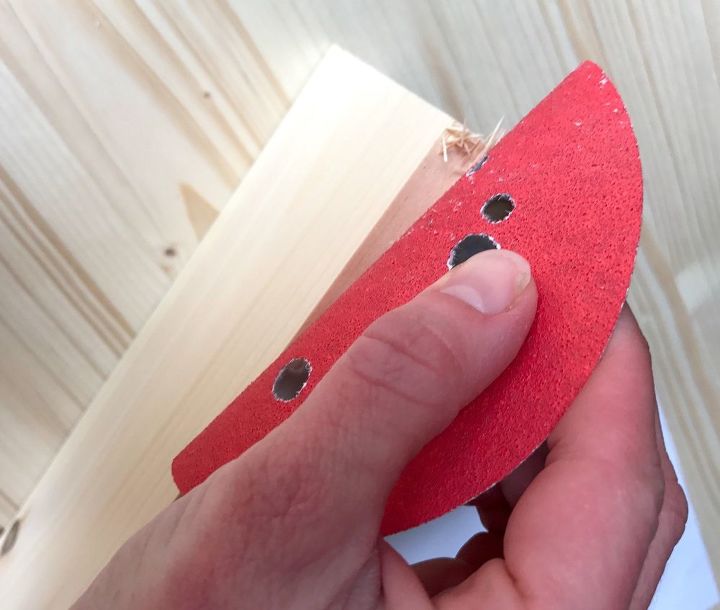
Step 1: Cut and sand wood according to size
Make sure you have a nice, clean final piece of wood. Cut it to desired size and sand off smooth. Get tutorial here
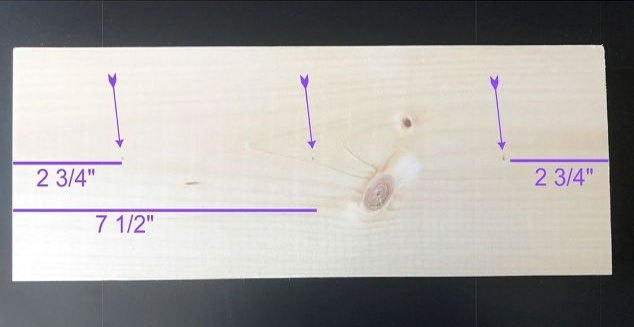
Step 2: Measure and mark three holes
Start from the sides and then mark the middle point. Get tutorial here
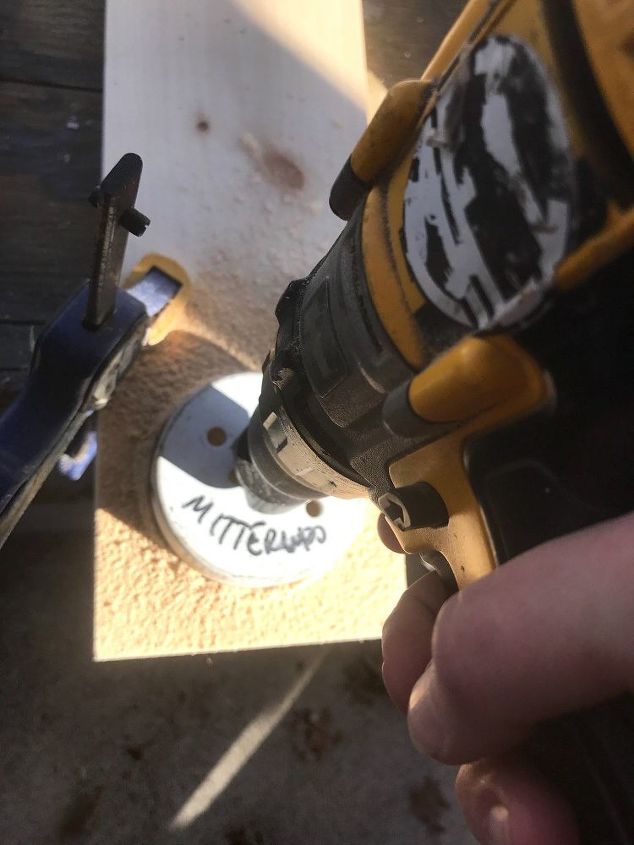
Step 3: Drill holes for the 4" pots
You can use a 3 3/8" hole saw attachment for your drill. Get tutorial here
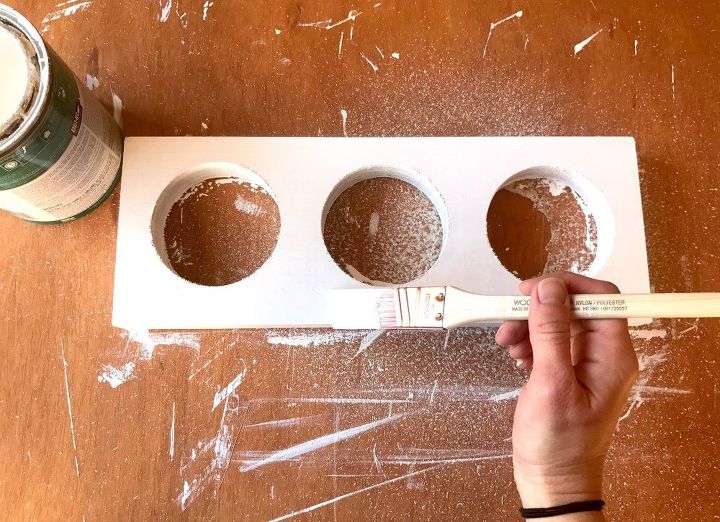
Step 5: Apply two coats of paint to the shelf
Make sure to get all the nook and crannies, especially on the inside of the holes and the outer edges. Get tutorial here
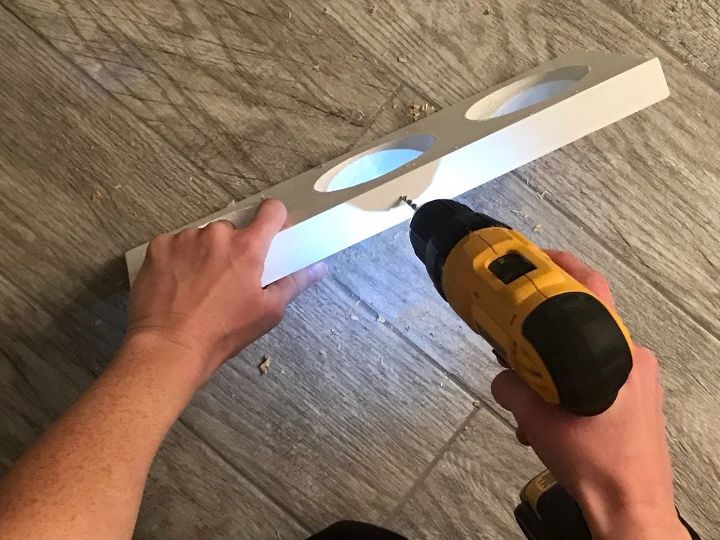
Step 6: Drill hole and attach to the wall
This is for the screw that would mount the shelf to the wall. Get tutorial here
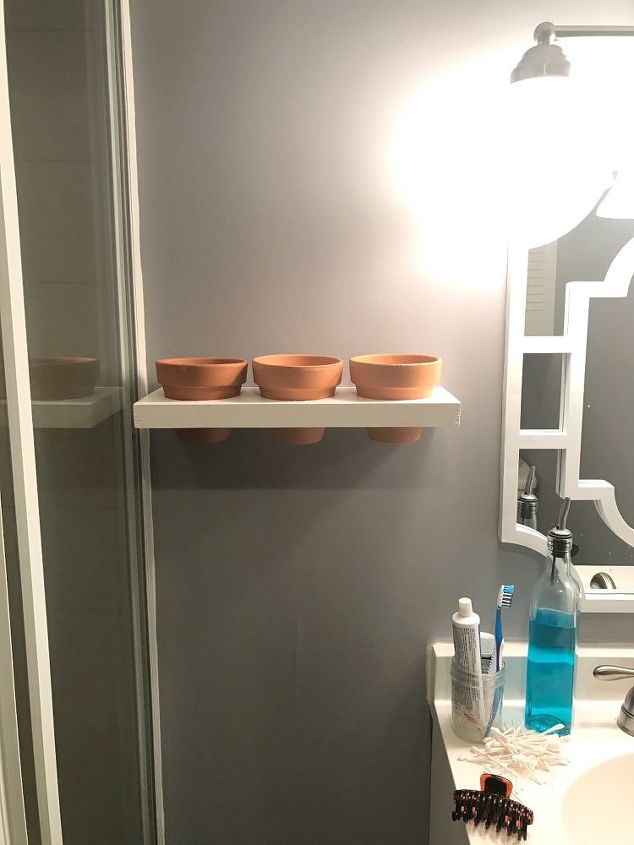
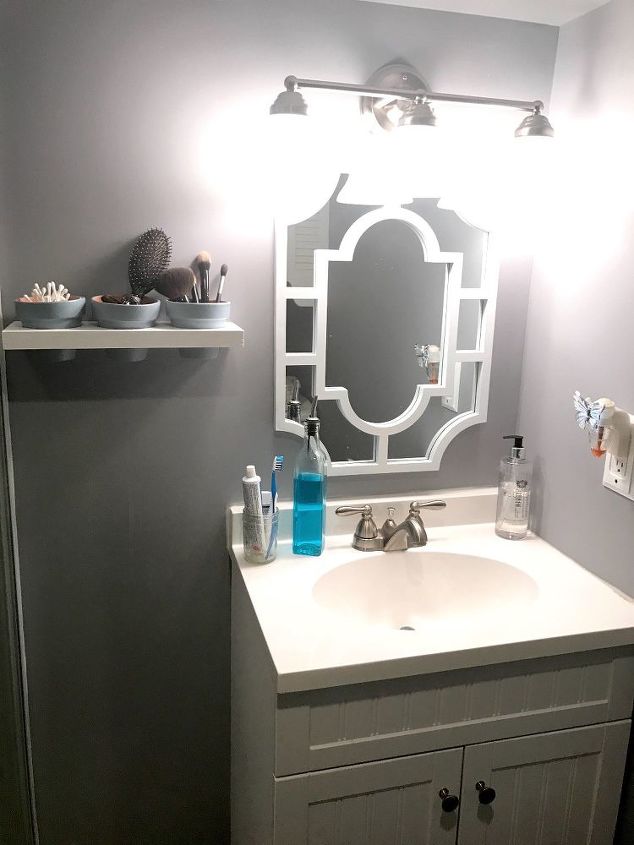
Step 7: Insert terracotta pots
You can also paint the pots to match the colors of your bathroom. Get tutorial here
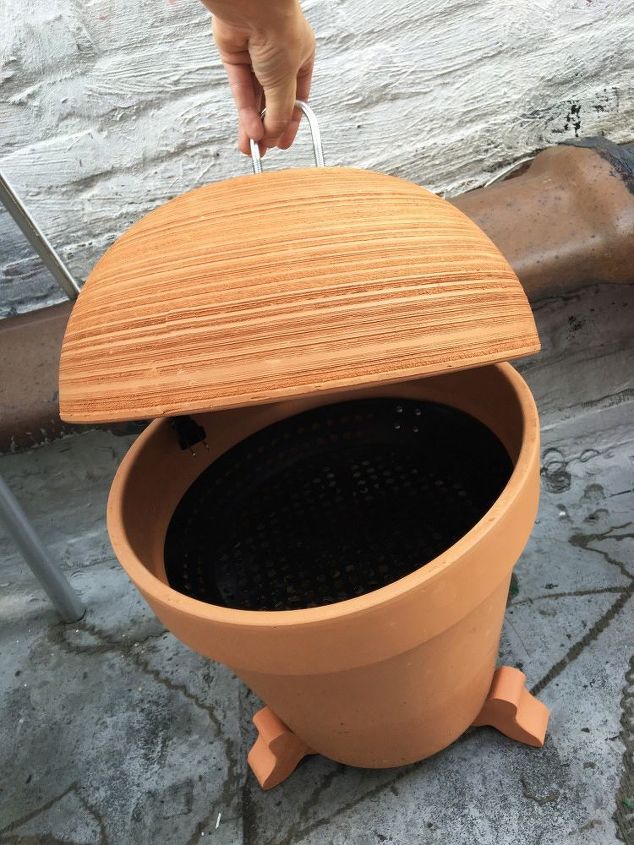
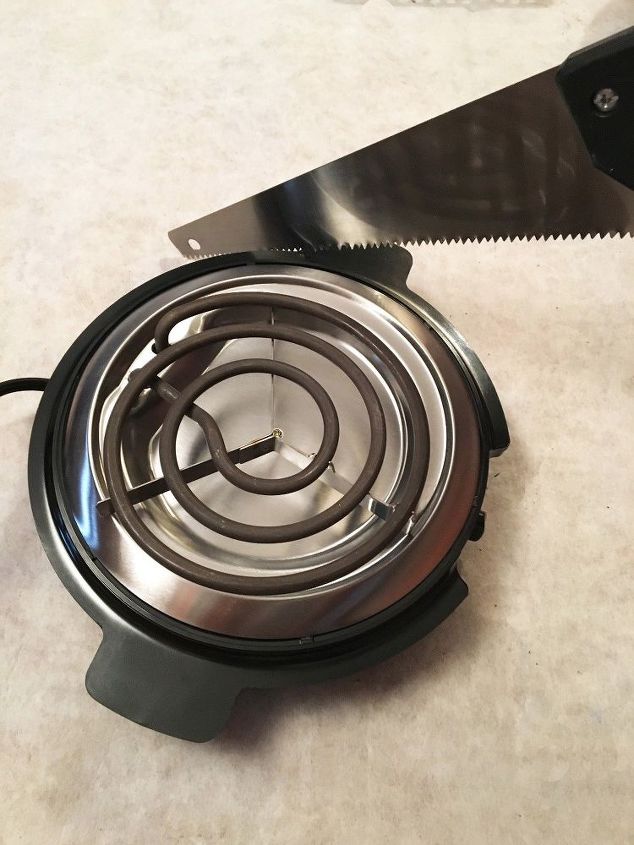
Step 1: Cut burner handles to fit the pot
If the burner has plastic handles, cut them off with a saw so that the burner fits down in the pot. Get tutorial here
Step 2: Feed the cord through the bottom hole
Feed the cord of the burner down through the hole on the bottom of a large terracotta pot. Get tutorial here

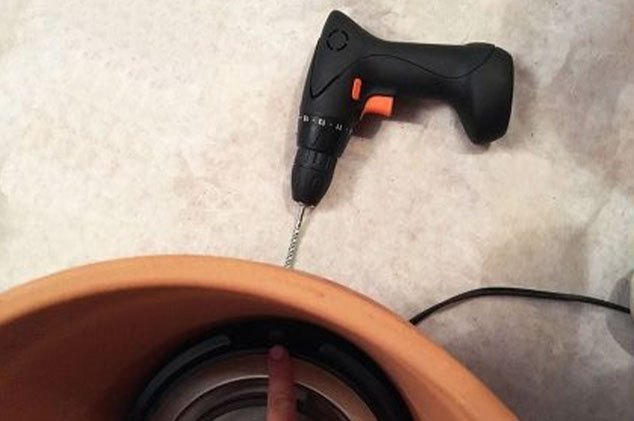
Step 3: Drill a hole for the burner's dial
This is so that you can later move the dial and adjust the temperature. Get tutorial here
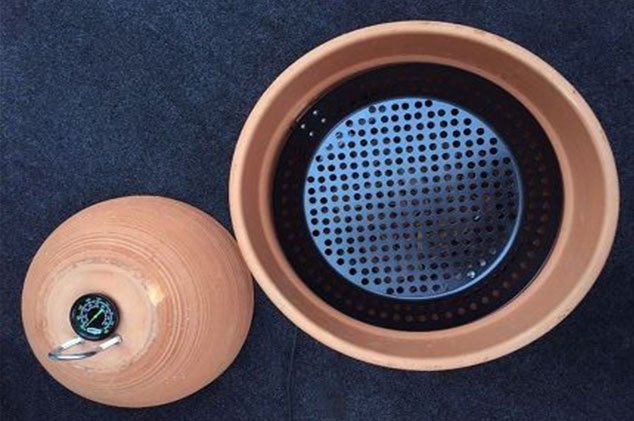
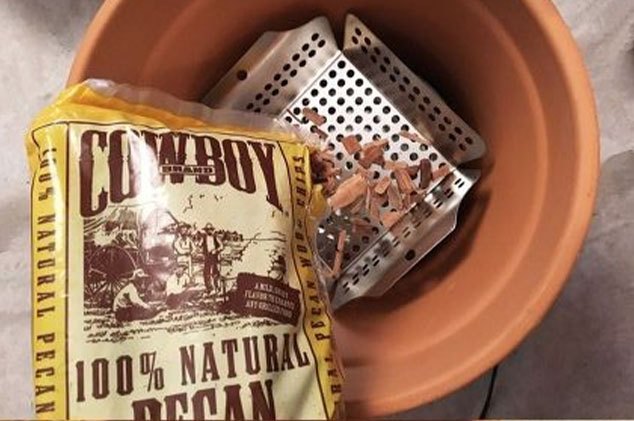
Step 4: Insert grill tray and fill with wood
Place the grill tray directly on top of the burner and pack full of wood smoking chips. Get tutorial here
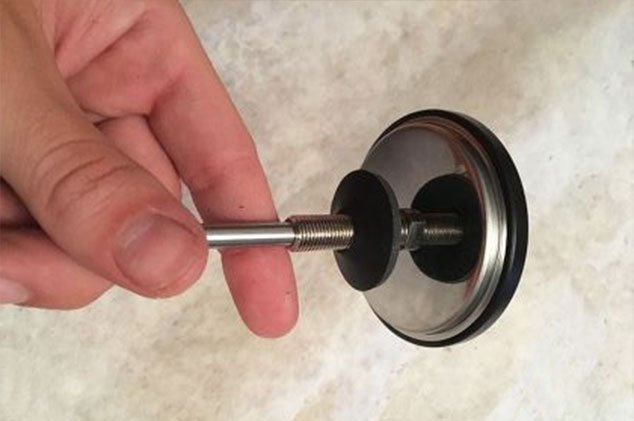
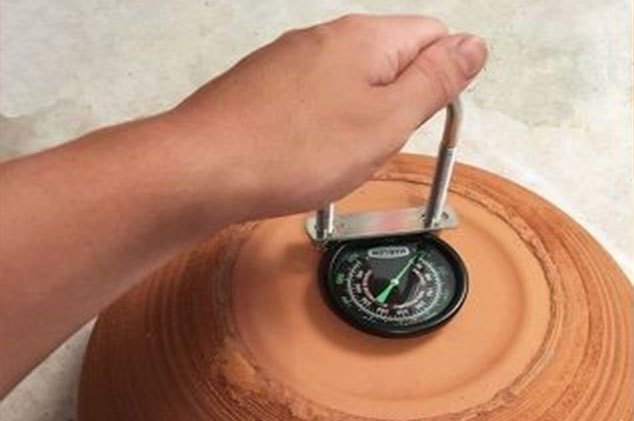
Step 6: Secure to the second "lid" pot
Feed the thermometer stem through the pot hole. Place a rubber washer on the other side and screw it in place. Get tutorial here
Step 7: Mark and drill hole for the handle
Mark where the handle will sit on top of the pot lid and drill. Get tutorial here
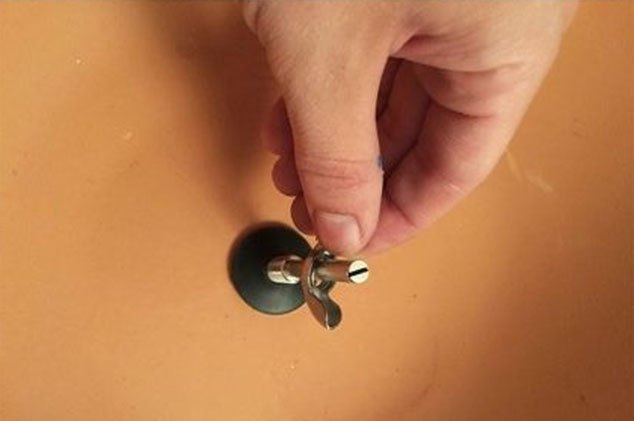
Step 8: Secure handle from the other side
Use nuts on the outside and inside. Get tutorial here

Step 9: Fit a grilling skillet inside
Lay a grill grate or grilling skillet on top of the wood chips. Remove skillet handle if it has one. Get tutorial here