


Handmade Stocking Sewing Tips

by
Nancy Gramm
2 Materials
2 Hours
Medium
November’s here, and I’m sure you have lots to do before the holidays, but there’s still time to make Christmas stockings.
No, this isn't a tutorial, just a few tips from a longtime sewer.
There are tons of stocking patterns out there. Choose one that suits you.
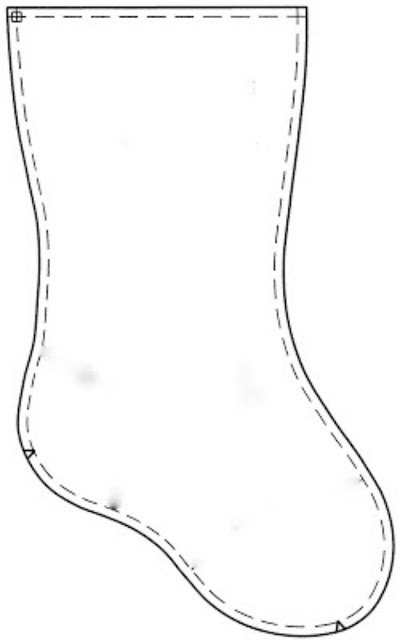
I liked the curves of this one: it came from the blog Positively Splendid where it was used as a flatware holder. I enlarged it on my printer until it was a workable stocking size. My finished stockings measure approximately 6” wide at the top, 15” from top to toe and 9 1/2" wide at the bottom.
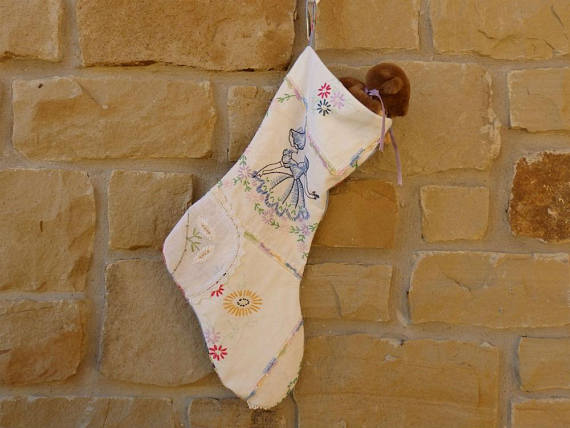
To cuff: This one I made without a cuff, using a technique I found at Diary of a Quilter. Blogger Amy shows how to put together lining and outer in 2 strips before sewing together in one long seam. Works beautifully!
Or not to cuff: Melissa at Sew Like My Mom uses a method similar to Amy's for putting together lining, cuff, outer in one long seam. When I made the one pictured, I hadn't found her technique yet. Instead I used the old put-all-the-parts-together-and-stitch-one-great-honking-seam-all-the-way-around routine. Next time though, it's Melissa's way all the way!
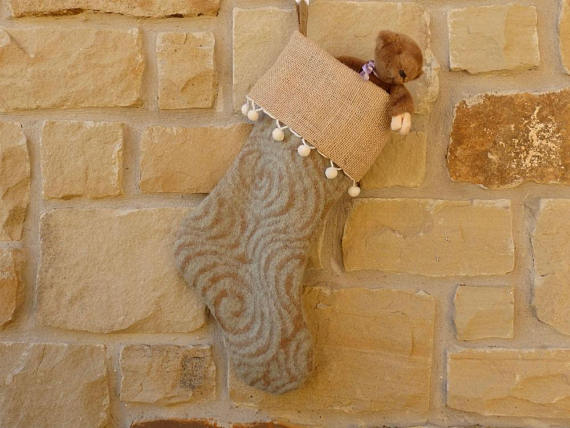
The pattern for the cuff on this one I found at Sew4Home. The poms were my idea, and I tried several methods for adding them before coming up with one that holds securely.
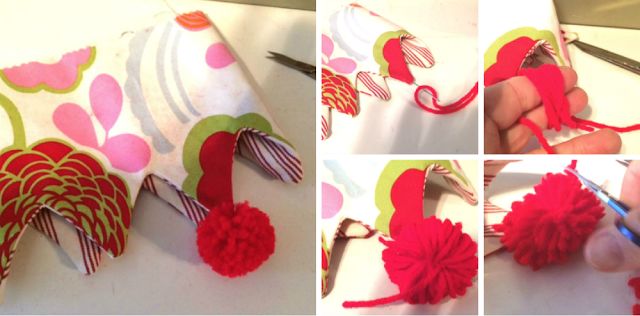
I've tried a number of ways of making poms and my favorite of all time is to use a tool I can always find: my fingers. The poms on the pointy cuff were made using 2 fingers. For larger I use 4.
To attach poms, I thread a strand of yarn onto an upholstery needle and stitch up into the point and back out again. After wrapping a sufficient amount of yarn around my fingers (the number of wraps varies depending on the thickness of the yarn), I tie the pom off with the threaded yarn, trim with cuticle scissors (The curved blades are perfect for this.), and voilà!
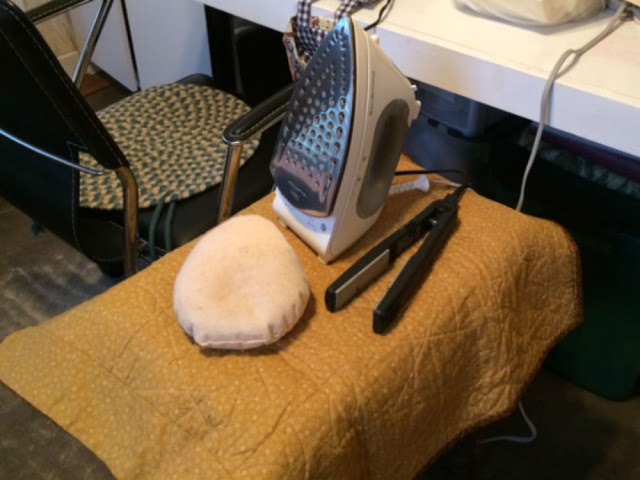
Any sewer knows how important it is to iron seams as you go. It's just as necessary in making stockings, though not always as easy. I keep an iron on a small table next to my sewing machine, but I also keep a flat iron (hair straightener) nearby. It makes a handy small seam presser. I made the small ham ages ago and it's bedraggled, but it fits for ironing in the cuff and top part of the stocking.
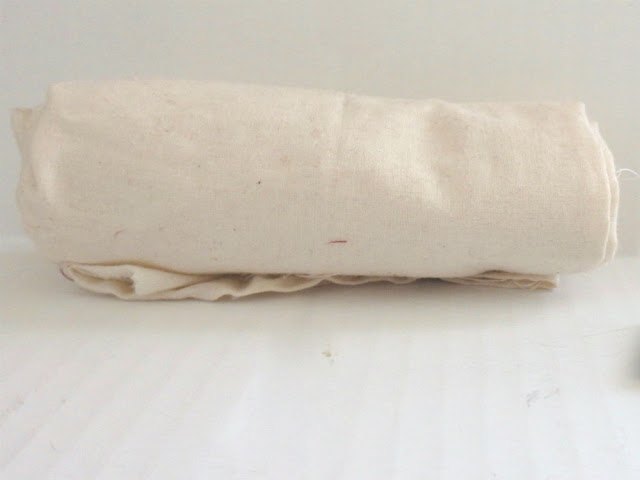
For ironing farther inside and down in the toe (and if you don't have a bedraggled ham), you can use a rolled-up bit of fabric--muslin works great. This one's not even a yard length.
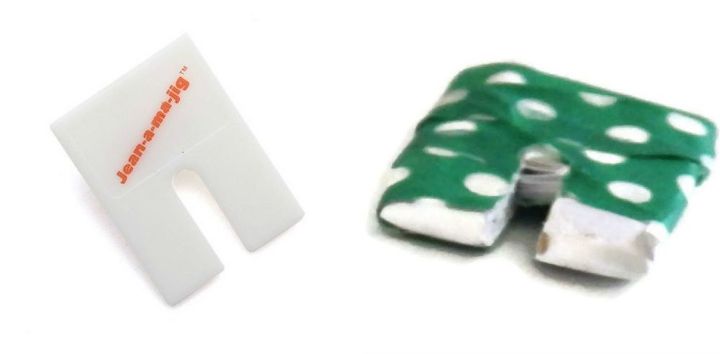
Sometimes you're faced with stitching a seam that changes in thickness as you go.. There are tools that help deal with that, i.e. Hump Jumper and Jean-A-Ma-Jig. Or you can make your own. When I need one and can't find mine--it happens too often to be funny--I fold a bit of printer paper until it’s as thick as I need, wrap it in washi tape and cut out a slit for my needle. Works as well as a purchased tool, better than a purchased tool I can't find!

A bodkin’s great for turning the tube that becomes your loop, but if you don’t have one, you can use a safety pin. Or follow the directions found at So Sew Easy for using a bit of tubing and a slender dowel.
(I've estimated time and cost on this as it relates to me. The fabric was all either something I already had or something I found at the thrift store, as was the yarn. As to the time spent, that's actual work time. I spent a lot of time designing; figuring which fabric to use for stocking, cuff, liner; which yarns to use; which design, etc.)
Hope my tips help you. For links and to see more, you can visit my blog at https://sumpnsassy.blogspot.com/2017/11/christmas-stocking-sewing-tips.html .


Any price and availability information displayed on [relevant Amazon Site(s), as applicable] at the time of purchase will apply to the purchase of this product.
Hometalk may collect a small share of sales from the links on this page.More info
Comments
Join the conversation
2 of 4 comments
-
They're all lovely. A good few tips too. Good share.
-
Thanks, William. My fave tip is the flat iron. When my sister told me she uses hers for quick press jobs on collars and cuffs, I thought Duh! Works beautifully.


Frequently asked questions
Have a question about this project?