


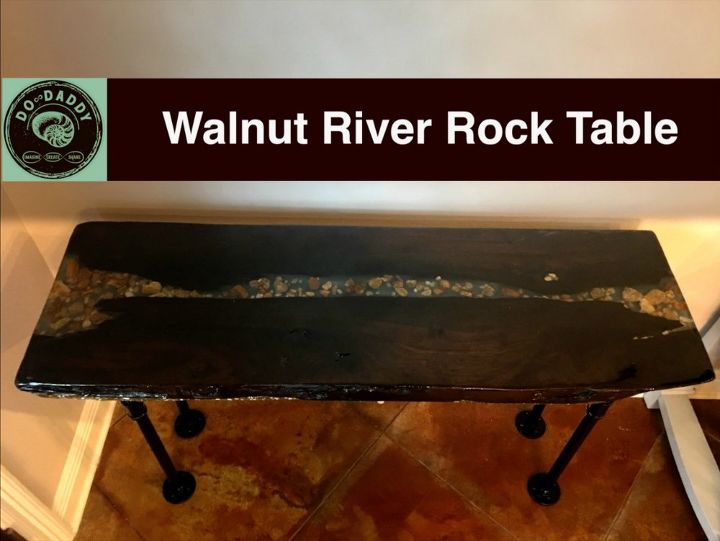
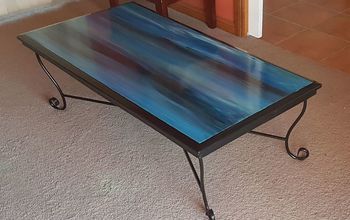
Walnut River Rock Table - Glow in the Dark Epoxy Resin
21 Materials
$250
3 Days
Advanced
Hey Everyone, I'm Jeremy Hoffpauir.
I purchased a unique piece of walnut from my local hardwood dealer (Riverside Lumber) a few months ago to make a Walnut River Rock Table. The piece of Walnut was in the Sinker Cypress portion of their warehouse, which confused me. My hardwood dealer jokingly referred to the piece of Walnut as ‘Sinker Walnut’ or ‘Walnut Driftwood’.
I purchased the piece of walnut for it’s uniqueness without a specific project in mind. I decided to build a Walnut River Rock Table with epoxy resin, glow powder, and concrete.
{
"id": "4471468",
"alt": "",
"title": "",
"video_link": "https://www.youtube.com/embed/q9vbPadpzsk",
"youtube_video_id": "q9vbPadpzsk"
}
{
"width": 634,
"height": 357,
"showRelated": true
}
Wood
The piece of walnut had characteristics of driftwood and sinker cypress, so the names accurately described the wood. Part of the wood appeared to be petrified like driftwood. The surface of the wood had unique colors and grain patterns like sinker cypress.
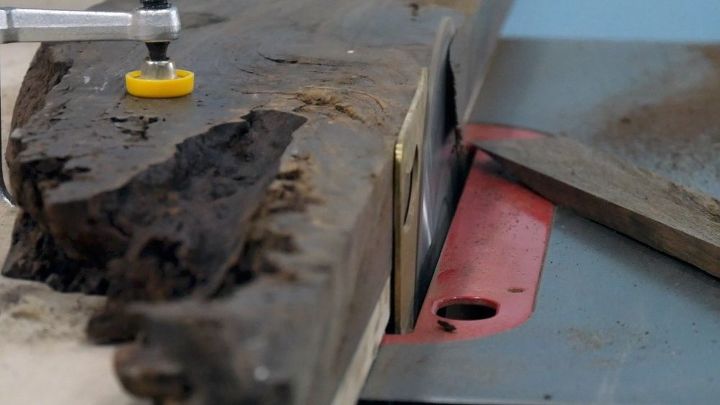
Straight Edge without Joiner
Prep Wood
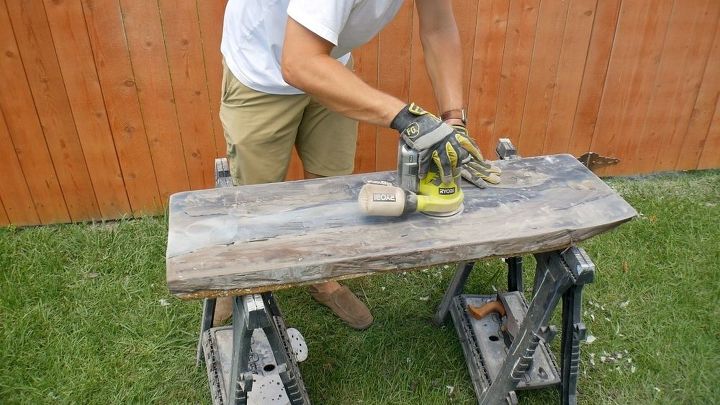
I prepped the wood as the first step of the walnut river rock table. I resawed the wood down the center with my bandsaw. Next, I used my low angle jack plane to get a flat surface. I decided not to send this wood through my planer for obvious reasons. Lastly, I used my jointer jig with Dovetail Clamps to get one straight side from each piece. I don't own a jointer, so this jig comes in very handy.
I sanded each piece of Walnut for the Walnut River Rock Table with 80, 100, 120, 150, and 220 grit paper. My orbital sander received a nice workout!
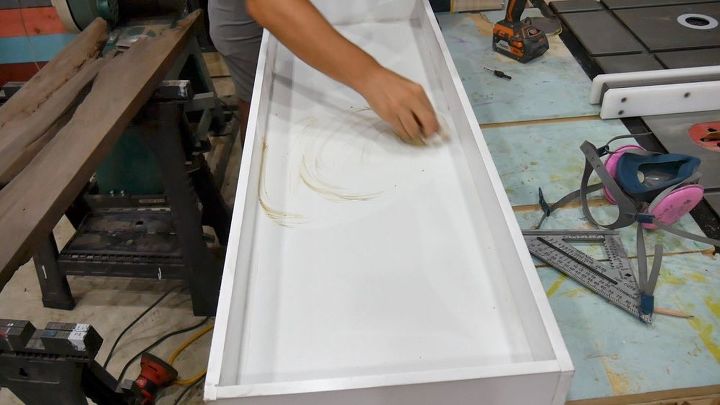
Melamine Box
I purchased 3 pieces of melamine from my local big box store because cement and epoxy resin does not bond to melamine. Once I ripped and cut the melamine pieces (2 sides, 2 ends, bottom) to size, I pre-drilled holes and used screws to fasten them together. Next, I ran a bead of silicon caulk along all seams to seal the box. After the silicon dried, I used a rag to spread Johnson Paste Wax on the bottom and sides of the box. The paste wax was an extra precaution to prevent epoxy resin and the cement from adhering to the melamine. This precaution makes removing the melamine shell easier.
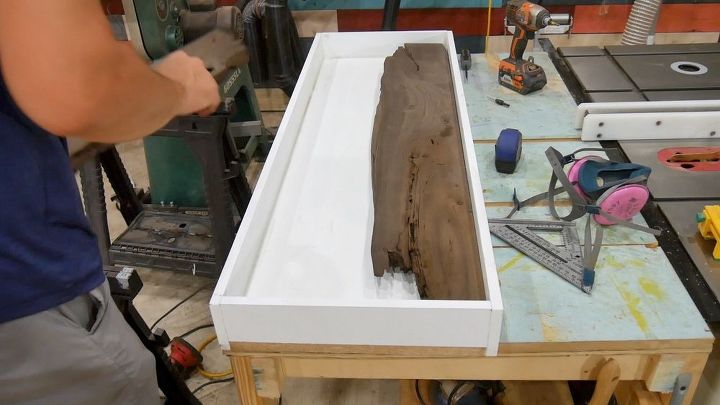
Square Sides
Melamine Box Test Fit
I squared the sides of each piece of Walnut with my miter saw. Afterwards, I performed a quick test fit to make certain the walnut fit into the melamine box.
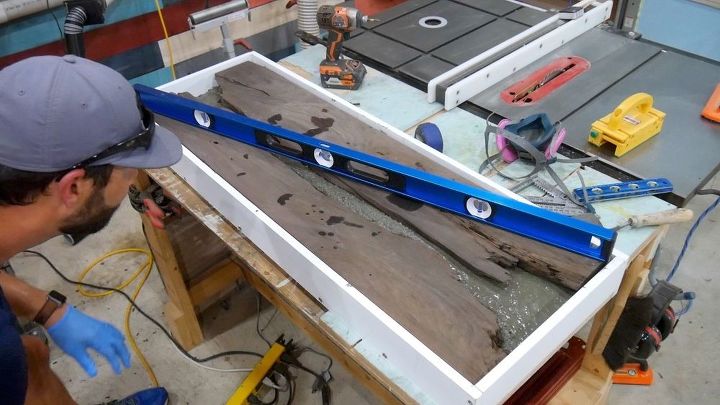
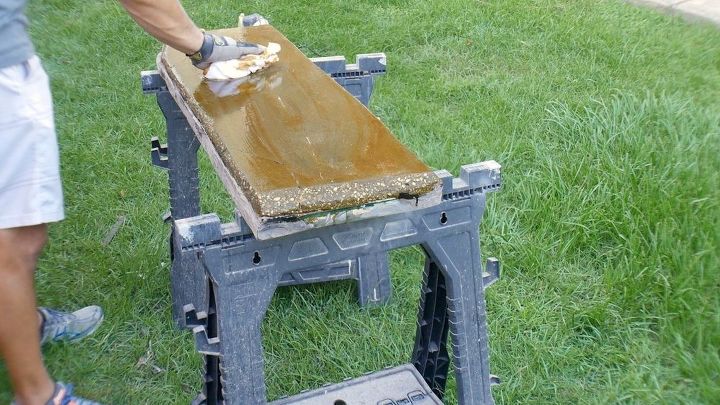
Mix and Set Concrete
Next, I mixed and set the concrete into the melamine mold. I used roughly a half bag of Quikrete 5000 concrete, water, drill, and mixing bit. Per the manufacturer’s instructions, I mixed the concrete to a paste/putty consistency. I spread the concrete into the melamine box to about 1.5 inches thick. Next, I placed the pieces of walnut into the concrete and pushed down until a suction was formed. I made sure the wood was as level as possible with my leveler and rubber mallet. The side of my sander removed the air bubbles from the concrete.
I let the concrete cure for 24 hours before proceeding to the next step.
Mistake 1
I did not make sure the square sides of each piece of wood were against the melamine box. I left about a 1/2″ space because I did not pay attention. I didn’t notice until the concrete dried and hoped it would be ok. Needless to say, I didn’t like the look and caused me a bunch of work later on in the process.
Epoxy Resin 1st and 2nd layer
Epoxy Resin 1st and 2nd Layers
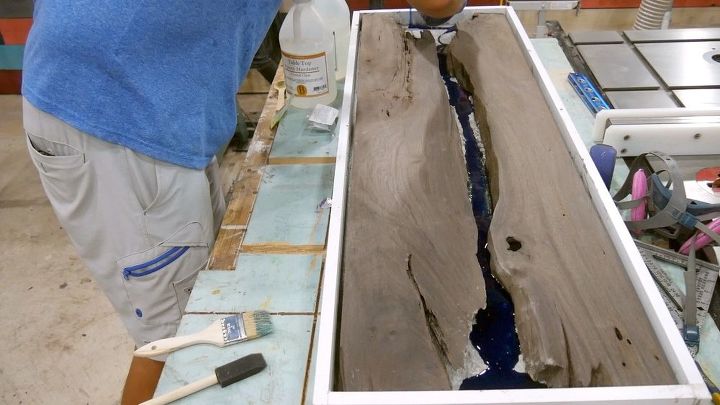
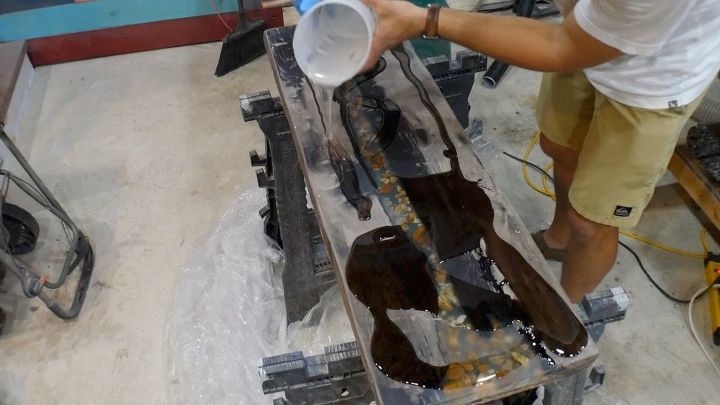
I didn’t have a set plan regarding how to mix the epoxy resin with the glow powder and dye for the walnut river rock table. Additionally, I didn’t know what colors I needed to use. I aimed to make the table look like it was in a Florida lagoon or spring. In my mind, this involved creating a dark blue layer for the bottom, then a emerald green layer, and a few clear layers.
The ingredients I used for each layer are listed below along with pictures and a brief explanation. I learned from my previous epoxy resin projects it is much easier to pour multiple layers of epoxy resin. Therefore, each layer of epoxy resin used to make the walnut river rock table was 16 ounces (8 ounces of hardener, 8 ounces of resin). I used my heat gun to remove the bubbles after I poured each layer.
I followed the instructions that came with the Epoxy Resin as closely as possible. This is very important!
1st Layer
For the first layer, I mixed 16 ounces of epoxy resin, 3 drops of blue dye, and 1 table spoon of yellow glow powder.
Mistake 2
I didn’t mix enough glow powder in this step. I should have mixed about 3 times the amount.
2nd Layer
For the second layer, I mixed 16 ounces of epoxy resin, 1 drop of green dye, and 1 table spoon of yellow glow powder. I poured the second layer roughly 3 hours after the first layer. Refer to mistake 2.
Epoxy Resin 3rd and 4th layer
Epoxy Resin 3rd and 4th Layers
3rd layer
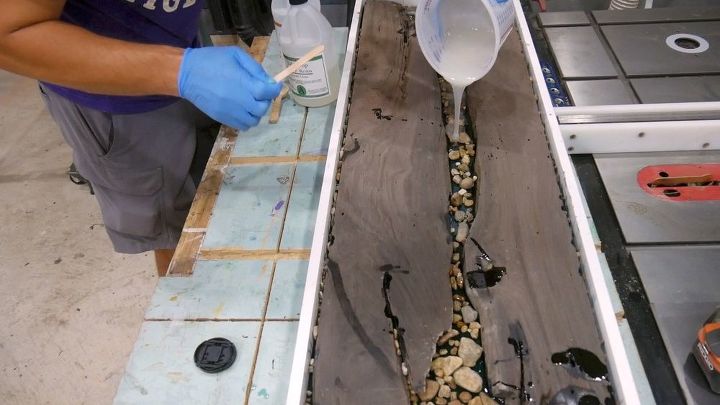
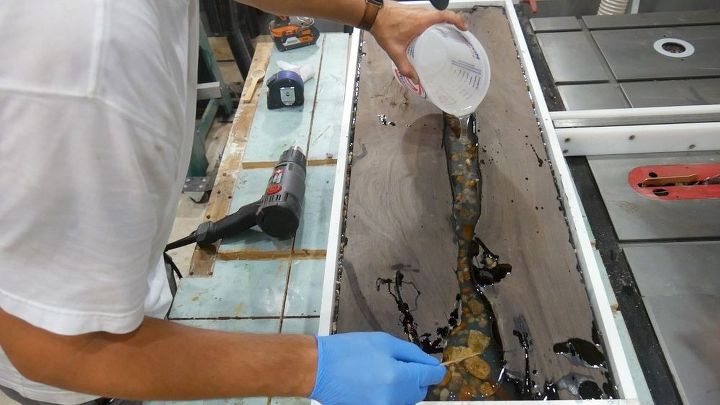
Before I mixed the 3rd layer, I placed garden rocks on top of the second layer. I gathered the rocks from my garden around my pond. I thoroughly cleaned the rocks with dawn soap and warm water. Next, I mixed 16 ounces of epoxy resin and 2 tablespoons of white glow powder. I poured this layer 24 hours after the 2nd layer.
4th Layer
I mixed 16 ounces of epoxy resin and 2 tablespoons of white glow powder. I poured this layer immediately after the 3rd layer.
Epoxy Resin Layers 5-7
5th Layier
I mixed 16 ounces of epoxy resin and poured this layer 24 hours after the 4th layer.
6th Layer
The same as the 5th layer and poured immediately after the 5th layer.
7th Layer
The same as the 6th layer and poured immediately after the 6th layer. I used a rubber squeegee to spread the epoxy resin across the wood surface – this is referred to as a seal coat. I let this coat dry for 48 hours before I proceeded to the next step.
On a separate note, I thought about not spreading the epoxy resin on top of the walnut river rock table to preserve the natural finish of the wood. The decision ended up being a coin flip – literally. Next time I’ll preserve the natural finish of the wood.
As I mentioned previously, I used a heat gun to remove bubbles after each layer.
Remove Melamine & Concrete Problem
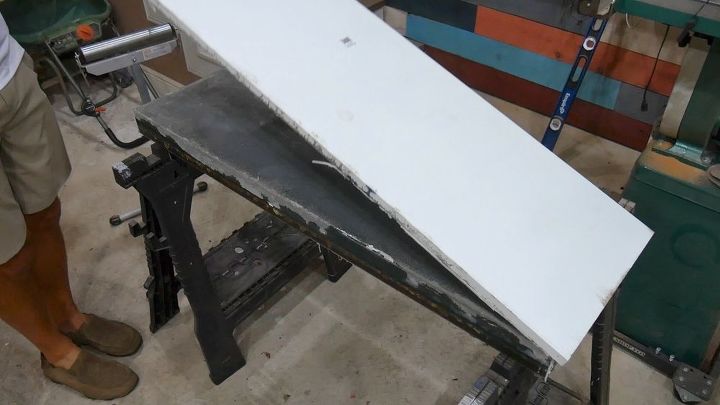
I removed the screws from the melamine box and tapped the sides a few times with my rubber mallet. Next, I flipped the piece over and removed the bottom. The melamine sides, ends, and bottom fell off with little effort. I believe the paste wax really helped.
I had to make a repair to the concrete bottom due to my inability to ask for help. I used construction adhesive that bonds concrete and it worked better than I expected.
I attempted to pick up the walnut river rock table and move it across my shop. I made it about half way to my destination and tried to gently place it on the floor. My grip came loose and I dropped it. A piece of concrete came loose and I was very upsetat myself.
Grind and Stain Concrete
I moved the walnut river rock table outside to grind the concrete and cutoff the embedded rocks in the epoxy resin. I didn’t want epoxy resin to be on the outer edges of the walnut river rock table. This step was necessary because of Mistake 1. I used my grinder with a cement cutting disc to round the edges and cutoff the sides and ends. Needless to say, this made an absolute mess.
Next, I used my belt sander to knock down the high spots on the top as much as possible.
I decided to apply concrete stain to the bottom of the walnut river rock table. I wanted the bottom piece to look like a brown sand from a river bed. I found leftover concrete stain from our concrete floors in our house and decided to use it. I applied the stain with a chip brush, allowed it to soak for 5 minutes, and wiped the excess off with a towel. I didn’t allow the stain to soak any longer than 5 minutes to control the color.
I let it dry for 24 hours then sealed it with concrete sealer.
Final Sanding and Planing
It was time to finish the walnut river rock table top. I started with 120 grit sandpaper because I used 80 grit sandpaper in the belt sander in a previous step. Next, I used 150 grit sandpaper. I noticed a few high spots on the walnut river rock table top and decided to use my low angle jack plane to knock these down. I learned over time it is safe to use a hand plane between 150 grit – 200 grit sandpaper. This eliminated the need to regress to lower sandpaper grits. After I planed down the high spots, I went to 180 grit then 220 grit sandpaper.
Epoxy Resin Flood Coat
Before I applied the flood coat, I ran the walnut river rock table through my table saw to square the walnut on one side. I couldn’t do this with the grinder because I had a cement grinding disc.
I applied the epoxy resin flood coat and used 8 ounces (4 ounces of hardener, 4 ounces of resin). Next, I used a rubber squeegee to spread the material, but I did not press down on the epoxy resin. I gently spread it across the table and let it blend together. I used a chip brush to apply the epoxy resin to the side of the walnut river rock table.
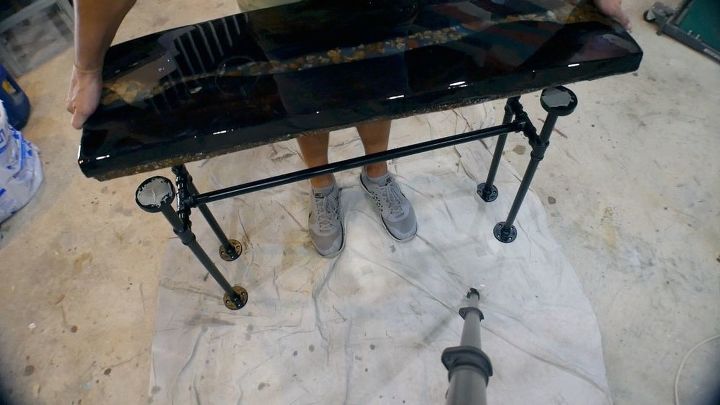
Pipe Bottom
I used 3/4″ black steel plumber’s pipe to make the table bottom. Next, I cleaned each piece with acetone because they were covered with grease and grime. I did not need to cut the black steel because I designed my dimensions according to the standard pipe sizes sold in the big box store. Each end of pipe was threaded as well.
- qty. 1 – 3/4″ x 3 ft
- qty. 4 – 3/4″ x 6″
- qty. 4 – 3/4″x2″
- qty. 8 – black malleable iron floor flange
- qty. 4 – 3/4″ x 18″
- qty. 6 – black malleable iron threaded tee
I needed to figure out a way to attach the top flanges to the bottom of the walnut river rock table without drilling into the concrete. Drilling into the concrete would have not caused an issue; however, I was not going to risk cracking the concrete again. I decided to use a scrap piece of wood, trace the flanges, and cut them out on the bandsaw. Next, I used screws and construction adhesive to secure the flange to the wood.
After securing the wood to the flanges, I finished the bottom assembly.
I used Rustoleum Universal All Surface Satin Primer/Paint (Black) spray paint to paint the walnut river rock table bottom. This spray paint dried fast which allowed me to apply 2 coats within a half hour.
After the paint dried outside for a few hours, I applied a liberal about of construction adhesive to the top of the wooden flange pads. I placed the walnut river rock table on top and let it dry for 24 hours. The weight of the table top is plenty heavy enough to ensure proper adhesion.

Glowing River
The glow powder I used is charged by sunlight or an ultraviolet black light. The glow lasts for approximately 6 hours and can be recharged millions of times according to the manufacturer. The pictures I placed below were taken after I completed the project with no sunlight or UV light exposure. It’s difficult to take pictures in the dark, but I did the best I could. The glowing is much brighter than the pictures depict – it looks really cool in the dark!
This walnut river rock table project was a lot of fun because I incorporated multiple materials to make a unique piece of art. It turned out better than I expected.
I hope this post provided you with some value. Be sure to visit my blog for more details on this project.
Please consider and visiting my website for more projects and other fun stuff.
Feel free to contact me anytime if you have any questions. I'm happy to help! Until next time – Imagine…Create…Share


Any price and availability information displayed on [relevant Amazon Site(s), as applicable] at the time of purchase will apply to the purchase of this product.
Hometalk may collect a small share of sales from the links on this page.More info

Want more details about this and other DIY projects? Check out my blog post!
Comments
Join the conversation
2 of 6 comments
-
Very Nice you did a great job, I have just tried something similar and found that mine did not glow in the dark either, what brand did you buy.
-
Thanks for the compliment! I used art n glow powder, which is a great product. It didn't glow on this project because I didn't use enough. I used the glow powder on other projects and it worked really well - check out my website to see that project.. A link to the glow powder is in this post under the material section.


Frequently asked questions
Have a question about this project?