


4 Last-Minute Ideas for Thanksgiving Decorations

Thanksgiving can be stressful enough without having to think about how to decorate for the holiday. But, luckily the Hometalk community has come to the rescue with these quick and easy DIY Thanksgiving decorations. With these four last-minute Thanksgiving table decor ideas, you’ll transform any Thanksgiving dinner. Learn how to make a corn husk wreath, a centerpiece, a cornucopia, and place cards with these tried-and-tested Thanksgiving decorating ideas.
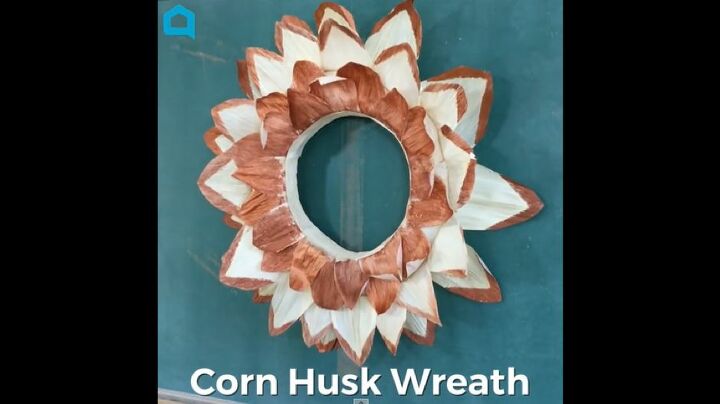
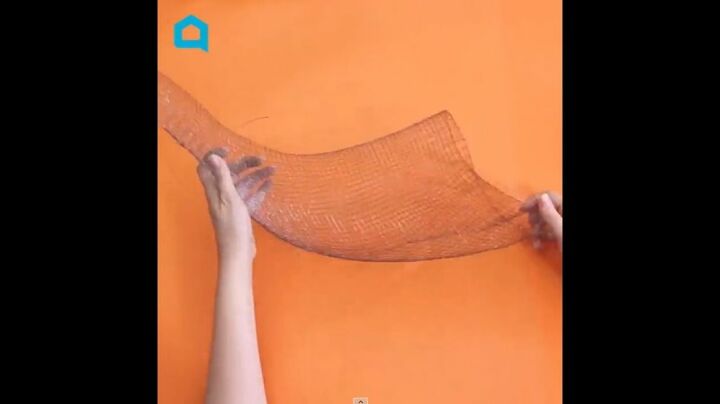
Corn Husk Wreath
Get the full instructions here:
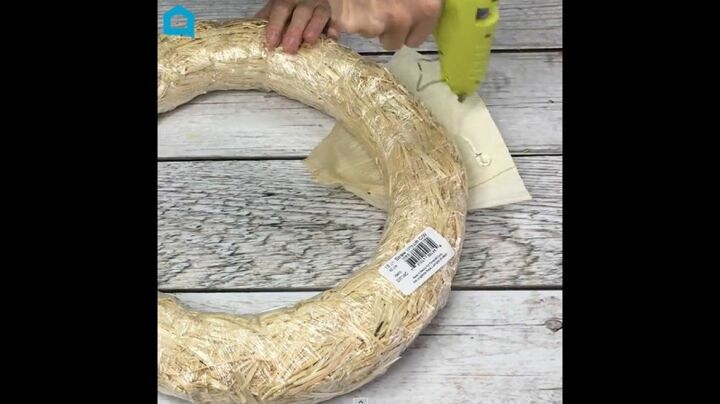
Gather Your Materials
The first step to making the corn husk wreath is to collect the materials you will need. Only two items are needed for this incredibly easy and creative project – a straw wreath and corn husks. Make sure you also have some hot glue on hand and some paint if you wanted to be even more creative. The best thing about this project is that it looks impressive yet is very simple to make.
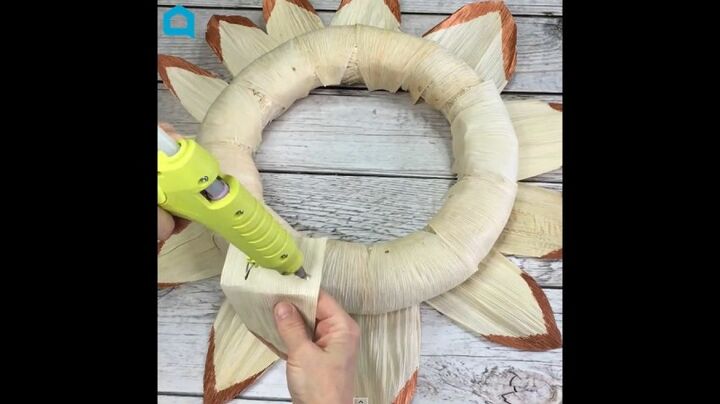
Glue Corn Husks to Wreath
I began the corn husk wreath by, unsurprisingly, wrapping husks of corn around the wreath and fixing them in place with hot glue. You don’t need to be too delicate with the layers of husks as long as the wreath itself is fully covered up underneath. Then, I folded some of the husks in half and cut them into petal shapes. I painted some of the tips of the husk petals and some of the bodies of the other petals. I then layered the petals around the edge of the wreath, bending some backwards for the inside of the wreath. Once I’d created the desired petal look, I affixed a piece of twine on the back of the wreath as a hanger.
Layered Centerpiece
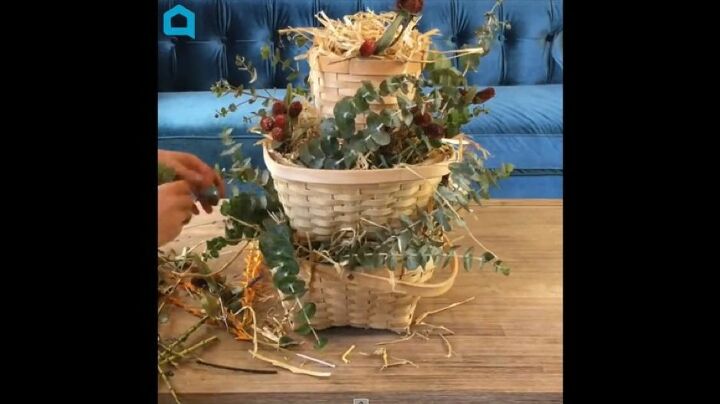
Gather Your Materials
The layered centerpiece is one of my most creative Thanksgiving decorating ideas. In order to make it, you’ll need some baskets of different sizes, some oranges, straw, pinecones, a candle, some fake greenery, and floral foam. I also used a dowel and hot glue to put it all together.
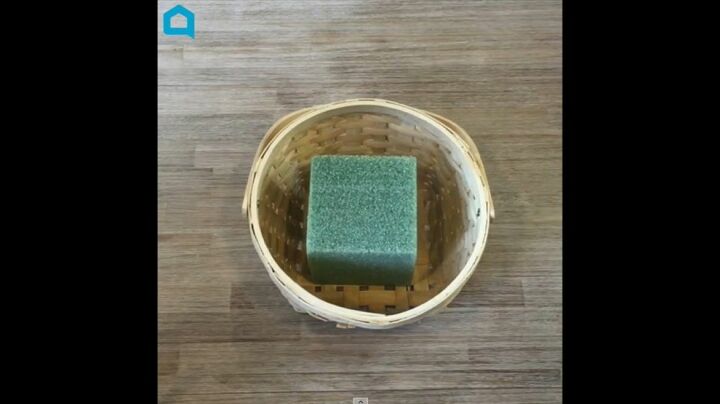
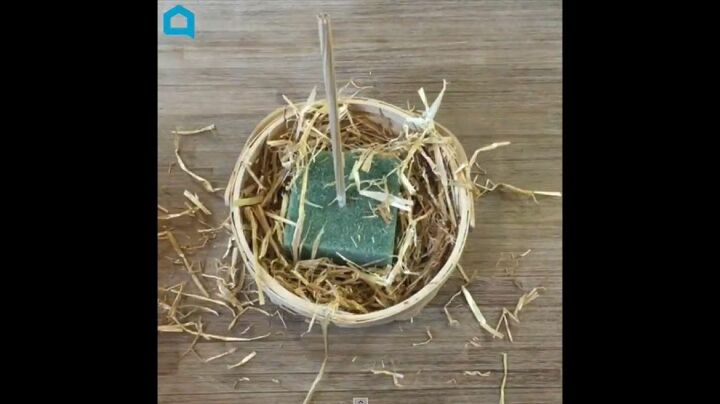
Create the Base
The first step was to create the base. I hot glued the floral foam to the bottom of the biggest basket, then pushed the dowel through the foam to the base. I made sure that the dowel wouldn’t be bigger than the size of all three baskets. I packed straw around the foam and made sure it was sturdy enough to hold the other baskets.
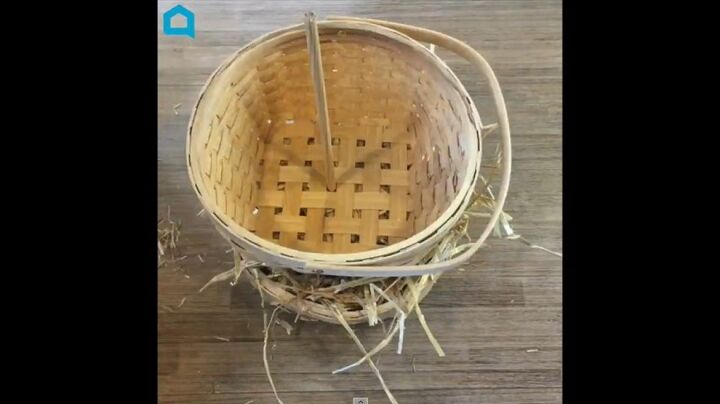
Add Baskets
Then, it’s time to add the rest of the baskets. I pushed the second basket through the dowel and let it rest on the foam. I filled this with straw and then added the final basket on top. The baskets could be any sizes or decoration you wanted, but I found that the sturdier basket at the bottom meant the centerpiece wouldn’t come crashing down.
Decorate
Next, I began decorating the centerpiece to look more festive. I used a candle and the oranges and added fake greenery to all the baskets. I used skewers to stick the oranges into the baskets, though hot glue would work too. I then added more flowers and pinecones to create a Thanksgiving table décor I was proud of.
DIY Cornucopia
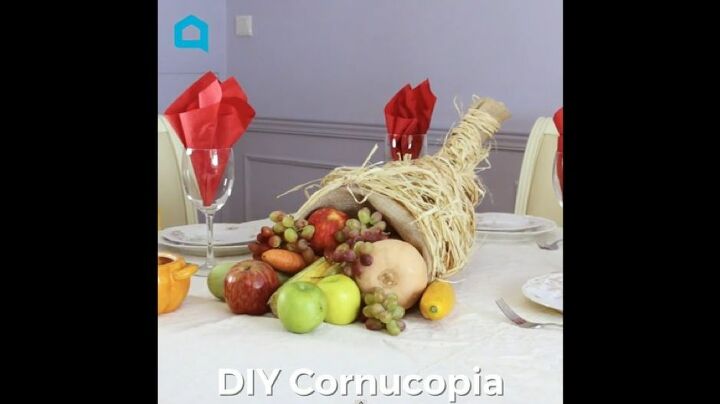
Gather Your Materials
What’s Thanksgiving without a cornucopia! Your Thanksgiving decorations wouldn’t be complete without a symbol of a bountiful harvest to be thankful for. I began by gathering some chicken wire, a scrap of burlap, some raffia strands, and some hot glue.
Shape the Cornucopia
The most important stage was in shaping the cornucopia. I began by cutting the chicken wire into a triangle. The base of the triangle will be the opening of the cornucopia. If it looks frayed, just bend the edges down. Then begin shaping the chicken wire into a cornucopia horn shape. It’s easier than it seems and fairly malleable.
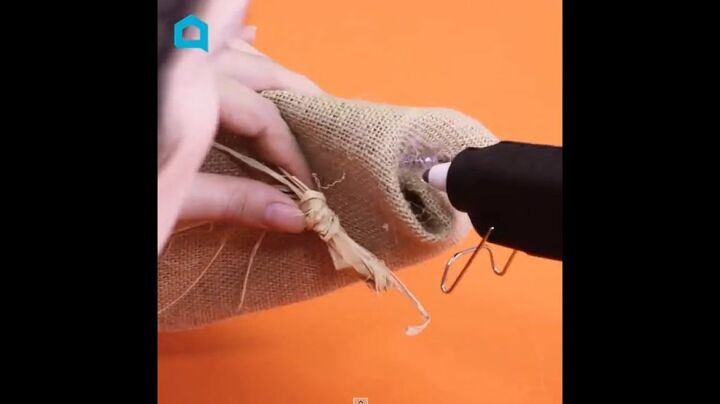
Wrap the Cornucopia
Once I was happy with the shape of the cornucopia, I wrapped the horn with the scrap of burlap. It’s best to cut it once it’s been shaped, rather than attempting to cut it to size beforehand. Once the burlap was in place with hot glue, I began wrapping the raffia around it. I glued as I went to fix it firmly in place. If any bits were sticking out, I used scissors to remove them.
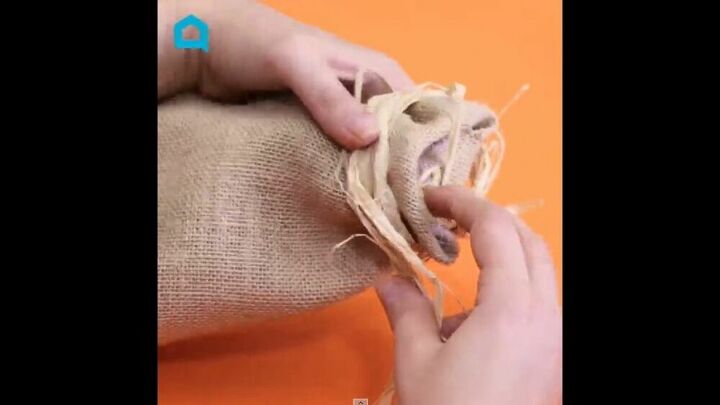
Fill with Fruits and Vegetables
To create the desired effect for the cornucopia, I filled it with fruits and vegetables. I chose vegetables that would reflect the time of year and fruit that would add to the harvest look I was aiming for.
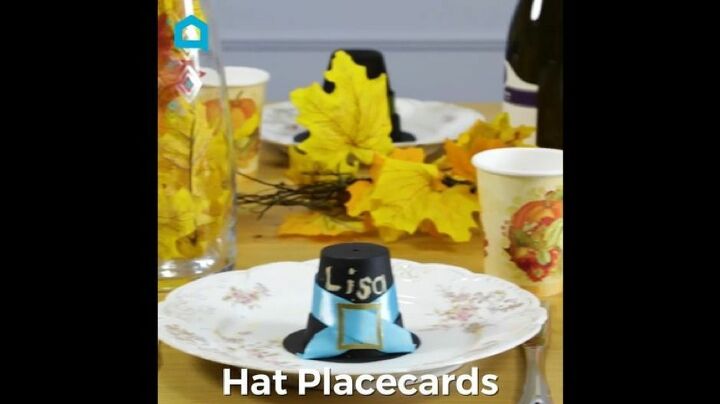
Hat Place Cards
Gather Your Materials
To add a little touch to your Thanksgiving table décor, these hat place cards look great and also serve a function. I began by collecting some small terracotta plant pots, some chalkboard spray, black paper, ribbons, stickers, and craft glue.
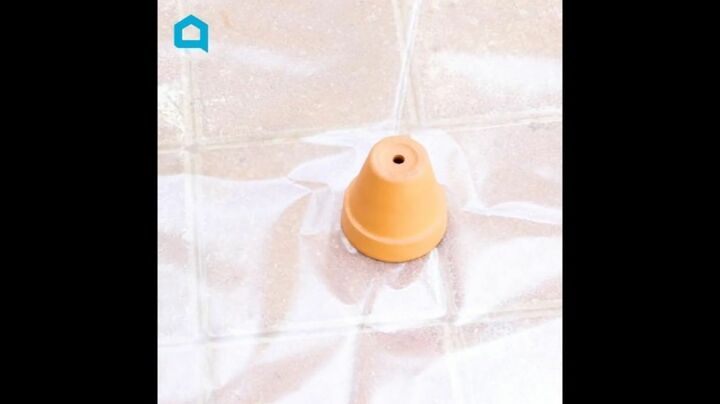
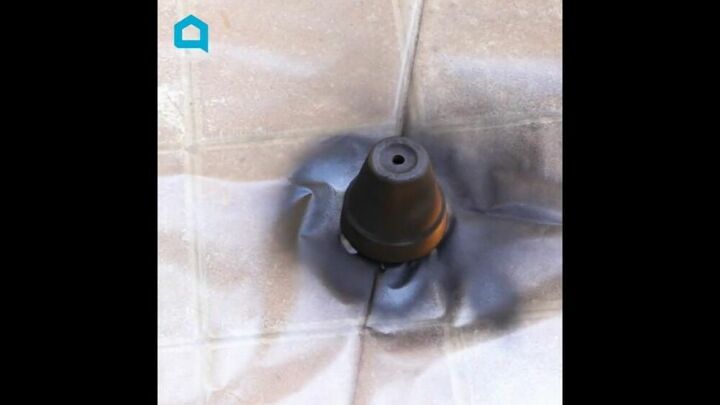
Paint
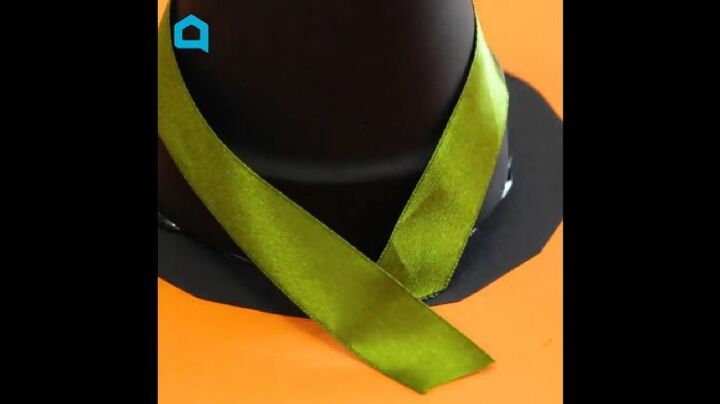
I began by spray painting the plant pots to resemble pilgrim’s hats. Then once they were dried, tied ribbon around them. I used stickers that resembled gold picture frames as the buckles on the hats.
Attach Brim and Decorate
For the brim, I used a piece of black paper and cut it around the plant pot in a circle. Then, it was time to add the names with chalk to each of the plant pots. While I used them as place cards, the hats can be decorations on their own.
Making these quick and simple Thanksgiving decorating ideas will help add a flair of creativity to your Thanksgiving. Not only are these DIY Thanksgiving decorations inexpensive, but they provide something that you can’t always find in stores. Not only will you wow your friends and family, but you’ll feel fulfilled in that you have added to the Thanksgiving dinner table something special you have made yourself. Don’t forget to share with us your attempts at making these projects and suggest this tutorial to a friend who you know would love to make some of these Thanksgiving decorations.


Frequently asked questions
Have a question about this project?