


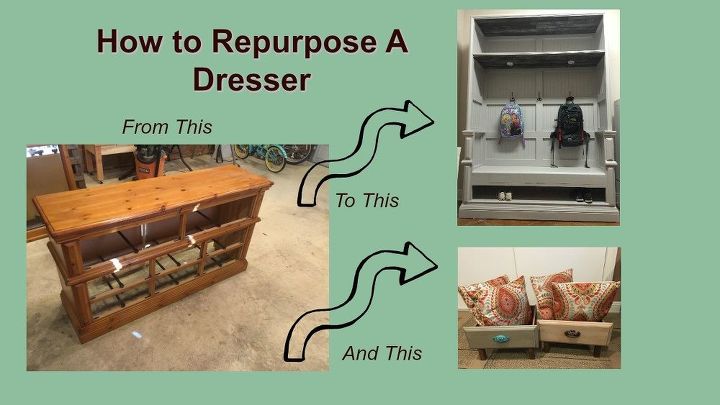
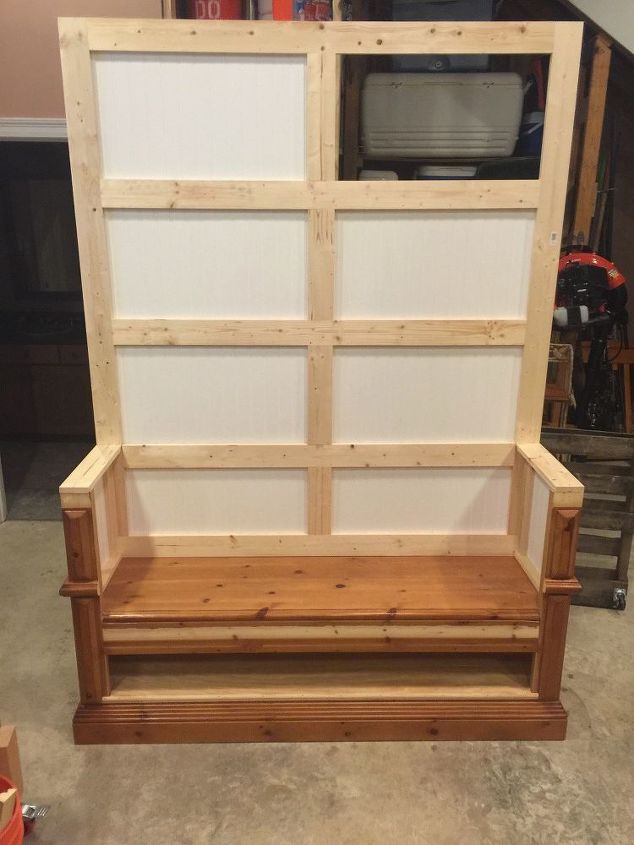
How to Repurpose a Dresser to a Mudroom Hutch
15 Materials
$90
2 Days
Medium
Hello everyone, I'm Jeremy Hoffpauir.
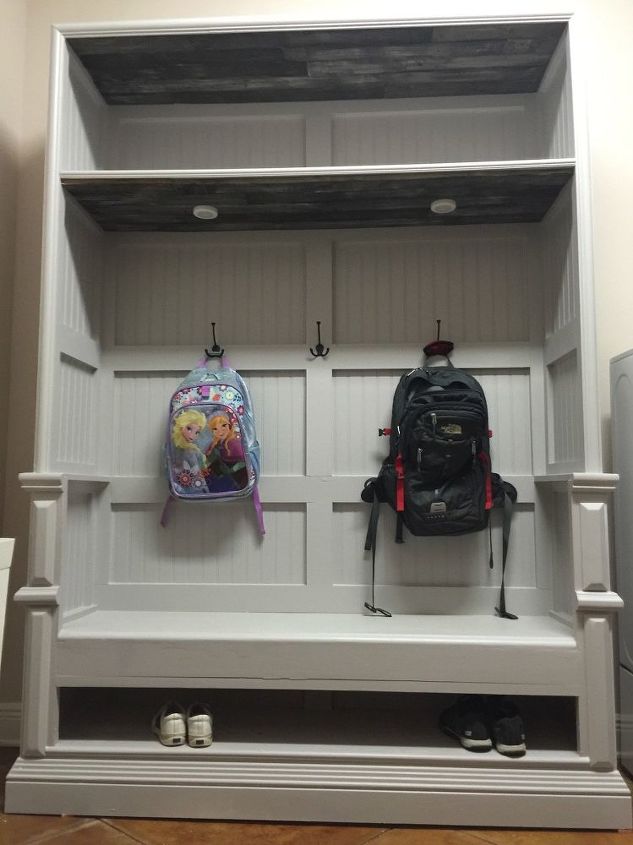
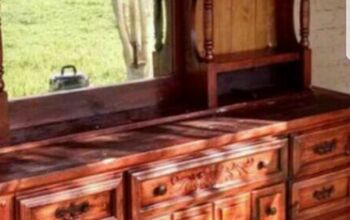
My family and I moved recently and had a few pieces of extra furniture. Stacey and I decided to repurpose this furniture into items we needed in the new house instead of selling them as individual pieces for next to nothing on Craigslist. I converted our old bedroom dresser to a super-functional mudroom hutch & repurposed the drawers for something else..
Choose End Result
Like most of my other projects which involves repurposed furniture, I didn't have any set plans, drawings, or measurements. The lack of plans and uniformity is the main reason I enjoy repurposed projects. My imagination and creativity lead me to the end result; therefore, it is sort of a work of art rather than a project.
The first step to any project is to get a clear picture of the end result. Well, this is easier said than done. I removed the drawers from the dresser in order to spark my imagination, but I simply couldn't get a clear picture of how I could possibly convert this dresser into a mudroom hutch.
It was time for me to focus. I turned my phone off, cleared my mind, imagined I was looking at the dresser from the eyes of a child, and simply stared at the dresser. I know, I know - you are probably saying to yourself, "What the hell? Say what? Looking at the dresser from the eyes of a child?" Let me briefly add some color to this comment. For most of us as we grow older, our ability to use our imagination significantly decreases. As adults, we often times complicate things, worry about potential outcomes, and allow our logical minds to block our creative flow.
My way of overcoming this creative stumbling block is to quiet my mind and pretend I am a child (~8 years old or so). When I perform this simple exercise, the false limitations I impose on myself are lifted b/c anything is possible when I think like a child. If I have trouble with this exercise, I have another trick. I simply ask myself, "What would my son or daughter instruct me to do if I asked them how to convert this dresser?" As soon as I asked myself the aforementioned question, the answer came to me: Drop down the top of the dresser to form the seat! This may seem like the obvious thing to do, but answers aren't that clear when my imagination is blocked. That spark was all I needed - I was off to the races.

Disassembly
This dresser had 8 drawers - 6 medium & 2 large. More to come on these later...
Next, I carefully removed the top of the dresser, the drawer sliding hardware, the moulding/trim, and the front frame that segmented the drawers. I was very careful with when I removed each piece in order to use them in a later step. I placed the small pieces of wood in my bucket to keep them in one place.

Bottom Cubby
After I removed the top of the dresser, I cut the middle support board (between the large and small drawers of the dresser) and dropped it down about 6" to form the shoe storage cubby. I used a speed square to make sure each board was square to the side. I secured the board to each side with pocket holes using my Kreg Jig.
Next, I built a 2x4 support square at the bottom of the dresser to secure the right/left wings & to add much needed stability.
I did not have any remaining 2x4s in my shop, so I grabbed a few 1x4s I had laying around, cut them to size with my miter saw, and formed the base of the bench and the bottom cubby with pocket hole screws. I secured the 1x4 braces to each wing of the bench with pocket holes as well.
I used 1/2" plywood as the base for the bottom cubby. I ripped the plywood to a rough size with my circular saw and used my jig saw to cut around the front left/right indentations. I secured the plywood to the 2x4 frame with wood screws.
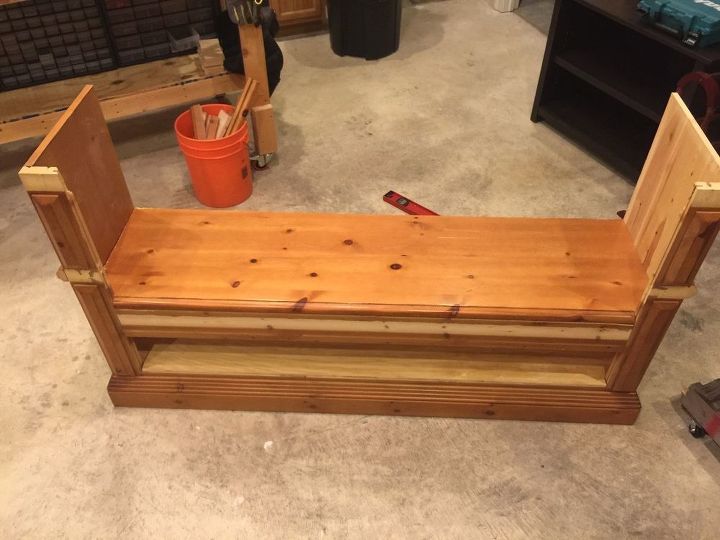
Form The Bench
Next, it was time to cut what was the top of the dresser to size in order to form the bench.
This was a vital part of the project because it was important to me to use the top of the dresser for the bench piece. So, I measured, measured again & measured again.
Similar to the previous step, I used my circular saw to rip the 2 sides to size and my jig saw to cut around the front left/right indentations.
The bench had a very snug fit, but I still elected to secure the bench from the outside of each side. The 1x4's supporting the bench were very stable, but they are onl 1x4s so securing the bench from each side with screws and from the top with brad nails was a necessity.
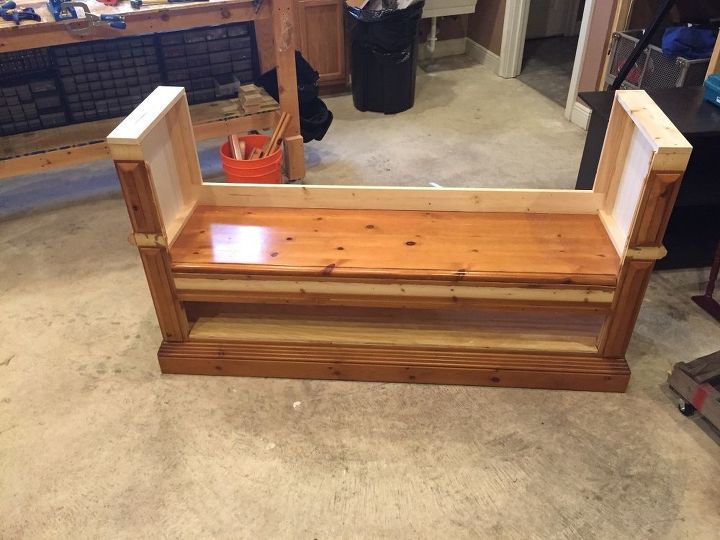
Base for Hutch
I had to figure out a way to square things up a bit on the backside of the bench in order to mount the hutch. I cut a 1x4 to size to go across the back of the bench and used 1x4s to form a square on each side of the bench. I secured a 1x4 on the top, bottom, and back of each side. I secured the 1x4's with pocket holes.
I then cut a square piece of wainscoting and secured it with brad nails and wood glue on the inside of each square on the right & left side of the bench. The wainscoting covered the bare wood on the right/left sides of the bench. I trimmed out the wainscoting with quarter rounds.
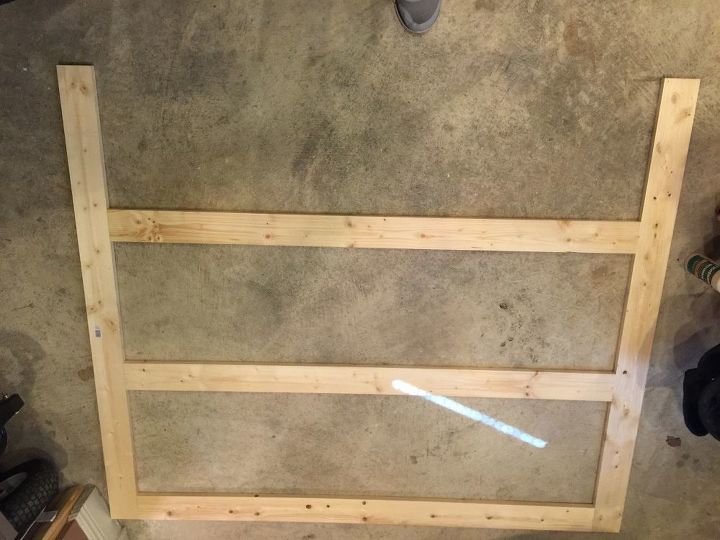
Create Hutch Frame
I created the hutch frame out of 1x4s and securing them with pocket holes. I then secured this frame with pocket holes on the back of each arm rest. Of course, this is not very secure but keep reading. :)
Attach and Secure Hutch
After I secured the hutch frame to the top of each armrest, I used 2x4s to further secure the frame to the bench and are recessed about an inch so they cannot me seen.
The 2x4s run from the bottom of the bench to the top of the hutch, across the top, down the other side to the bottom of the bench, and in the middle from the bottom of the bench to the top.
In other words. the 2x4 frame in the back mirrors the 1x4 frame in the front. I didn't use only 2x4s to form the hutch frame b/c it simply didn't look right. The 1x4s matched the original wood size of the dresser.
Instead of using an entire sheet of wainscoting and securing it to the back of the hutch in the openings, I cut them out in squares and lined up each piece to the adjacent piece. I chose to do this mainly to cut down on the weight of the hutch. I did not want this piece to get top heavy.
My only complaint up to this point in the project is the size of the bottom 2 squares above the bench are not the same size as the squares on the hutch frame. I did this on purpose b/c the smaller squares did not look right on the top hutch - they were too small. At this point, I hoped it would blend nicely once I installed the hardware.
Attach Sides and Top
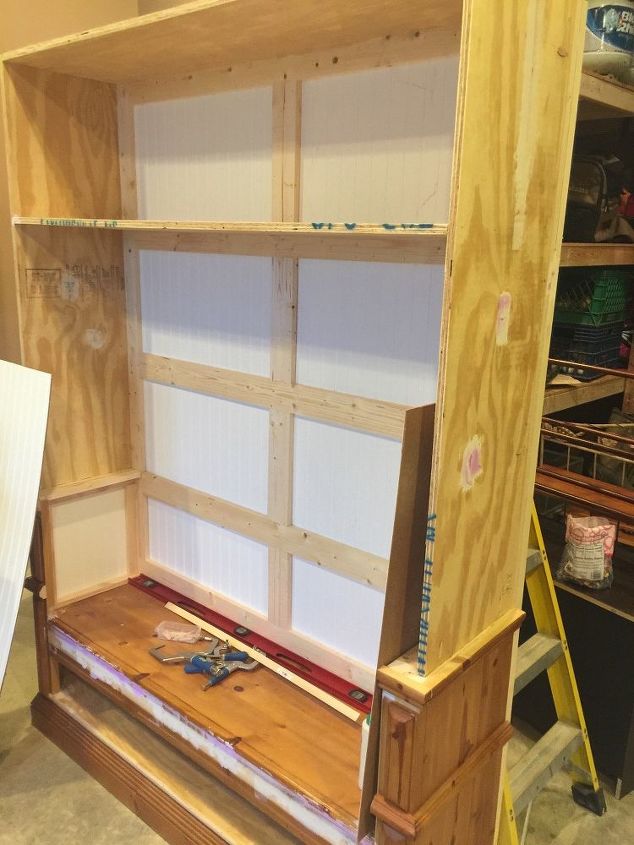
I added 1/2" plywood on the sides, top and upper middle to sort of enclose the hutch.
I didn't like the 'open' look of the hutch without these extra pieces. Plus, it was the only way to build an upper compartment. I secured the plywood to the 2x4s on the back of the hutch. The plywood actually wraps around the 1x4 frame on the sides and on top.
It's hard to notice from the pictures, but I used a lot of the original trim I removed from the dresser at the beginning of the project. Notice the front of each arm at the top and on the outside of each side in the top picture compared to the bottom picture.
This sheet of plywood was really rough, so I added wood filler to patch the holes in various spots. I let it dry for a few hours and then used my orbital sander to sand it down. I also did the same on other parts of the bench.
I trimmed out the inside of the enclosed plywood frame with wainscoting, 1x4s, & 1x2s. I also added a piece of trim moulding along the edge of the plywood frame and the front of the upper shelf in order to hide the edge of the plywood.
Prime and Paint
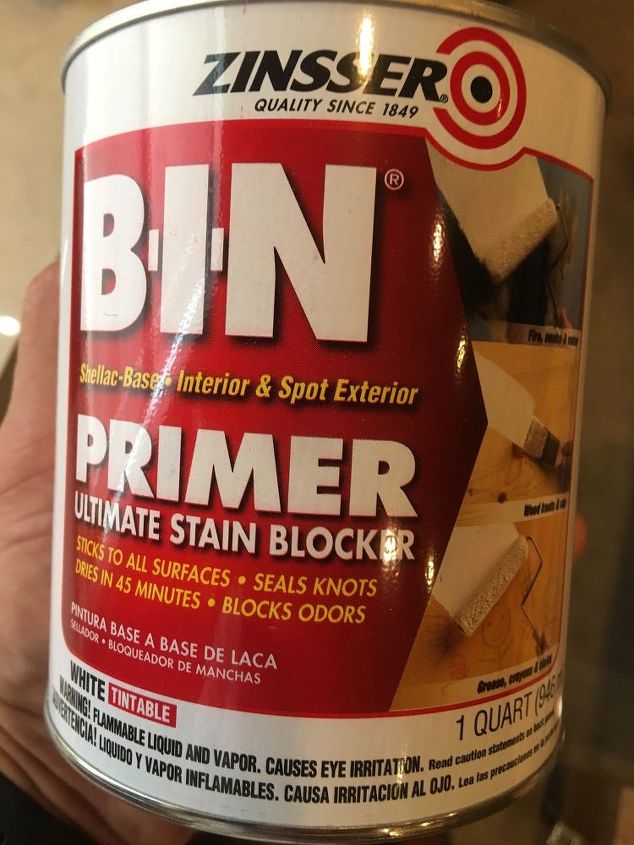
Next, it was time to paint. I primed the piece with my Graco Truecoat Plus II paint sprayer & used this primer.
Let me back up, I used a roller on the first coat of primer and used the paint sprayer on the second coat.
The original dresser had a thick coat of polyurethane, which is not an ideal surface for paint to adhere to. This Zinnser Primer worked really well.
I then applied 2 coats of Sherwin Williams Essential Gray paint (Satin finish) with my paint sprayer. This paint sprayer is a bit of a pain to use b/c it takes time to setup and clean, but it saves so much time on painting pieces that have hard to reach spots. I painted this entire piece in 5 minutes (for one coat).
Add Character and Charm
I used wood from the pallet I pointed out earlier in my blog. I put a dark stain (Dark Walnut - Minwax) on the wood and wiped each piece with a soft rag. I then applied white chalk paint very lightly with a chip brush. I didn't paint the surface; rather, I used a dusting motion and wiped (smeared) the paint across the surface to distress it a bit.
I cut the pallet wood into various sizes with my miter saw and nailed them to both ceilings in the hutch. While I did this, I patched a few spots on the front of the bench that were uneven and touched it up with a paint brush after it dried.
I found these battery-operated, motion lights on amazon. I use these things EVERYWHERE now - I really like them.
I thought this would be useful for the kids if they were searching for a book in their schoolbag. That is actually not the real reason, but it sounded good - huh.. The real reason is I thought it looked cool. :)
I secured the coat racks with my drill and screws to the hutch frame.
This mudroom hutch was awkward to get into the house. It wasn't necessarily heavy, just bulky and hard to deal with. I called my buddy Carlos who lives a few miles away to help me load it in the house. If you are reading this, Thanks Carlos!
I'm happy with the final product and I am also happy b/c we use this piece of furniture very often.
Repurpose Dresser Drawers
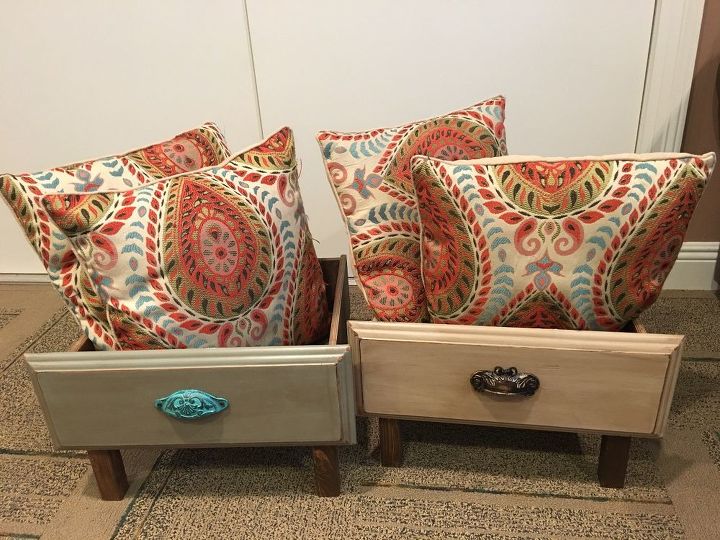
Remember the drawers I removed from the original dresser at the beginning of the project? Stacey came up with an idea to make them into decorative storage cubbies with legs. Again, we had a total of 8 drawers and 2 of them were larger than the others.
First, I removed the hardware from the drawers and sanded each of them with orbital sander on all sides with 120 grit sandpaper and then 220 grit sandpaper.
I then painted the face of the drawers with leftover latex paint (Satin finish) I had laying around my shop. Next, I let the paint dry for about 24 hours and then used 220 grit sandpaper to sand the edges of the face I painted. Note: I sanded these by hand in order to control how much paint I removed. The goal of doing this is to expose a small amount of the wood on the corners/edges so that the stain can penetrate those spots and add to the distressed look.
I cut 4 2x2s to 6" with my miter saw for the legs and sanded them with 220 grit sandpaper.
Next, I applied wiped Dark Walnut stain on one piece at a time with a staining pad and wiped the excess with a rag. The stain darkens the paint color a small amount as you can see from the picture below. Since the back of the drawers and legs were wood, so the stain darkened them quite a bit.
I attached the legs to the drawers using brad nails and wood glue
Stacey bought some antique knobs to put on the front of the drawers. These drawers add a bit of charm to a bedroom or living room - they can be used to hold pillows, magazines, or just about anything.
Every part of this dresser was repurposed into something useful!
I hope this project provided you with some value because this is, and always will be, my ultimate goal.
Please consider subscribing to my YouTube channel and visiting my website for more projects and other fun stuff. Feel free to contact me anytime if you have any questions. I'm happy to help!
Until next time – Imagine…Create…Share
Thanks, Jeremy Hoffpauir
Resources for this project:
See all materials


Any price and availability information displayed on [relevant Amazon Site(s), as applicable] at the time of purchase will apply to the purchase of this product.
Hometalk may collect a small share of sales from the links on this page.More info

Want more details about this and other DIY projects? Check out my blog post!
Comments
Join the conversation
4 of 223 comments
-
Great job! Or should I say jobs! I have some small drawers from a chest that has sentimental value. The actual chest is in bad shape, but the drawers are in good shape. You have inspired me. Thank you!!
-
Beautiful & fantastic directions.


Frequently asked questions
Have a question about this project?
This is beautiful!!! I have a dresser to do this with. I think I will make the shoe cubby higher in size so we can store their snow boots. Thank u so much for the info. U did a fantastic job on this and on the directions.
Great job. I love it! Very creative and useful!
You used wood pallets inside ? Aren't they pressure treated?
I had a terrible experience last year with a repairman who used pressure treated wood inside my home.
There is a reason wood is pressure treated and why it should never be used inside the home. I wonder why people use it, inside other than you can find wood pallets easy and alot of times free.
The chemicals in the wood palettes, I would never want to be exposed to them inside my home.