


How to Emboss With Aluminum Foil

I love the look of 3 dimensional art and metal embossing is a fun way to come up with a unique project. This week, I took one of my older patterns, Holiday Partridge, and made her into a brilliant foil embossed piece of art. This easy DIY project is based off of grade school memories.
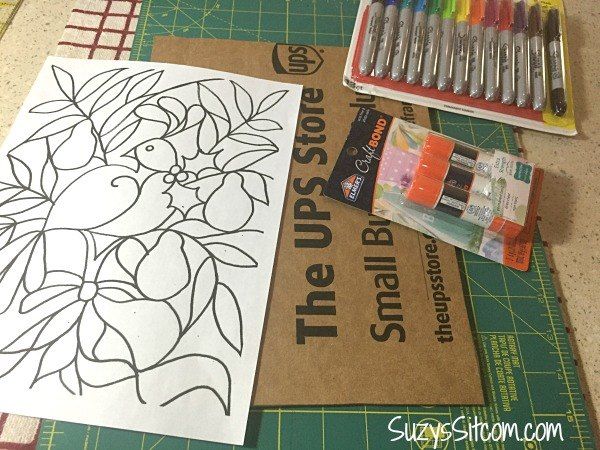
For this project I used:
- 9″x 12″ piece of scrap cardboard
- Heavy Duty Aluminum Foil
- Free Holiday Partridge Pattern
- Glue Sticks
- White Glue
- Yarn
- Colored Permanent Markers
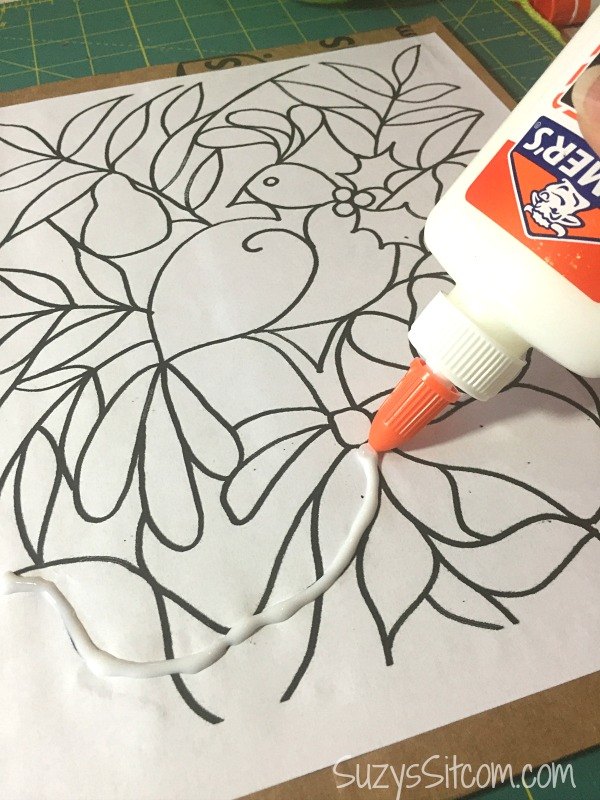
Print out the free Holiday Partridge Pattern. Center it on the cardboard and use glue sticks to stick it down. Take the white glue and following one line at a time trace a line a glue onto the first line.
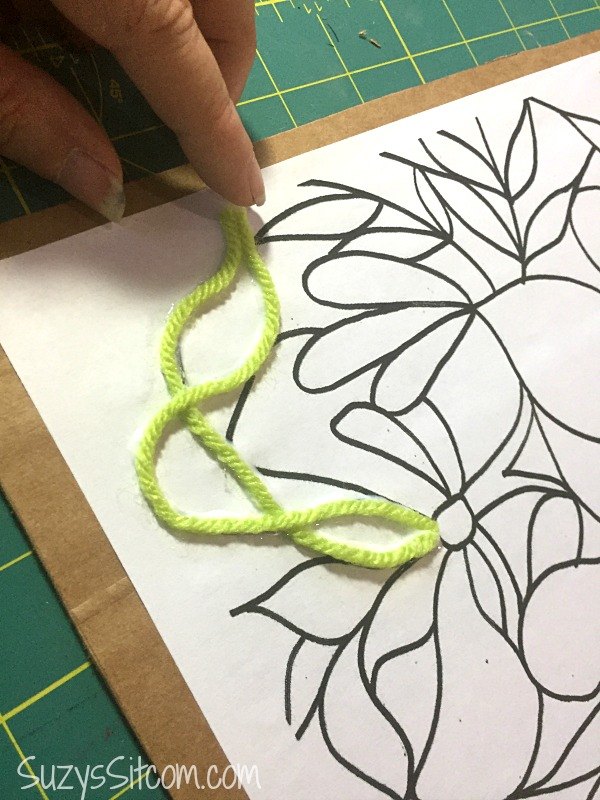
Glue down pieces of yarn along the lines.
Because this drawing is so detailed, it will take a while to glue down your yarn. If you are wanting to try this technique out on a simpler line drawing, be sure to check out the links at the bottom of this post, or even use a page from a coloring book!
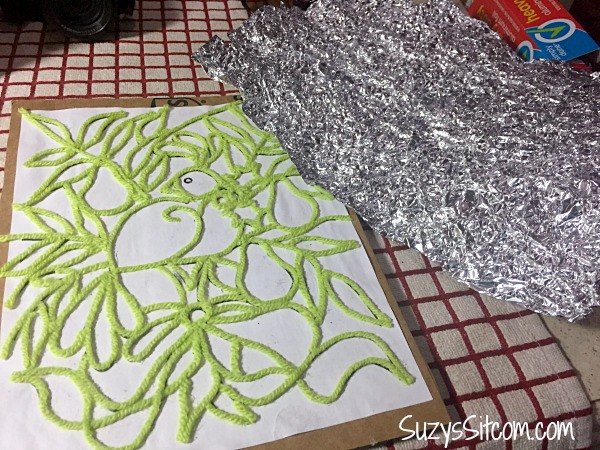
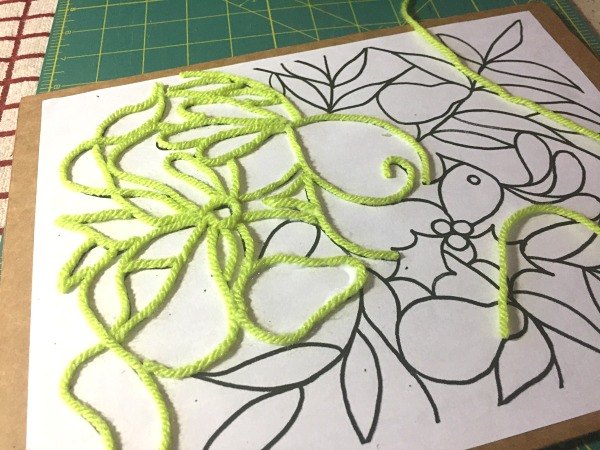
Once all the lines are covered with yarn, allow the glue to thoroughly dry before going to the next step. Cut out a piece of heavy duty aluminum foil that is quite a bit larger than your 9 x 12 picture. Carefully crumple it up in your hands a few times and then very carefully open it back out.
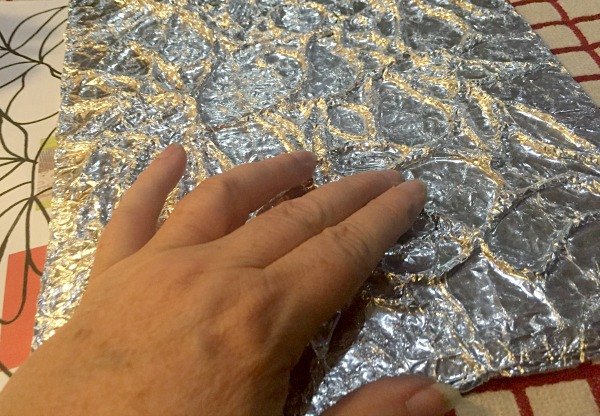
Coat your entire yarn covered picture in a thin layer of white glue. (I used a flat brush to paint it on). Place the crumpled foil over top and begin to press it down into the hills and valleys of the drawing. You can carefully use the end of a pencil eraser to emboss the aluminum into the crevices. This also takes many of the wrinkles out of the foil as you rub it lightly over the flat spaces.
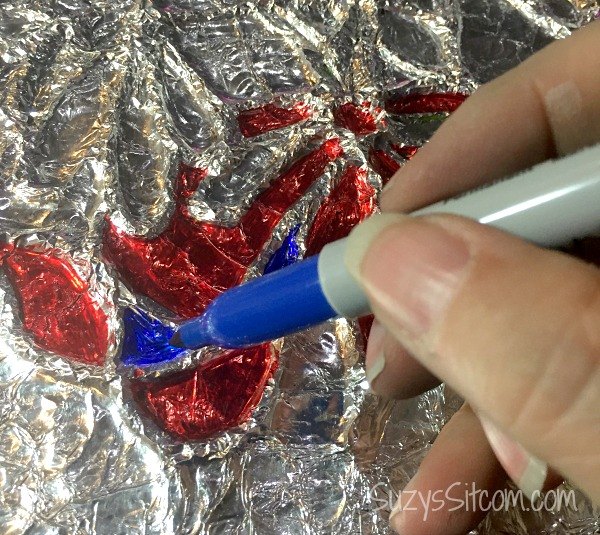
Once the foil is placed how you like it, you can begin to color in all the flat places with permanent markers. (Do not color in the raised foil lines).
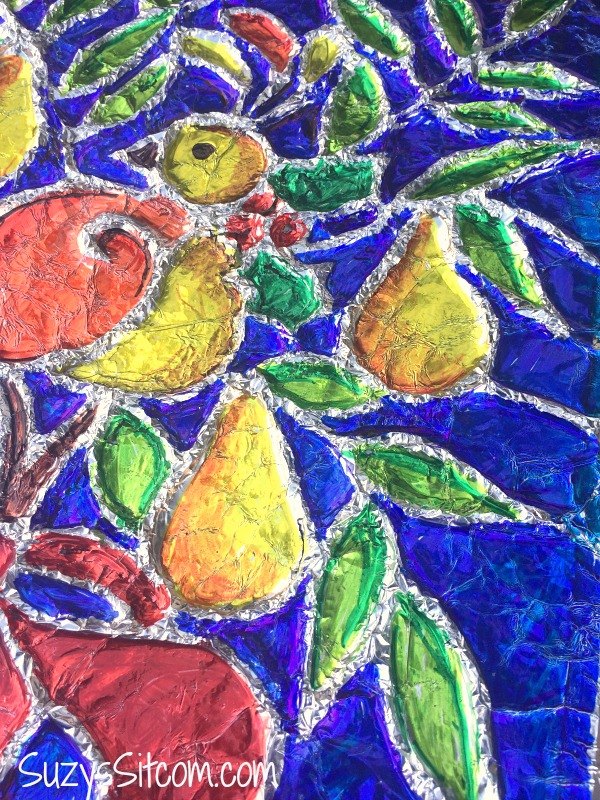
Feel free to play with color! For the pears, I colored them in with yellow and then added orange to shade.
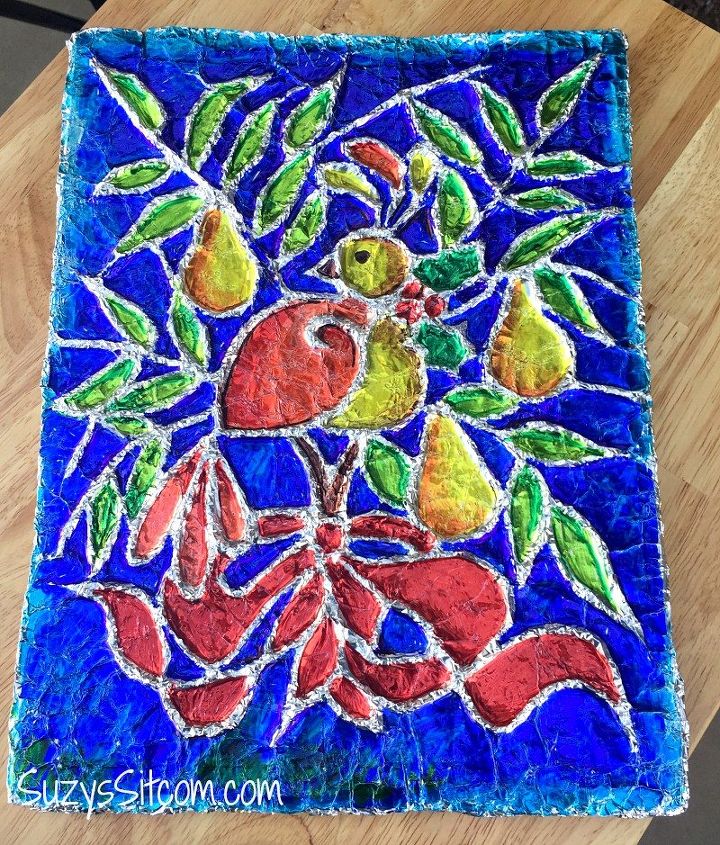
The final piece can be framed. What a unique way to decorate for the holidays!
For the free Holiday Partridge Pattern, be sure to click on the link below!
DIY Christmas Decorations
Resources for this project:
See all materials


Comments
Join the conversation
-
I'm thinking I might try this with glass paint instead of the permanent markers. Thanks for sharing and for the inspiration. Beautiful idea.
-
thinking about trying with a hot glue gun instead of glue and yarn, and just spray glue the foil... very pretty


Frequently asked questions
Have a question about this project?
Would this work with gold leaf? TIA
I clicked on the link to get the free partridge pattern, but I didn’t see it. Where can I find it?
Can I use acrylic paints instead of markers ?