


Sofa Arm Table From Old Shelves

by
Clint
3 Materials
$5
2 Hours
Easy
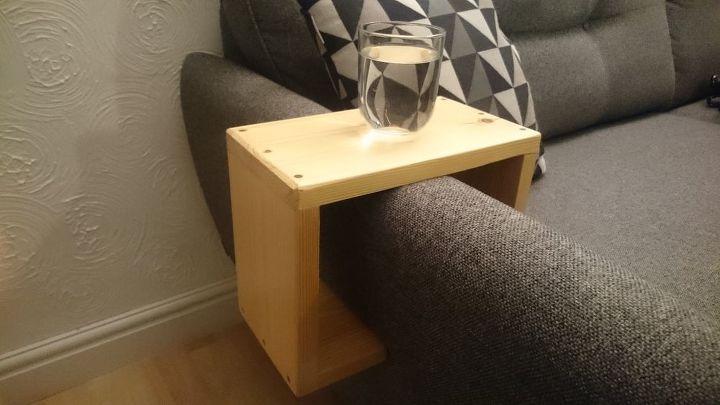
My good friends wanted a sofa arm table to keep their drinks on whilst sitting in comfort and so asked me to make one. I had some pine that was previously used for shelves which was the right size and so perfect for the job.
I have a video on YouTube showing the process as well as more details below.
{
"id": "4493455",
"alt": "",
"title": "",
"video_link": "https://www.youtube.com/embed/V-OL4MbWEV4",
"youtube_video_id": "V-OL4MbWEV4"
}
{
"width": 634,
"height": 357,
"showRelated": true
}
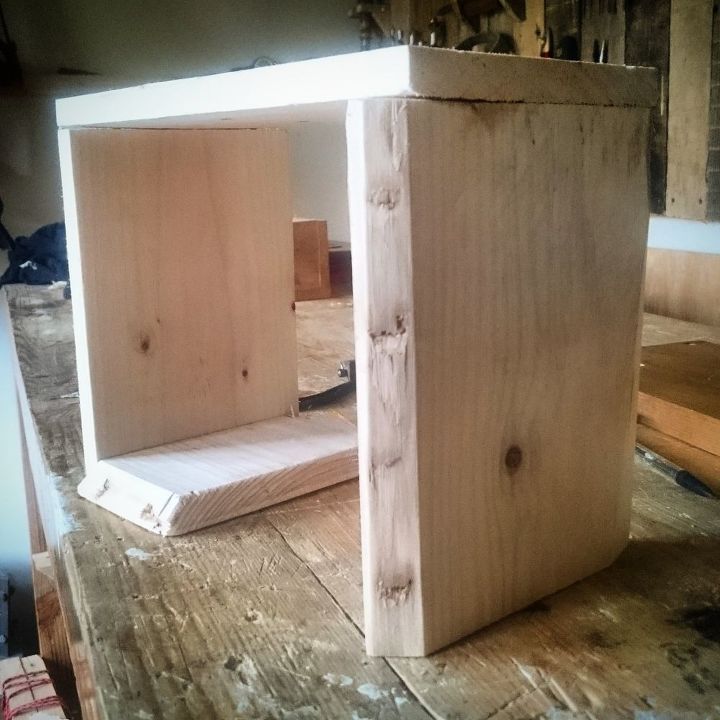
I decided to make a rough prototype from some pallet wood to start off with as their sofa had a very strangely shaped arm at an awkward angle. The simple solution was to add a little piece to the side to hold it in place.
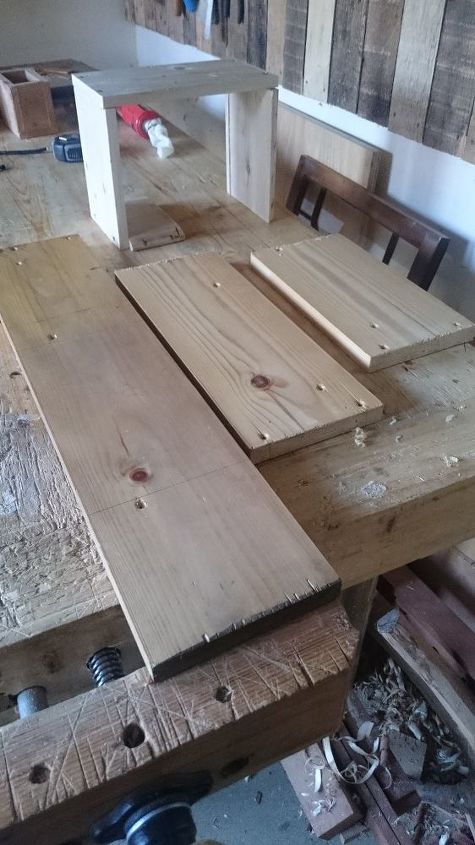
I used this pine shelving to make the table, making sure to mark the cut lines with a knife to ensure less breakout of the wood when cutting through it with a saw.
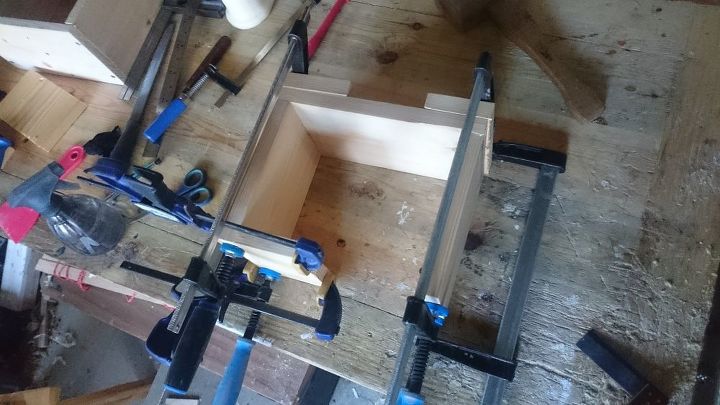
Its important to get all the pieces as square as possible when joining the wood using butt joints. The more contact between the two joining pieces of wood there is, the better the joint. To start with I glued up all the pieces together making sure they were square to each other when doing so. I left it to dry for a day.
This glue joint alone would not be enough to hold the piece together in the long term but it was a good idea to help me keep the pieces in place for the next step.
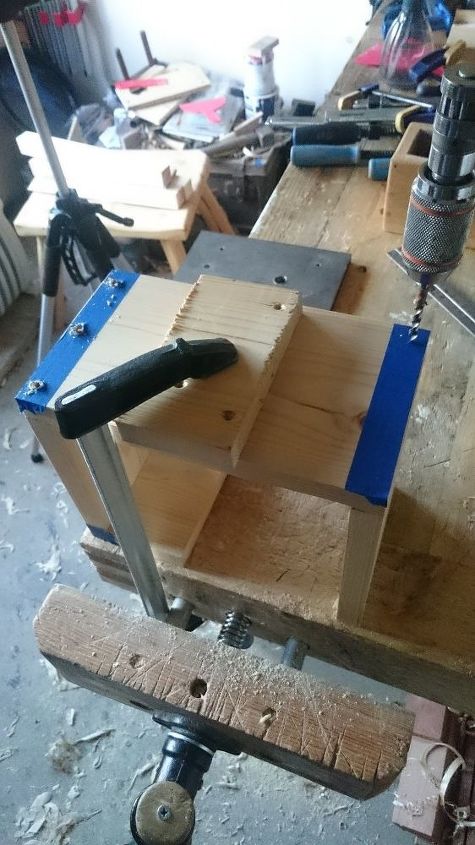
When the glue dried the next day I went about making the holes for the dowels. I added some painters tape along the edge where the holes would be drilled, this not only made it so I didn't have any pencil marks on the wood but also helped to reduce the amount of breakout in the wood when drilling. I probably need some better drill bits to be honest!
I marked the drill bit with a piece of tape so that all of my holes were consistently the same depth. Which was around 45mm.
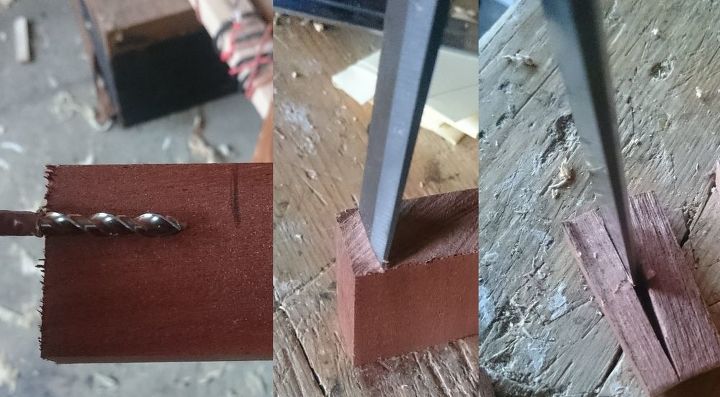
To make the dowels I used a little piece of sapele so it'd have some contrasting wood against the pine. The process of preparing the dowel is fairly easy, using the measurement on the drill bit for reference I cut the piece of wood a little longer. Using a chisel I split down the grain of the wood and then split across the grain to make some small pegs.
You can then do one of two things, either whittle the dowels with a knife or chisel until they fit into the holes or you can whittle the dowels down a little and hit them through a dowel plate. I recommend the second option not only for accuracy but for how satisfying it is! (or you can just buy dowels)
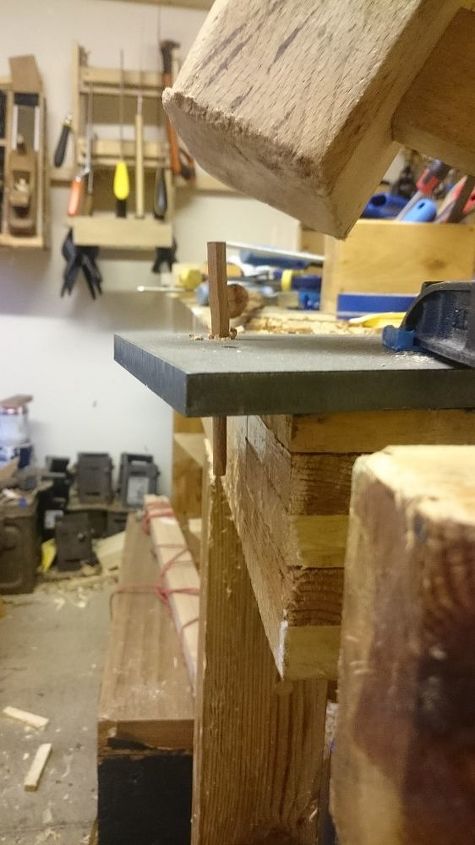
So I whittled the dowels down until they were just a little larger than the hole in the dowel plate, which was 6mm. I then proceeded to hit them through the hole with a mallet, using the next dowel to complete the process.
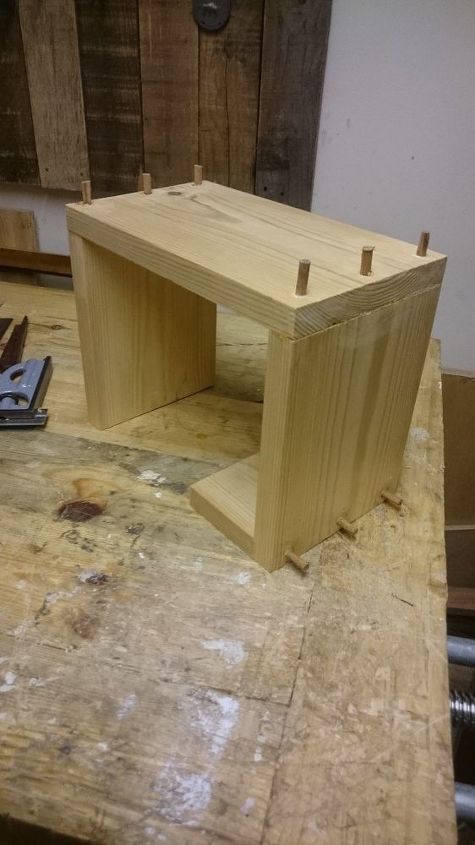
Putting a little bit of glue into each hole as well as a little onto each dowel I tapped them into the table ends. I find its best to use a small metal hammer to tap the dowels in as it has a more firm and accurate strike than a wooden mallet. Once the dowels were in I let it dry for a day and added finishing touches.

Using a flush cut saw I trimmed off the ends of all the dowels. I filled in a few gaps using a mixture of sawdust from the pine and some glue. When that dried I planed and sanded the whole thing and added some chamfers to the edges to try and avoid anyone getting scratched or splintered.
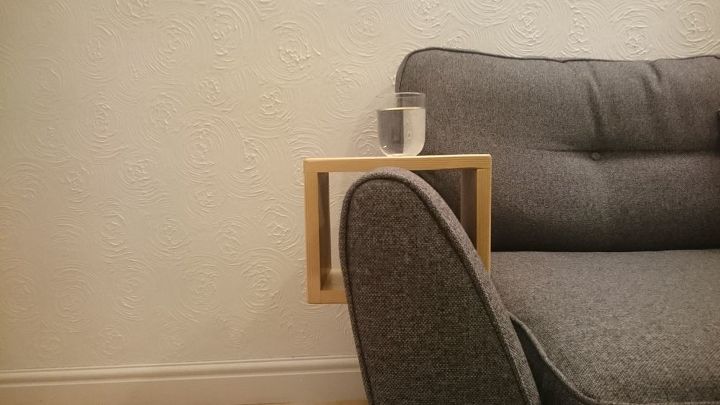
A few coats of hard wearing varnish later and this was the result. You can see how that extra little piece on the side holds it firmly to the sofa arm.
The great thing about this project is that it can be as simple or complicated as you like. If you want to make some fancy joinery for the edges like dovetails then you can. Alternatively there's no reason why you couldn't attach all the pieces together with screws. You could use some oak or some pallet wood, add extra little pieces to hold the remote or a magazine, it really can be made into whatever you want it to be.
Thank you for taking the time to check that out, if you'd like to see videos and pictures of my projects and behind the scenes reports from the shed then please give the a like.
As always, any criticisms, comments and general greetings are always welcome.
Want more details about this and other DIY projects? Check out my blog post!


Frequently asked questions
Have a question about this project?