


DIY Holiday Barn Wood Sign

by
Patricia
7 Materials
$15
1 Hour
Medium
I've been having fun making holiday barn wood signs this past week. Today I'm sharing a step-by-step tutorial with you in case you want to give it a try yourself. The signs make great gifts or to sell. Or make one for yourself to show spread some holiday cheer!
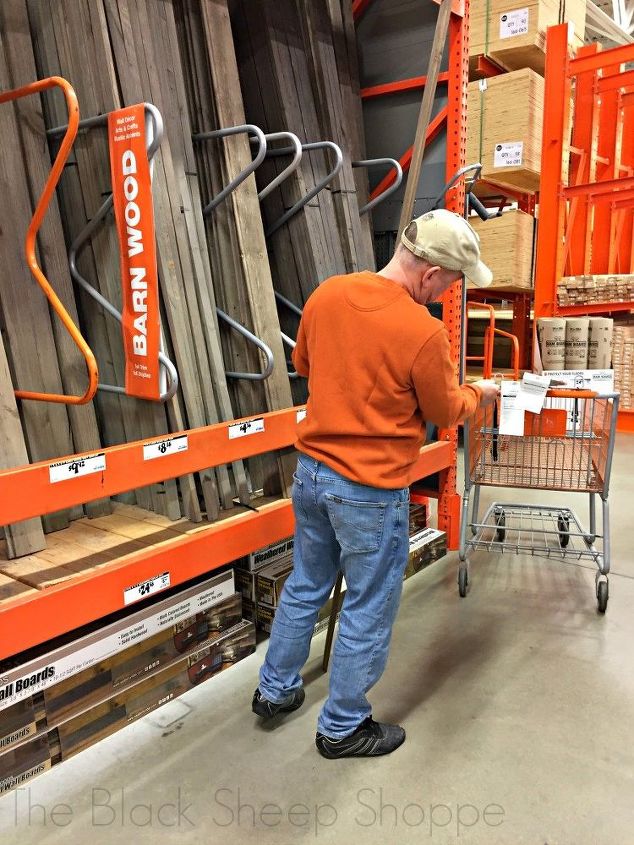
I selected an 8 foot piece of barn wood flooring at Home Depot and had it cut in half at the store so that I ended up with two 4' pieces.
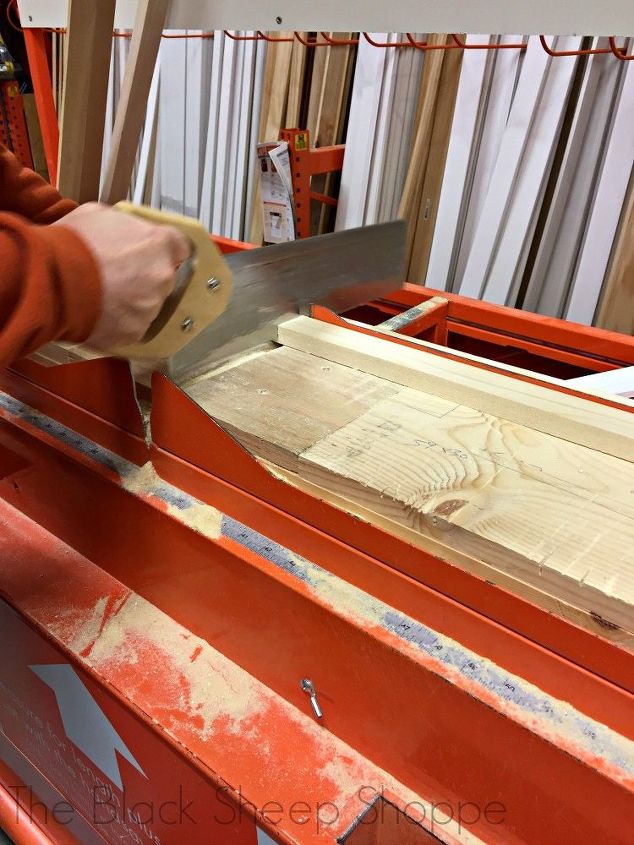
Next I selected a 1 x 2 piece of trim and cut it myself at the store. Well actually I had my husband cut it because I couldn't take a picture and saw the wood at the same time.
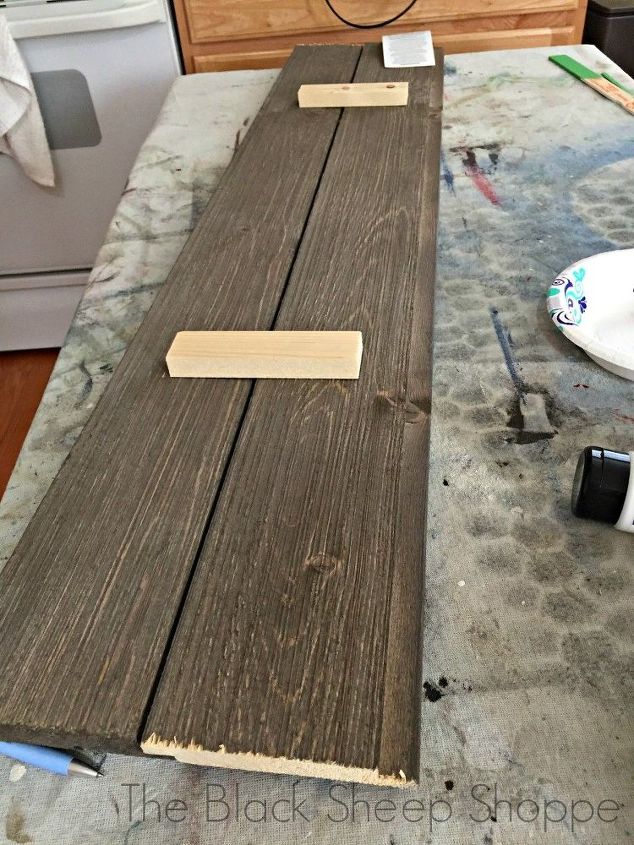
I hammered the nails through the front of the wood (it blends in later) into the trim piece on the back. I used a little wood glue to help secure the trim, too. Two pieces of trim, one at the top and the other at the bottom, secure the two pieces of barn wood together.
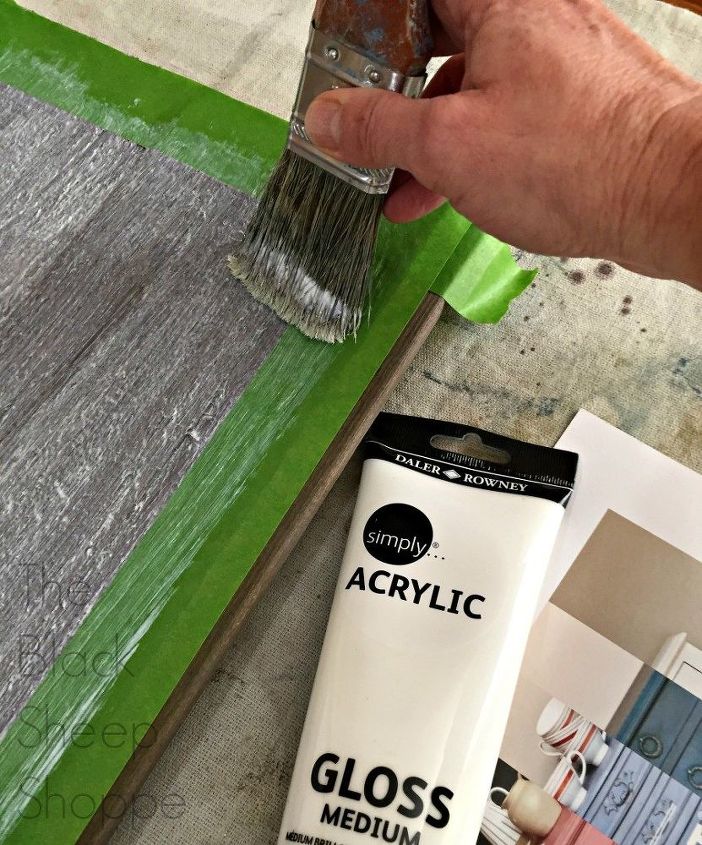
For this design I wanted a background color with a border. First I used painters tape to tape off a border area. To avoid paint bleeding underneath the rough texture of the wood, I applied a clear coat of sealer before applying paint. Usually I use Mod Podge for this step, but I didn't have enough on hand, so I use a gloss medium instead. Either product will look milky when applied but will dry clear.
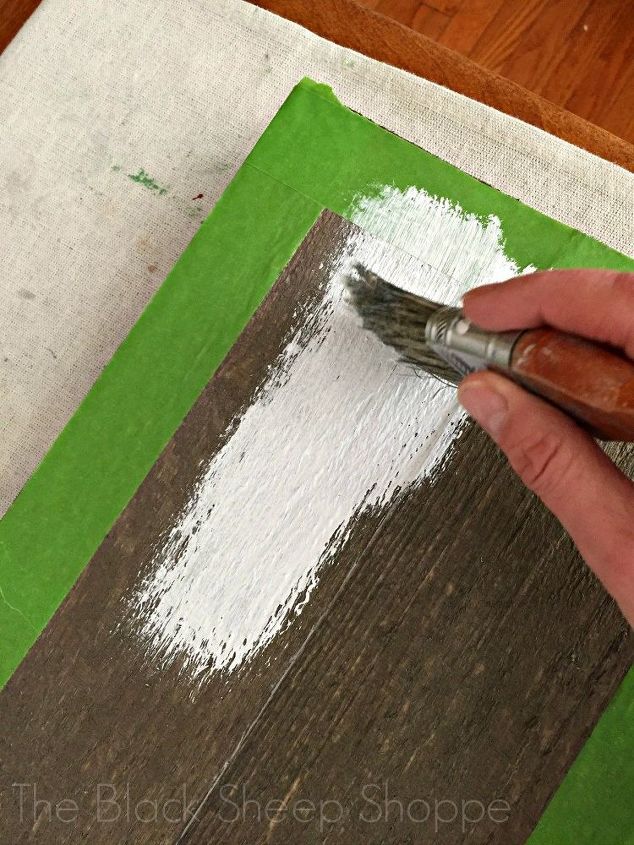
Once the sealer was dry, I painted on my background color. I used an old paint brush for this step. An inexpensive chip brush would work just as well, too.
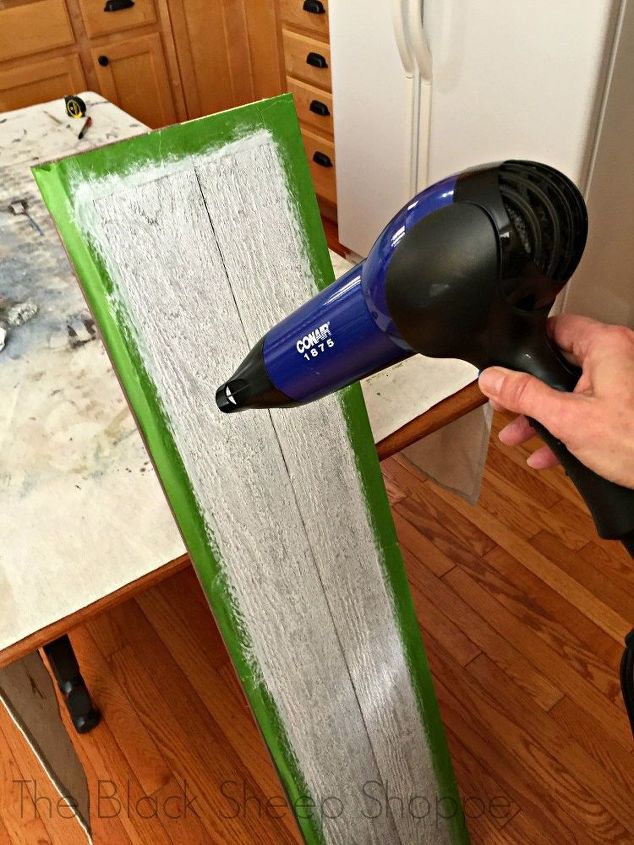
I used a hair dryer after each application of paint through out the project to speed up the drying time.
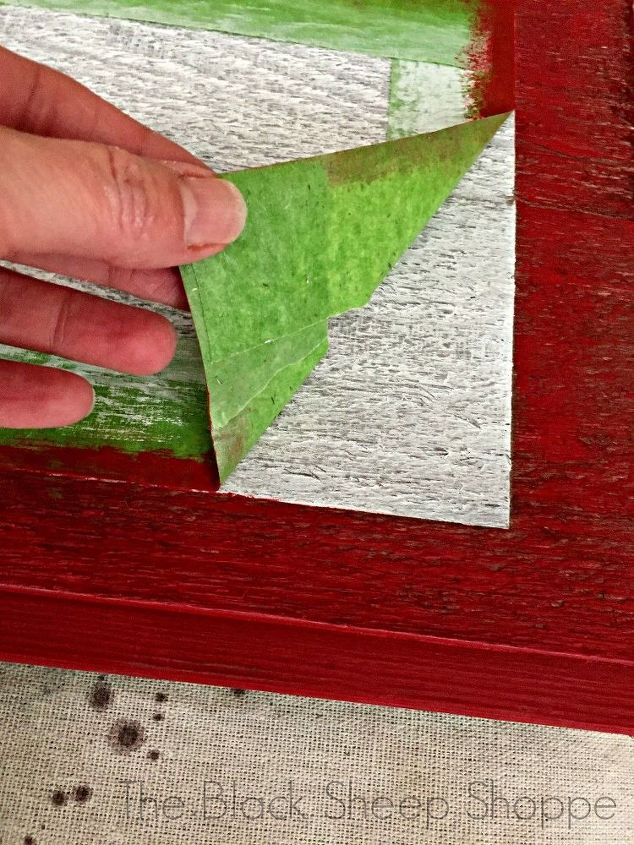
Next I taped off the background and then painted a red border. Once again I used a sealant first to prevent the paint from bleeding under the tape.
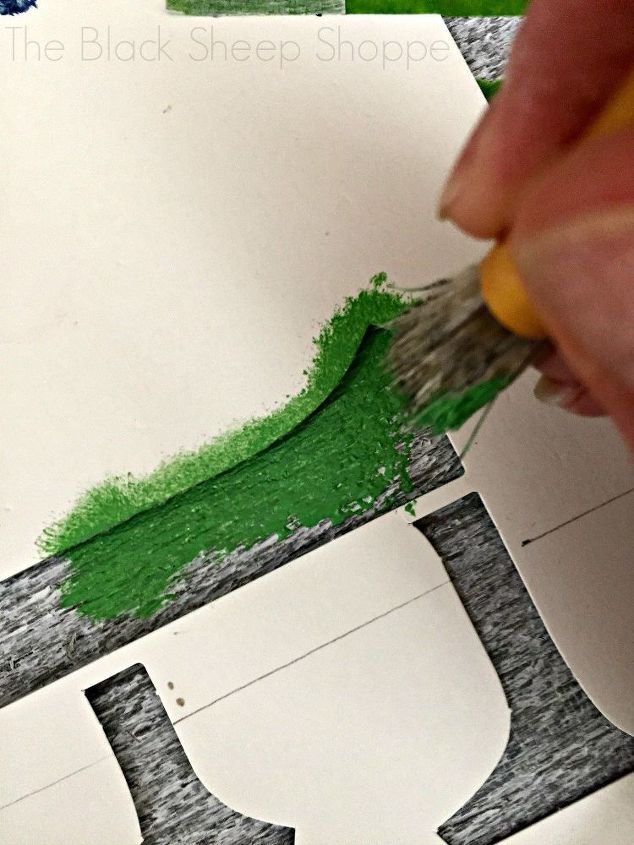
For the stencils, I first draw out my design on paper and play around with the layout then mark my measurements. Then I lay the stencil in place, hold it flat with one hand. Using a small amount of paint pounce or dab the paint on with a stencil brush. Overloading the brush can cause the paint to seep underneath the stencil.
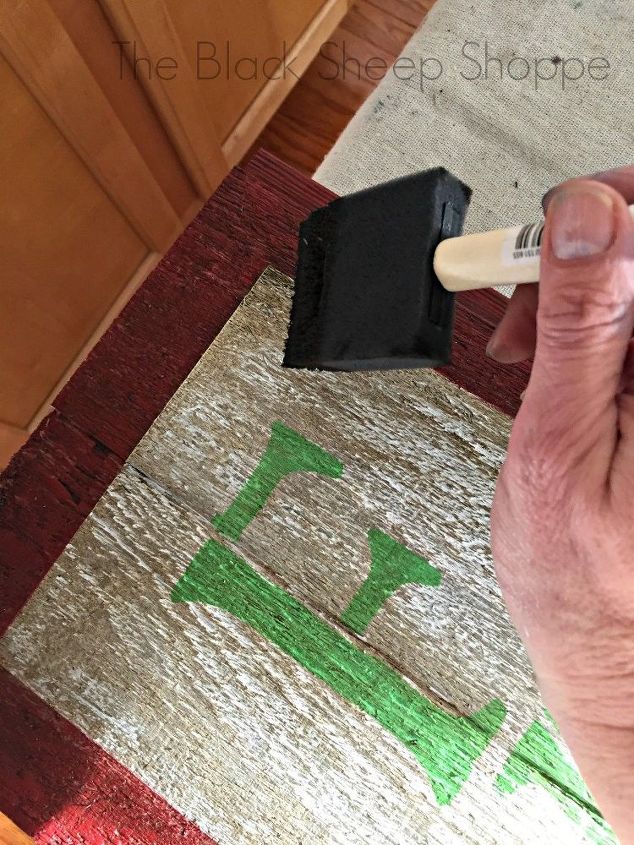
After the stenciling was finished I sealed all the paint again. Then I used a foam brush to apply a dark glaze for a rustic aged look.
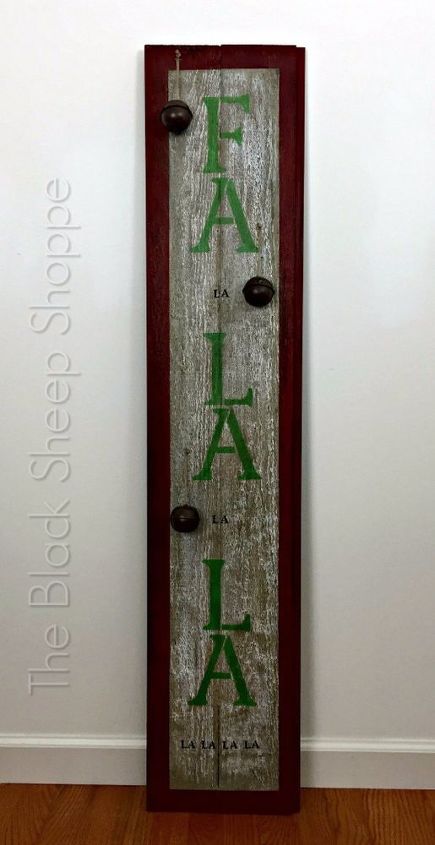
And here is the finished sign "Fa-la-la".

I attached some jingle bells with a staple gun for a little extra holiday cheer.
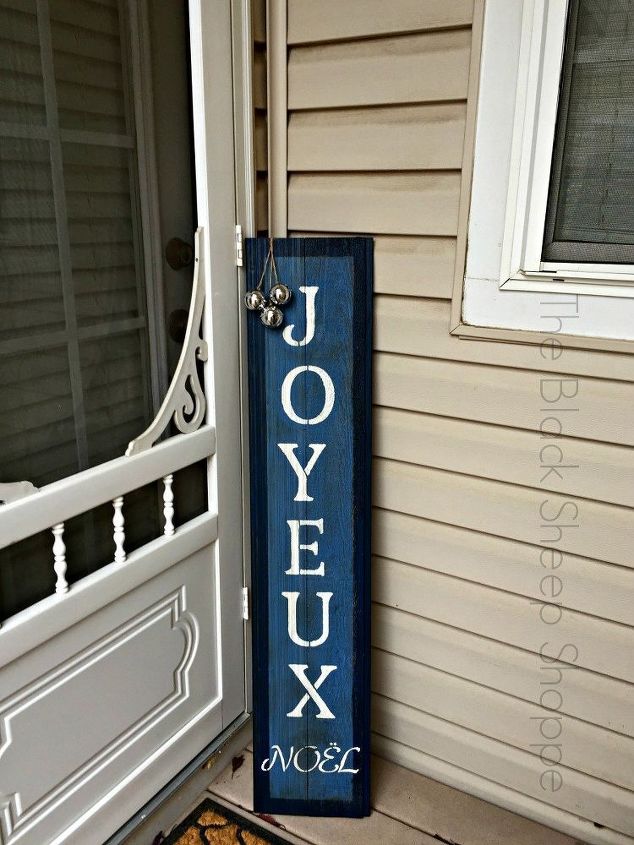
I'd like to invite you to stop over at my blog, The Black Sheep Shoppe, to see the other designs I created this year. I've also included more photos and tips to help you get professional results for your own holiday signs.
(The cost and time estimate will vary depending on your actual design and what items you already have on hand. The wood itself was just under $10.)


Any price and availability information displayed on [relevant Amazon Site(s), as applicable] at the time of purchase will apply to the purchase of this product.
Hometalk may collect a small share of sales from the links on this page.More info
Want more details about this and other DIY projects? Check out my blog post!
Comments
Join the conversation
2 comments
-
I love these signs!!!! So pretty!!!!


Frequently asked questions
Have a question about this project?