


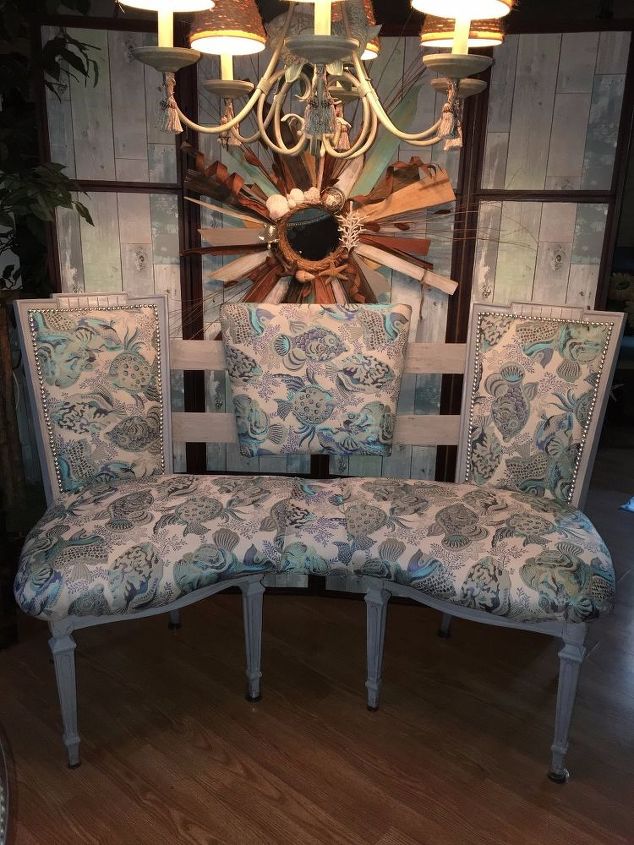
Elegant Curved Dining Banquette Bench From Vintage Thrift Store Chairs

by
Suzette
4 Materials
$75
2 Days
Medium
I posted an elegant dining table I made a couple of weeks ago, and needed to find nice seating. Well, after looking and looking, I found 3 chairs at the thrift store for $8 and decided to make a my own curved banquette bench!
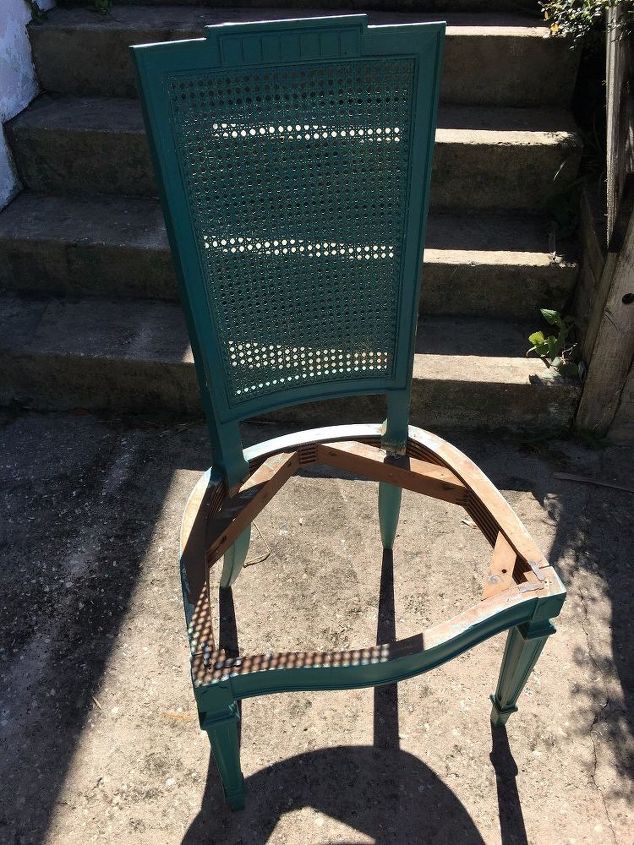
This is one of the 3 chair I found at the thrift store. They were all structurally sound. I used 2 for the banquette bench and re imagined one to complete the set.
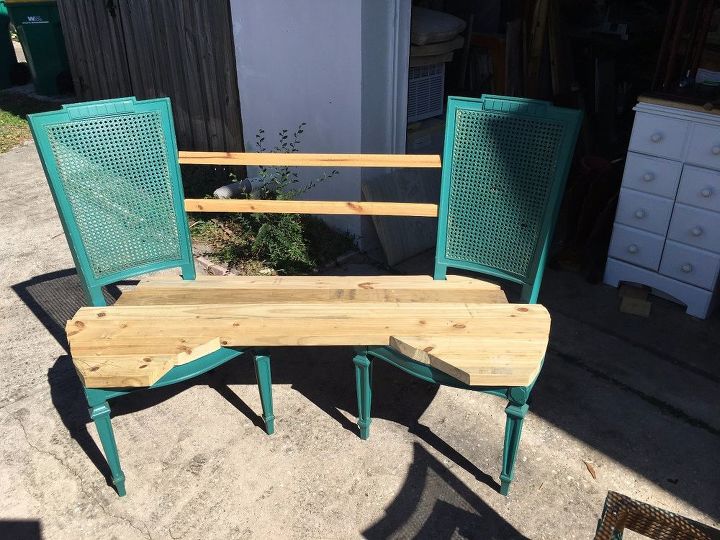
I put 2 chairs at an angle and measured the length I wanted it to be. I cut my 2x4's to add a little height because my daughter is short! Then I just cut the angles I wanted as I went along. Then I added two support cross pieces so I could add a 3rd seat back.
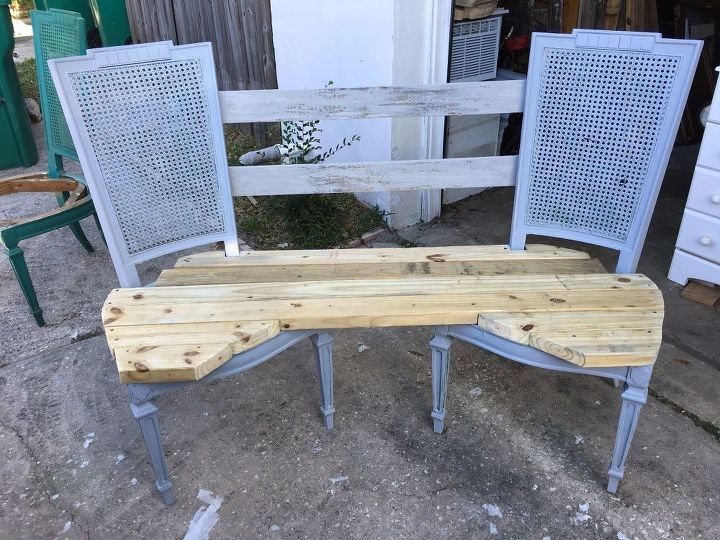
I painted the chairs to match my table then attached the 2x4's with screws to the chairs. I drilled holes first so the chair frames wouldn't crack. After sanding, it was time to give it some glam!
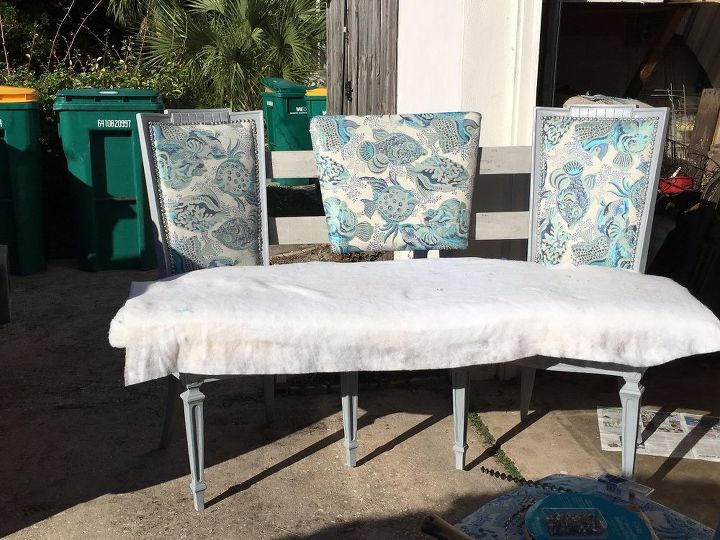
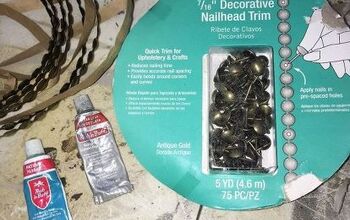
Starting with the chair backs, I used foam to cover the wicker and create a soft back rest. Then I covered it with fabric and trimmed it out with nailhead trim. I used the foam from a long bench seat I had and started the upholstery process. I used the seat from another chair project, for the middle back rest.
I'm obviously not an upholsterer, but did my best.

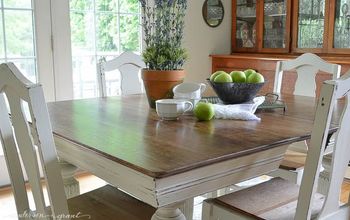
The perfect seating for a my round table. If you didn't see my previous post, this table is 30" round, so with the curved banquette seating, it doesn't take up a lot of room! But the best part is, it's one of a kind, and the whole set only cost $95.00! It would have been less expensive, but the fabric I chose was rather pricey.
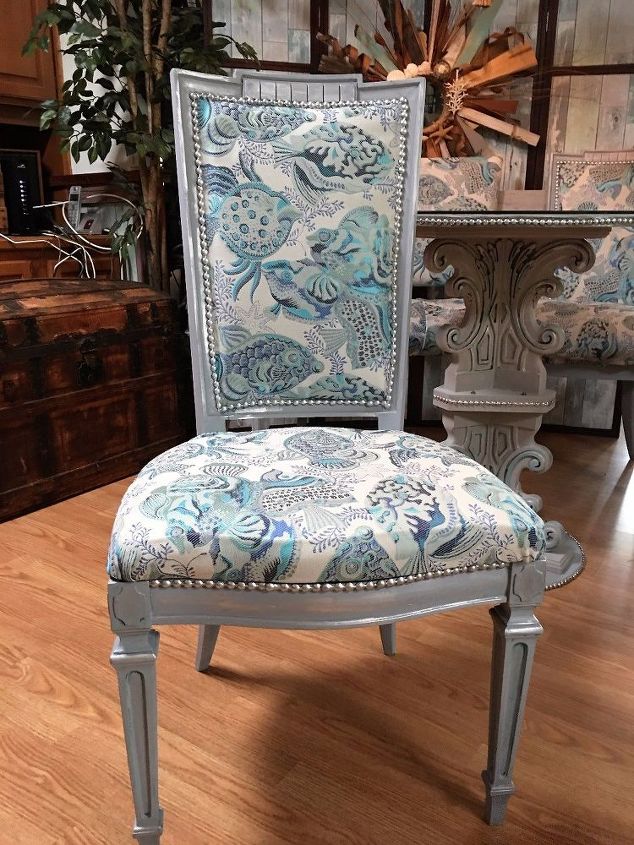
The extra chair to complete the set! Isn't it crazy how much different
it all looks now!! Thanks for lookin' :)
Comments
Join the conversation
6 of 113 comments
-
This is beautiful!!
-
Love this but i thjnk i would have covered all of middle not left boards show maybe curved top of middle. You are very creative to think of this and you did a beautiful job upholstering this piece and single chair.


Frequently asked questions
Have a question about this project?
Could you post a picture of the back of this so we can see how it is attached? does it have to be against the wall because of the back? The front is very unique.
I have some dining room chairs that have cane backs. I have been trying to figure out how to cover just the caning with upholstery. How did you cover her back? Can you post a picture of the back?
The pricey fabric was well worth it! Stunning set! How did you attach the fabric on the seats? and was the nailhead trim the type that's like a ribbon and a nail goes in every few spaces? Thanks for sharing!