


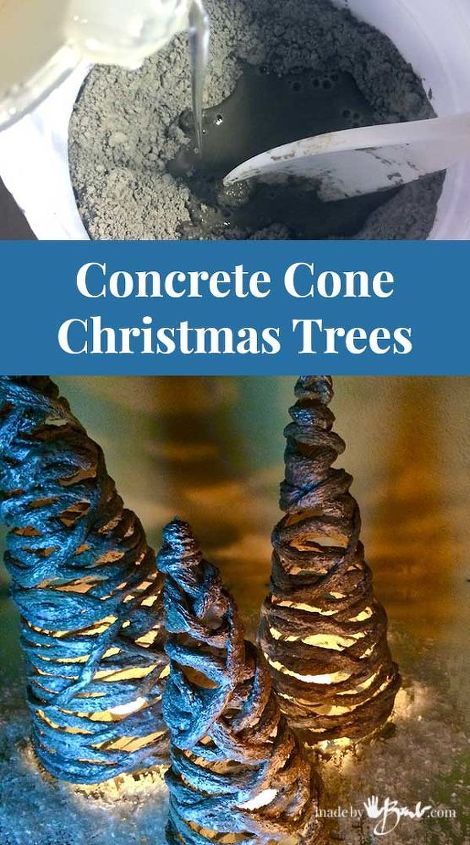
Concrete Cone Christmas Trees

by
MadeByBarb
5 Materials
$5
1 Hour
Easy
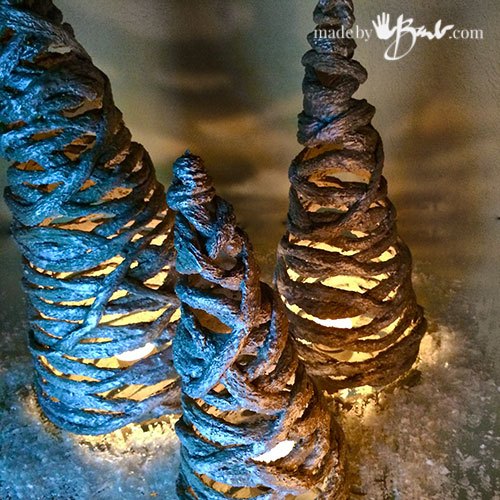
Oh, I know that you are expecting it… It just wouldn’t be right if I did not make something out of concrete for Christmas since I am known for concrete. I’m excited to have figured out a completely new project to share with you! Yup, concrete can be festive too, especially since it does not burn so it can be combined with candles. Come on, add some Concrete Cone Christmas trees to your holiday decor and spread the light!
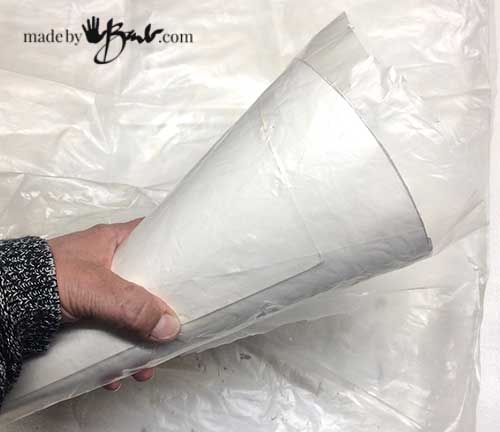
Step #1 Make your Cones
To make your templates, tie a string around a pencil and swing an arc on the cardboard from a centre point. The length of string will be the height of the cone and the centre will be the tip of the cone.
Once you cut out the odd shape you can roll it as tight or loose as you like. The overlapping will be good to strengthen the form. Tape the edges well. It is essential that the forms are somewhat flexible.
Use some plastic sheeting or bag to cover the shapes well. Tape with clear tape and fold bottom edges under and tape in place.
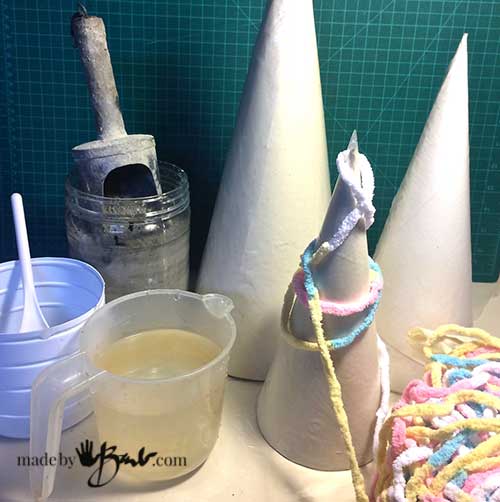
Step #2 Get the yarn ready
I like the typical 3 different sizes of Christmas trees. There are many choices of yarn, as long as they have some ability to absorb the cement (however check out the even better choice to follow). I like to do a ‘dry fit’ to see how much yarn I need to cut off the ball. The idea is to have enough loops around that they overlap and connect, so more is better than not enough.
Once you have an idea of the length; roll it loosely into a ball. Trust me, last thing you want is to get a knot in the concrete-covered yarn! ( I find all the pitfalls for you)
Step #3 Get the Cement mix ready
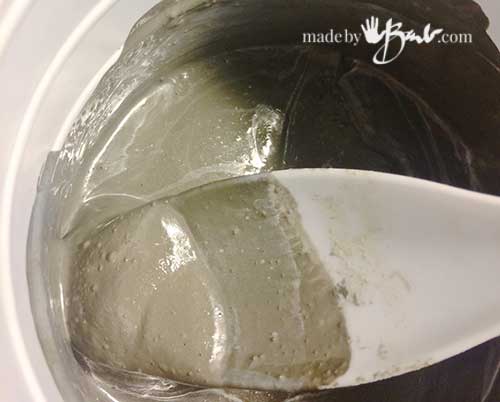
Put on you mask and gloves and mix the portland cement with water. Make a slurry that is about the thickness of melted ice cream. I added a squirt of acrylic paint to give a bit more strength, but you could omit it.
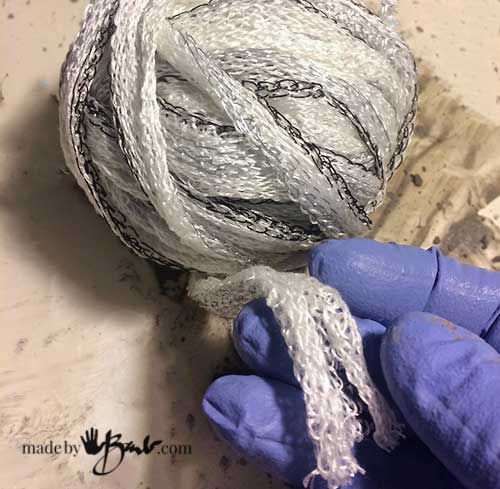
This yarn is now my favourite type for the dipping in cement. The others work but this has some nice texture without getting too rough looking. Once it’s rolled up dip it in water and wring it out. This will help it from ‘stealing’ all the moisture from the cement mix.
Dip the whole rolled ball of your estimated yarn into the slurry. Roll it around and ‘squish’ it to absorb the cement, but don’t lose the end of the yarn.
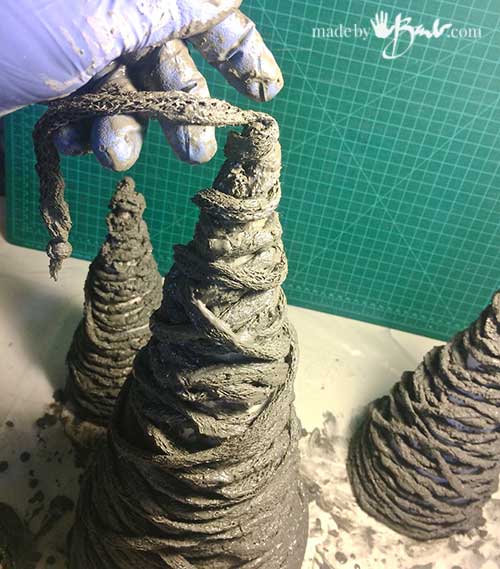
Step #4 ‘Wrap’ the tree
Pull the end out and run it through your fingers to rid of extra cement. Make a loop and start at the top. Loop around, down and up again and round and round… Try to not leave any extra large gaps or be too dense at any point.
If a bit of the tip sticks out, it is an easy way to lift it and turn it to see all sides. (or use a lazy susan) It is easy to adjust the loops once they are in place. Just poke them around with a skewer.
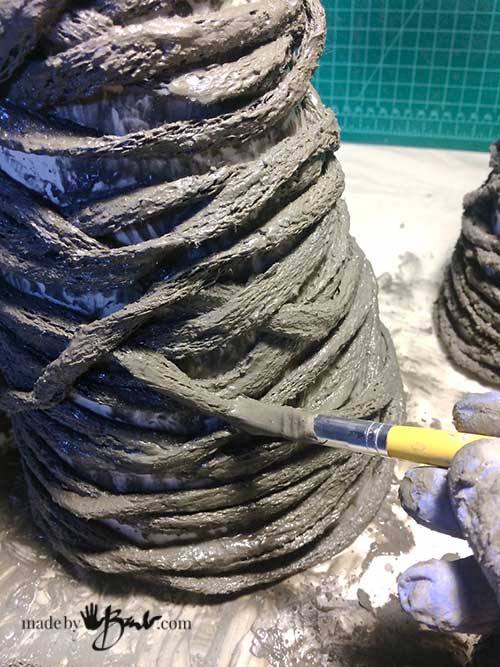
Once you are happy, let it sit for a day/overnight. Poke it to see how sturdy it is. There may be a few spots where the yarn may not be covered with enough cement and remain a bit soft.
Don’t despair! Mix up a bit of cement and water and give it an additional layer. That will also smooth out the roughness of the concrete.
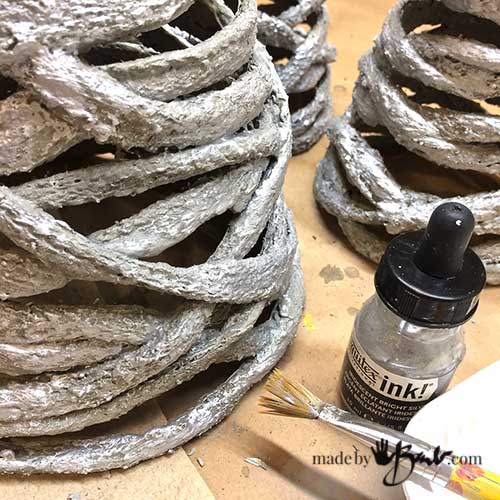
Alright, I always can’t leave well enough alone… I just needed to add a bit of sheen. Metallic ink or acrylic ink will work. Just a bit of dry brushing will be enough. Silver and grey are subtle and great together.
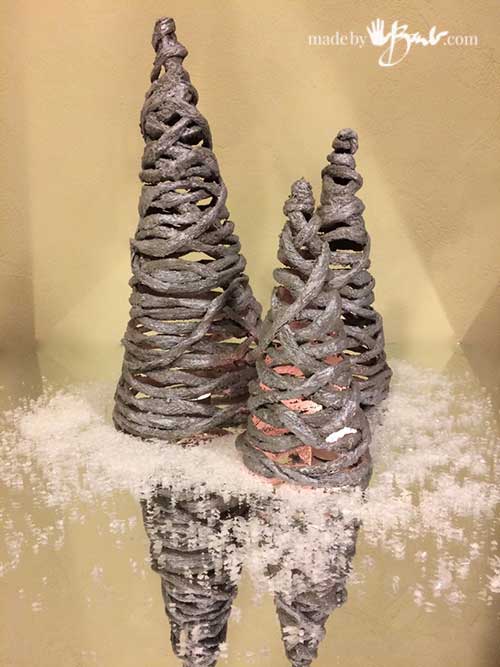
Perhaps they can sit on that table on the porch. They will not blow away and you can add twinkle lights or candles.
Want more details about this and other DIY projects? Check out my blog post!
Comments
Join the conversation
2 of 20 comments
-
Very nice!
-
Thank you so much, I make Christmas trees out of something different every year but never would have thought of this. I’m so excited to do these 😍


Frequently asked questions
Have a question about this project?
I'm not understanding the arch and how to make the cone out of it can you add a picture please
Hi Barb, could you use colored twine, or thick string? Re garding dying cement, what about using powderd paints? I think there is a special product here in Australia for dying cement to. Kay Adelaide Australia
Why couldn't you use styrofoam cones covered with plastic? They would be more expensive but more sturdy and also reusable. Great idea and so many other cool options for summer outdoor projects also, like garden balls.