


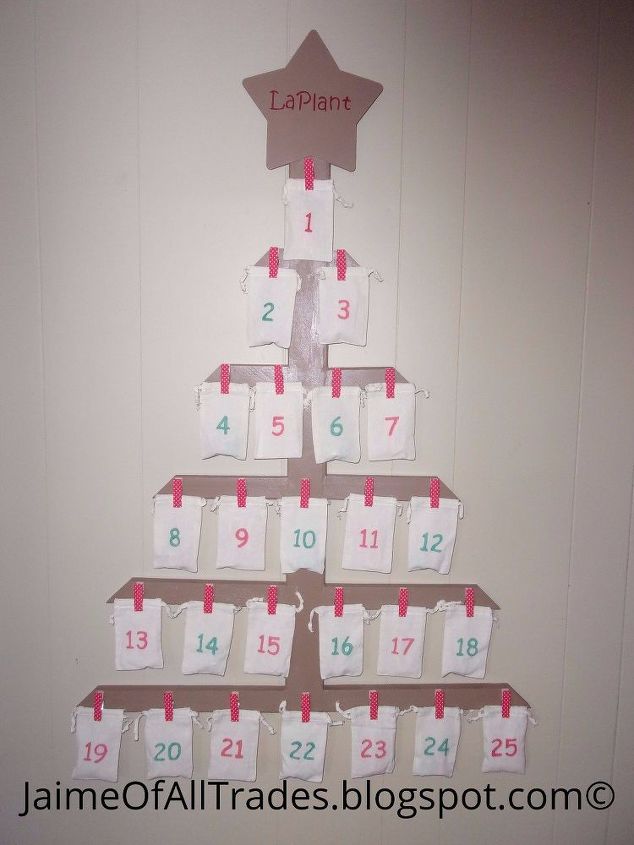
Last Minute DIY Advent Calendar Tree
9 Materials
$20
4 Hours
Easy
If you still don't have your Advent Calendar, don't worry! This project is easy enough to do in just one day!
I made this for under $20. Depending upon what you use, you could possibly make it cheaper!
You can get the full details and more pictures on my blog, but here are the basic steps to make your own!

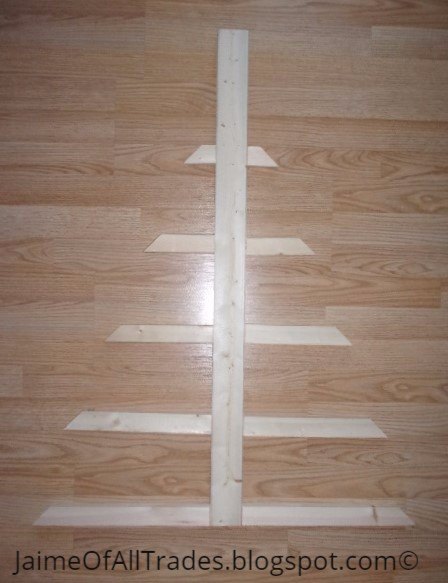
Step 1: Cut Your Boards. I used 1" x 2" furring strips for the branches and a 1" x 3" furring strip for the trunk of the tree.
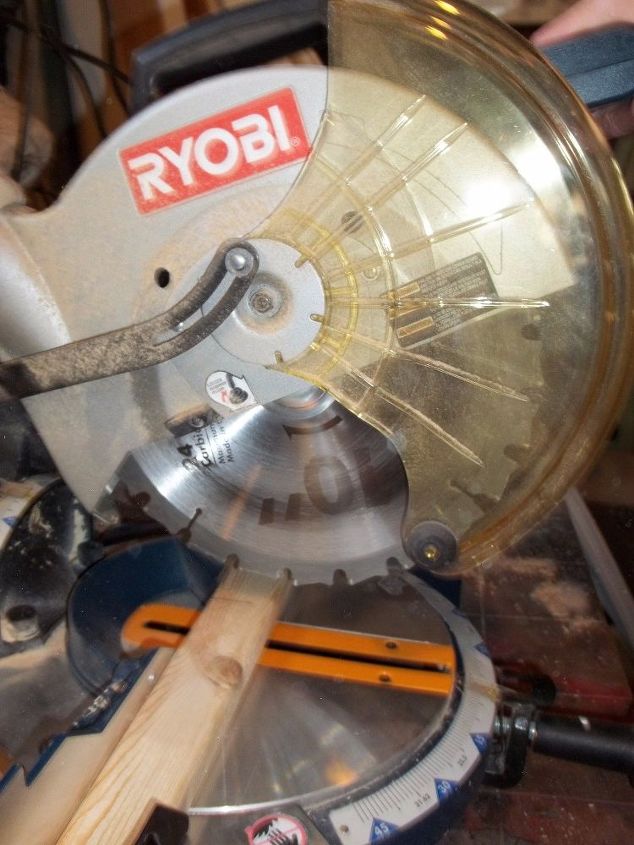
Step 2. Using a Kreg jig set at the 3/4" setting, drill pocket holes in the non-mitered end of the 1” x 2” pieces.

Step 3. Using the pocket hole screws and glue, attach the 1” x 2” pieces to the 1” x 3”. The longest pieces flush to the bottom of the 1" x 3" and gradually moving up to the smaller pieces.
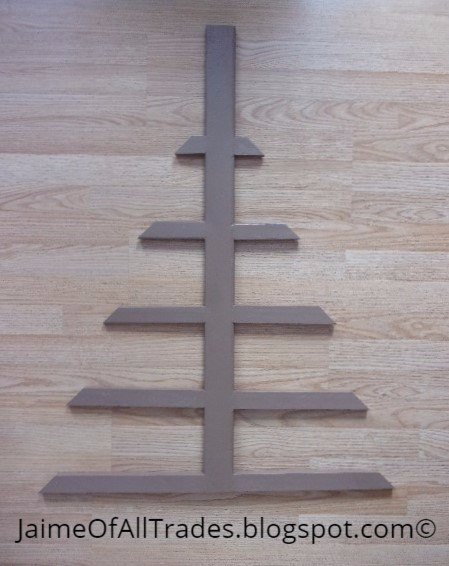
Step 4: Sand all surfaces.

Step 5: Paint the tree and star.
Step 6: Using the wood glue, glue the star to the top and attach the clips.
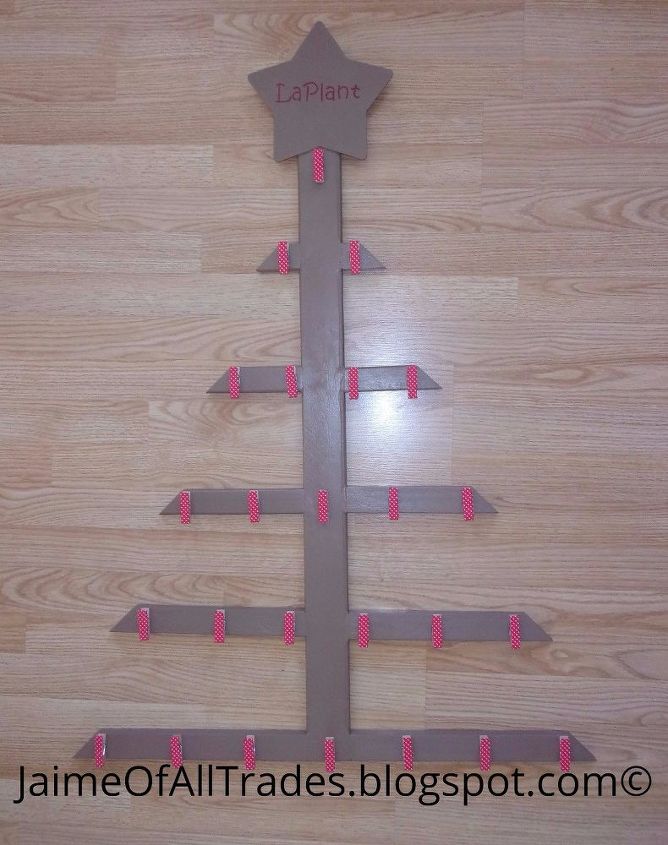
Step 7: Attach hooks to the back so you can hang it. I used two D hooks.

Step 8: Stuff and hang your bags. Then, hang the Advent Calendar on the wall and enjoy your holiday countdown!
Be sure to check out my blog for more details and pictures of this project, as well as other projects!


Any price and availability information displayed on [relevant Amazon Site(s), as applicable] at the time of purchase will apply to the purchase of this product.
Hometalk may collect a small share of sales from the links on this page.More info

Want more details about this and other DIY projects? Check out my blog post!


Frequently asked questions
Have a question about this project?