


Glitter Application Tutorial

2 Materials
$5
10 Minutes
Easy
In this tutorial we’ll show you how to use our Glass Glitter to add beautiful sparkle and shine to all of your home decor!

In this tutorial we’ll show you a few different methods of applying Glass Glitter to give any project a glam finish. If you’d rather watch a video, we also have a video tutorial available towards the bottom of the page!
Please keep in mind that our glitter is made with crushed glass. Do not use with children.
Glass Glitter is now available in the following colors:
- Vintage Silver
- Gold
- Black
{
"id": "4500232",
"alt": "",
"title": "",
"video_link": "https://www.youtube.com/embed/I2L0kY1_s9s",
"youtube_video_id": "I2L0kY1_s9s"
}
{
"width": 634,
"height": 357,
"showRelated": true
}
Option 1) Dip it
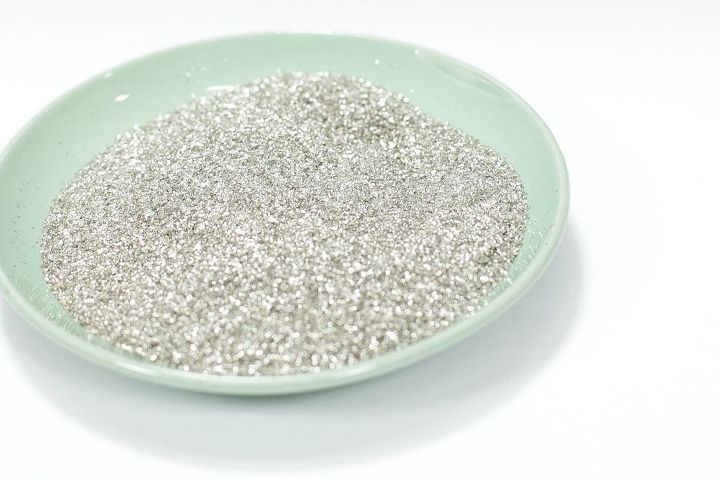
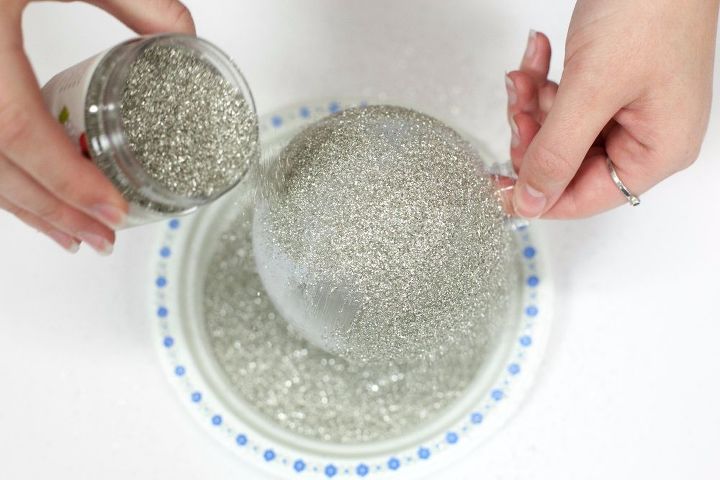
Step 1) Pour out some glitter
Start by pouring out some glitter onto a paper plate. This will make it easy to roll and dip your project in the glitter, plus cleanup will be a breeze!
Tip: lay out a large drop cloth over your work space. Let’s face it, glitter gets everywhere and a drop cloth will help you salvage excess sparkles that go astray.
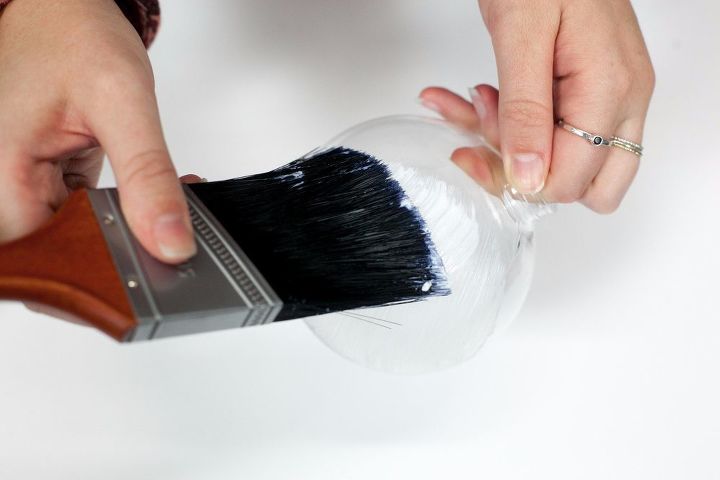
Step 2) Paint on some Image Transfer Medium or craft glue
We like to use for this step, but you can use a different clear-drying craft glue if you have a favorite on hand.
Use a synthetic bristle paint brush or a foam brush to apply one coat of Image Transfer Medium to any areas that you would like the glitter to stick to. Do your best to work quickly as you’ll need to move on to step 3 before the medium begins to dry.
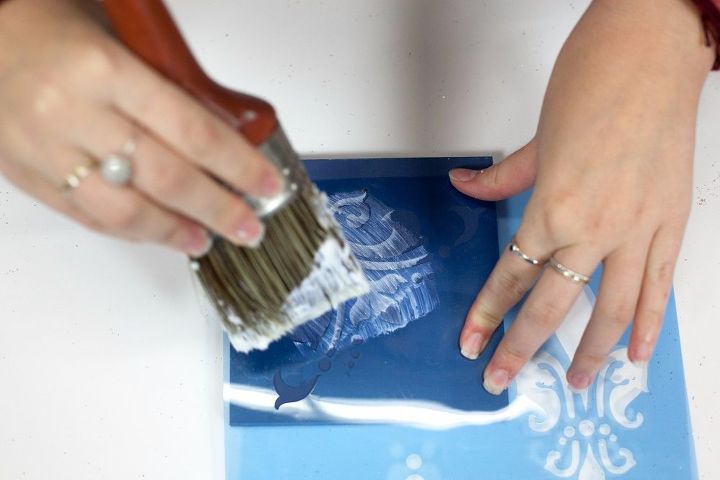
Tip: this can also be done over a stencil if you want to create glittery designs on your piece!
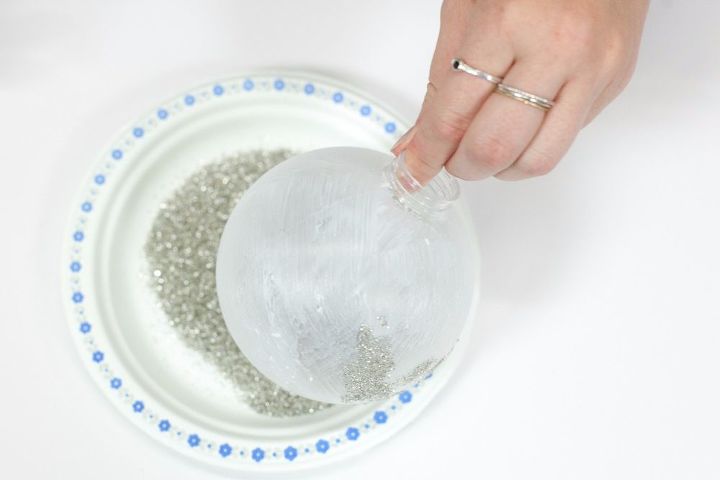
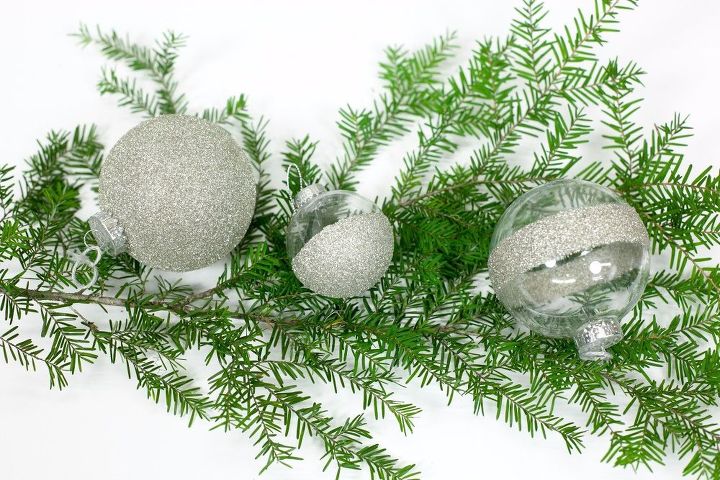
Step 3) Roll, dip, and sprinkle!
Now for the fun part! Depending on the size of your project, you might find that dipping, rolling, or sprinkling works best for you.
Once your entire piece is covered with glitter, gently tap or shake off the excess and set your project aside to dry overnight. The excess glitter can be poured back into your glitter jar for future use.
Step 4) Seal it

Here’s how the finished product turned out. Isn’t it fantastic? The possibilities are endless, so go get creative!
If your project will be handled regularly, it’s a good idea to add a coat of Clear Coat or more Image Transfer Medium to help make the finish more durable.
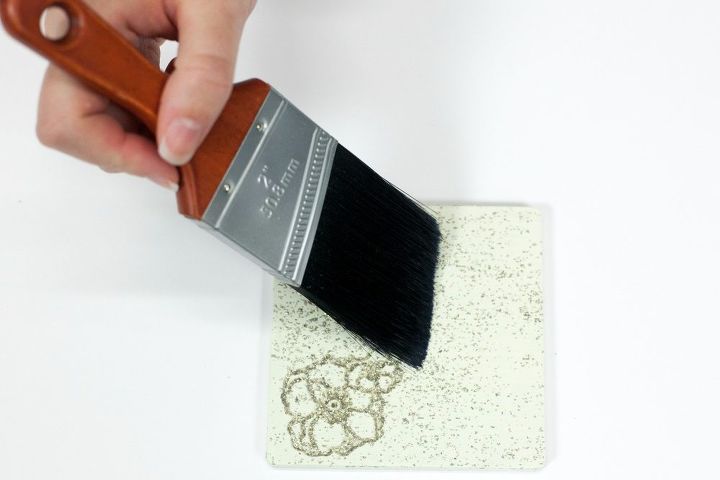
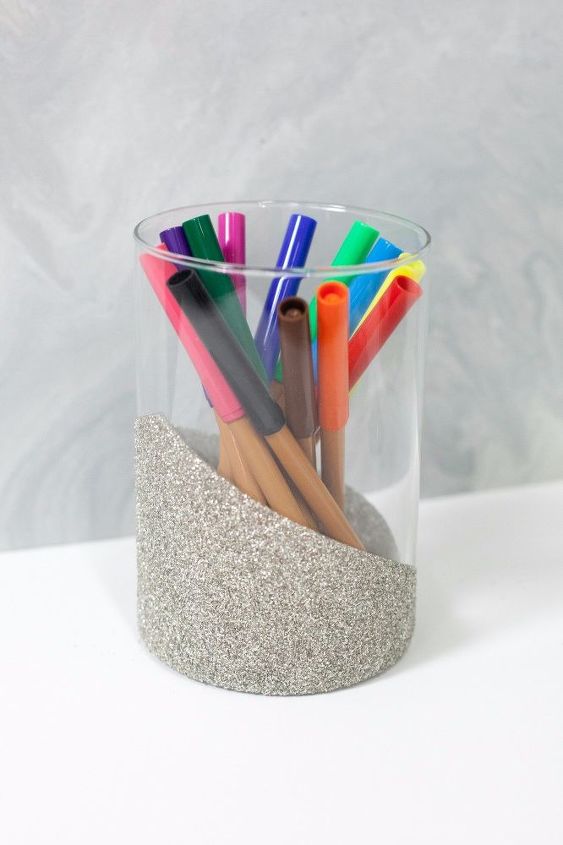
Option 2) Paint it
Step 1) Create spreadable glitter
If you want a thin coat of sparkle all over your piece, this might be the technique for you! This works beautifully over pre-painted pieces. Make sure you give your final paint coat at least 12 hours to dry.
Grab a clean container such as a plastic cup or an old yogurt container and pour some into it. Shake in a little glitter and stir well.
There’s no exact recipe for this step so you can use as much or as little glitter as you like. If you’re a glitzy gal, go nuts!
Step 2) Paint it on
Use a synthetic bristle paint brush to paint a coat of glittery glaze onto any areas of your piece that you want to sparkle. After one coat, let it dry for 1-2 hours. You can always add a second coat if desired.
{
"id": "4500235",
"alt": "",
"title": "",
"video_link": "https://www.youtube.com/embed/HeLttBI3jIA",
"youtube_video_id": "HeLttBI3jIA"
}
{
"width": 634,
"height": 357,
"showRelated": true
}
To watch Marissa demonstrate these glittering techniques first hand, watch our live video.
Comments
Join the conversation
3 of 5 comments
-
I used a clear glass ornament and poured glitter glue on the inside of the ball, swirled around until it was covered , let it dry and then replaced the holder and hung it on my tree. No mess, no fuss.
-
I am retired and moved from my home of thirty years to an apartment. Downsizing also meant going to a smaller Christmas tree. I would love to use the glitter decorating new bulbs for my new tree. They look lovely in the video !


Frequently asked questions
Have a question about this project?