


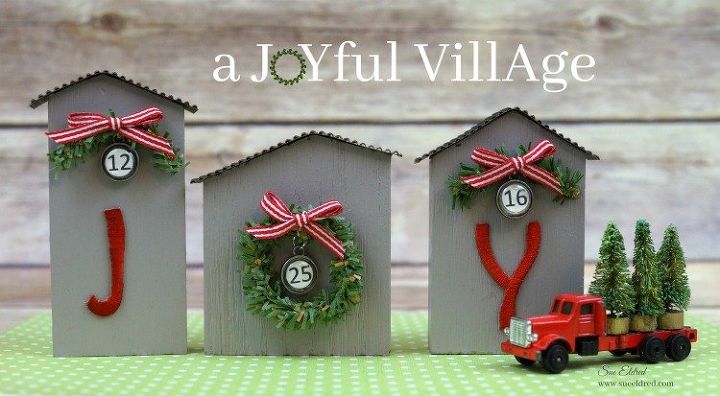
A Joyful Village
4 Materials
$10
1 Hour
Easy
I wanted to share this simple little wood project that makes a great Holiday Decoration. Also a great and inexpensive gift idea.
Being Joyful, is my goal not only at Christmas but throughout the entire year.
For my “Joyful Village”…
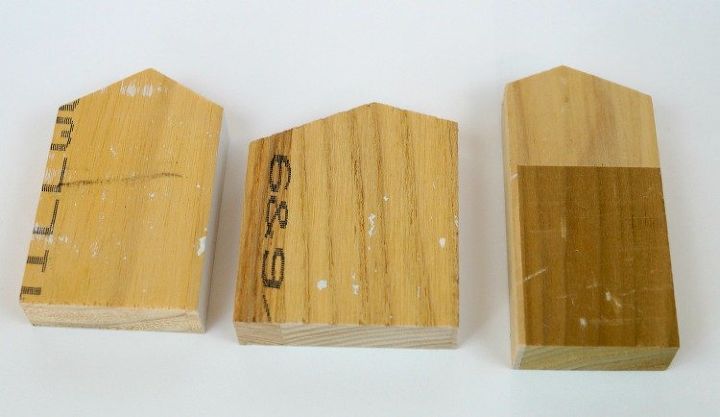
I started with some wood trim scrap pieces cut into simple whimsical house shapes.
My pieces measure 4″ x 2″, 3″ x 2 3/4″ and 3 1/2″ x 2 1/4″.
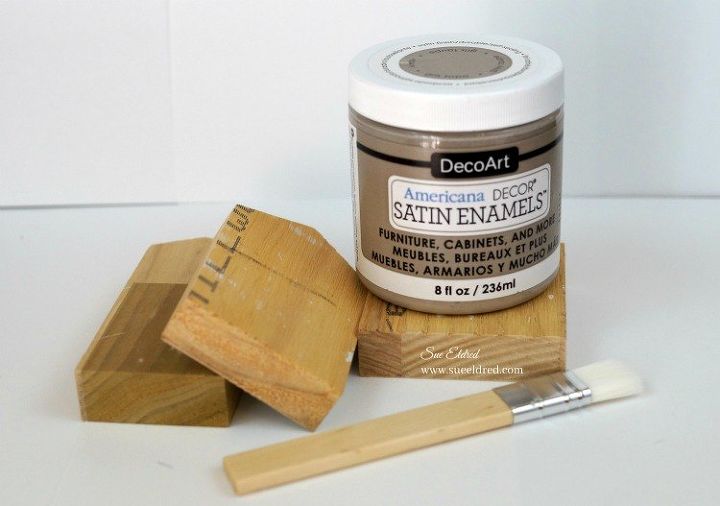
I painted the house with a couple coats of Americana Decor Satin Enamels 8oz-Grey Taupe.
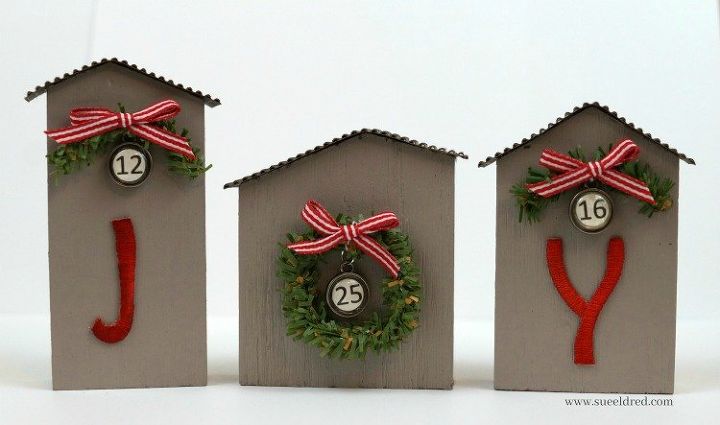
After painting the houses…
- I created a roof using black corrugated paper.
- I added color to my white iron-on embroidered letters by dampening them and rubbing color directly onto the letters using my Distress Mini Ink Pad-Fired Brick.
- After the letters are dry, glue the letters onto the houses using a craft glue.
- I created a mini wreath and mini pine swags using pine craft stems.
- I created small number charms by printing the numbers onto white cardstock and punching with a small circle punch. I added the numbers inside Metal Type Charms by Tim Holtz Idea-ology.
- I tied the charms onto the wreath and swags with thin twine and glued them onto the front of the houses along with a little tiny bow.

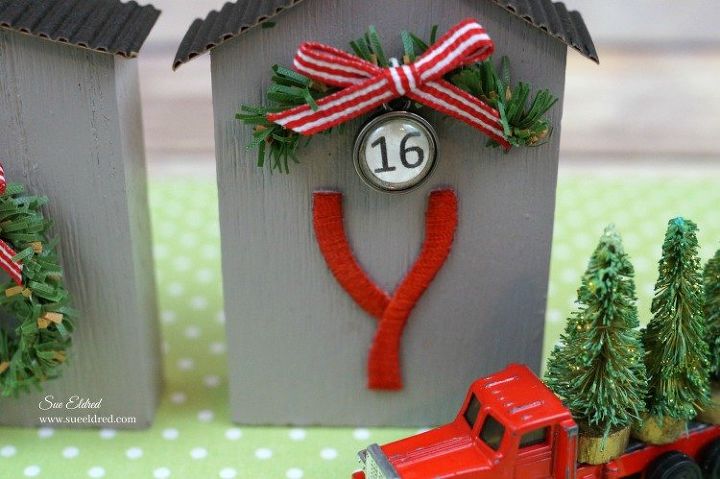
The village wouldn’t be complete without a cute little red truck.

I picked up the tiny red truck at the Elkhorn Flea Market in Wisconsin and I glued three little bottle brush trees to the back of the truck.
(I rubbed the trees with clear glitter glue for added sparkle.)


Any price and availability information displayed on [relevant Amazon Site(s), as applicable] at the time of purchase will apply to the purchase of this product.
Hometalk may collect a small share of sales from the links on this page.More info

Want more details about this and other DIY projects? Check out my blog post!


Frequently asked questions
Have a question about this project?