


Milkweed Pod Ornaments

by
Dorinda
6 Materials
2 Days
Easy
This project is one I remember doing at a very early age with my mother. We lived on a farm, and every fall we would go around collecting just the right milkweed pods for our ornaments. They couldn't be too closed up, or the ornaments wouldn't look right. BTW...milkweed plants have numerous things they are good for, from putting the milk of the plant on poison ivy to keep from itching, to what I'm making here, and all kinds of things in between. This project didn't cost me anything, as I had everything at home. I listed it at 2 days to complete because of having to let the paint and the glue dry.
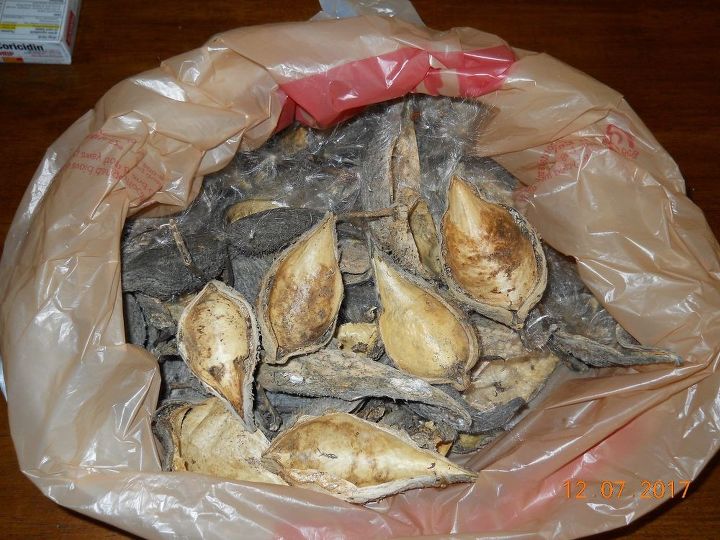
Here is my sack of milkweed pods. We were going to turn the field where they were, into a cow pasture, so I gathered all I could. I also saved some of the seed to plant in other parts of the farm.
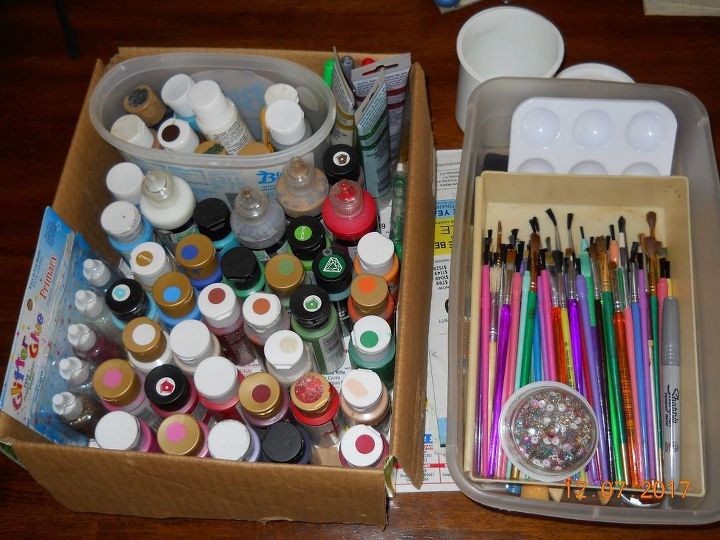
Having a dresser drawer full of paints, I gathered a few different colors and put them in a small box. I also gathered glitter glue and paint, as well as brushes. Some of the paints I knew I would use a lot of in the projects I was doing, I put in the oval tub that's in the box.
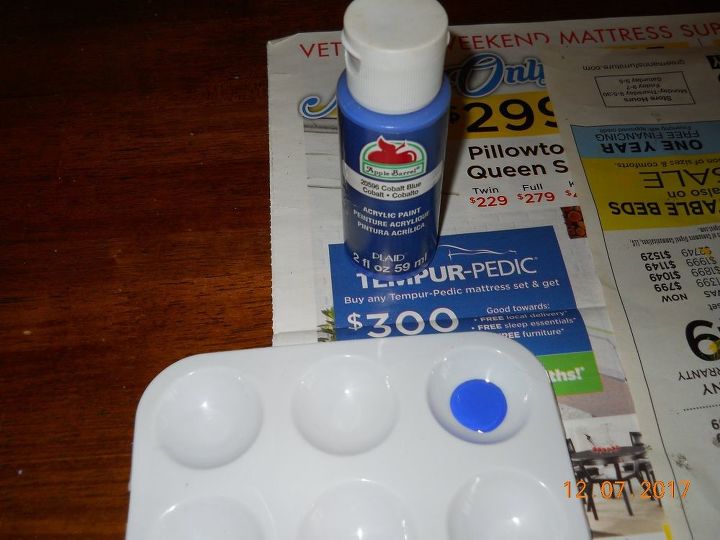
I used these little paint pallets that I bought at Dollar Tree. They came 6 to a package. This helped for me, because I only pour one paint out at a time normally, so they won't dry out.

I gathered all kinds of little goodies to put in, and on my ornaments, such as figurines, fake snow, and fake snowballs. I also found a ziplock bag of glitter.
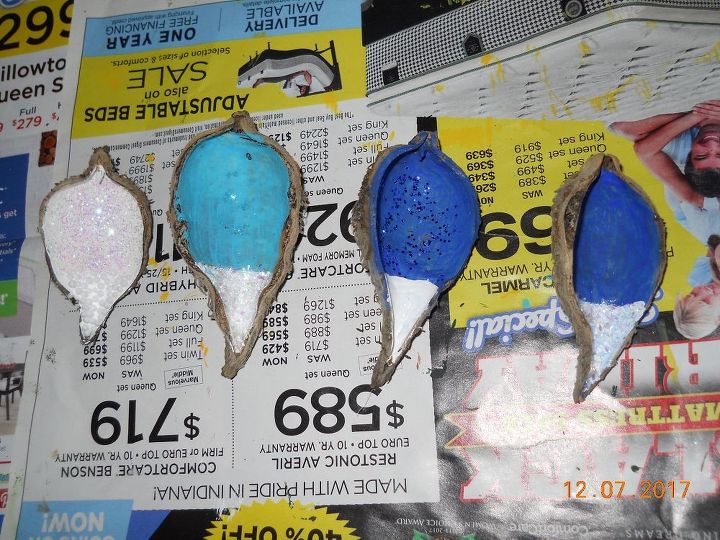
First thing I did was brush the insides of the pods out to get the dust and dirt away. Then I painted the insides with different colors, it's really up to you on what color background you want. I had to do two coats before I liked the results. I would only paint one color at a time on an ornament, and let dry before painting another. On the second coat of paint, before it dried, I sprinkled glitter, fake snow, and snowballs. I didn't put glitter in every one of them, as I wanted each one to be different. Oh, when I gather the pods, I leave a little stem on the back so I can tie a ribbon, (not shown), around it to hang them.
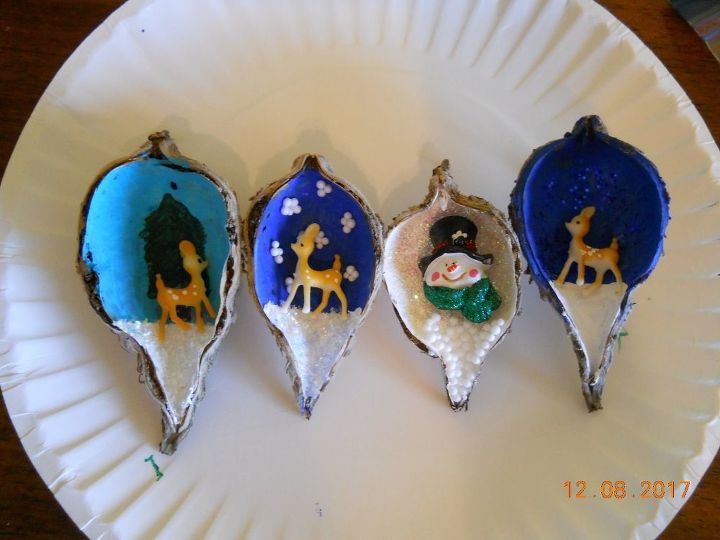
After the paint was dry, I put some Elmer's Glue in one of the paint pallets. Then starting from the left, I painted a tree, then glued the deer in place. The second one from the left, I took a paint brush, dipped it in the glue, and spotted the sky part. I then poured some snowballs in it, and swished it around so the balls stuck to the glue. Empty the extra balls out, then glue in a deer. The third from the left I glued a tiny snowman head ornament. Last but not least, on the one to the far right, I just glued a deer to the glittered sky. I wanted to show you a few different ways you could make the ornaments with the same deer, but only had three, so the snowman head ornament had to go in the other. lol Normally, I would have put a little piece of cotton ball where I have the white painted at the bottom, but I was out of them at the time I made these. So there you have it, a project that's fun and easy to do, and you can get the whole family involved.
Resources for this project:
See all materials


Any price and availability information displayed on [relevant Amazon Site(s), as applicable] at the time of purchase will apply to the purchase of this product.
Hometalk may collect a small share of sales from the links on this page.More info
Comments
Join the conversation
2 comments
-
What a creative mind you have, they are mini dioramas!


Frequently asked questions
Have a question about this project?