


Wooden Bath Tub Shelf
If you love this project, grab your quick start DIY guide & subscribe to our blog!
Learn how to make a wooden bath tub shelf to hold your book, phone and candle. This DIY bath tub shelf with cabinet pulls as handles makes a great handmade Christmas gift idea for her!
STEP 1: MEASURE YOUR BATH TUB.
First you want to measure the width of your bath tub. If your tub curves, you probably want to measure the widest part. My tub was the standard size (approx. 39 inches), so I was able to use a premade sign that fit perfectly. I love that it’s already assembled and everything so you can save a little time on this bath tub shelf.

STEP 2: LIGHTLY STAND WOOD SIGN.
The front side of the sign comes mostly smooth, but I did a light standing on it to smooth out any imperfections.
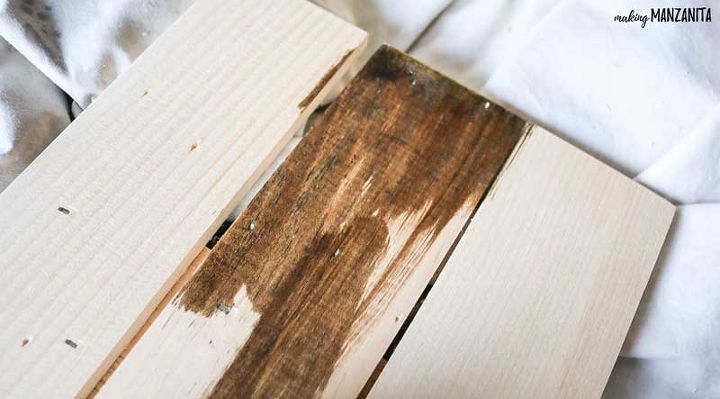
STEP 3: STAIN WOOD SIGN.
Next, stain your sign with a dark wood stain.
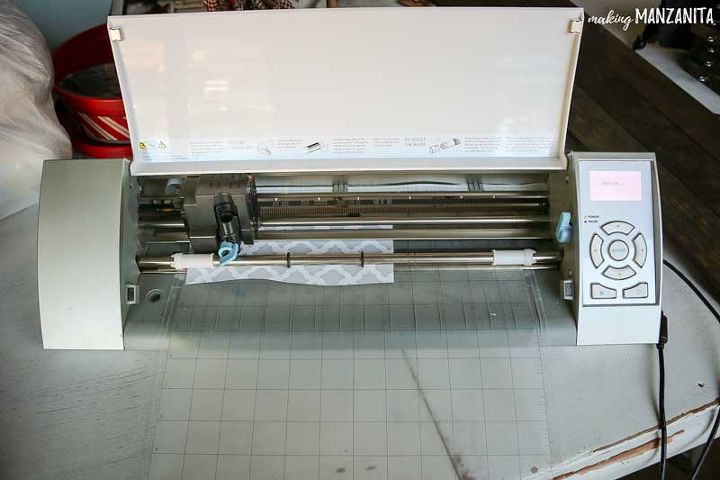
STEP 4. CUT STENCIL.
Now it’s time to make your stencil with the Silhouette Cameo. I chose to paint the word “relax”, which I think is perfect for this wooden bath shelf.
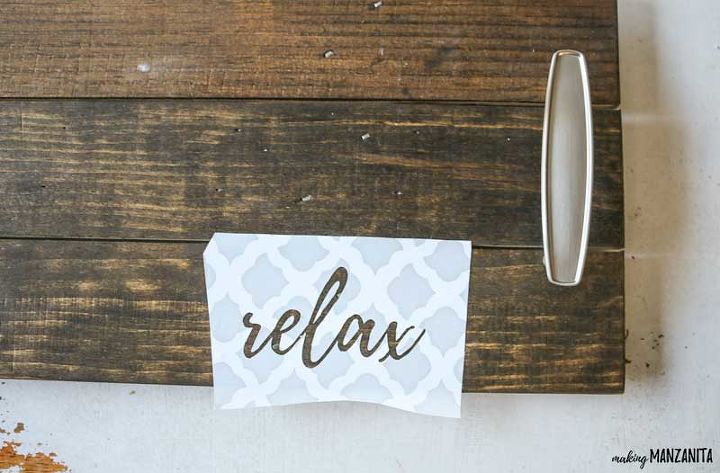
STEP 5. ADD STENCIL.
Be sure to hop on over to this post to get the full details my little hack on how to prevent stencil bleeding. You’ll do this magic little step before paining over the stencil.
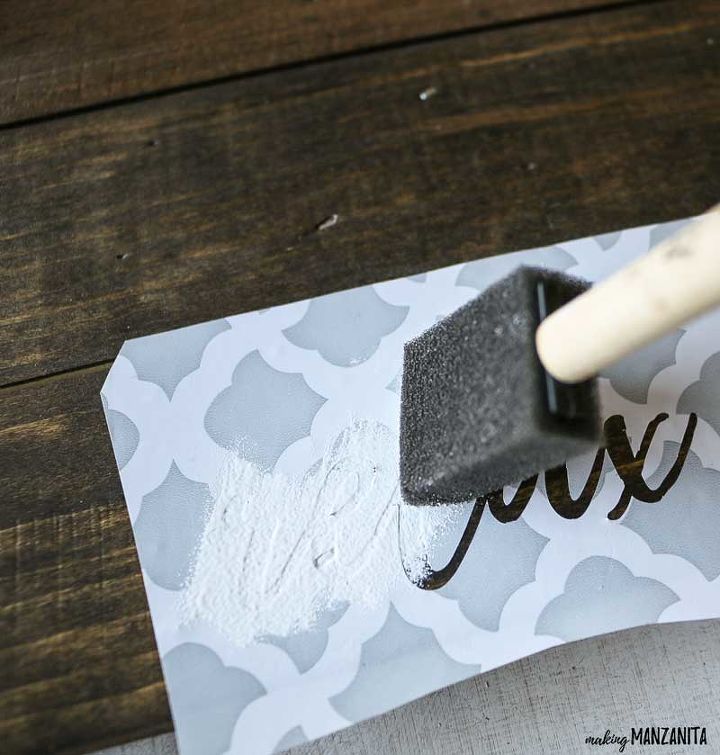
STEP 6. PAINT STENCIL.
Using a foam paint brush, gently “pounce” directly down onto the stencil with the brush (rather than using brush strokes). Let dry and remove the stencil.
STEP 7. SEAL TRAY.
Since the DIY bath tub tray is going to be around moisture, you definitely want to seal it. One of my favorite ways to seal wood projects is a spray sealant. It’s really simple to use. You just spray it on like spray paint and wait for it to dry. Visit the blog post (link below) for a link to my favorite spray sealant.
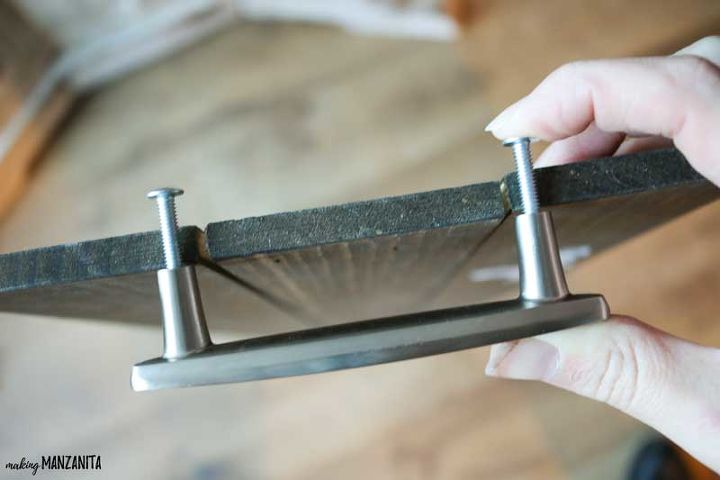
STEP 8. ATTACH HANDLES.
Here’s the thing…when I was shopping for the handles to go on each side of the wooden bath tray, I didn’t have the wooden tray with me. When I got home I realized that the handles line up almost directly above the slats in the wood. I was worried that the wood may split up open on the edge or something, so we decided to add a small piece of 1/4” plywood to the underside of the bath tray under the handles as shown in the photos above.
If you’re making this bath tray and using this same wooden sign as your base, try to grab some handles that are a little wider so you don’t run into this issue. If you do have this same issue, it was a pretty easy fix, so no worries.
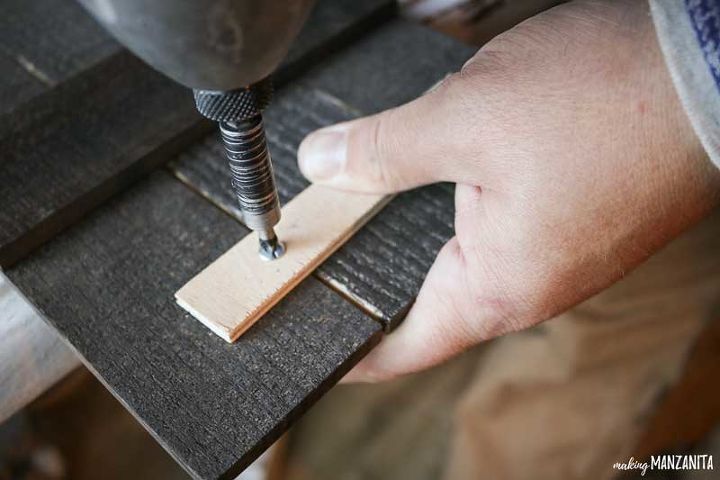
Measure where you want the handles, drill pilot holes and attach your handles to the tray.
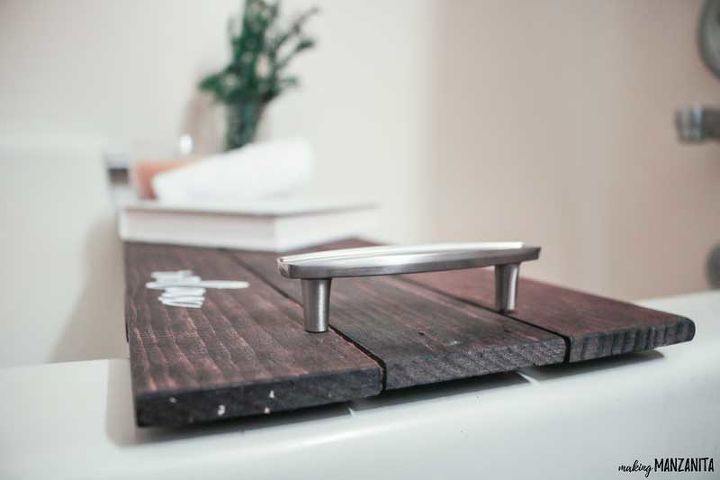
STEP 9. TAKE A NICE, RELAXING BATH.
And that’s it! Now you can fill that bath tub up, light a couple candles and hop in for a nice bath! Now you have a snazzy tray to hold your book, cell phone, glass…you name it. Relaxation is just around the corner.
Hop on over to the blog post (link below) to see more details and pictures of the finished product!
Resources for this project:
See all materials


Comments
Join the conversation
-
How do you keep it from sliding around


Frequently asked questions
Have a question about this project?