


Versatile Pillar Candles: Material of the Week!

4 Materials
$15
30 Minutes
Easy
We know that your Christmas prep is in full swing, but it’s never too late for a last minute holiday candle. One of the most popular crafts, candles with a unique holiday spin are a welcome addition to any holiday decor. That’s why unscented pillar candles are the Material of the Week! To get yours, click here. Perfect for decorating or gift giving, you can’t go wrong with candles!

Festive Christmas Candles
Creating beautiful Christmas candles from plain white pillar candles is easier than you think. Add your choice of Christmas embellishments; ribbon, burlap, pine cones, berry sprigs... whatever brings you cheer on this holiday season!
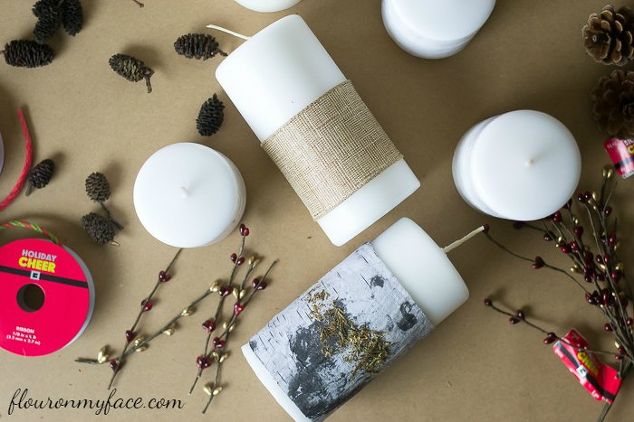
1. Choose burlap or wide wire ribbon for your candles. Secure ribbon or burlap to candles.
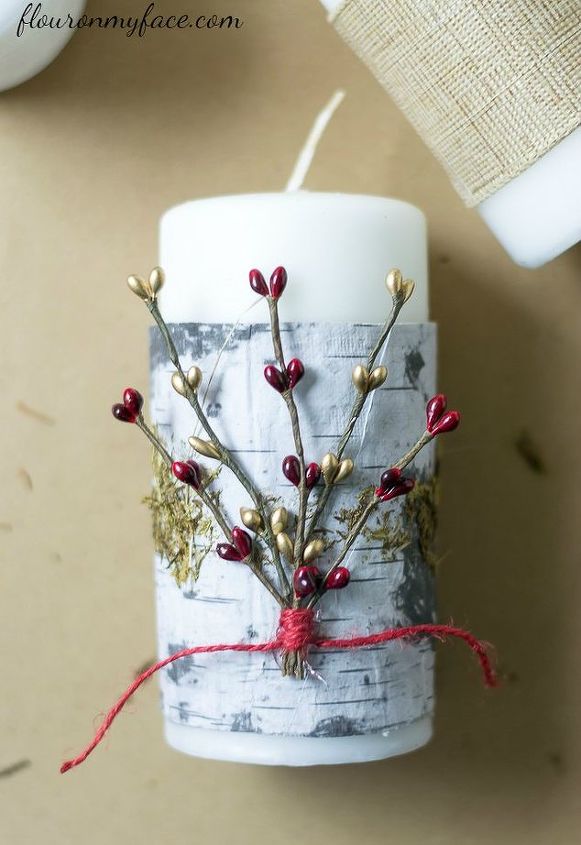
2. Bind berry sprigs and pine cones together using twine. Glue to ribbon or burlap on candle with hot glue.
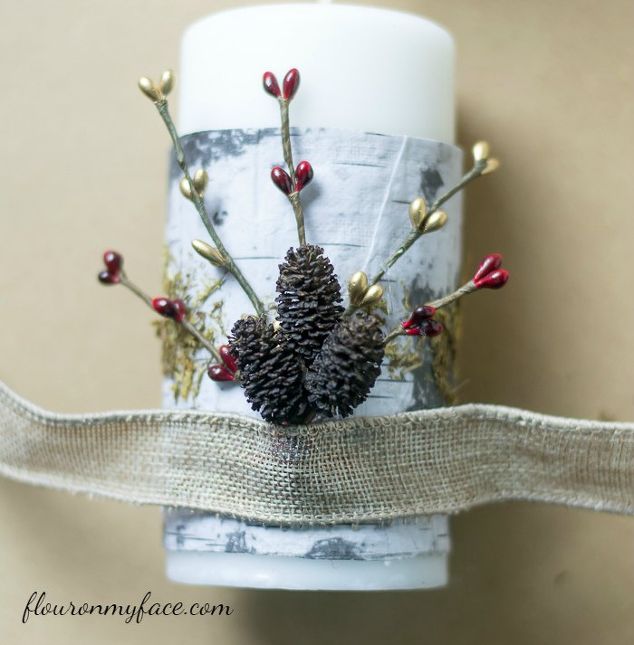
3. Add other embellishments or ribbon to your candle, secure with hot glue.

Enjoy your candles, or give them as gifts to family and friends. To see more pictures or details, click on the original post: https://flouronmyface.com/festive-christmas-candles/
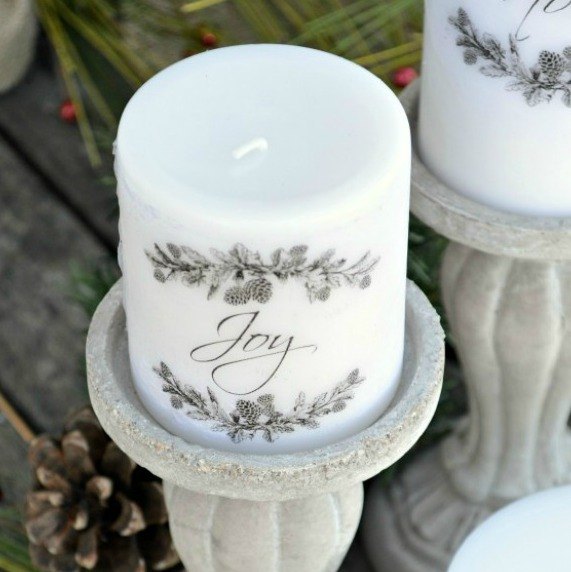
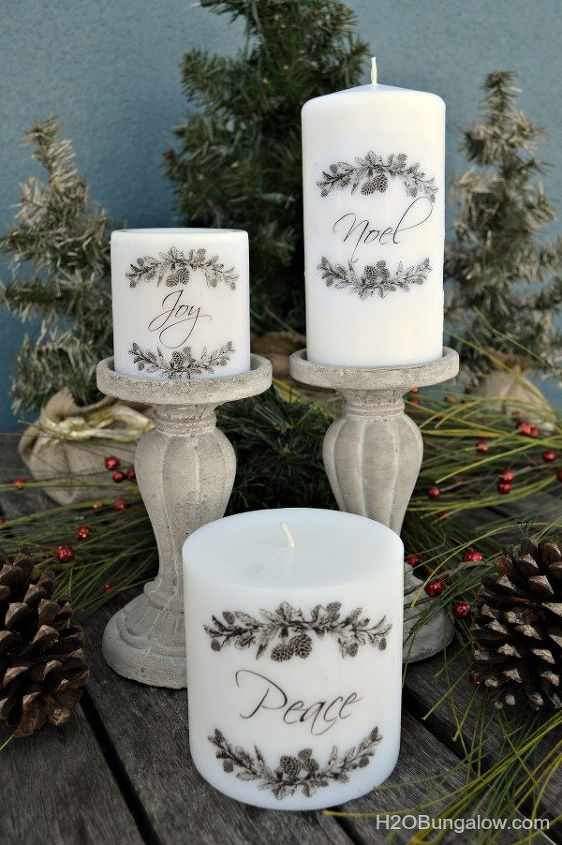
How To Add Images To Candles
Transfer images to plain white pillar candles to turn these inexpensive candles into boutique-chic home decor. These make great gifts for the teachers, co-workers and friends in your life!
For this project you’ll need:
White pillar candles ( buy here!)
White tissue paper
Cardstock or heavy duty paper
Painter’s tape
A heat gun
Wax paper
Scissors
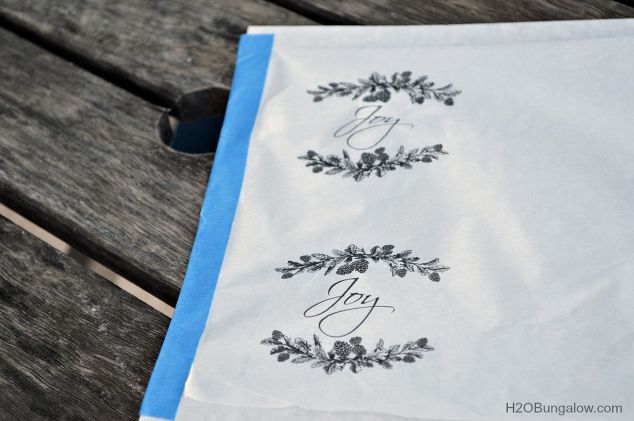
1. Tape your tissue paper to the card stock or heavy paper. The shiny side of the tissue paper should be down, matte side up.
2. Print your image on the paper.
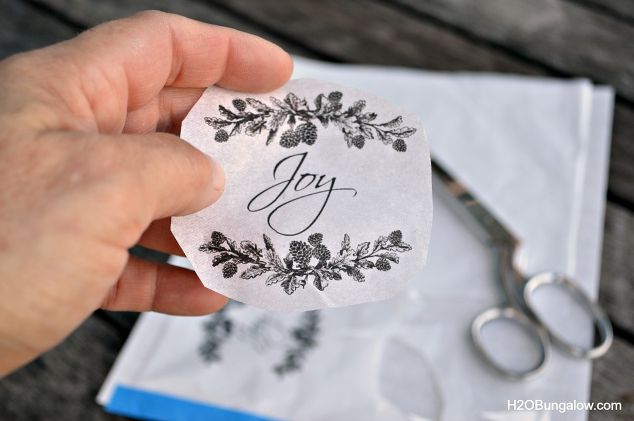
3. Cut out your image from the tissue paper.
4. Cut a piece of wax paper big enough to wrap around your candle.
5. Center the tissue paper with image on your candle, with the matte side against the candle.
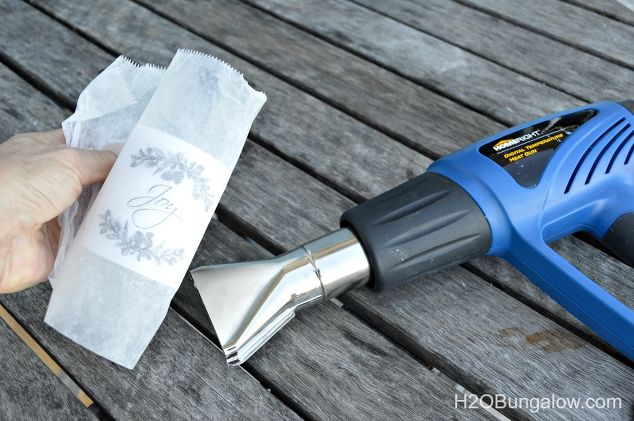
6. Wrap the image and the candle with wax paper, waxy side facing the candle.
7. Use the heat gun to gently heat the image. As soon as you see the image brighten, it’s been fused to the candle.
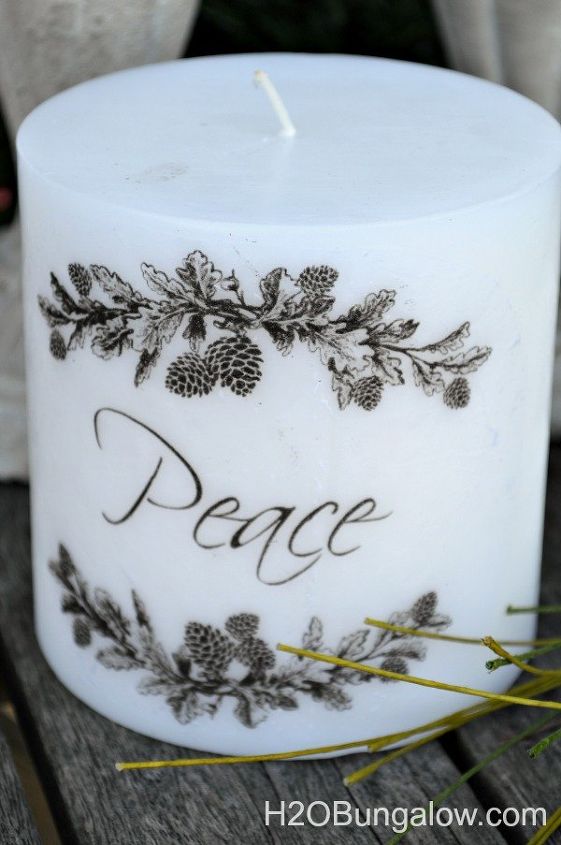
8. Make sure the whole image has been transferred before peeling back the wax paper to reveal your beautiful new candle! To see the full post and instructions, https://h2obungalow.com/how-to-add-images-to-candles/
Now all that’s left is to enjoy your beautiful new candles at home or add a ribbon and give these beauties as gifts.
Don’t you wish cooking Christmas dinner was this easy? Happy holidays!
Resources for this project:
See all materials


Any price and availability information displayed on [relevant Amazon Site(s), as applicable] at the time of purchase will apply to the purchase of this product.
Hometalk may collect a small share of sales from the links on this page.More info
Comments
Join the conversation
2 of 13 comments
-
. . . This is an easy fun project I would like to do. I think all I need are the candles. Thank you for the great idea ! ! !
-
Love, Love, Love!!! I have to admit it's the first time I've seen the tissue paper transfer.
Thanks for the share!!!


Frequently asked questions
Have a question about this project?
Do you think you could do this to a candle that is a light?
Wouldn’t you need to transvers the print so that when you heat the image onto the candle it won’t be backwards?
Is there anyway to do this without a heat gun?