


Re-purpose an Old Piano / DIY Dressing Table
by
Christine
3 Materials
$50
11 Months
Medium
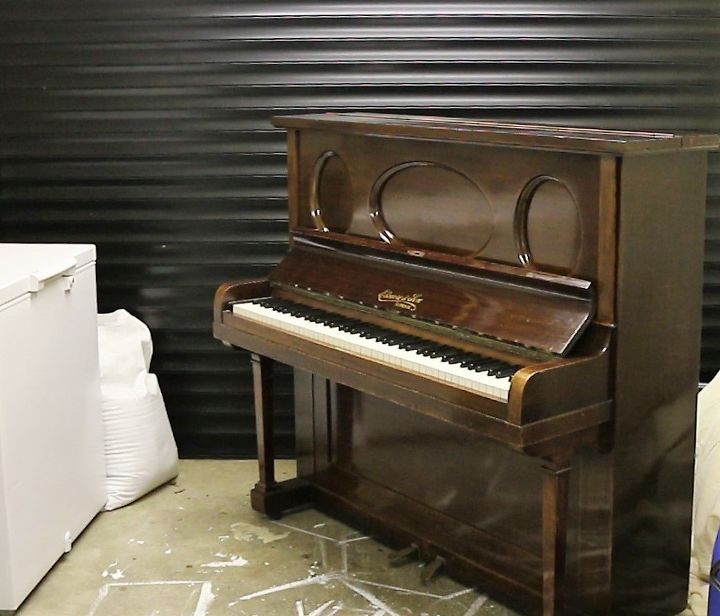
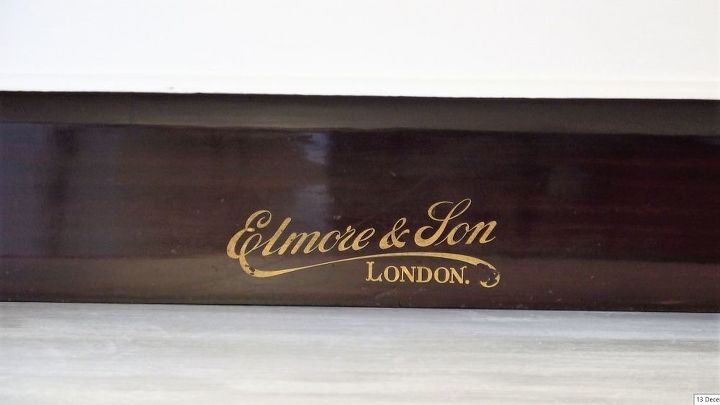
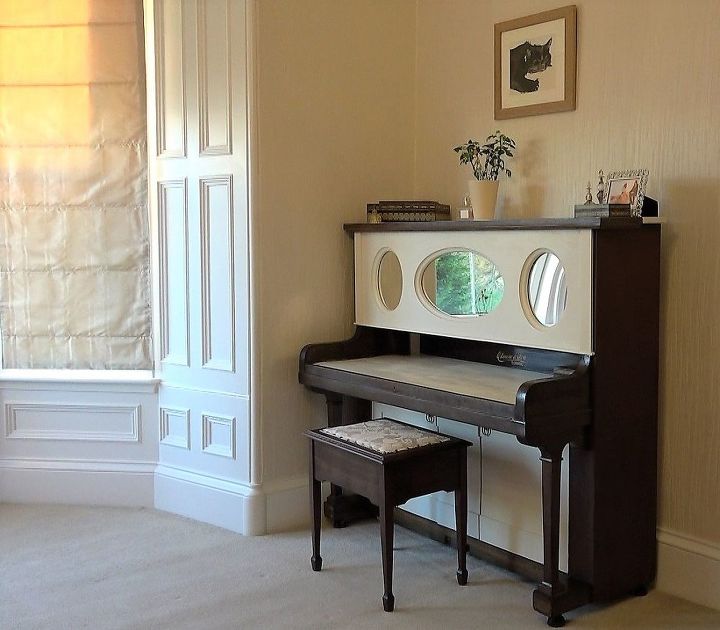
It took almost an entire year to bring this crazy idea of mine to fruition, but I have finally done it! I have transformed our old piano into a bespoke dressing table for our bedroom! It features two large storage areas as well as a generous table surface - plenty of room to store and organize all my little treasures. Originally made in 1889 by Elmore and Sons, London, our piano is no longer a musical instrument, but now a fun and functional piece of furniture, which definitely sparks joy!
The piano used to be in our dining room, but neither Tim nor myself are particularly musical so it was simply a decorative piece. Eventually, we removed the piano from the dining room to make space for an antique sideboard to hold our formal dinner service, and the piano ended up in the garage.
Being of no monetary or sentimental value, we initially advertised the piano online, trying to give it away for free. We received no responses, and with so many other pianos available for free up and down the country, (and many in far better condition than ours), I started thinking of ways in which I could turn it into something useful.
To begin with, I thought about converting the piano into a desk to use in my crafts room, but Tim actually bought me a large table to use in that room, so I finally decided that what I really needed was a dressing table for our bedroom, and I set about trying to make that idea a reality.
The first step was to remove all of the piano’s innards – everything that made it a musical instrument: the keys, wires, foot pedals, all of it. At first, it was super easy to remove parts, but the deeper inside we got, the more difficult and time-consuming it became to remove it all.
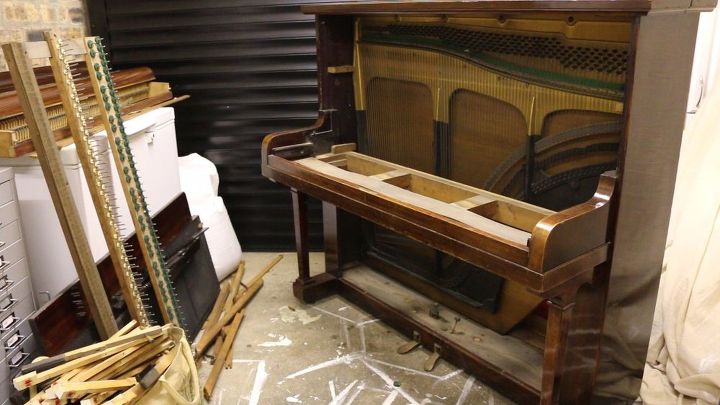
If you look at the inside workings of a piano, you will see there is a LOT going on in there – and by the way, I had never seen inside a piano before starting this project.
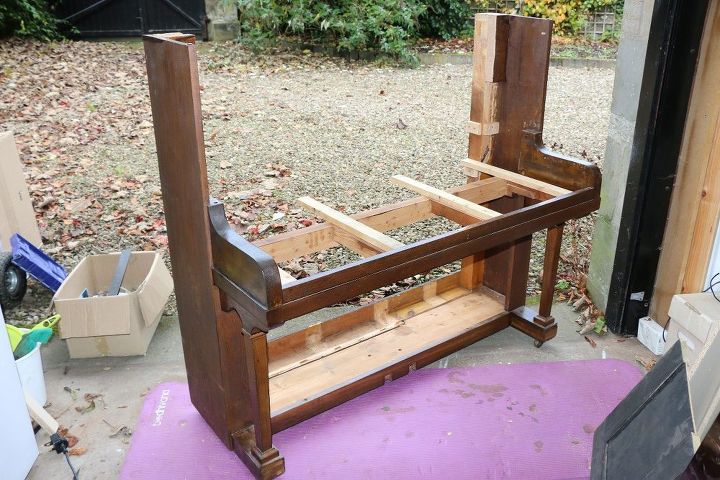
Eventually we were left with just the shell of the piano and I painstakingly sanded down every inch, every nook and cranny. The piano was originally covered in a mahogany veneer, but I didn’t want to keep this finish because that wasn’t the look I was going for.
Next, I applied a mixture of two dark oak stains to all of the wood which would show.
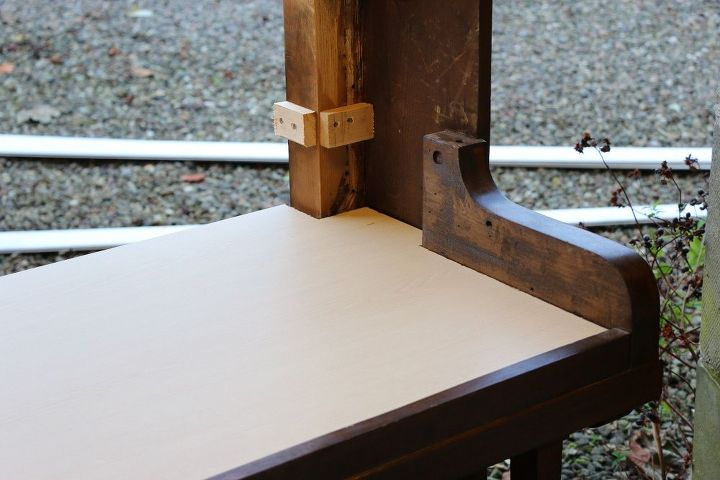
We then had to very carefully measure and cut different pieces of wood and MDF to create the shelf (behind the top panel), table surface, and a floor to the lower cupboard area. We used parts from an old wardrobe which we had stored in one of the attics for just such a project.
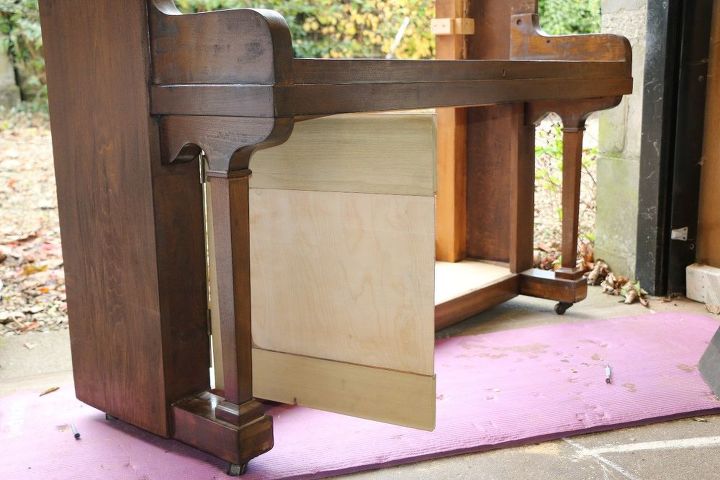
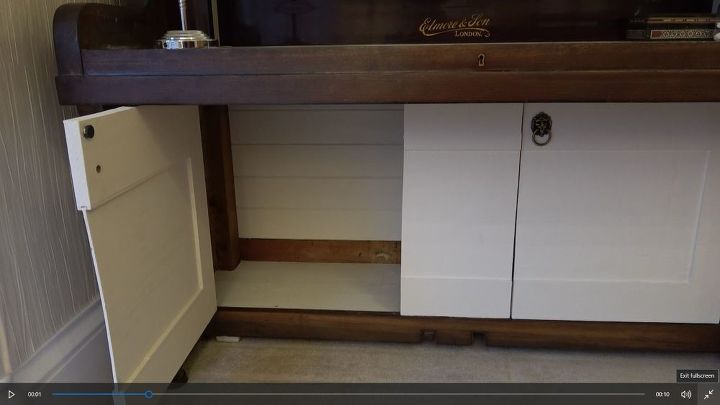
We cut the original lower panel of the piano into three pieces to create two cupboard doors, either side of a central post.
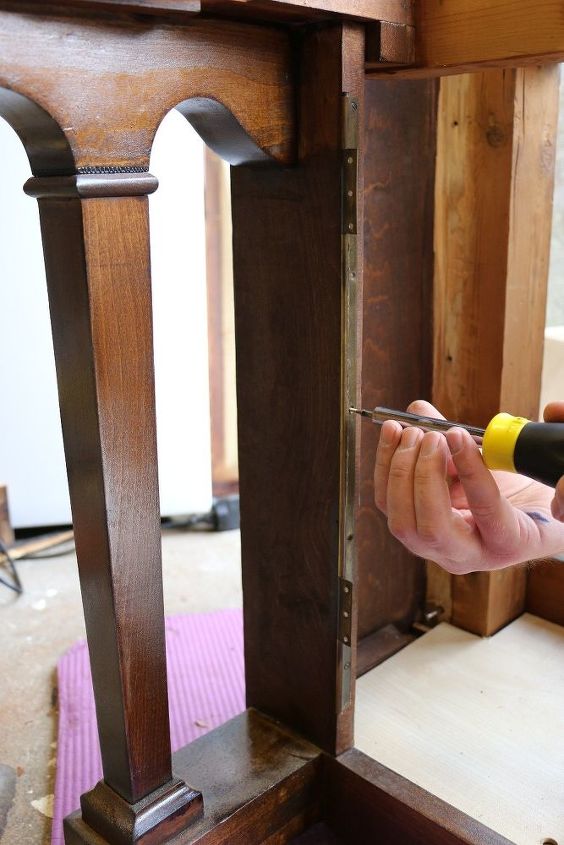
We actually used the piano hinge from the original piano lid to hang the cupboard doors, then added the handles and finally a couple of magnets to ensure the doors would stay closed.
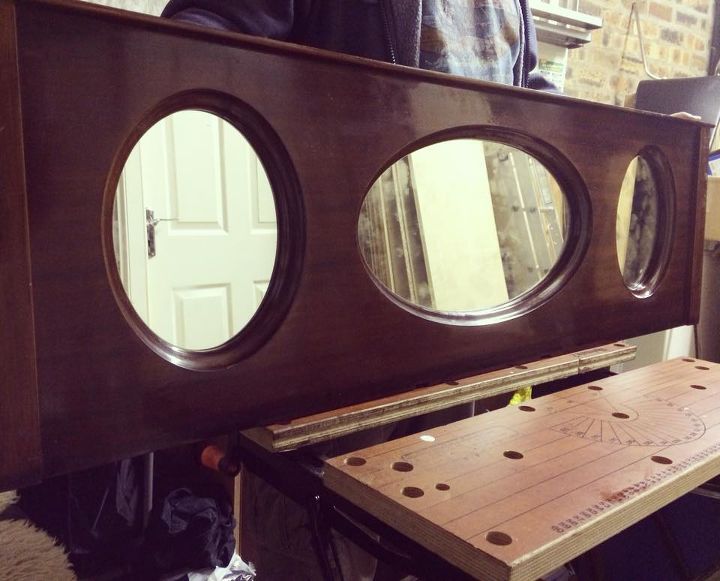
That same wardrobe also had a very large mirrored door, so I removed the mirror in its entirety from the door, and cut that into three pieces to form the three mirrors you see in the piano (I used a £3 glass cutting tool and copious amounts of olive oil). I had never cut glass before, and it took a lot of failed attempts before I finally succeeded in cutting three sections to the right size.
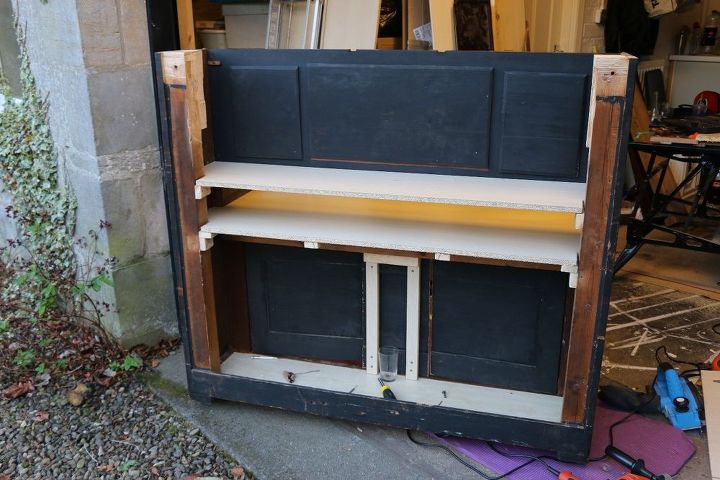
We had originally left intact the massive pieces of wood bracing the frame of the piano together at the back, however, we ultimately decided to remove all of them because they were so solid that the weight of the piano was still such that we never would have been able to carry it up the stairs! It was very difficult removing them because there were absolutely enormous screws and nails hidden throughout, and we had to saw through the wood with great care. It was a very slow process indeed.
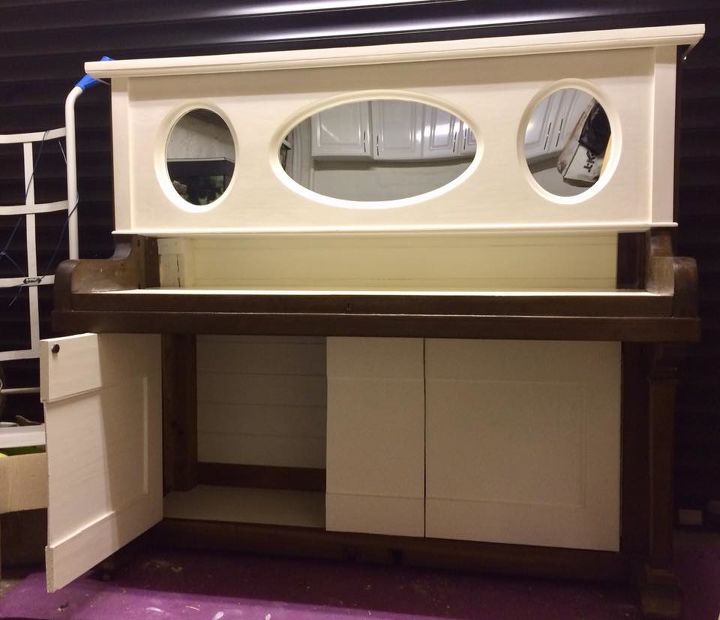
Later, I decided that it was altogether too dark, so I purchased some Rustoleum chalk paint in Antique White and applied that over the stained areas which I wanted to lighten, and as you can see, I ultimately settled on the high contrast of the dark wood stain and the light chalk paint.
We cut down the piano lid which used to sit over the keys to fit in between the shelf behind the mirrored section and the table. Now, I could have added in pigeon holes, or drawers at the back of the table area, but I wanted to have as much open space as possible.
One of the final steps was strengthening the back of the piano by screwing in beading boards to replace the huge wooden beams we had removed. We ran out of beading boards before we had reached the top so Tim added a piece of garden trellis to finish the job.
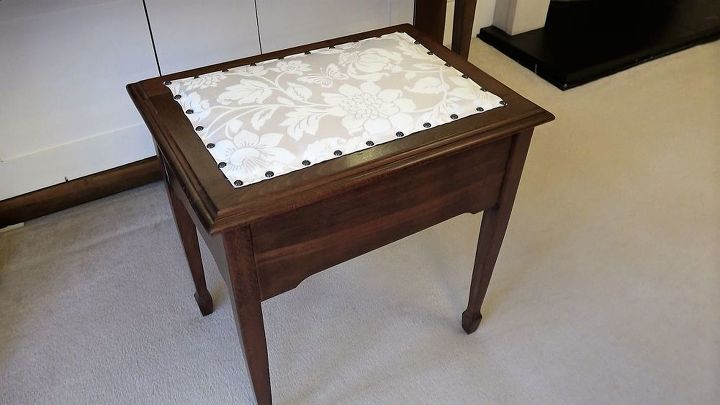
The very last thing we did was remove the fabric from the piano stool and replaced it with the same material as our bedding so that it would perfectly match the rest of the room. It was not easy to hammer in the new brass studs, and I destroyed so many in the process that Tim actually ended up taking over and finishing this part for me!
I love seeing and using the piano dressing table every day. I love that I was able to create something unique, and personal to me. It is exactly how I want it, it allows me to have things organised just as I like, and more than that, it is a physical representation of how perseverance can pay off even when you don’t really know what you’re doing!
{
"id": "4535251",
"alt": "",
"title": "",
"video_link": "https://www.youtube.com/embed/C9lPpnLKeWE",
"youtube_video_id": "C9lPpnLKeWE"
}
{
"width": 634,
"height": 357,
"showRelated": true
}
If you would like to find out more, watch our YouTube video all about the piano project :)
Comments
Join the conversation
1 comment
-
Wow this is just stunning your did a brilliant job.


Frequently asked questions
Have a question about this project?