


Industrial Message Board

13 Materials
$32
1 Hour
Easy
This message board was an idea that just popped into my head while I was going through some of my old material. I thought this would be a great addition to add to my kitchen. In my home we always struggle when we get to the grocery store because nobody seems to remember what we need. I created this industrial message board mainly to use for our grocery list. However, once I posted it and seen that everyone loved them, I made a few extra to give as gifts this holiday season. I hope you enjoy!
See what I made with this!
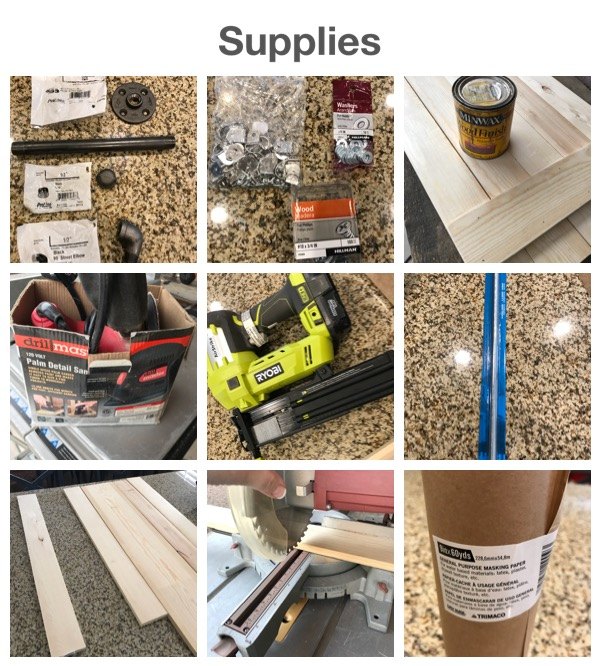
Supplies you'll need
2 boards 1x4x8"
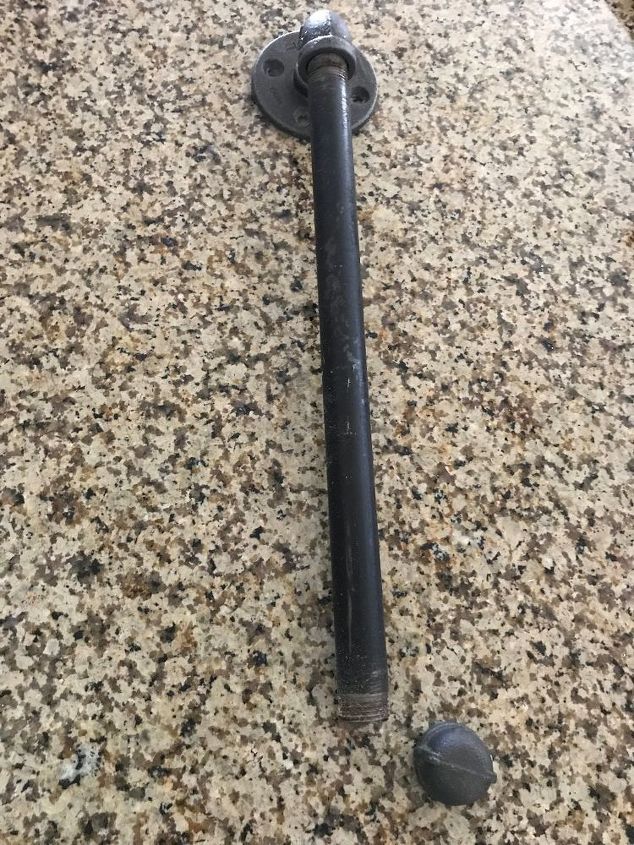
12" pipe
1 1/2" cap
1 1/2" gas flange
1 90 degree elbow
1 Screen door spring
2 Washers
2 D rings
6 Screws (#10 3/4 in.)
12" of painters masking paper
Saw
Screw gun
Nail gun
Sander
Stain

First I bought my 1x4x8 feet wood boards, while I was at Lowes I had them all cut to 32". This gave me 6 boards and allowed me to fit them into the car better. Then to start I put my 5 boards in a line and made sure they were all even. With my 6th board I used my saw and cut it down to 17" with the remainder board which should be 15" I used on the bottom.

Once I had all my boards cut I used my nail gun using 1 1/2" nails to secure the boards. I rechecked making sure the 5 boards are even and tight together. I then used the 17" in piece for the top cross bar and used the nails to nail one at the top and bottom of the cross board over each of the boards underneath. I then used the 15" board as the bottom cross board and secured it the same way.
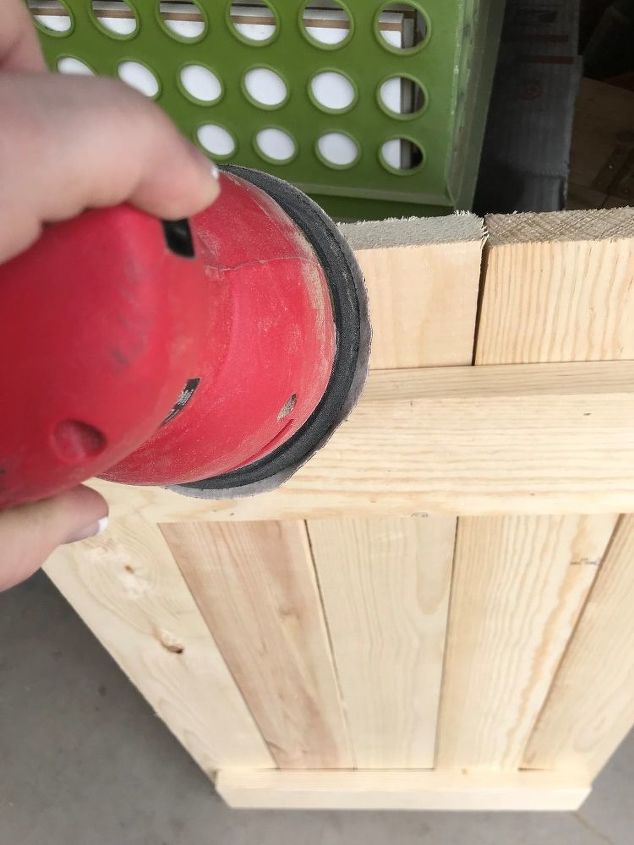
After all my boards were nailed together I used my electric sander to sand down and smooth all the edges. Often the edges are rough and can leave splinters when cut, so this was an easy way to prevent that.
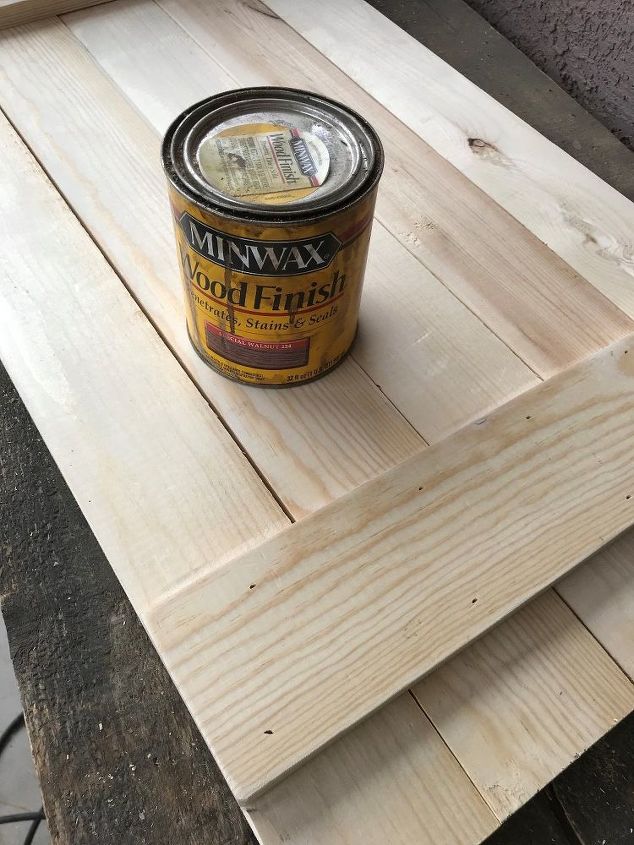
Once I was happy and all the edges were smoothed I went out to my patio and stained all the way around. I choose to wear gloves and I would recommend this because stain can be messy! I hate when my nails get stained. I also suggest doing 2 coats of stain depending on your color, I used the Minwax Provincial color.
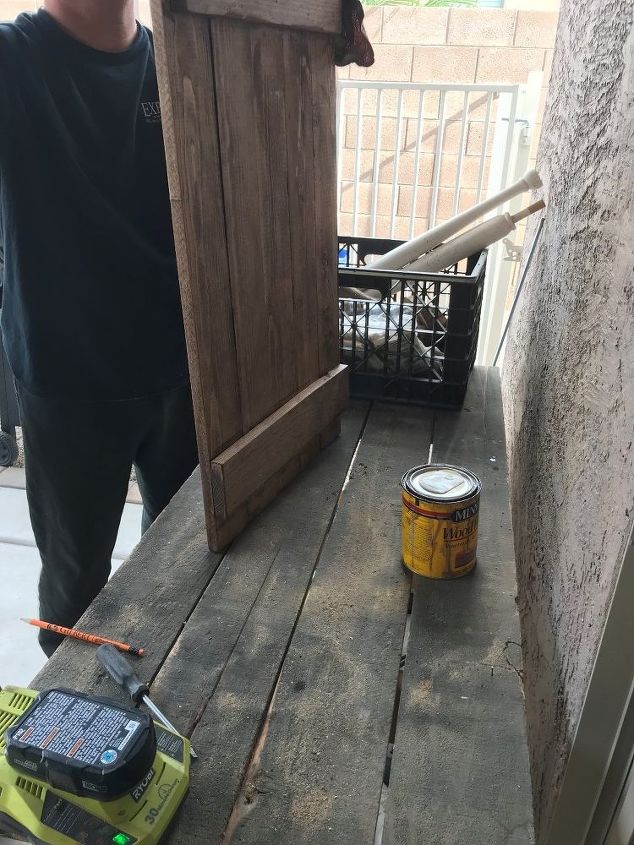
Another way to avoid getting your nails and hands stained is have your husband help! I had my husband do all the staining. If you get some helping hands keep them close for the next step.
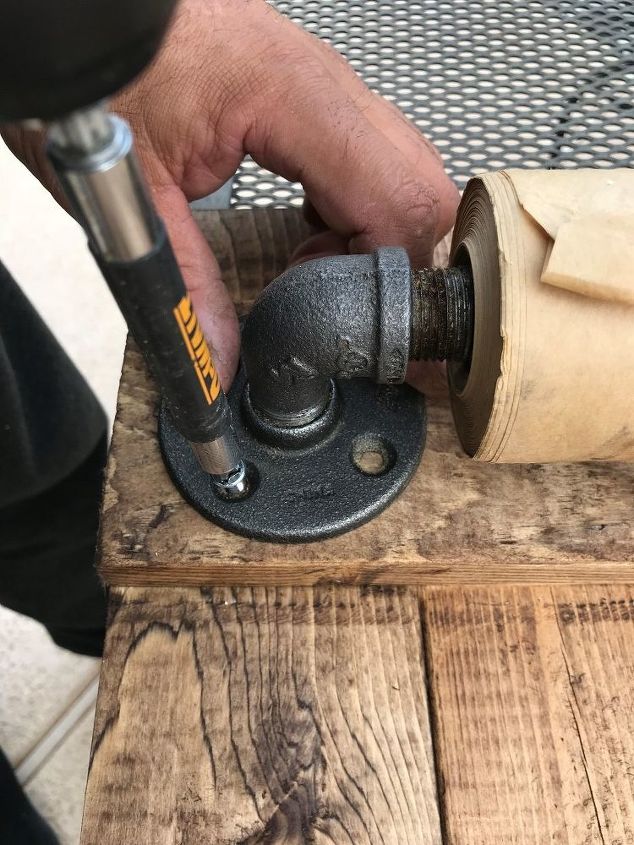
Once the board sits and the wood absorbs the stain, you will want to screw all your metal pieces together. It will be the flange than the 90 degree elbow followed by the pipe. Once the pipe is screwed on you will slide your roll of paper and secure that with the cap. Once that is all finished up use your screws and secure the flange. I choose to center mine within the first board.

Here you will take your spring and washers to attach onto the board. At the bottom , roughly 3 in. above the cross board place your washer on the screw and screw in the spring.

Here I turned over the board and secured my 2 D rings roughly 5in from the top of the board. This way I could hang my project easily and move it easily.
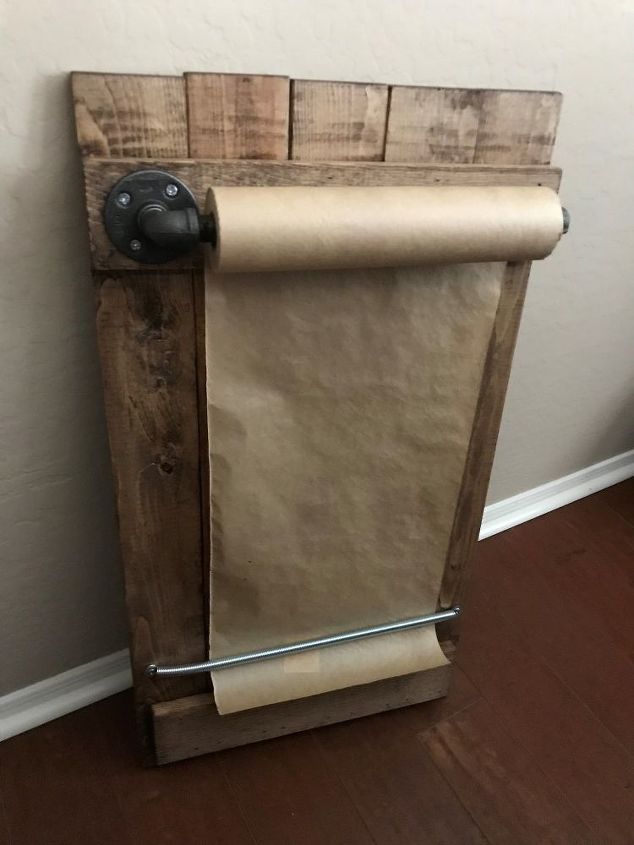
Enjoy!
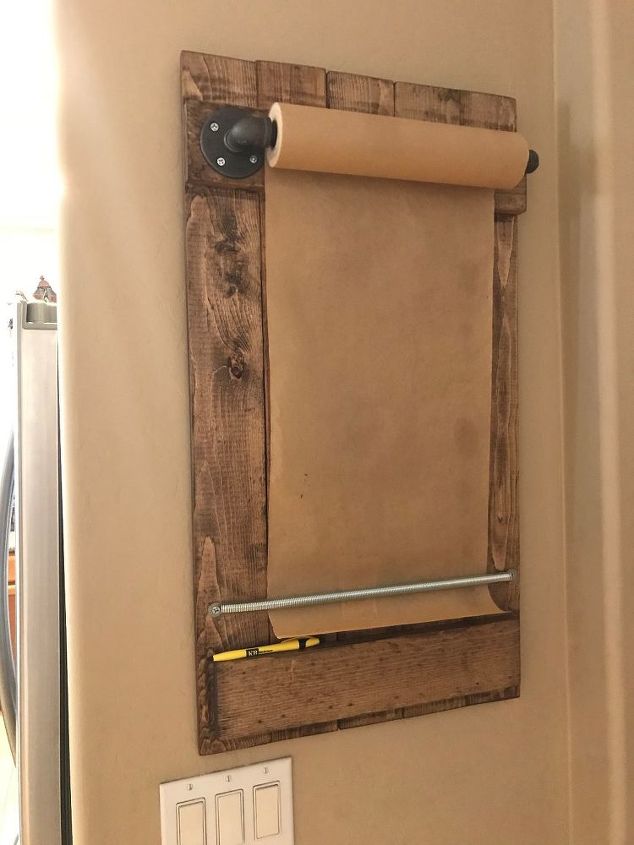
I mounted mine in the kitchen to be used for my family to create their grocery list.
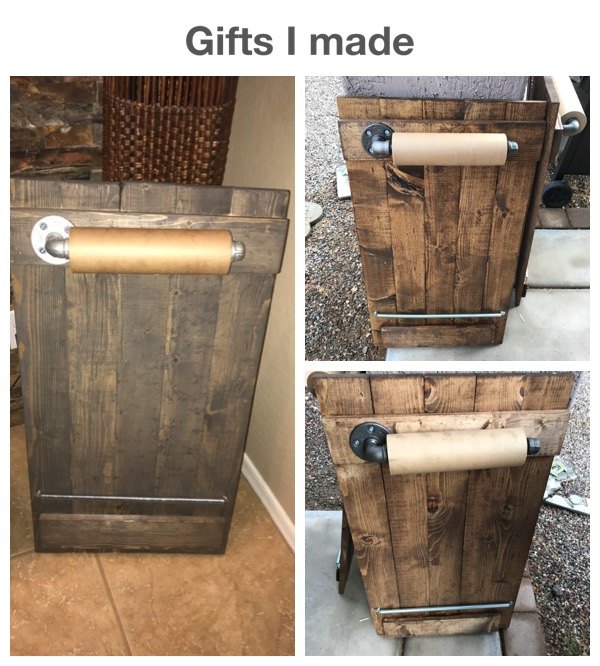
Here are some other varieties in colors that I did using them as gifts. One I did one in galvanized pipe. FYI that will be more expensive.


Any price and availability information displayed on [relevant Amazon Site(s), as applicable] at the time of purchase will apply to the purchase of this product.
Hometalk may collect a small share of sales from the links on this page.More info
Comments
Join the conversation
3 of 5 comments
-
This is just gorgeous!


Frequently asked questions
Have a question about this project?
Love this idea! I bought the materials tonight to make. When attaching the pipe to the elbow I noticed since the paper is the same length as the pipe, the pipe wasn't long enough for the cap. In the materials 12" is listed, did you use a different size?
Do you get the paper at lowes also