


Walnut Slab Wireless Charger

by
Zac Builds
3 Materials
$40
4 Hours
Easy
Wireless chargers are cool, but they are all made of cheap and ugly black plastic. I wanted something a little different for my desk so I decided to make my own with a slab of walnut wood.
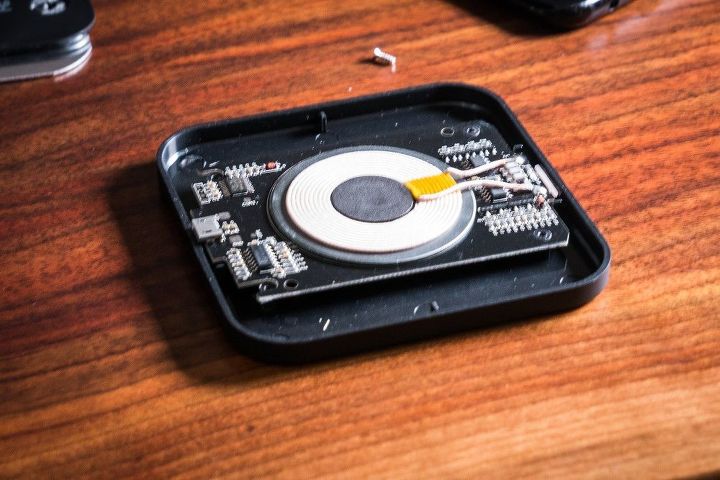
First I started by disassembling an off the shelf wireless charger that I bought off of Amazon. I did some testing to make sure it would work without it's housing and tested to make sure it would still work through a thin layer of wood. Good news, it does on both counts!

Next I traced it's outline onto a scrap piece of walnut I had kicking around the shop. The walnut was left over from another project. It's a roughly 6"x6" and 1 inch thick, but yours could be any size really.
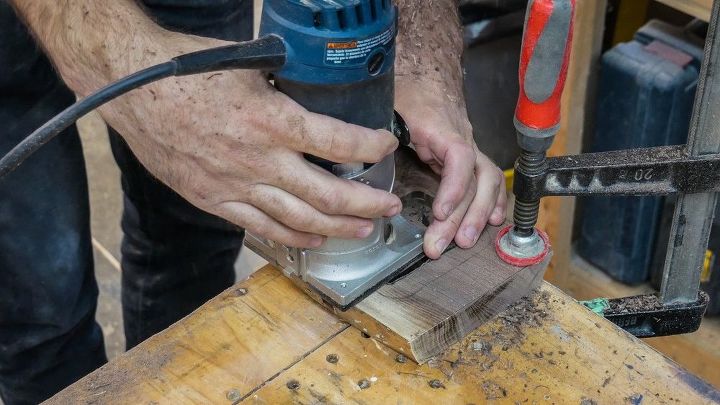
Then I carefully used a trim router cut out the area inside my tracings. The piece of walnut was roughly 1" thick and from my earlier testing I knew that the wireless charger would still charge through something that was 1/4" thick. So I had to take out at least 3/4" of wood inside my traced lines.
Because I was using a trim router I did this in many passes. Only taking out 1/4" of walnut with every pass. Taking it slow like that prevented me from burning out the motor in my small router.
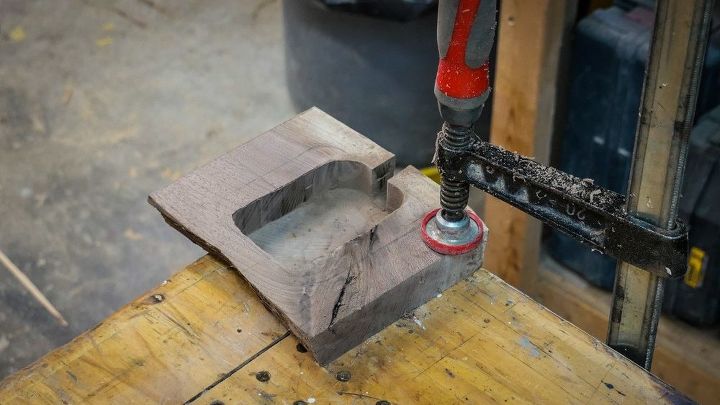
When I was done with the trim router this is what it looked like. It's ok if the hole you cut in the wood is a little bigger than the circuit board of the wireless charger. In fact a little too big is much better than a little too small.
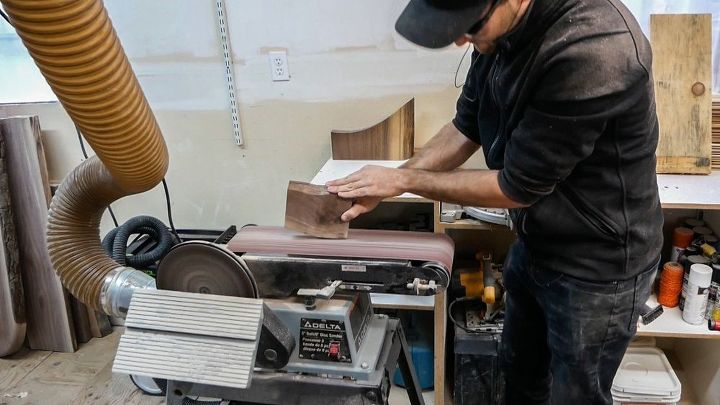
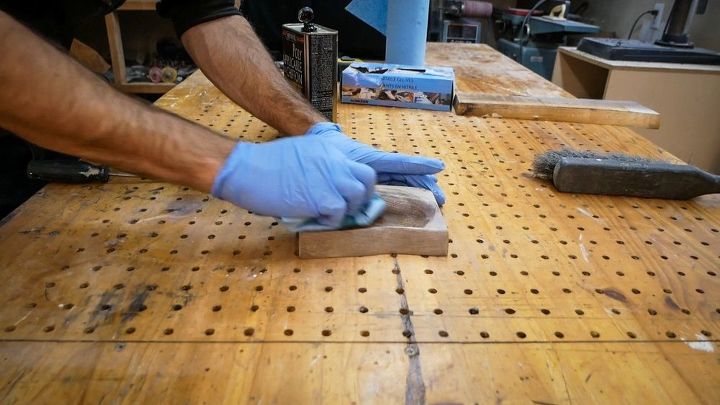
Next I used a big belt sander to smooth out the piece of walnut. I removed it's bark, smoothed it's flat surfaces and rounded it's corners. A palm sander or just sanding by hand would work equally well here.
I used a wipe on poly-urethane product that brought out the natural colours of the walnut. This will also help protect it against moisture and water in the future.
It's super easy to apply and dries very quickly.
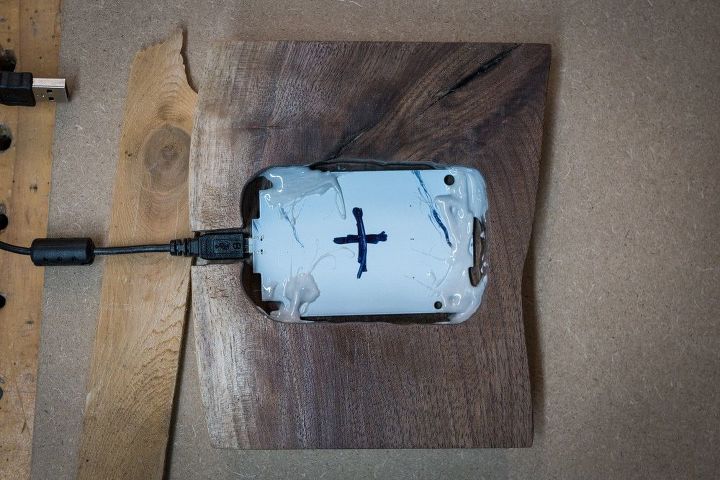
After the poly-urethane had dried I laid the circuit board of the wireless charger into the piece of wood and fixed it in place with a two part epoxy. Not the cleanliest epoxy job, but that's ok no one is ever going to see that part.
Working with the two part epoxy is a little tricky. After you mix it you only have a few minutes to apply it before its starts to cure. So before you mix it have a plan of action and makes sure everything is where it needs to be.
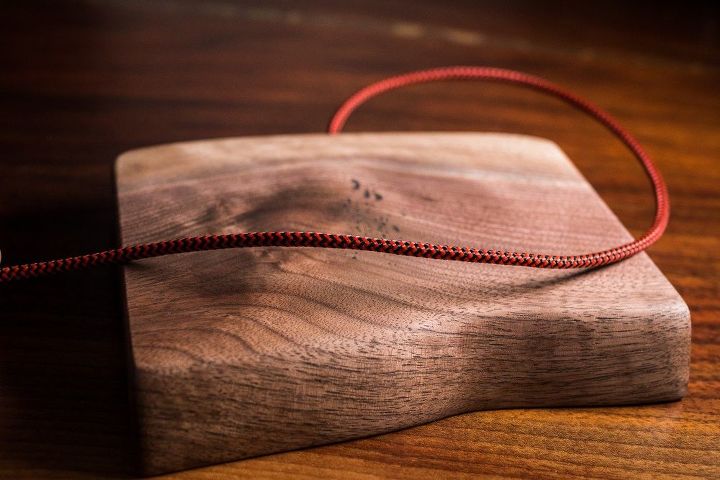
Now the only thing left to do is replace the ugly USB cable that came with the wireless charger with this nice red braided one from Amazon as well.
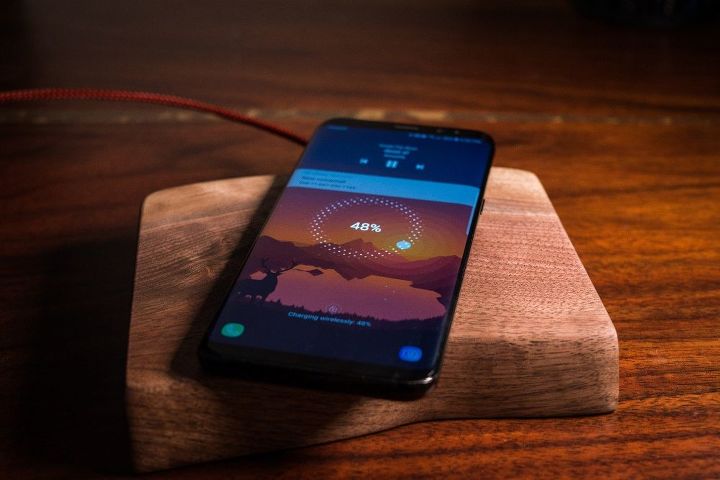
Hurray! It works!
Finally something I'm proud to have on my desk, and it's completely functional still.
{
"id": "4545621",
"alt": "",
"title": "",
"video_library_id": "7353",
"thumbnail": "https://cdn-fastly.hometalk.com/media/2017/12/18/4545621/walnut-slab-wireless-charger.jpg"
}
{
"width": 634,
"height": 357,
"showRelated": true,
"noautoplay": ""
}
Hope you enjoyed this little DIY project. Let me know if you have any questions or comments!
Resources for this project:


Any price and availability information displayed on [relevant Amazon Site(s), as applicable] at the time of purchase will apply to the purchase of this product.
Hometalk may collect a small share of sales from the links on this page.More info
Want more details about this and other DIY projects? Check out my blog post!
Comments
Join the conversation
5 of 7 comments
-
looks really good - such an improvement!
-
Very cool! You ought to make them and sell them, I see a hot market for these. If you are into wood burning, I can see these being personalized too. Love what you can do with scrap wood. 👍


Frequently asked questions
Have a question about this project?