


FANTASTIC FUZZY FLEECE SCARF

3 Materials
2 Days
Medium
RECYCLING POST CHALLENGE
This is a no sew fleece scarf, all warm and soft. I just Love to make things out of soft and warm fleece. It's Lovely as a blanket, or a pillow cover. I recommend if your not familiar with fleece fabric to get a very good pair of scissor. The reason why is because fleece is difficult to cut. I learned very quickl, when I first started making things out of fleece. And bought a pair of fiskar scissors. I made this scarf a little wider then I usually do. The reason I made it wider, so It can be folded in half to mak it thicker, or it can be opened up and draped across th shoulde. Or just be wrapped around under a coa.
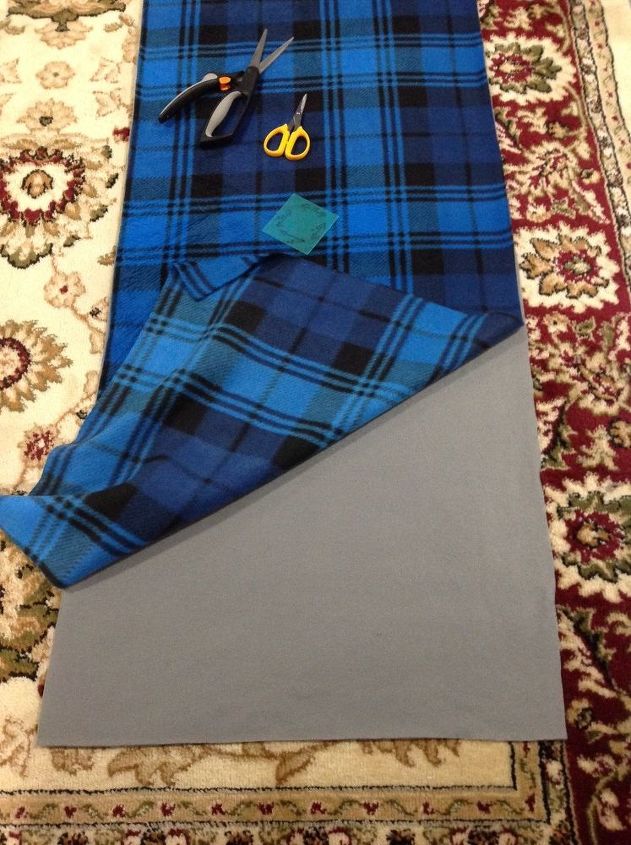
Theses are the supplies I recycled, fabric I had left over from something I had previously made. Both Pieces of fabric are fleece and a pair of large cutting scissors, and a small pair of detail scissors for cutting the slices in the fabric.
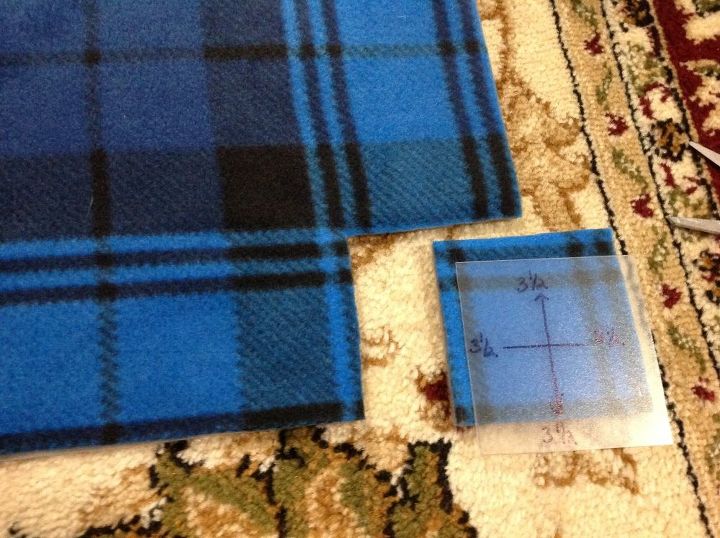
This is how you start, you determine how long you want your slices to be. Then you make a template to put on the corner and cut around it to get the corner cut to size. Then You cut all the way around the fabric, slicing the fabric only to the edge of the cutout of the corner. Cutting each slice of fabric 1" wide, all the way around.
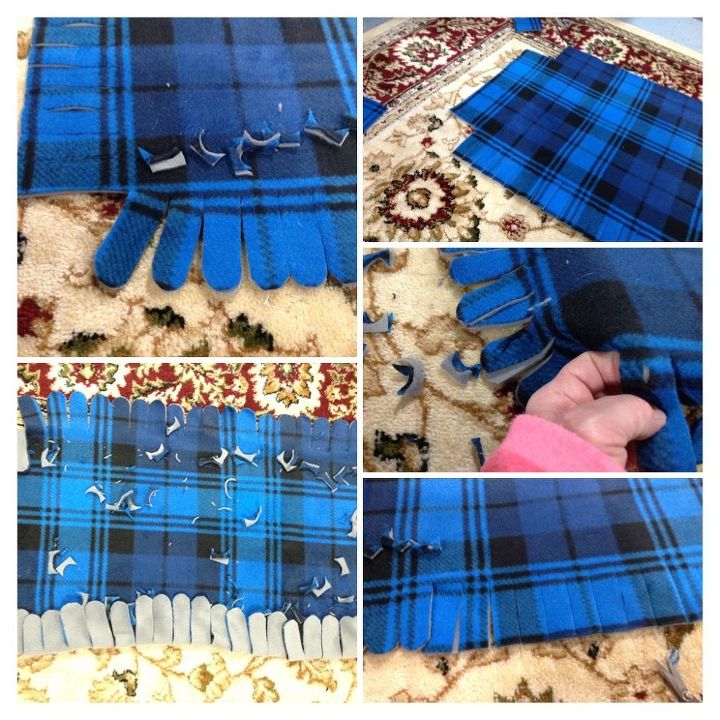
This is the step showing how I had cut the slits in the fabric. I like the look of the rounded corners, but you don't have to round them. Then you fold up the back edge of the fabric as if it is pinched together, make sure to cut through both layers. leaving the edges straight or rounded is the preference of the person, and the look you like. I like both but prefer the look of the rounded edges on most things I make. On the no sew blankets I make I like the tied edges straight, and on the no sew blankets I braid I also like the edges straigh. Pillows scarfs and some others I like the rounded edges. So here all the slits are cut, the edges are rounded and the slices are cut in each slice. Be sure not to cut the slits to large.
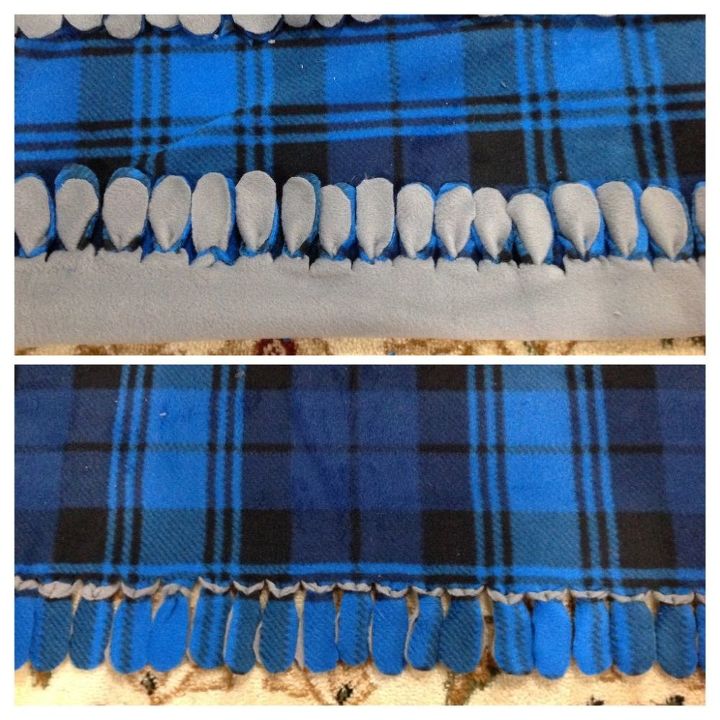
This is the section all the slices are put together you choose what ever way you want your colors to go. I like the contrasting color on the opposite side. So you take a blue slice push it down through the hole of the grey. So now you have a blue slice on the grey side and a grey on the blue side. Now you fold the grey slice down and push it Bach through the the blue slice. lay the 2 together and you have a v shaped grey on the blue side and a grey on the blue side. You do this all the way around the scarf. Fabric was 2 yards long or 72" x 20" wide 3 1/2" slices
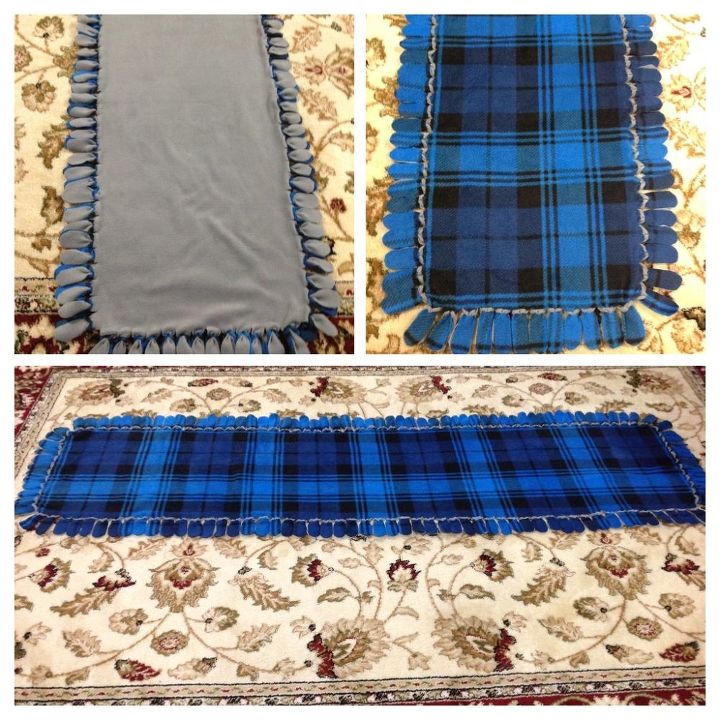
AND THIS IS THE FINISHED PRODUCT
Resources for this project:


Any price and availability information displayed on [relevant Amazon Site(s), as applicable] at the time of purchase will apply to the purchase of this product.
Hometalk may collect a small share of sales from the links on this page.More info


Frequently asked questions
Have a question about this project?