


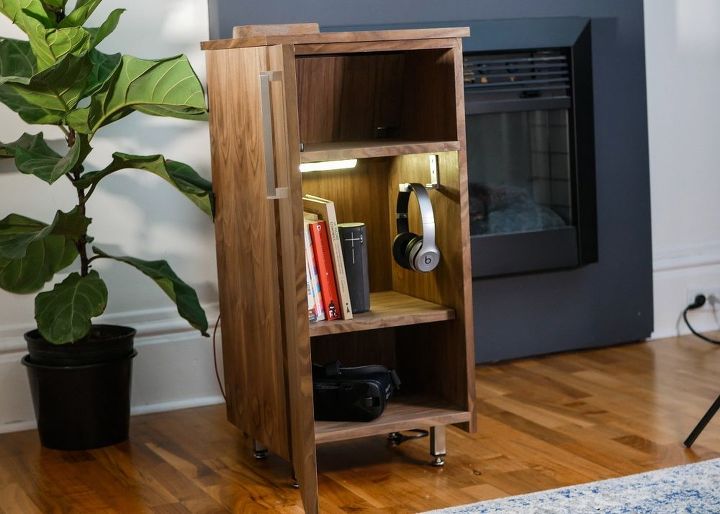
Smart Bedside Cabinet

by
Zac Builds
9 Materials
$270
2 Days
Medium
Tired of struggling to find things in your nightstand? You might be interested in my smart bedside cabinet then. Featuring a motion sensing LED light, USB charging hub and a self closing door. I'll show you how I made it so you can make your own!
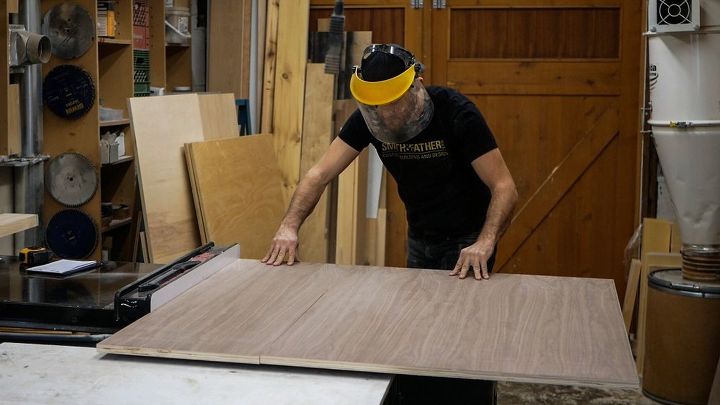
Ok so here's where it all started. I bought a sheet of walnut veneer ply from a local mill. Veneer ply is like regular plywood except the two exterior layers are made up out of a higher grade of wood, in this case I picked walnut, but they have basically every type of wood you can imagine.
I started by cutting the plywood sheet into all of the various pieces I was going to need for this project.
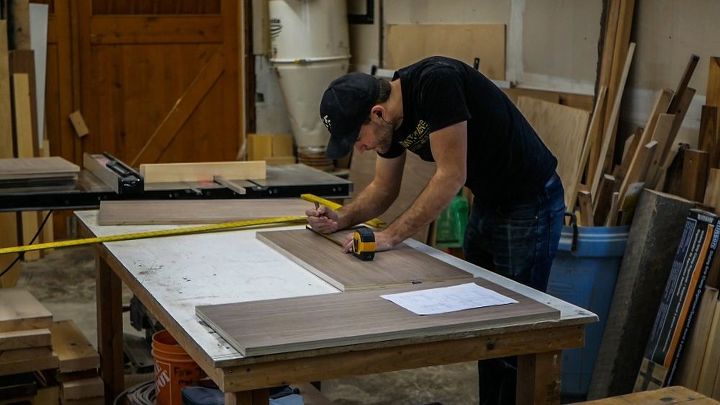
After I had all of my pieces cut it was time to start planning out how I was going to assemble this cabinet. Because I didn't want to have any external fasteners I was going to have to glue the whole thing together.
In order to glue a cabinet like this together I needed to cut channels in the plywood. Each channel is 3/4" wide (the same as the thickness of the ply I was using) and 1/4" deep.

I set my table saw to exactly 1/4" above the table and used it to cut channels into my plywood pieces. This was a very time consuming process. Each pass would only remove 1/8" of material. So for every channel I had to between 6-8 passes.
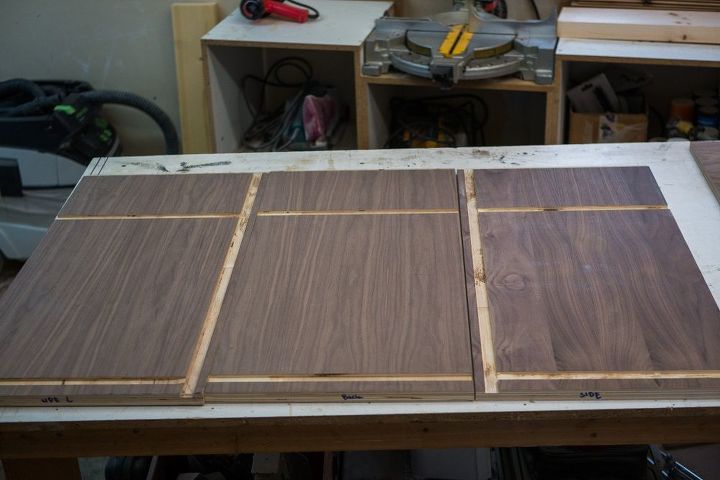
After a couple of hours of cutting I ended up with pieces that looked like this. The lighter wood sections are the channels. I kept a small offcut of the plywood next to me while I was working on the table saw and would frequently test it in the channels to make sure I got a tight fit.
Take your time on this part, you can always cut more, you can't material back on after it's been cut.
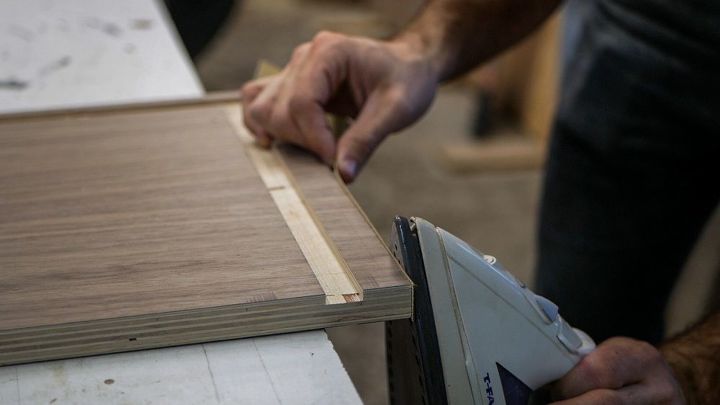
Because I'm working with plywood all of the cut edges expose the inner layers of the plywood. That's ok though, there a product to fix that. It's called edge tape.
Edge tape is a thin layer of wood with a heat activated adhesive backing. You apply it with an iron and then use a razor blade to cut off any excess. Like veneer plywoods you can get edge tapes in just about any type of wood.
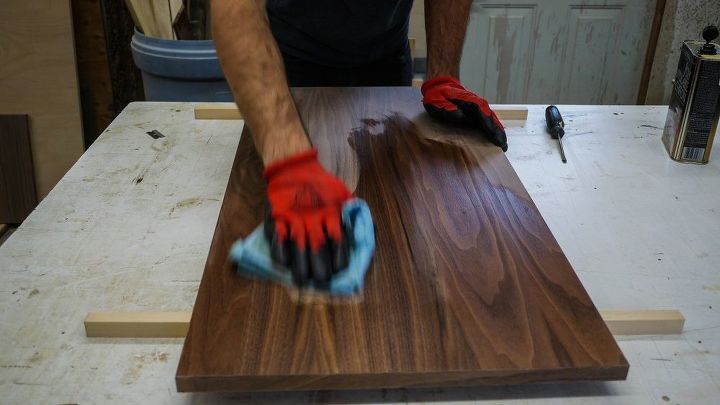
I always prefer the look of walnut when it's a bit darker and richer looking. In order to bring out the colour in the walnut I used a wipe on poly urethane product. The poly urethane has the added bonus of making the wood resistant to moisture and smoother to the touch.
I ended up doing 3 coats, sanding lightly between coats with 220 grit sand paper.
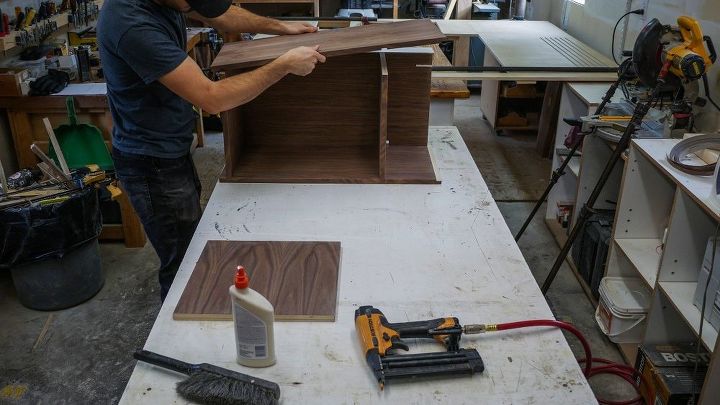
Time to assemble everything! I used white carpenters glue in all of the channels. Be generous with the glue, you want to make sure it gets into all the nooks and crannies.
I had a soft rubber mallet with me when I assembled everything to hammer everything together. Like I said all of the joints were very tight, the rubber mallet let me hammer everything together without worrying about damaging the finish.
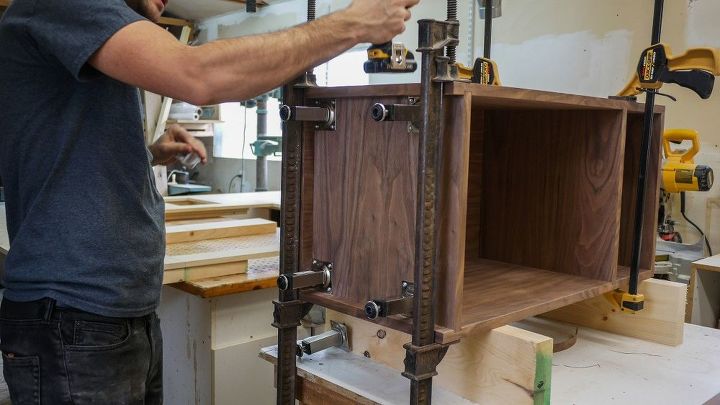
After everything was in it's correct place I clamped everything together and left it overnight to dry.
Before I left the shop though I remembered that I had some adjustable legs left over from another project and thought they fit the look of this piece quite nicely. I grabbed my impact gun and mounted them to the bottom of the cabinet.
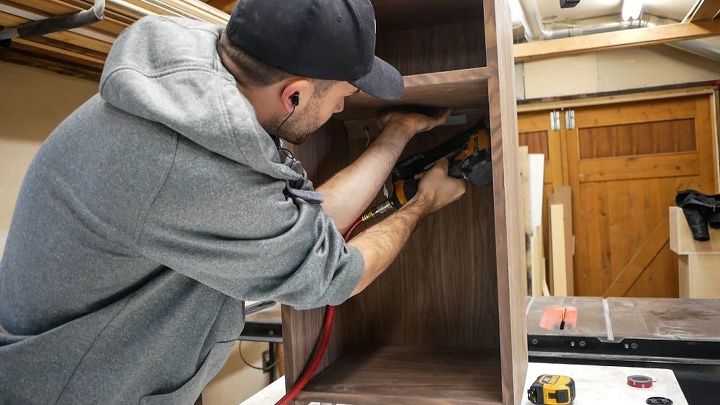
In order to give the motion sensing light a good mounting point I cut a 45 degree cant strip out of the walnut plywood and nailed it in place.
The motion sensing light came with an adhesive backed magnetic mounting plate that I then attached the cant strip. The magnets allow me to remove the light easily if I ever need to.
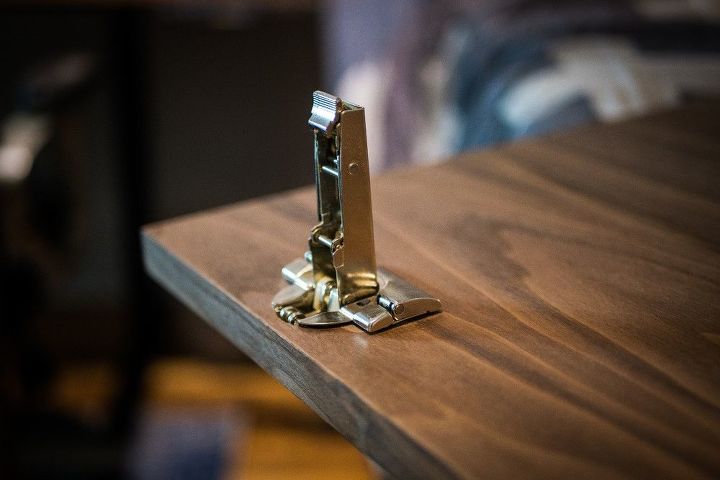
Every good cabinet needs a door. Every good door needs good hinges. I grabbed these self closing hinges and installed them on the door.
What's a self closing hinge? It's a hinge that returns the door to the closed position if you get it between 15-20 degrees of being fully closed. As an added bonus it prevents the door from ever being slammed. Check out the video at the end of this guide to see it in action!
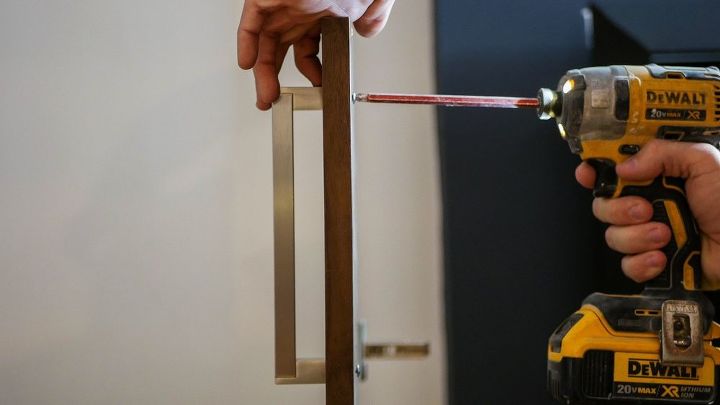
Every door needs a handle as well! The handle has two screw holes for mounting, so I figured out how far apart they were and marked two holes that were equally far apart on the surface of the door. Then I drilled two holes through the door and mounted the handle to the door.
If you're using a powerful impact gun to mount door handles like I am in this photo be careful not to over tighten the screws. Handles usually come with cheap brittle screws that can strip and snap very easily. Also if you over tighten the screws you risk denting and marking the wood.
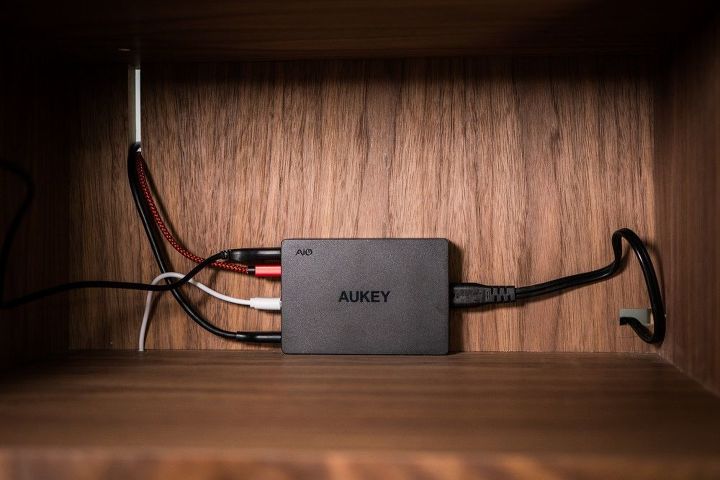
Like most people I charge my phone on my nightstand. I also hate cluttered cables. My solution? An integrated charging hub. All of my USB devices can be charged through this USB charging hub. It also powers the motion sensing LED light.
I simply mounted it to the back of the cabinet with 3m double sided tape. Don't worry, I made a cover plate that covers this mess.
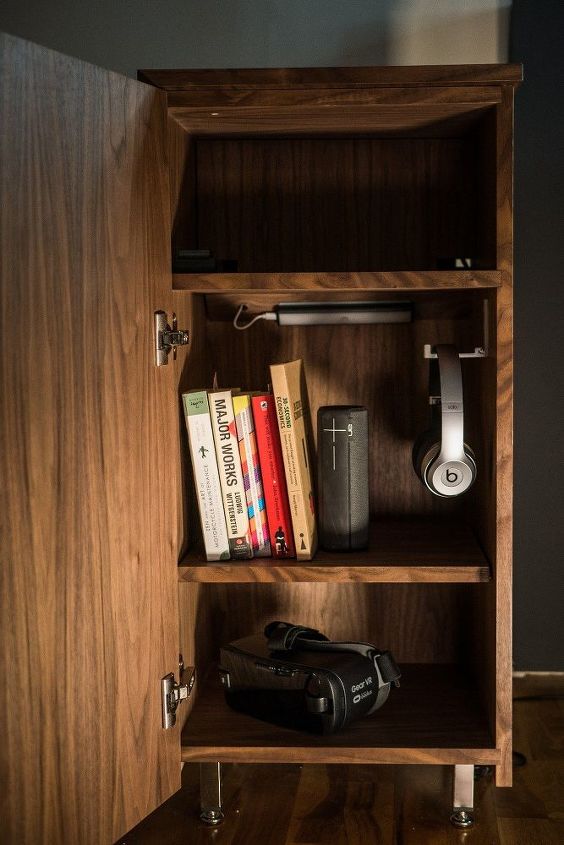
Here's what the inside of the project looked like when it was all done. So much neater than my old night stand. Also note how the charging hub is now covered by a piece of walnut ply.
This project was a lot of fun but took a lot longer than I had originally anticipated. I'm super happy with how it turned out though. Checkout the video below so you can see how it all works.
{
"id": "4547480",
"alt": "",
"title": "",
"video_library_id": "7350",
"thumbnail": "https://cdn-fastly.hometalk.com/media/2017/12/19/4547480/smart-bedside-cabinet.jpg"
}
{
"width": 634,
"height": 357,
"showRelated": true,
"noautoplay": ""
}
Thanks for checking out this project, I hope you enjoyed it. For a more in-depth build guide please checkout my blog.
Resources for this project:
See all materials


Any price and availability information displayed on [relevant Amazon Site(s), as applicable] at the time of purchase will apply to the purchase of this product.
Hometalk may collect a small share of sales from the links on this page.More info
Want more details about this and other DIY projects? Check out my blog post!
Comments
Join the conversation
4 of 45 comments
-
Great idea, but I would reuse a kitchen cabinet and adjust it for the need.
-
Beautiful cabinet, beautiful job! Nice addition to any home. Great job Zac!


Frequently asked questions
Have a question about this project?
What were the dimensions of the boards you cut for ur project? Would be nice to know. Great job by the way!
how does the charging hub work? I am a bit confused by your comment that it is now covered.
wondering why you chose to cut your channels with a regularvsaw blade and not a dado blade? using a dado blade would have saved you so much time & effort.